原文出处: https://blog.xugaoxiang.com/ai/face-recognition-cnn.html
软硬件环境
- ubuntu 18.04 64bit
- GTX 1070Ti
- anaconda with python 3.6
- face_recognition 1.2.3
- dlib
- opencv
face_recognition简介
face_recognition号称是世界上最简单的基于python的人脸识别库,是在大名鼎鼎的深度学习框架dlib上做的整合,dlib模型在LFW(Labeled Faces in the Wild)能有99.38的准确率。另外face_recognition提供了相应的命令行工具,可以通过命令行来对图片文件夹进行人脸识别,非常的酷。
安装face_recognition
可以利用pip来安装
pip install face_recognition
或者从源码开始安装
git clone https://github.com/ageitgey/face_recognition.git
cd face_recognition
python setup.py install
face_recognition工作流
找出人脸
第一步就是要找出给定图片中包含的全部的脸的位置

import face_recognitionimage = face_recognition.load_image_file("your_file.jpg")
face_locations = face_recognition.face_locations(image)
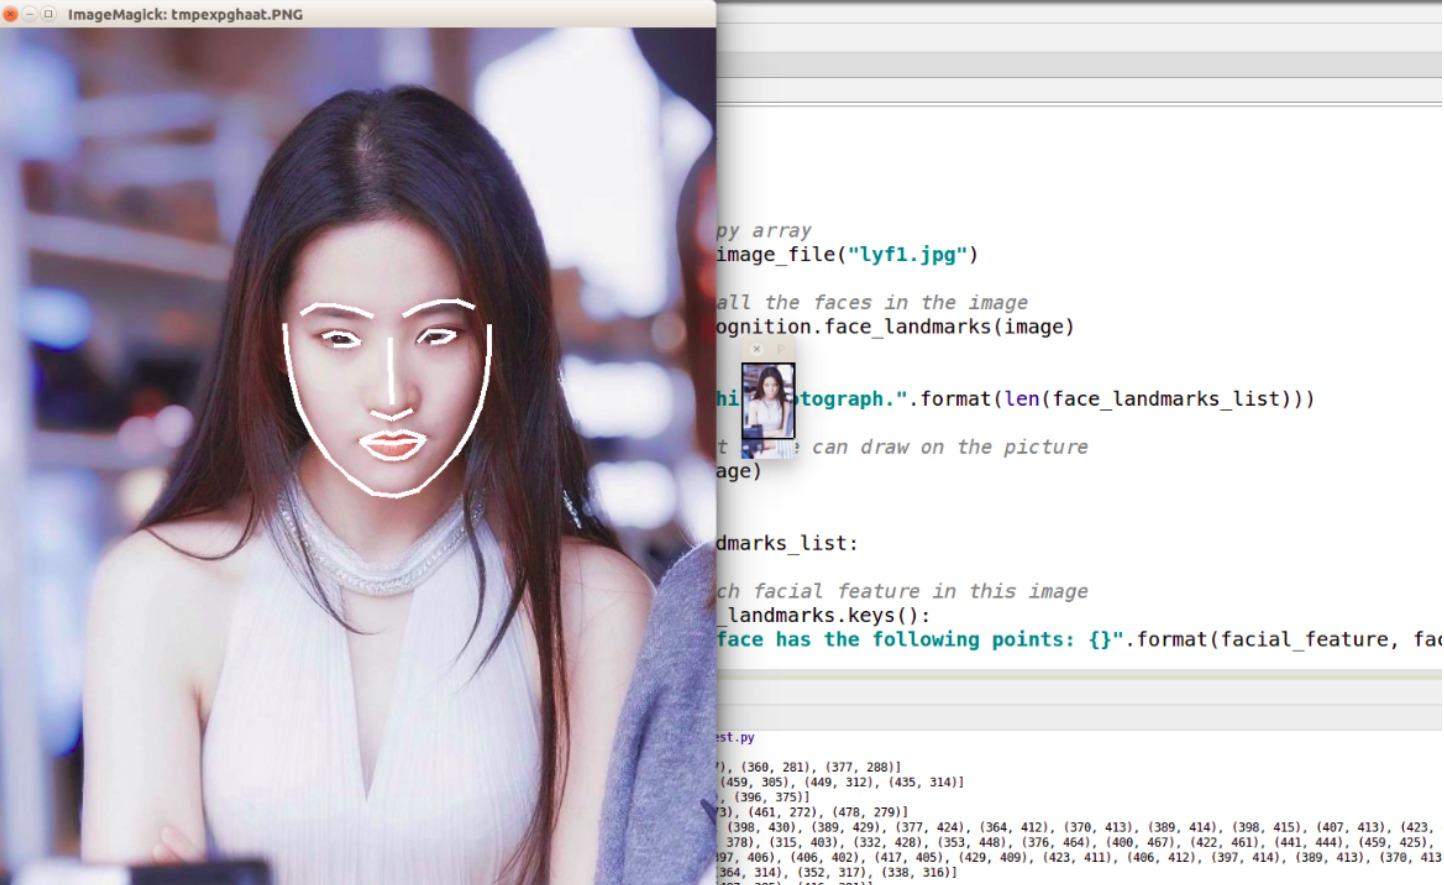
操作特征点
找出每个人的眼睛、鼻子、嘴巴和下巴

import face_recognitionimage = face_recognition.load_image_file("your_file.jpg")
face_landmarks_list = face_recognition.face_landmarks(image)

进行识别
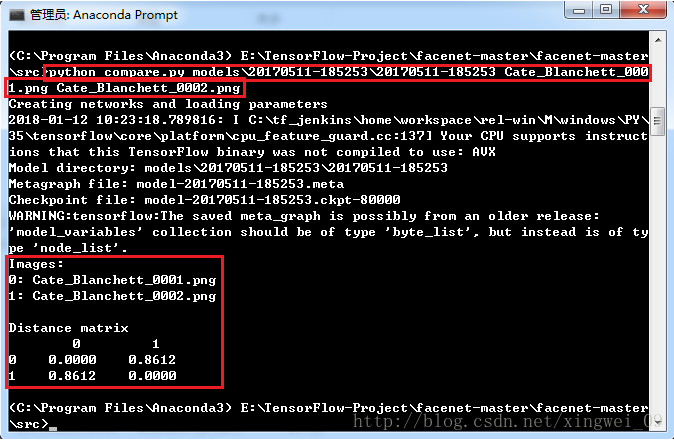
最后一步,也是最关键的一步,识别出这张脸是属于谁的。face_recognition使用了欧几里得距离(可以参考我的另一篇文章https://www.xugaoxiang.com/147)来确定是不是同一张脸。

import face_recognitionknown_image = face_recognition.load_image_file("biden.jpg")
unknown_image = face_recognition.load_image_file("unknown.jpg")biden_encoding = face_recognition.face_encodings(known_image)[0]
unknown_encoding = face_recognition.face_encodings(unknown_image)[0]results = face_recognition.compare_faces([biden_encoding], unknown_encoding)
命令行工具
face_recognition提供了2个命令行工具
face_detection- 找出给定图片或图片文件夹中的人脸face_recognition- 进行人脸识别
具体如何使用,可以通过--help来查看参数。face_detection比较简单,这里就不讲了。
命令行工具face_recognition使用
要进行人脸识别,首先必须准备已知人员的信息,这里用一个独立的文件夹来存放,比如known,然后每一个人的图片都以他的名字来命令,如Joe Biden.jpg、Kobe.jpg。
然后将需要识别的图片放置在另一个文件夹中,如unknown,执行以下命令进行识别
face_recognition known unknown

默认情况下,不设置阈值的话,正确识别率是非常非常低的。在实际情况下,需要根据自己的情况,来适当调整阈值。在同样的测试环境下,将相似度阈设成了0.38,识别结果就正确了。
face_recognition known unknown --tolerance 0.38
打印中的unknown_person表明是陌生人

另一个有用的参数是--cpus,如果你使用的是多核CPU,可以利用这个参数来提升识别速度。--cpus=-1表示使用所有的CPU核。
KNN分类器
KNN(K-Nearest Neighbor)通过测量不同特征值之间的距离进行分类。它的思路是:如果一个样本在特征空间中的k个最相似(即特征空间中最邻近)的样本中的大多数属于某一个类别,则该样本也属于这个类别,其中K通常是不大于20的整数。KNN算法中,所选择的邻居都是已经正确分类的对象。该方法在定类决策上只依据最邻近的一个或者几个样本的类别来决定待分样本所属的类别。
在实际的项目中,一般都会用一个分类器(classifier)来存储已知人脸的数据,方便管理。face_recognition使用了基于KNN算法的分类器。
制作分类器
代码来自examples/face_recognition_knn.py,注释很详细了,就不一一解释了。经测试,同一人的图片越多,识别的准确率就越高。
def train(train_dir, model_save_path=None, n_neighbors=None, knn_algo='ball_tree', verbose=False):"""Trains a k-nearest neighbors classifier for face recognition.:param train_dir: directory that contains a sub-directory for each known person, with its name.(View in source code to see train_dir example tree structure)Structure:<train_dir>/├── <person1>/│ ├── <somename1>.jpeg│ ├── <somename2>.jpeg│ ├── ...├── <person2>/│ ├── <somename1>.jpeg│ └── <somename2>.jpeg└── ...:param model_save_path: (optional) path to save model on disk:param n_neighbors: (optional) number of neighbors to weigh in classification. Chosen automatically if not specified:param knn_algo: (optional) underlying data structure to support knn.default is ball_tree:param verbose: verbosity of training:return: returns knn classifier that was trained on the given data."""X = []y = []# Loop through each person in the training setfor class_dir in os.listdir(train_dir):if not os.path.isdir(os.path.join(train_dir, class_dir)):continue# Loop through each training image for the current personfor img_path in image_files_in_folder(os.path.join(train_dir, class_dir)):image = face_recognition.load_image_file(img_path)face_bounding_boxes = face_recognition.face_locations(image)if len(face_bounding_boxes) != 1:# If there are no people (or too many people) in a training image, skip the image.if verbose:print("Image {} not suitable for training: {}".format(img_path, "Didn't find a face" if len(face_bounding_boxes) < 1 else "Found more than one face"))else:# Add face encoding for current image to the training setX.append(face_recognition.face_encodings(image, known_face_locations=face_bounding_boxes)[0])y.append(class_dir)# Determine how many neighbors to use for weighting in the KNN classifierif n_neighbors is None:n_neighbors = int(round(math.sqrt(len(X))))if verbose:print("Chose n_neighbors automatically:", n_neighbors)# Create and train the KNN classifierknn_clf = neighbors.KNeighborsClassifier(n_neighbors=n_neighbors, algorithm=knn_algo, weights='distance')knn_clf.fit(X, y)# Save the trained KNN classifierif model_save_path is not None:with open(model_save_path, 'wb') as f:pickle.dump(knn_clf, f)return knn_clf
使用分类器
def predict(X_img_path, knn_clf=None, model_path=None, distance_threshold=0.6):"""Recognizes faces in given image using a trained KNN classifier:param X_img_path: path to image to be recognized:param knn_clf: (optional) a knn classifier object. if not specified, model_save_path must be specified.:param model_path: (optional) path to a pickled knn classifier. if not specified, model_save_path must be knn_clf.:param distance_threshold: (optional) distance threshold for face classification. the larger it is, the more chanceof mis-classifying an unknown person as a known one.:return: a list of names and face locations for the recognized faces in the image: [(name, bounding box), ...].For faces of unrecognized persons, the name 'unknown' will be returned."""if not os.path.isfile(X_img_path) or os.path.splitext(X_img_path)[1][1:] not in ALLOWED_EXTENSIONS:raise Exception("Invalid image path: {}".format(X_img_path))if knn_clf is None and model_path is None:raise Exception("Must supply knn classifier either thourgh knn_clf or model_path")# Load a trained KNN model (if one was passed in)if knn_clf is None:with open(model_path, 'rb') as f:knn_clf = pickle.load(f)# Load image file and find face locationsX_img = face_recognition.load_image_file(X_img_path)X_face_locations = face_recognition.face_locations(X_img)# If no faces are found in the image, return an empty result.if len(X_face_locations) == 0:return []# Find encodings for faces in the test iamgefaces_encodings = face_recognition.face_encodings(X_img, known_face_locations=X_face_locations)# Use the KNN model to find the best matches for the test faceclosest_distances = knn_clf.kneighbors(faces_encodings, n_neighbors=1)are_matches = [closest_distances[0][i][0] <= distance_threshold for i in range(len(X_face_locations))]# Predict classes and remove classifications that aren't within the thresholdreturn [(pred, loc) if rec else ("unknown", loc) for pred, loc, rec in zip(knn_clf.predict(faces_encodings), X_face_locations, are_matches)]
CUDA加速
如果还想提升性能,那就必须上显卡了,由于face_recognition依赖与dlib,因此需要先安装支持CUDA的dlib,可以参考另一篇文章https://www.xugaoxiang.com/138
import face_recognitionimage = face_recognition.load_image_file("my_picture.jpg")
face_locations = face_recognition.face_locations(image, model="cnn")# face_locations is now an array listing the co-ordinates of each face!
与摄像头联动
这里使用opencv来实现,opencv读取摄像头每一帧的数据,然后进行resize、颜色空间的转换(由opecv使用的BGR转换成face_recognition使用的RGB),最后进行人脸的检测及识别。
import face_recognition
import cv2video_capture = cv2.VideoCapture(0)# Load a sample picture and learn how to recognize it.
obama_image = face_recognition.load_image_file("obama.jpg")
obama_face_encoding = face_recognition.face_encodings(obama_image)[0]# Load a second sample picture and learn how to recognize it.
biden_image = face_recognition.load_image_file("biden.jpg")
biden_face_encoding = face_recognition.face_encodings(biden_image)[0]# Create arrays of known face encodings and their names
known_face_encodings = [obama_face_encoding,biden_face_encoding
]
known_face_names = ["Barack Obama","Joe Biden"
]# Initialize some variables
face_locations = []
face_encodings = []
face_names = []
process_this_frame = Truewhile True:# Grab a single frame of videoret, frame = video_capture.read()# Resize frame of video to 1/4 size for faster face recognition processingsmall_frame = cv2.resize(frame, (0, 0), fx=0.25, fy=0.25)# Convert the image from BGR color (which OpenCV uses) to RGB color (which face_recognition uses)rgb_small_frame = small_frame[:, :, ::-1]# Only process every other frame of video to save timeif process_this_frame:# Find all the faces and face encodings in the current frame of videoface_locations = face_recognition.face_locations(rgb_small_frame)face_encodings = face_recognition.face_encodings(rgb_small_frame, face_locations)face_names = []for face_encoding in face_encodings:# See if the face is a match for the known face(s)matches = face_recognition.compare_faces(known_face_encodings, face_encoding)name = "Unknown"# If a match was found in known_face_encodings, just use the first one.if True in matches:first_match_index = matches.index(True)name = known_face_names[first_match_index]face_names.append(name)process_this_frame = not process_this_frame# Display the resultsfor (top, right, bottom, left), name in zip(face_locations, face_names):# Scale back up face locations since the frame we detected in was scaled to 1/4 sizetop *= 4right *= 4bottom *= 4left *= 4# Draw a box around the facecv2.rectangle(frame, (left, top), (right, bottom), (0, 0, 255), 2)# Draw a label with a name below the facecv2.rectangle(frame, (left, bottom - 35), (right, bottom), (0, 0, 255), cv2.FILLED)font = cv2.FONT_HERSHEY_DUPLEXcv2.putText(frame, name, (left + 6, bottom - 6), font, 1.0, (255, 255, 255), 1)# Display the resulting imagecv2.imshow('Video', frame)# Hit 'q' on the keyboard to quit!if cv2.waitKey(1) & 0xFF == ord('q'):break# Release handle to the webcam
video_capture.release()
cv2.destroyAllWindows()
另外本地视频文件、网络摄像头(基于rtsp视频流)的识别场景跟本地摄像头的处理非常相似,这里以就不再继续贴代码了。
参考资料
- https://github.com/ageitgey/face_recognition.git
- https://medium.com/@ageitgey/machine-learning-is-fun-part-4-modern-face-recognition-with-deep-learning-c3cffc121d78