前言
之前实践了下face++在线人脸识别版本,这回做一下离线版本。github 上面有关于face_recognition的相关资料,本人只是做个搬运工,对其中的一些内容进行搬运,对其中一些例子进行实现。
官方描述:
face_recognition 是一个强大、简单、易上手的人脸识别开源项目,并且配备了完整的开发文档和应用案例,特别是兼容树莓派系统。本项目是世界上最简洁的人脸识别库,你可以使用 Python 和命令行工具提取、识别、操作人脸。本项目的人脸识别是基于业内领先的 C++ 开源库 dlib 中的深度学习模型,用 Labeled Faces in the Wild 人脸数据集进行测试,有高达 99.38% 的准确率。但对小孩和亚洲人脸的识别准确率尚待提升。
(关于兼容树莓派,以后有板子了再做一下)
下面两个链接划重点
https://github.com/ageitgey/face_recognition/blob/master/README_Simplified_Chinese.md
https://face-recognition.readthedocs.io/en/latest/face_recognition.html
环境配置
- ubuntu16.04(其他环境的安装可以参考第一个链接,官方有说明)
- pycharm (可忽略,怎么舒服怎么来)
- python3
- opencv (我的是4.1.2,三点几的版本应该也一样)
实际上只需要安装 face_recognition,当然,没有 opencv 的也需要安装一下 opencv
pip3 install face_recognition
图片准备
由于需要做一些图片的比对,因此需要准备一些图片,本文图片取自以下链接
https://www.zhihu.com/question/314169580/answer/872770507
接下来开始操作
官方还有提供命令行的操作(这个没去做),本文不做这个,我们只要是要在python中用face_recognition,因此定位到这一块。
这个api文档地址就是上面的第二个链接。进去之后可以看到:

part1.识别图片中的人是谁
# part1
# 识别图片中的人是谁import face_recognition
known_image = face_recognition.load_image_file("lyf1.jpg")
unknown_image = face_recognition.load_image_file("lyf2.jpg")lyf_encoding = face_recognition.face_encodings(known_image)[0]
unknown_encoding = face_recognition.face_encodings(unknown_image)[0]results = face_recognition.compare_faces([lyf_encoding], unknown_encoding)
# A list of True/False values indicating which known_face_encodings match the face encoding to checkprint(type(results))
print(results)if results[0] == True:print("yes")
else:print("no")
结果
<class 'list'>
[True]
yes
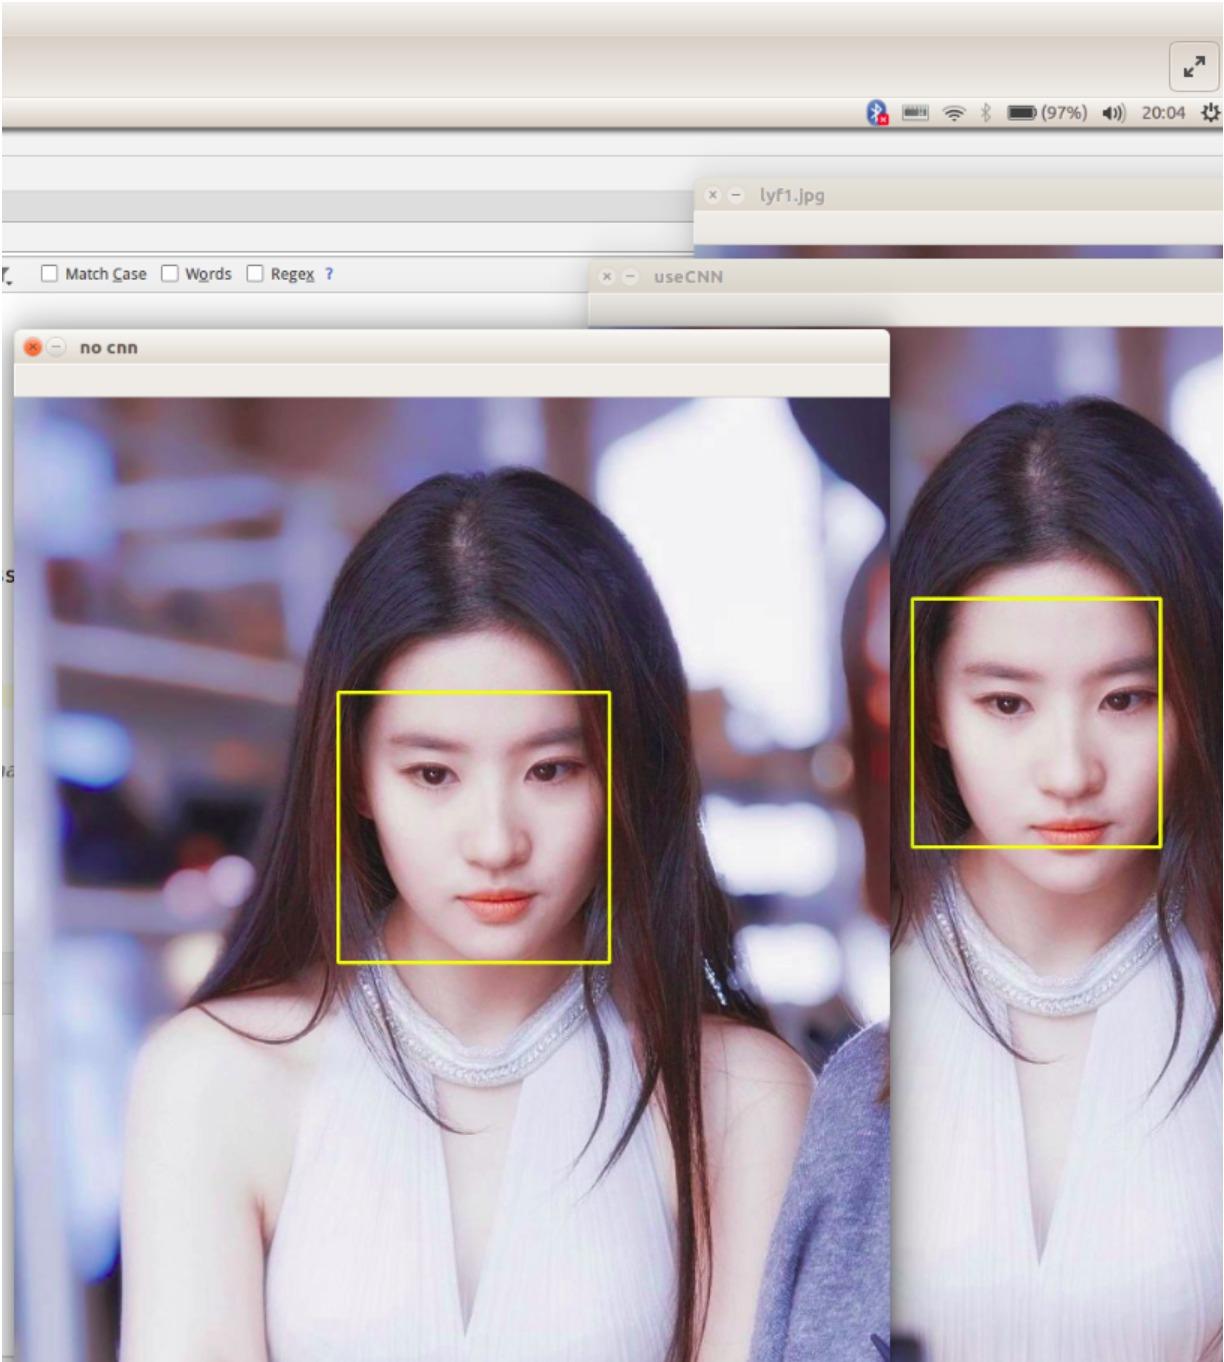
part2.从图片中找到人脸
# part2
# 从图片中找到人脸(定位人脸位置)import face_recognition
import cv2image = face_recognition.load_image_file("lyf1.jpg")face_locations_useCNN = face_recognition.face_locations(image,model='cnn')
# model – Which face detection model to use. “hog” is less accurate but faster on CPUs.
# “cnn” is a more accurate deep-learning model which is GPU/CUDA accelerated (if available). The default is “hog”.face_locations_noCNN=face_recognition.face_locations(image)
# A list of tuples of found face locations in css (top, right, bottom, left) order
# 因为返回值的顺序是这样子的,因此在后面的for循环里面赋值要注意按这个顺序来print("face_location_useCNN:")
print(face_locations_useCNN)
face_num1=len(face_locations_useCNN)
print(face_num1)       # The number of facesprint("face_location_noCNN:")
print(face_locations_noCNN)
face_num2=len(face_locations_noCNN)
print(face_num2)       # The number of faces
# 到这里为止,可以观察两种情况的坐标和人脸数,一般来说,坐标会不一样,但是检测出来的人脸数应该是一样的
# 也就是说face_num1 = face_num2; face_locations_useCNN 和 face_locations_noCNN 不一样org = cv2.imread("lyf1.jpg")
img = cv2.imread("lyf1.jpg")
cv2.imshow("lyf1.jpg",img)  # 原始图片# Go to get the data and draw the rectangle
# use CNN
for i in range(0,face_num1):top = face_locations_useCNN[i][0]right = face_locations_useCNN[i][1]bottom = face_locations_useCNN[i][2]left = face_locations_useCNN[i][3]start = (left, top)end = (right, bottom)color = (0,255,255)thickness = 2cv2.rectangle(img, start, end, color, thickness)    # opencv 里面画矩形的函数# Show the result
cv2.imshow("useCNN",img)# for face_location in face_locations_noCNN:
#
#     # Print the location of each face in this image
#     top, right, bottom, left = face_location
# # 等价于下面的这种写法for i in range(0,face_num2):top = face_locations_noCNN[i][0]right = face_locations_noCNN[i][1]bottom = face_locations_noCNN[i][2]left = face_locations_noCNN[i][3]start = (left, top)end = (right, bottom)color = (0,255,255)thickness = 2cv2.rectangle(org, start, end, color, thickness)cv2.imshow("no cnn ",org)cv2.waitKey(0)
cv2.destroyAllWindows()
结果
face_location_useCNN:
[(223, 470, 427, 266)]
1
face_location_noCNN:
[(242, 489, 464, 266)]
1
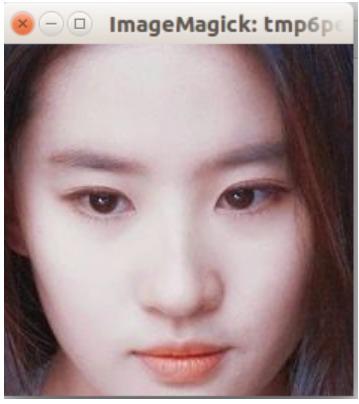
图片效果大致是这样
part3.找到人脸并将其裁剪打印出来(使用 cnn 定位人脸)
# part3
# 找到人脸并将其裁剪打印出来(使用cnn定位人脸)from PIL import Image
import face_recognition# Load the jpg file into a numpy array
image = face_recognition.load_image_file("lyf1.jpg")face_locations = face_recognition.face_locations(image, number_of_times_to_upsample=0, model="cnn")print("I found {} face(s) in this photograph.".format(len(face_locations)))for face_location in face_locations:top, right, bottom, left = face_locationprint("A face is located at pixel location Top: {}, Left: {}, Bottom: {}, Right: {}".format(top, left, bottom, right))face_image = image[top:bottom, left:right]pil_image = Image.fromarray(face_image)pil_image.show()
结果
I found 1 face(s) in this photograph.
A face is located at pixel location Top: 205, Left: 276, Bottom: 440, Right: 512
图片效果大致是这样
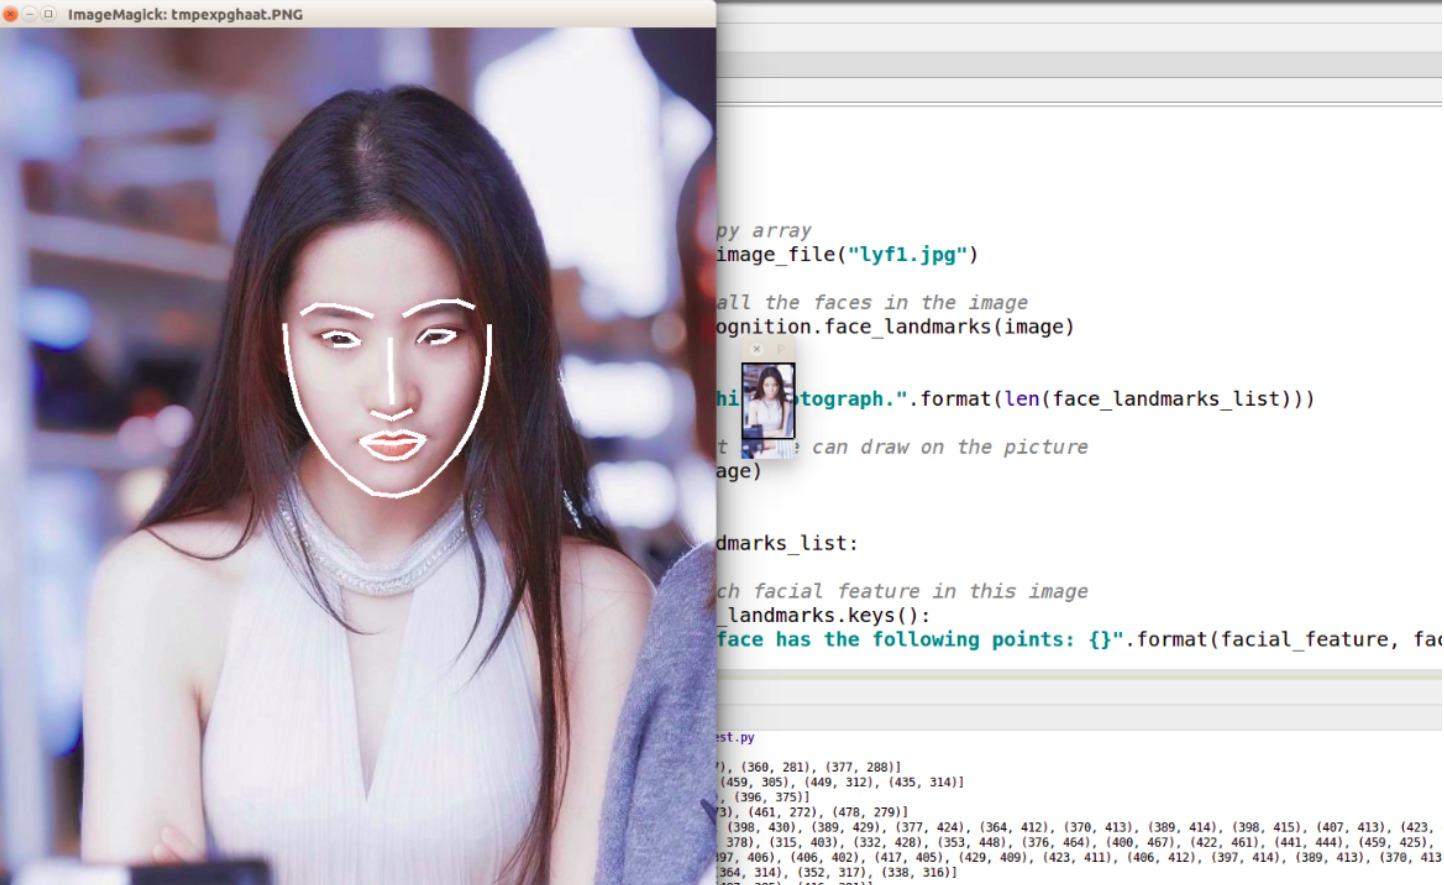
part4.识别单张图片中人脸的关键点
# part4 识别单张图片中人脸的关键点from PIL import Image, ImageDraw
import face_recognition# Load the jpg file into a numpy array
image = face_recognition.load_image_file("lyf1.jpg")# Find all facial features in all the faces in the image
face_landmarks_list = face_recognition.face_landmarks(image)
# print(face_landmarks_list)print("I found {} face(s) in this photograph.".format(len(face_landmarks_list)))# Create a PIL imagedraw object so we can draw on the picture
pil_image = Image.fromarray(image)
d = ImageDraw.Draw(pil_image)for face_landmarks in face_landmarks_list:# Print the location of each facial feature in this imagefor facial_feature in face_landmarks.keys():print("The {} in this face has the following points: {}".format(facial_feature, face_landmarks[facial_feature]))# Let's trace out each facial feature in the image with a line!for facial_feature in face_landmarks.keys():d.line(face_landmarks[facial_feature], width=5)# Show the picture
pil_image.show()
结果
I found 1 face(s) in this photograph.
The left_eyebrow in this face has the following points: [(305, 285), (321, 276), (340, 277), (360, 281), (377, 288)]
The right_eye in this face has the following points: [(422, 313), (432, 303), (446, 302), (459, 305), (449, 312), (435, 314)]
The nose_bridge in this face has the following points: [(394, 309), (394, 331), (395, 354), (396, 375)]
The right_eyebrow in this face has the following points: [(407, 287), (424, 278), (442, 273), (461, 272), (478, 279)]
The bottom_lip in this face has the following points: [(429, 409), (419, 421), (408, 428), (398, 430), (389, 429), (377, 424), (364, 412), (370, 413), (389, 414), (398, 415), (407, 413), (423, 411)]
The chin in this face has the following points: [(289, 295), (291, 323), (296, 351), (303, 378), (315, 403), (332, 428), (353, 448), (376, 464), (400, 467), (422, 461), (441, 444), (459, 425), (473, 403), (484, 377), (490, 351), (493, 323), (493, 296)]
The top_lip in this face has the following points: [(364, 412), (377, 407), (389, 403), (397, 406), (406, 402), (417, 405), (429, 409), (423, 411), (406, 412), (397, 414), (389, 413), (370, 413)]
The left_eye in this face has the following points: [(327, 308), (339, 304), (353, 306), (364, 314), (352, 317), (338, 316)]
The nose_tip in this face has the following points: [(375, 383), (386, 387), (396, 390), (407, 385), (416, 381)]
图片效果