新建文件夹 : basic
在文件夹中打开terminal,初始化git
git init
安装
pip install dvc
初始化dvc
dvc init
新建文件夹data
mkdir data
从dvc官方github获取demo数据源头,获取方式是通过http
dvc get https://github.com/iterative/dataset-registry \
get-started/data.xml -o data/data.xml
查看是否已经获取demo数据
ls -lh data
使用dvc来管控demo数据
dvc add data/data.xml
使用git来管控dvc的版本指向文件
git add data/.gitignore data/data.xml.dvc
使用git记录和提交本次操作
git commit -m "Add raw data"
查看dvc版本指向文件的内容
outs:
- md5: a304afb96060aad90176268345e10355path: data.xml```
这里使用上传至公司服务器器为例子
建立远程连接
dvc remote add -d -f storage ssh://172.20.8.10/home/hairou/algorithm-dvcdvc remote modify storage user hairoudvc remote modify storage port 22dvc remote modify storage password hairou
然后上传指向文件
dvc push
当把数据文件删除之后,依旧可以从服务器端获取
dvc pull
假设我们的数据文件发生了改变,要如何处理,比如往里添加内容
vim data/data.xml
用dvc来管控文件的变化
dvc add  data/data.xml
git add 'data\data.xml.dvc'
同时也要用git来管控变化的 .dvc 文件
git add data/data.xml.dvc
git commit -m "Dataset updates"
都管理好变化之后,将有变动的文件上传至服务器来管理
dvc push

如果想要回到上一个版本的数据源,也可以用常规的git命令
git checkout HEAD^1 data/data.xml.dvc
注意!git 跟踪管理的不是数据文件,而是数据文件的映射文件 .dvc
git checkout 完了之后,还得
dev checkout
因为已经回退到上一个版本了,所以要记录一下这个操作
git commit data/data.xml.dvc -m "Revert dataset updates"
我们把刚才的启动dvc和git来管理的项目,上传到github作为一个项目
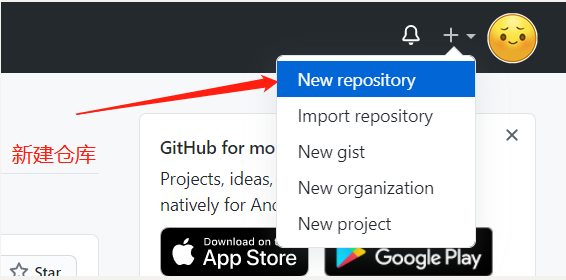
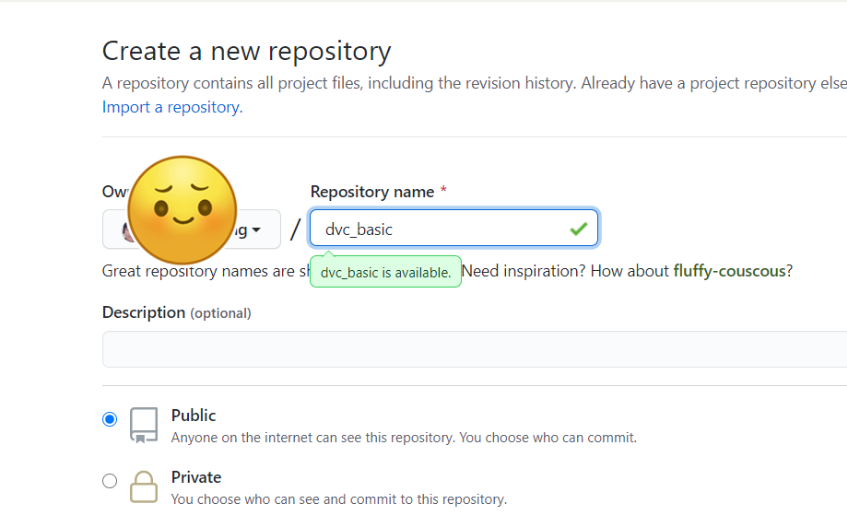
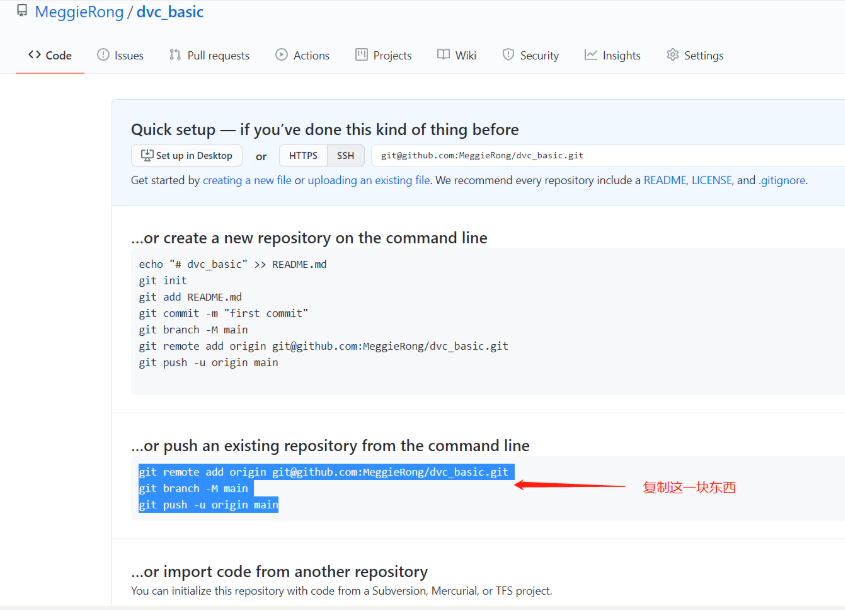
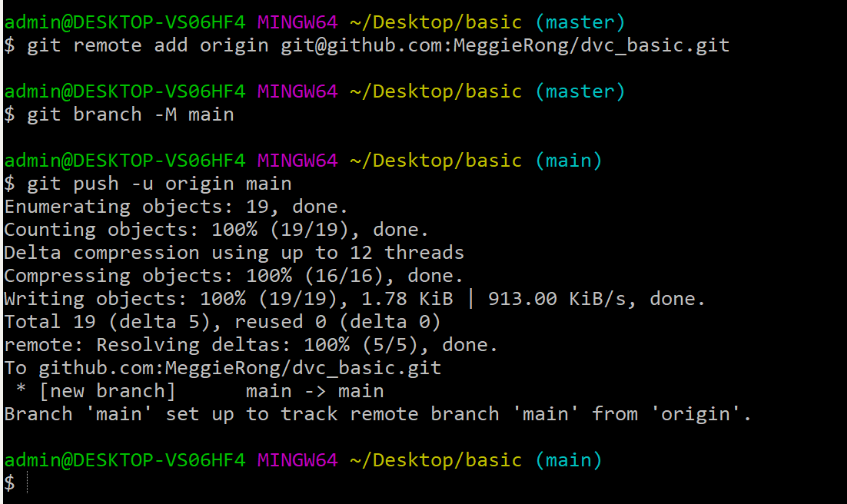
这样直接回到github,就看到东西已经在github同步了
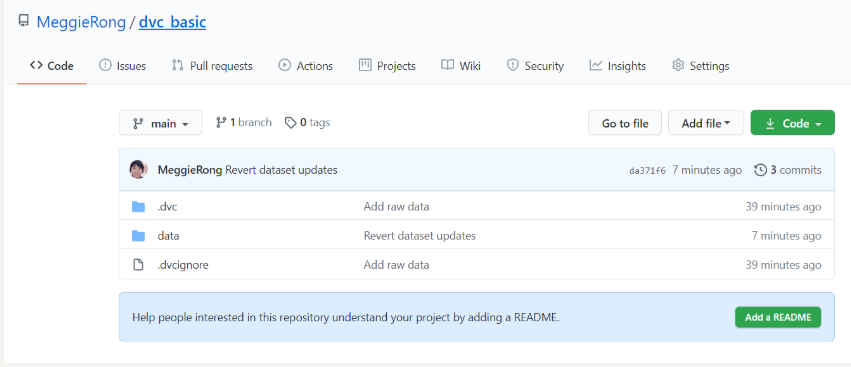
在ML中使用dvc
数据文件及ml脚本 ;
https://github.com/elleobrien/wine
当数据集或者程序或者模型发生了改变,dev要如何管控
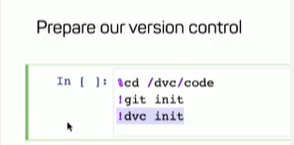
dvc init
dvc run -n get_data \-d get_data.py \-o data_raw.csv \--no-exec \ python get_data.py
参数说明:
-n : --name : 要执行的名称
-d : dependencies 所依赖的
-o : --output 输出的结果叫做 data_raw.csv
当使用dvc run的时候不想马上执行命令,可以用 --no-exec
如果是命令行的形式,也可以使用类似
dvc run -n my_stage "./my_script.sh > /dev/null 2>&1"
dvc run -n my_stage './my_script.sh $MYENVVAR'

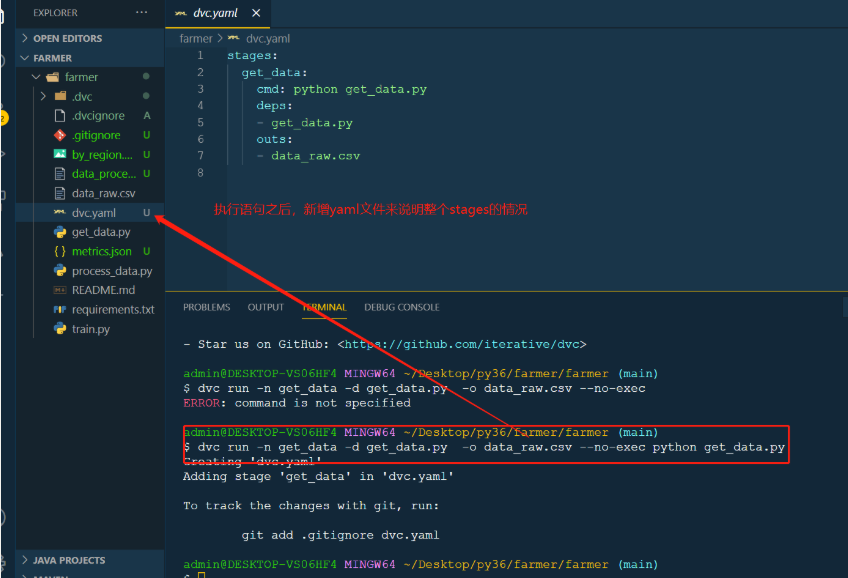
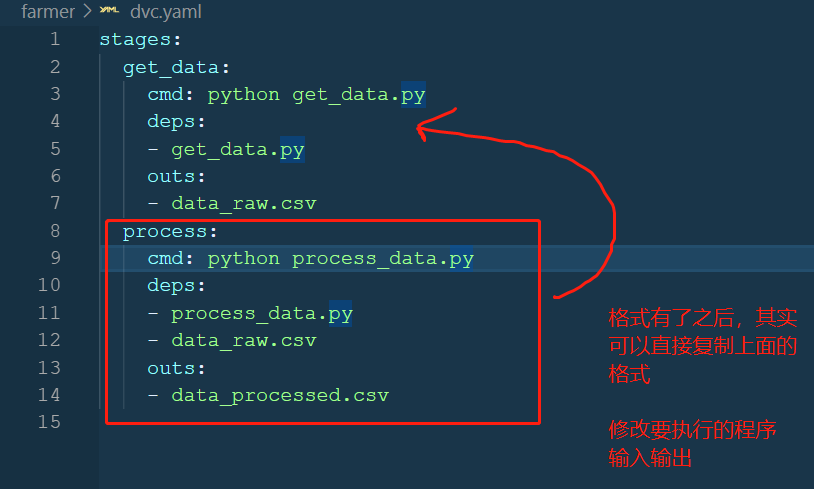
#把所有程序都执行,且把所有输入输出等都列出来
stages:get_data:cmd: python get_data.pydeps:- get_data.pyouts:- data_raw.csvprocess:cmd: python process_data.pydeps:- process_data.py- data_raw.csvouts:- data_processed.csvtrain:cmd: python train.pydeps:- train.py- data_processed.csvouts:- by_region.pngmetrics:- metrics.json:cache: false
#再执行以下命令则可以整个过程一次性执行
dvc repro
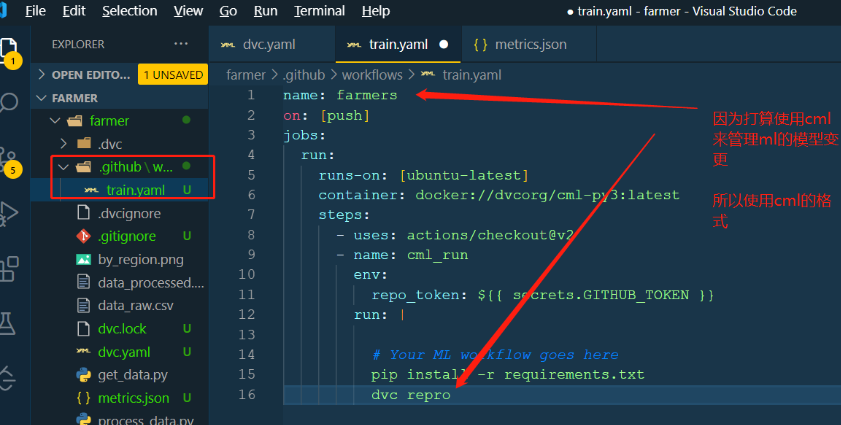
如果使用同一套FS,但替换不同的数据文件和配置,改怎么做
要修改文本啥的,然后repro
案例

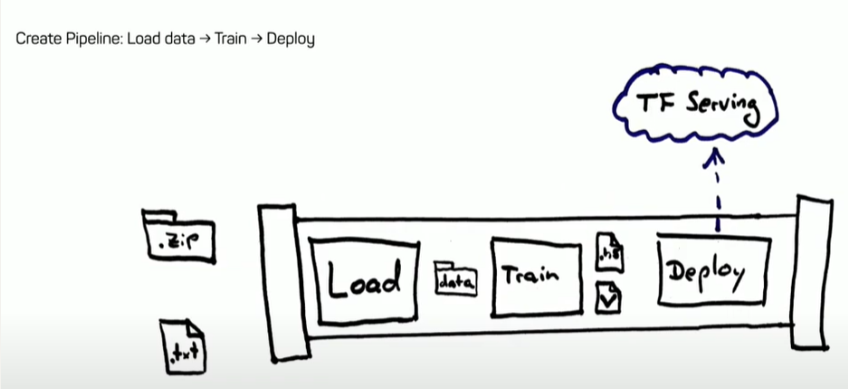
dvc run -d 要執行的程式或要輸入的檔案 -o 要輸出的檔案 python 要執行的程式
$ dvc run -d script/split_train_test.py \-d script/config.py \ -d dataset/annotation.csv \-o dataset/train.csv \-o dataset/test.csv \python script/split_train_test.py #最后的这个应该是需要执行的主程序
dvc run -d script/evaluate.py \-d script/config.py \-d dataset/test.csv \-d model/model.pth \-M log/eval.txt \# -M 指定檔案路徑,因为DVC 後續會去追蹤這份檔案,讓我們能夠快速地去 做成效的比較-f Dvcfile \ # -f 是因为后面如果dvc repro没有指定档案,就读取默认档案,这里就会 把上面的这些-d 放到Dvcfilepython script/evaluate.py
如果修改了一些文件或者配置,但其他都不变,则
$ git checkout -b epochs51
$ vi script/config.py  # 將epochs = 21 改為 epochs = 51
$ dvc repro
官方案例
git clone https://github.com/iterative/example-versioning.git
cd example-versioning#一次性导入即将需要的各个模块
pip install -r requirements.txt#获取第一个版本的代码模型
dvc get https://github.com/iterative/dataset-registry \tutorial/ver/data.zip
unzip -q data.zip
rm -f data.zip#类似git status
dvc status -c
常用场景解决
1.同一个分支使用不同的数据
即针对新开发出来的一个算法,需要使用不同的数据集来模拟验证和对比不同场景的效率
1.1 串行模拟
1.1.1 本地模拟器
#把模拟器dvc 初始化
dvc init#配置远端数据源获取渠道
dvc remote add -d -f DataSet ssh://172.20.8.10/home/hairou/algorithm-benchmark
dvc remote modify DataSet user hairou
dvc remote modify DataSet port 22
dvc remote modify DataSet password hairou#获取数据源,比如想要WY项目的,则
cp ../dataStore/*.dvc data/
cd data/ & dvc pull
rm -f data/*.dvc
mv data/*.yaml config/#使用命令行执行程序
dvc run -n run_haiq "cd cmake-build-release ; nohup ./run_haiq ../config/*.yaml > /dev/null 2>&1 &"#用git管理dvc的process
git add dvc.lock dvc.yaml
git commit -m "Add dvc.yaml"#当程序跑完之后,存储结果
cd statistic/script ; bash +x clean_log.sh#删除原有的不同的数据集并拉取新的数据集
cd ../../ ; rm -rf  data/*/ ; rm -f config/*.yaml
cp ../algorithm-benchmark/WY*.dvc data/
cd data/ & dvc pull
rm -f data/*.dvc
mv data/*.yaml config/#直接
dvc repro
1.1.2 服务器的模拟器
#若没有安装dvc,需要安装
pip install dvc
或者
snap install --classic dvc#把模拟器dvc 初始化
dvc init#配置远端数据源获取渠道
dvc remote add -d -f storage ssh://172.20.8.10/home/hairou/algorithm-dvc
dvc remote modify storage user hairou
dvc remote modify storage port 22
dvc remote modify storage password hairou#获取数据源,比如想要WY项目的,则
cp ../algorithm-benchmark/WY*.dvc data/
cd data/ & dvc pull
rm -f data/*.dvc
mv data/*.yaml config/#使用命令行执行程序
dvc run -n run_haiq "cd build ; nohup ./run_haiq ../config/*.yaml > /dev/null 2>&1 &"#当程序跑完之后,存储结果
cd statistic/script ; bash +x clean_log.sh#删除原有的不同的数据集并拉取新的数据集
cd ../../ ; rm -rf  data/*/ ; rm -f config/*.yaml
cp ../algorithm-benchmark/WY*.dvc data/
cd data/ & dvc pull
rm -f data/*.dvc
mv data/*.yaml config/#直接
dvc repro
1.2 并行模拟
1.2.1 本地模拟器
#若没有安装dvc,需要安装
pip install dvc
或者
snap install --classic dvc#把模拟器dvc 初始化
dvc init#配置远端数据源获取渠道
dvc remote add -d -f storage ssh://172.20.8.10/home/hairou/algorithm-dvc
dvc remote modify storage user hairou
dvc remote modify storage port 22
dvc remote modify storage password hairou#准备好所需要的数据,这里采用JDKA及WY为例
cp ../../algorithm-benchmark/*.dvc data/
cd data/ & dvc pull
rm -f data/*.dvc
mv data/*.yaml config/#创建执行脚本 multiConfig.sh
#!/bin/bash
for file in config/*
doif [ $( basename `pwd` ) = "cmake-build-release" ]thennohup ./run_haiq ../$file > /dev/null 2>&1 &echo "Begin to run $file"elsecd cmake-build-releasenohup ./run_haiq ../$file > /dev/null 2>&1 &echo "Begin to run $file"fi
done#使用命令行执行程序
chmod +x multiConfig.sh
dvc run -n run_haiq "./multiConfig.sh > /dev/null 2>&1"#当程序跑完之后,存储结果
cd statistic/script ; bash +x clean_log.sh
1.2.2 服务器模拟器
#若没有安装dvc,需要安装
pip install dvc
或者
snap install --classic dvc#把模拟器dvc 初始化
dvc init#配置远端数据源获取渠道
dvc remote add -d -f storage ssh://172.20.8.10/home/hairou/algorithm-dvc
dvc remote modify storage user hairou
dvc remote modify storage port 22
dvc remote modify storage password hairou#准备好所需要的数据,这里采用JDKA及WY为例
cp ../algorithm-benchmark/*.dvc data/
cd data/ & dvc pull
rm -f data/*.dvc
mv data/*.yaml config/#创建执行脚本 multiConfig.sh
#!/bin/bash
for file in config/*
doif [ $( basename `pwd` ) = "build" ]thennohup ./run_haiq ../$file > /dev/null 2>&1 &echo "Begin to run $file"elsecd buildnohup ./run_haiq ../$file > /dev/null 2>&1 &echo "Begin to run $file"fi
done#使用命令行执行程序
chmod +x multiConfig.sh
dvc run -n run_haiq "./multiConfig.sh > /dev/null 2>&1"#当程序跑完之后,存储结果
cd statistic/script ; bash +x clean_log.sh
2.不同分支使用相同或不同的数据源
*即针对新开发出来的一个算法,对比改版前后的算法效果
2.1 并行模拟-相同数据源
区别 : 需要同样的数据源,不同的分支
TO DO : 使用相同的数据源,并行跑模拟输出的日志除了时间不一样之外,识别所使用的项目名称是一样的
2.1.1 本地模拟器
#若没有安装dvc,需要安装
pip install dvc
或者
snap install --classic dvc#把模拟器dvc 初始化
dvc init#配置远端数据源获取渠道
dvc remote add -d -f storage ssh://172.20.8.10/home/hairou/algorithm-dvc
dvc remote modify storage user hairou
dvc remote modify storage port 22
dvc remote modify storage password hairou#准备好所需要的数据,这里采用WY为例
cp ../algorithm-benchmark/WY*.dvc data/
cd data/ & dvc pull
rm -f data/*.dvc
mv data/*.yaml config/#使用命令行执行程序
dvc run -n run_haiq "cd cmake-build-release ; nohup ./run_haiq ../config/*.yaml > /dev/null 2>&1 &"#切换程序
gco only_used_by_dev_test_v2#执行程序
dvc repro
2.1.2 服务器模拟器
服务器切换分支都需要重新编译,耗时久也麻烦。如果涉及两个及以上的分支模拟。
那就下载两个或多个FastSimulation-G2

