分类任务和回归任务本质上并没有太大的区别,只是最终得到的结果和损失函数不同而已。
MNIST手写数字分类任务,最终得到的是10个值,也类似一个one-hot编码格式,表示该图片是0-9数字的概率,概率值最大的就是预测的最终结果
当然标签也得是one-hot编码格式,例如标签图片是2,对应0010000000
网络模型:1*784,通过隐藏层转化为128个特征,再转换为10个输出结果,最后连接一个Softmax转化为每个类别的概率值
分类问题一般使用交叉熵损失函数
一、数据集预处理
数据集采用MNIST手写数字,共计50,000张,每张图片均是一个大小为28*28的手写数字黑白单颜色通道照片,共784个像素点,[28,28,1]。
1,导包
from pathlib import Path
import requests
import pickle
import gzip
from matplotlib import pyplot
import numpy as np
import torch
import torch.nn.functional as F
from torch import nn
from torch.utils.data import TensorDataset
from torch.utils.data import DataLoader
from torch import optim
2,下载MNIST数据集并展示
数据集存放路径为项目同级路径下的data\mnist,数据集文件为mnist.pkl.gz
若不存在,则联网下载;MNIST手写数字数据集免费下载链接

2.1 下载数据集
DATA_PATH = Path("data")
PATH = DATA_PATH / "mnist"PATH.mkdir(parents=True, exist_ok=True)URL = "http://deeplearning.net/data/mnist/"
FILENAME = "mnist.pkl.gz"if not (PATH / FILENAME).exists():content = requests.get(URL + FILENAME).content(PATH / FILENAME).open("wb").write(content)with gzip.open((PATH / FILENAME).as_posix(), "rb") as f:((x_train, y_train), (x_valid, y_valid), _) = pickle.load(f, encoding="latin-1")
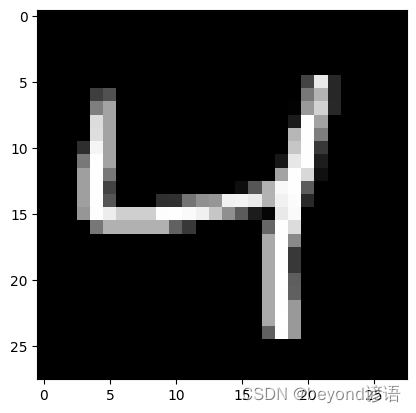
2.2 展示一下其中训练集中的一个样本
pyplot.imshow(x_train[2].reshape((28, 28)), cmap="gray")
print(x_train.shape)
2.3 数据集转换为tensor格式
通过map方法将数据集x_train, y_train, x_valid, y_valid转换为tensor格式
x_train, y_train, x_valid, y_valid = map(torch.tensor, (x_train, y_train, x_valid, y_valid)
)
n, c = x_train.shape
x_train, x_train.shape, y_train.min(), y_train.max()
print(x_train, y_train)
"""
tensor([[0., 0., 0.,  ..., 0., 0., 0.],[0., 0., 0.,  ..., 0., 0., 0.],[0., 0., 0.,  ..., 0., 0., 0.],...,[0., 0., 0.,  ..., 0., 0., 0.],[0., 0., 0.,  ..., 0., 0., 0.],[0., 0., 0.,  ..., 0., 0., 0.]]) tensor([5, 0, 4,  ..., 8, 4, 8])
"""
print(x_train.shape)
"""
torch.Size([50000, 784])
"""
print(y_train.min(), y_train.max())
"""
tensor(0) tensor(9)
"""
二、模型构建
1,functional和Module模块用法
| 模块名称 | 使用场景 |
|---|---|
| torch.nn.functional | 不带参数的时候优先使用,例如,一些激活函数、损失函数等 |
| torch.nn.Module | 模型中有带学习参数(w和b)的时候使用,例如,一些卷积层、全连接层等 |
1.1 functional模块用法
交叉熵损失函数,不带参数,故优先使用 torch.nn.functional下的cross_entropy
这里定义一个简单的网络model,仅有一层,将原先的[50000,784]转化为[50000,10],最终得到[50000,10],即每条样本仅含有10个特征,也就是0-9是个数字的概率值,共50000条数据样本。故weights随机初始化为[784,10]
自定义weights和bias
model(x_batchsize)即:xb.mm(weights) + bias
x_batchsize为[50000,784]
weights为[784,10]
bias为[1,10]
[50000,784] * [784,10] = [50000,10]
[50000,10] + [1,10] = [50000,10]
loss_func(model(x_batchsize), y_batchsize)
使用交叉熵损失函数的时候,需要传入模型预测结果model(x_batchsize),和实际结果y_batchsize,最终会得到一个损失值loss_value
loss_func = torch.nn.functional.cross_entropydef model(xb):return xb.mm(weights) + biasbatch_size = 64
x_batchsize = x_train[0:batch_size]  # a mini-batch from x
y_batchsize = y_train[0:batch_size]
weights = torch.randn([784, 10], dtype = torch.float,  requires_grad = True)
bias = torch.zeros(10, requires_grad=True)loss_value = loss_func(model(x_batchsize), y_batchsize)
print("loss_value is ",loss.item())
"""
loss_value is  15.282693862915039
"""
1.2 Module模块用法
①继承torch.nn.Module且在其构造函数中需调用torch.nn.Module的构造函数
②torch.nn.Module能够利用autograd自动实现反向传播
③Module中的可学习参数可以通过named_parameters()或者parameters()返回迭代器
class Mnist_NN(torch.nn.Module):def __init__(self):super().__init__()self.hidden1 = torch.nn.Linear(784, 128)self.hidden2 = torch.nn.Linear(128, 256)self.out  = torch.nn.Linear(256, 10)def forward(self, x):x = torch.nn.functional.relu(self.hidden1(x))x = torch.nn.functional.relu(self.hidden2(x))x = self.out(x)return xnet = Mnist_NN()
print(net)"""
Mnist_NN((hidden1): Linear(in_features=784, out_features=128, bias=True)(hidden2): Linear(in_features=128, out_features=256, bias=True)(out): Linear(in_features=256, out_features=10, bias=True)
)
"""
参看模型中的权重参数及偏置项,很明显可以看到pytorch已经将权重参数weights和bias进行了初始化
for name, parameter in net.named_parameters():print(name, parameter,parameter.size())"""
hidden1.weight Parameter containing:
tensor([[-0.0103, -0.0190, -0.0043,  ...,  0.0030, -0.0281, -0.0044],[ 0.0266,  0.0323,  0.0084,  ...,  0.0356, -0.0234, -0.0319],[ 0.0097,  0.0259, -0.0062,  ..., -0.0251, -0.0205,  0.0192],...,[ 0.0027,  0.0076, -0.0102,  ...,  0.0129, -0.0046,  0.0261],[ 0.0086, -0.0191, -0.0071,  ...,  0.0031,  0.0103,  0.0261],[ 0.0283,  0.0107, -0.0344,  ..., -0.0068, -0.0294,  0.0064]],requires_grad=True) torch.Size([128, 784])
hidden1.bias Parameter containing:
tensor([ 0.0216, -0.0272,  0.0331, -0.0009,  0.0174,  0.0257,  0.0065,  0.0003,0.0300, -0.0152, -0.0201, -0.0261,  0.0050,  0.0260, -0.0282,  0.0345,-0.0012,  0.0142,  0.0331, -0.0031,  0.0273, -0.0191, -0.0110, -0.0095,0.0284, -0.0113,  0.0225,  0.0055, -0.0091, -0.0120, -0.0197,  0.0104,0.0045, -0.0280,  0.0257,  0.0159,  0.0349, -0.0131,  0.0108,  0.0218,0.0185, -0.0068, -0.0295,  0.0322,  0.0290, -0.0259,  0.0168,  0.0019,-0.0259, -0.0175,  0.0344, -0.0213, -0.0316,  0.0299, -0.0163, -0.0270,0.0191,  0.0266,  0.0115,  0.0094, -0.0097, -0.0059, -0.0014,  0.0002,0.0303, -0.0142, -0.0020,  0.0115, -0.0350,  0.0063,  0.0197,  0.0349,0.0066,  0.0145,  0.0126, -0.0327,  0.0066, -0.0247, -0.0279, -0.0338,-0.0083, -0.0174,  0.0040,  0.0266,  0.0186, -0.0242,  0.0202,  0.0080,0.0162,  0.0340,  0.0081,  0.0107, -0.0025, -0.0291,  0.0274,  0.0278,-0.0067, -0.0251, -0.0070, -0.0098, -0.0274,  0.0311, -0.0184, -0.0021,0.0349,  0.0077, -0.0178,  0.0102,  0.0209,  0.0181,  0.0215, -0.0017,0.0202,  0.0239, -0.0071, -0.0115,  0.0295,  0.0246,  0.0123,  0.0175,-0.0263, -0.0001,  0.0025,  0.0092,  0.0010, -0.0005, -0.0195, -0.0303],requires_grad=True) torch.Size([128])
hidden2.weight Parameter containing:
tensor([[-0.0695,  0.0737,  0.0376,  ..., -0.0743,  0.0488, -0.0577],[ 0.0853, -0.0837, -0.0820,  ..., -0.0524, -0.0631, -0.0884],[ 0.0197,  0.0445,  0.0115,  ...,  0.0682, -0.0595,  0.0394],...,[ 0.0714, -0.0377,  0.0020,  ..., -0.0712, -0.0086,  0.0522],[ 0.0236, -0.0035,  0.0493,  ..., -0.0229,  0.0803,  0.0179],[ 0.0659, -0.0182, -0.0769,  ..., -0.0166,  0.0726, -0.0735]],requires_grad=True) torch.Size([256, 128])
hidden2.bias Parameter containing:
tensor([ 0.0183,  0.0099, -0.0448,  0.0838, -0.0734, -0.0142, -0.0436, -0.0154,-0.0244, -0.0263,  0.0354,  0.0448, -0.0390,  0.0124, -0.0233, -0.0495,0.0037, -0.0407, -0.0827, -0.0067, -0.0540,  0.0819,  0.0035,  0.0408,0.0589,  0.0687, -0.0075,  0.0123, -0.0455,  0.0319, -0.0565, -0.0632,-0.0445, -0.0497, -0.0884,  0.0604, -0.0763,  0.0799, -0.0792, -0.0108,0.0238, -0.0842, -0.0196,  0.0354,  0.0795, -0.0863,  0.0022, -0.0864,0.0042, -0.0249,  0.0077,  0.0880, -0.0154,  0.0281, -0.0115,  0.0725,0.0870,  0.0301,  0.0606, -0.0185,  0.0663,  0.0699,  0.0871,  0.0118,-0.0254, -0.0482,  0.0105, -0.0523, -0.0479, -0.0275, -0.0284, -0.0720,0.0261, -0.0533, -0.0619,  0.0075,  0.0054, -0.0535, -0.0180,  0.0242,-0.0596,  0.0572, -0.0202, -0.0387, -0.0463,  0.0692, -0.0386,  0.0561,-0.0243, -0.0506, -0.0881,  0.0110, -0.0650, -0.0861, -0.0495,  0.0682,-0.0283,  0.0833,  0.0398, -0.0657,  0.0555, -0.0533,  0.0658,  0.0737,0.0540, -0.0451,  0.0682, -0.0578,  0.0440, -0.0437, -0.0654,  0.0751,-0.0745,  0.0042, -0.0147, -0.0569, -0.0623,  0.0775,  0.0091,  0.0279,-0.0501,  0.0583,  0.0678,  0.0089, -0.0820,  0.0817, -0.0344,  0.0255,-0.0555,  0.0547,  0.0685,  0.0306, -0.0300,  0.0403, -0.0279,  0.0202,-0.0820,  0.0615, -0.0076, -0.0441,  0.0326,  0.0401, -0.0319,  0.0820,0.0206, -0.0017,  0.0708,  0.0190,  0.0230, -0.0216,  0.0568, -0.0080,-0.0383, -0.0544, -0.0615,  0.0631, -0.0607,  0.0278, -0.0583, -0.0352,0.0366, -0.0495,  0.0379, -0.0525, -0.0833,  0.0035, -0.0335,  0.0035,0.0511,  0.0351, -0.0740, -0.0139,  0.0403,  0.0526, -0.0718,  0.0162,-0.0850,  0.0107, -0.0147, -0.0585,  0.0393,  0.0059,  0.0435,  0.0786,-0.0692,  0.0510, -0.0684,  0.0609, -0.0507,  0.0758, -0.0459, -0.0352,0.0209,  0.0770,  0.0499, -0.0505,  0.0456,  0.0666,  0.0681,  0.0481,-0.0462,  0.0185, -0.0787,  0.0354, -0.0553, -0.0860,  0.0690, -0.0738,-0.0327, -0.0022,  0.0376,  0.0795, -0.0759,  0.0221, -0.0463, -0.0018,-0.0396,  0.0051,  0.0354, -0.0525,  0.0017, -0.0321,  0.0224,  0.0812,0.0007,  0.0191,  0.0600, -0.0778,  0.0328,  0.0567, -0.0762,  0.0303,0.0458, -0.0680, -0.0247,  0.0681,  0.0281, -0.0423, -0.0765, -0.0693,0.0539,  0.0803,  0.0544, -0.0693,  0.0676,  0.0337, -0.0803, -0.0588,-0.0669,  0.0054,  0.0858,  0.0852,  0.0579,  0.0029,  0.0217,  0.0020],requires_grad=True) torch.Size([256])
out.weight Parameter containing:
tensor([[-0.0123, -0.0068, -0.0562,  ...,  0.0388, -0.0082, -0.0343],[ 0.0063, -0.0397,  0.0095,  ...,  0.0393,  0.0570,  0.0350],[-0.0014, -0.0031,  0.0413,  ...,  0.0558, -0.0057,  0.0295],...,[-0.0041, -0.0314,  0.0068,  ...,  0.0051, -0.0595, -0.0526],[ 0.0240,  0.0077, -0.0286,  ...,  0.0616, -0.0109,  0.0282],[-0.0037,  0.0257,  0.0358,  ...,  0.0238, -0.0070, -0.0130]],requires_grad=True) torch.Size([10, 256])
out.bias Parameter containing:
tensor([-0.0253, -0.0390,  0.0220, -0.0050, -0.0236,  0.0182, -0.0462,  0.0092,-0.0282,  0.0165], requires_grad=True) torch.Size([10])
"""
三、数据集加载
1,TensorDataset和DataLoader模块
使用Dataset加载数据集x_train和y_train
再使用DataLoader进行分batch_size使用数据
train_dataset = TensorDataset(x_train, y_train)
train_dataloader = DataLoader(train_dataset, batch_size=batch_size, shuffle=True)valid_dataset = TensorDataset(x_valid, y_valid)
valid_dataloader = DataLoader(valid_dataset, batch_size=batch_size * 2)
可以定义成一个函数进行简化操作,与上面等同
def get_data(train_ds, valid_ds, bs):return (DataLoader(train_ds, batch_size=bs, shuffle=True),DataLoader(valid_ds, batch_size=bs * 2),)
2,搭建模型函数
class Mnist_NN(torch.nn.Module):def __init__(self):super().__init__()self.hidden1 = torch.nn.Linear(784, 128)self.hidden2 = torch.nn.Linear(128, 256)self.out = torch.nn.Linear(256, 10)def forward(self, x):x = torch.nn.functional.relu(self.hidden1(x))x = torch.nn.functional.relu(self.hidden2(x))x = self.out(x)return xdef get_model():model = Mnist_NN()return model, optim.SGD(model.parameters(), lr=0.001)
3,模型训练
model.train(),一般在训练模型时加上该函数,这样会正常使用Batch Normalization和Dropout
model.eval(),一般在测试的时候加上该函数,这样就不会使用Batch Normalization和Dropout,只需要得到结果,不需要加其他的东西
def fit(steps, model, loss_func, opt, train_dl, valid_dl):for step in range(steps):model.train()for xb, yb in train_dl:loss_batch(model, loss_func, xb, yb, opt)model.eval()with torch.no_grad():losses, nums = zip(*[loss_batch(model, loss_func, xb, yb) for xb, yb in valid_dl])val_loss = np.sum(np.multiply(losses, nums)) / np.sum(nums)print('当前step:'+str(step), '验证集损失:'+str(val_loss))4,计算损失
def loss_batch(model, loss_func, xb, yb, opt=None):loss = loss_func(model(xb), yb)if opt is not None:loss.backward()opt.step()opt.zero_grad()return loss.item(), len(xb)
四、模型训练
三行搞定!
①get_data(train_dataset, valid_dataset, batch_size),通过DataLoader把数据分成多个batch
②get_model(),拿到模型和优化器
③fit(25, model, loss_func, opt, train_dl, valid_dl),迭代25次,损失函数loss_func,opt优化器,以及数据集train_dl和valid_dl
train_dl, valid_dl = get_data(train_dataset, valid_dataset, batch_size)
model, opt = get_model()
fit(25, model, loss_func, opt, train_dl, valid_dl)
"""
当前step:0 验证集损失:2.273124300003052
当前step:1 验证集损失:2.236217007827759
当前step:2 验证集损失:2.178324108505249
当前step:3 验证集损失:2.084301624298096
当前step:4 验证集损失:1.9348833778381347
当前step:5 验证集损失:1.714909873199463
当前step:6 验证集损失:1.4460701025009155
当前step:7 验证集损失:1.1931273698806764
当前step:8 验证集损失:0.999380665397644
当前step:9 验证集损失:0.8610858593940734
"""
五、完整代码
from pathlib import Path
import requests
import pickle
import gzip
from matplotlib import pyplot
import numpy as np
import torch
import torch.nn.functional as F
from torch import nn
from torch.utils.data import TensorDataset
from torch.utils.data import DataLoader
from torch import optimDATA_PATH = Path("data")
PATH = DATA_PATH / "mnist"PATH.mkdir(parents=True, exist_ok=True)URL = "http://deeplearning.net/data/mnist/"
FILENAME = "mnist.pkl.gz"if not (PATH / FILENAME).exists():content = requests.get(URL + FILENAME).content(PATH / FILENAME).open("wb").write(content)with gzip.open((PATH / FILENAME).as_posix(), "rb") as f:((x_train, y_train), (x_valid, y_valid), _) = pickle.load(f, encoding="latin-1")#展示其中一个样本
#pyplot.imshow(x_train[2].reshape((28, 28)), cmap="gray")
#print(x_train.shape)x_train, y_train, x_valid, y_valid = map(torch.tensor, (x_train, y_train, x_valid, y_valid)
)
n, c = x_train.shape
x_train, x_train.shape, y_train.min(), y_train.max()
#print(x_train, y_train)
#print(x_train.shape)
#print(y_train.min(), y_train.max())batch_size = 64
loss_func = torch.nn.functional.cross_entropydef get_data(train_ds, valid_ds, bs):return (DataLoader(train_ds, batch_size=bs, shuffle=True),DataLoader(valid_ds, batch_size=bs * 2),)def fit(steps, model, loss_func, opt, train_dl, valid_dl):for step in range(steps):model.train()for xb, yb in train_dl:loss_batch(model, loss_func, xb, yb, opt)model.eval()with torch.no_grad():losses, nums = zip(*[loss_batch(model, loss_func, xb, yb) for xb, yb in valid_dl])val_loss = np.sum(np.multiply(losses, nums)) / np.sum(nums)print('当前step:'+str(step), '验证集损失:'+str(val_loss))class Mnist_NN(torch.nn.Module):def __init__(self):super().__init__()self.hidden1 = torch.nn.Linear(784, 128)self.hidden2 = torch.nn.Linear(128, 256)self.out  = torch.nn.Linear(256, 10)def forward(self, x):x = torch.nn.functional.relu(self.hidden1(x))x = torch.nn.functional.relu(self.hidden2(x))x = self.out(x)return xdef get_model():model = Mnist_NN()return model, optim.SGD(model.parameters(), lr=0.001)def loss_batch(model, loss_func, xb, yb, opt=None):loss = loss_func(model(xb), yb)if opt is not None:loss.backward()opt.step()opt.zero_grad()return loss.item(), len(xb)train_dl, valid_dl = get_data(train_dataset, valid_dataset, batch_size)
model, opt = get_model()
fit(10, model, loss_func, opt, train_dl, valid_dl)