4--Gradle入门 - 创建普通的web工程
前言
上一篇,我们已经创建了java工程,本篇章再来创建web工程。
“其实没啥用,还是研究如何部署 Springboot 环境就好了
”
创建普通的web工程
1. 新建 gradle 管理的工程项目
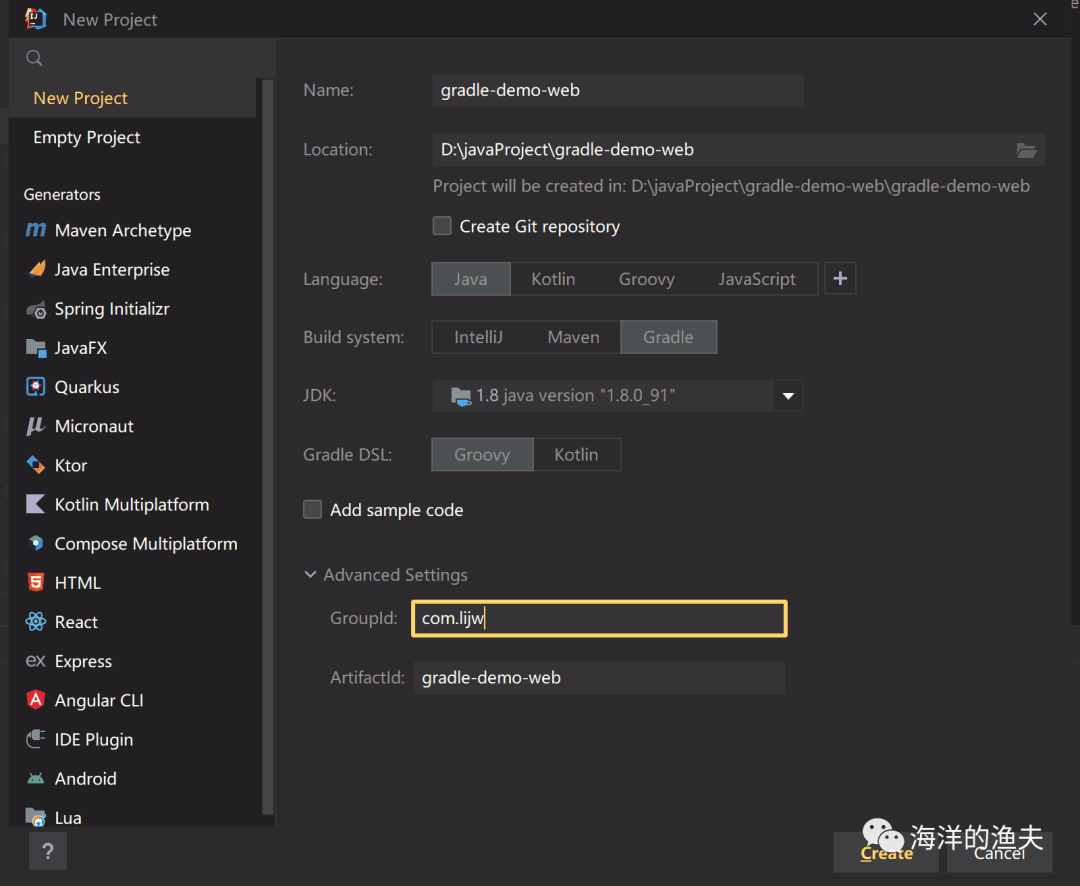
2. 设置项目使用本地的 gradle
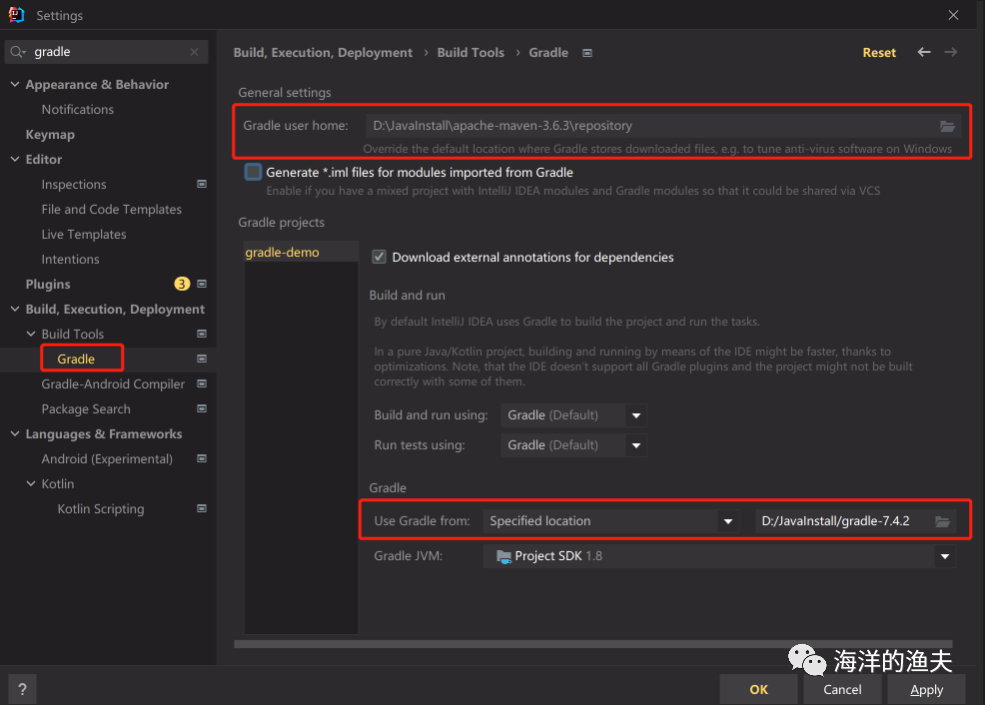
-
设置 Gradle user home:默认会设置 GRADLE_USER_HOME 的缓存仓库
-
设置 Use Gradle from:使用本地 gradle ,设置 Specified location
3. 修改项目下的build.gradle 配置一个war插件
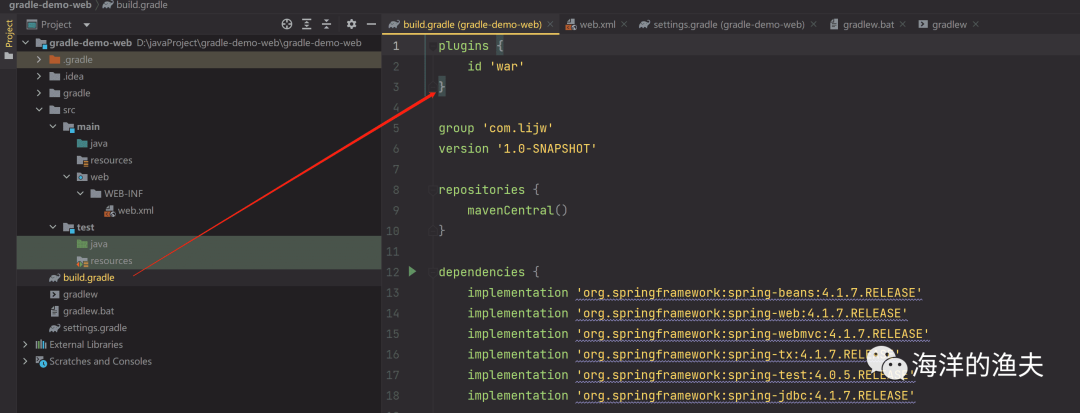
plugins {id 'java'id 'war'
}
4. 导入依赖
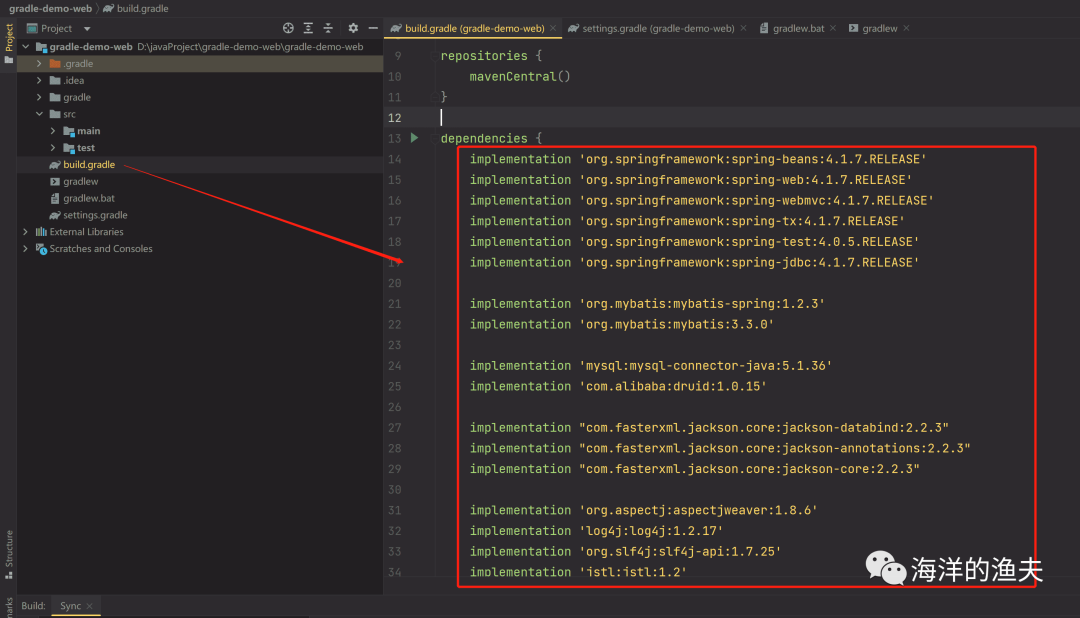
dependencies {implementation 'org.springframework:spring-beans:4.1.7.RELEASE'implementation 'org.springframework:spring-web:4.1.7.RELEASE'implementation 'org.springframework:spring-webmvc:4.1.7.RELEASE'implementation 'org.springframework:spring-tx:4.1.7.RELEASE'implementation 'org.springframework:spring-test:4.0.5.RELEASE'implementation 'org.springframework:spring-jdbc:4.1.7.RELEASE'implementation 'org.mybatis:mybatis-spring:1.2.3'implementation 'org.mybatis:mybatis:3.3.0'implementation 'mysql:mysql-connector-java:5.1.36'implementation 'com.alibaba:druid:1.0.15'implementation "com.fasterxml.jackson.core:jackson-databind:2.2.3"implementation "com.fasterxml.jackson.core:jackson-annotations:2.2.3"implementation "com.fasterxml.jackson.core:jackson-core:2.2.3"implementation 'org.aspectj:aspectjweaver:1.8.6'implementation 'log4j:log4j:1.2.17'implementation 'org.slf4j:slf4j-api:1.7.25'implementation 'jstl:jstl:1.2'compileOnly 'javax.servlet:servlet-api:2.5'testImplementation group: 'junit' ,name: 'junit', version: '4.12'
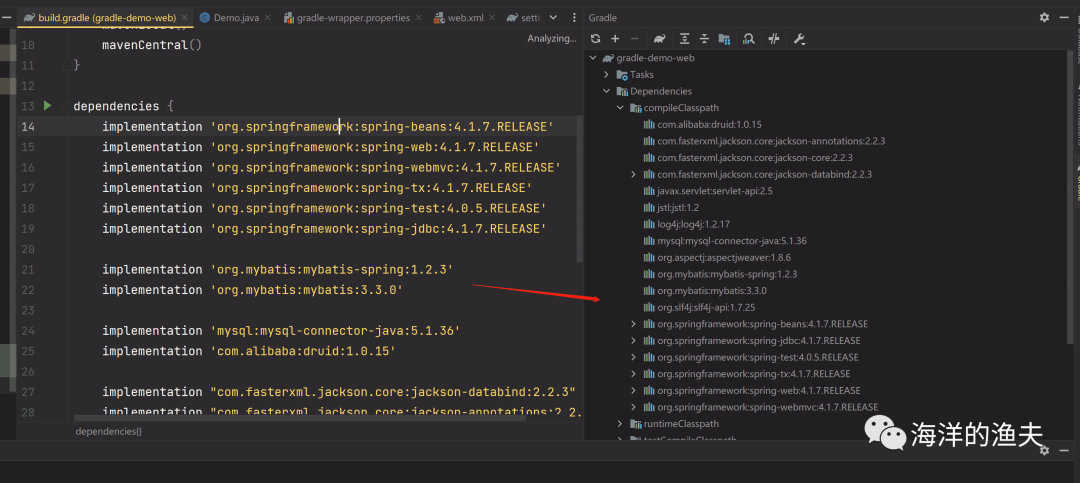
}“注意:配置好 gradle 以及依赖之后,检查一下依赖是否正常下载;如果未下载,则重启 idea
依赖下载好如下:
”
5、main目录下,新建一个webapp目录,然后创建web.xml配置文件
设置 webapp
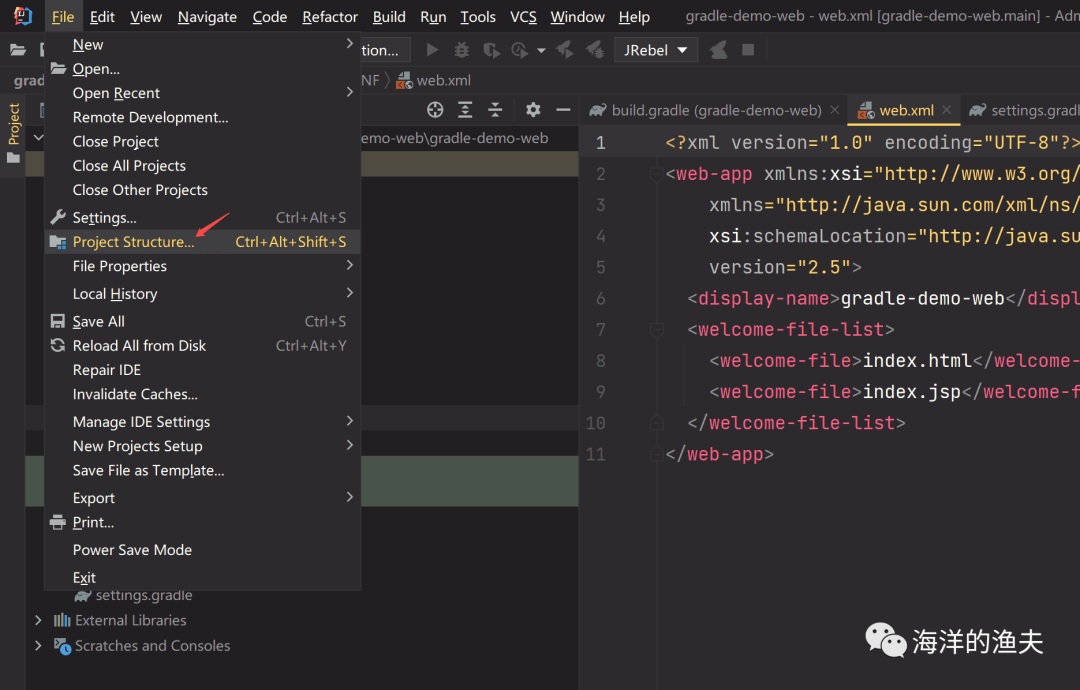
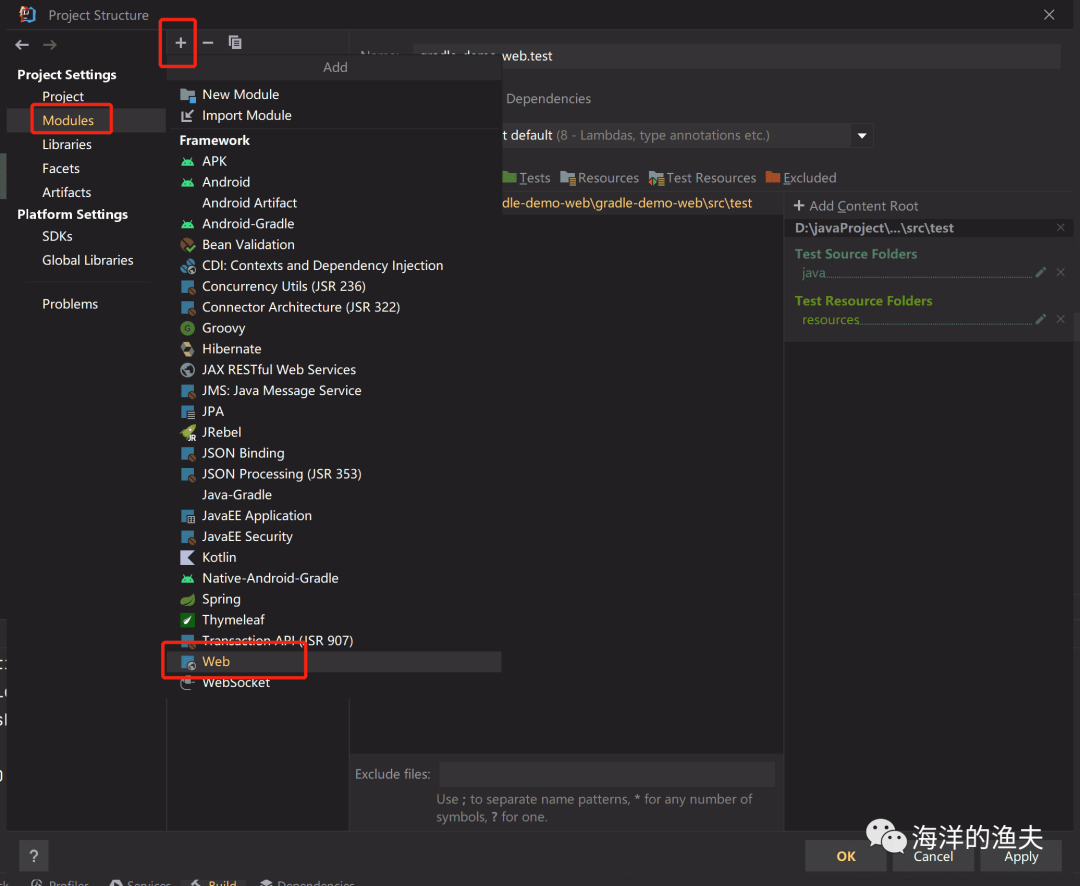
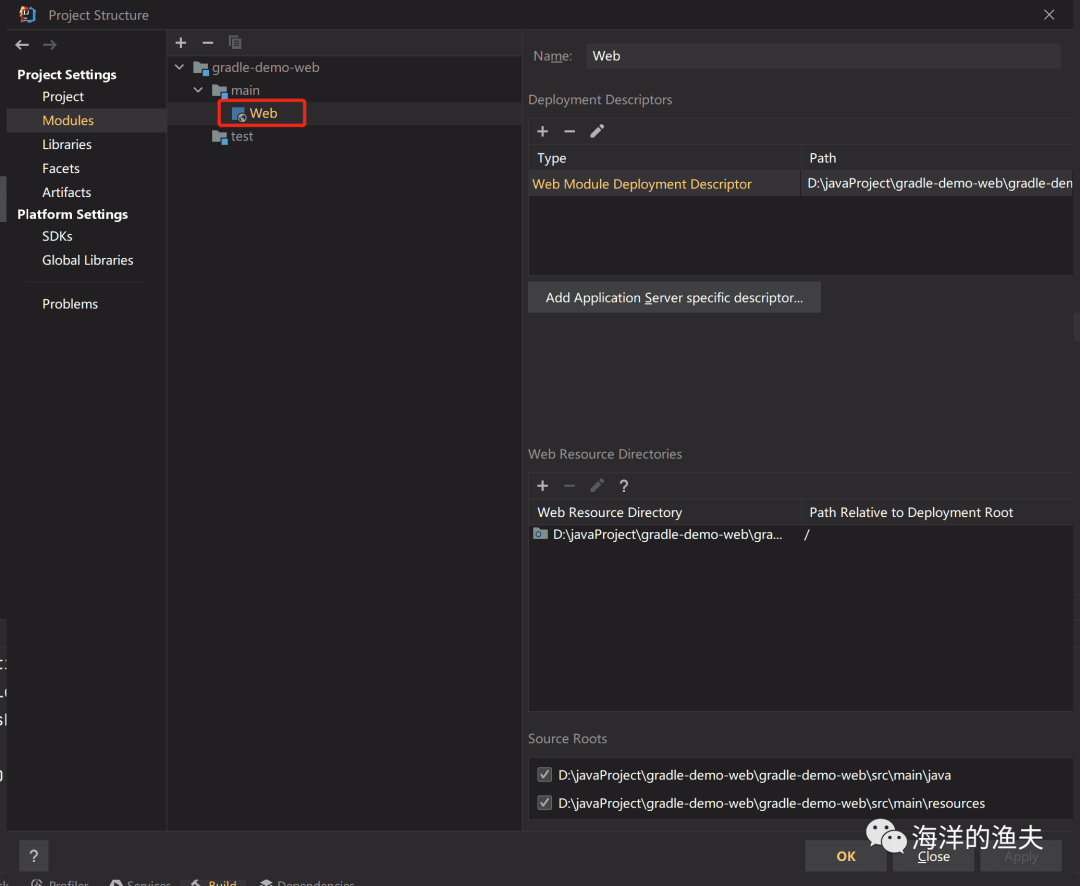
创建好的目录如下:


