发现界面完整效果


本文实现Banner轮播图效果
文章基于IOS 17 基于UITabBarController实现首页TabBar继续实现发现界面
实现逻辑
从发现界面的效果图可以看出,发现界面是一个列表,列表包含了不同的Item,我们可以将 banner部分看成是列表的一个Item(Cell),列表使用UITableView来实现。
封装BaseLogicController
由于返现界面控制器DiscoveryController和多个界面控制器都继承自BaseLogicController,而且列表UITableView在多个控制器上都需要用到,故将列表使用UITableView统一编写在父类BaseLogicController上,方便统一管理和使用。
实现代码:
/// 初始化TableView,四边都在安全区内func initTableViewSafeArea() {//外面添加一层容器,是方便在真实内容控件前后添加内容initLinearLayoutSafeArea()//tableViewcreateTableView()container.addSubview(tableView)}/// 创建TableView,不会添加到任何布局func createTableView() {tableView = ViewFactoryUtil.tableView()tableView.delegate = selftableView.dataSource = self}由于UITableView在多个地方会使用到,故统一在ViewFactoryUtil类上使用静态方法创建tableView,方便管理和复用。
static func tableView() -> UITableView {let r = QMUITableView()r.backgroundColor = .clear//去掉没有数据cell的分割线r.tableFooterView = UIView()//去掉默认分割线r.separatorStyle = .none//修复默认分割线,向右偏移问题r.separatorInset = UIEdgeInsets(top: 0, left: 0, bottom: 0, right: 0)r.tg_width.equal(.fill)r.tg_height.equal(.fill)//设置所有cell的高度为高度自适应,如果cell高度是动态的请这么设置。 如果不同的cell有差异那么可以通过实现协议方法-(CGFloat)tableView:(UITableView *)tableView heightForRowAtIndexPath:(NSIndexPath *)indexPath//如果您最低要支持到iOS7那么请您实现-(CGFloat)tableView:(UITableView *)tableView heightForRowAtIndexPath:(NSIndexPath *)indexPath方法来代替这个属性的设置。r.rowHeight = UITableView.automaticDimensionr.estimatedRowHeight = UITableView.automaticDimension//不显示滚动条r.showsVerticalScrollIndicator = falser.allowsSelection = true//分割线颜色r.separatorColor = .colorDividerreturn r}BaseLogicController完整代码:
//
//  BaseLogicController.swift
//  MyCloudMusic
//
//  Created by jin on 2024/8/19.
//import UIKit//提供类似Android中更高层级布局框架
import TangramKitclass BaseLogicController: BaseCommonController {/// 根容器var rootContainer: TGBaseLayout!/// 头部容器var superHeaderContainer: TGBaseLayout!var superHeaderContentContainer: TGBaseLayout!/// 容器var container: TGBaseLayout!/// 底部容器var superFooterContainer: TGBaseLayout!var superFooterContentContainer: TGBaseLayout!/// TableViewvar tableView: UITableView!lazy var datum: [Any] = {var r :[Any] = []return r}()/// 初始化RelativeLayout容器,四边都在安全区内func initRelativeLayoutSafeArea() {initLinearLayout()//headerinitHeaderContainer()//中间内容容器container = TGRelativeLayout()container.tg_width.equal(.fill)container.tg_height.equal(.fill)container.backgroundColor = .clearrootContainer.addSubview(container)//footerinitFooterContainer()}/// 初始化垂直方向LinearLayout容器,四边都在安全区内func initLinearLayoutSafeArea(){initLinearLayout()//headerinitHeaderContainer()//中间内容容器container = TGLinearLayout(.vert)container.tg_width.equal(.fill)container.tg_height.equal(.fill)container.backgroundColor = .clearrootContainer.addSubview(container)//footerinitFooterContainer()}/// 初始化TableView,四边都在安全区内func initTableViewSafeArea() {//外面添加一层容器,是方便在真实内容控件前后添加内容initLinearLayoutSafeArea()//tableViewcreateTableView()container.addSubview(tableView)}/// 创建TableView,不会添加到任何布局func createTableView() {tableView = ViewFactoryUtil.tableView()tableView.delegate = selftableView.dataSource = self}/// 使用默认分割线func initDefaultTableViewDivider() {tableView.separatorStyle = .singleLine}/// 初始化垂直方向LinearLayout容器func initLinearLayout() {rootContainer = TGLinearLayout(.vert)rootContainer.tg_width.equal(.fill)rootContainer.tg_height.equal(.fill)rootContainer.backgroundColor = .clearview.addSubview(rootContainer)}/// 头部容器,安全区外,一般用来设置头部到安全区外背景颜色func initHeaderContainer() {superHeaderContainer = TGLinearLayout(.vert)superHeaderContainer.tg_width.equal(.fill)superHeaderContainer.tg_height.equal(.wrap)superHeaderContainer.backgroundColor = .clear//头部内容容器,安全区内superHeaderContentContainer = TGLinearLayout(.vert)superHeaderContentContainer.tg_height.equal(.wrap)superHeaderContentContainer.tg_top.equal(TGLayoutPos.tg_safeAreaMargin)superHeaderContentContainer.tg_leading.equal(TGLayoutPos.tg_safeAreaMargin)superHeaderContentContainer.tg_trailing.equal(TGLayoutPos.tg_safeAreaMargin)superHeaderContentContainer.backgroundColor = .clearsuperHeaderContainer.addSubview(superHeaderContentContainer)rootContainer.addSubview(superHeaderContainer)}func initFooterContainer() {superFooterContainer = TGLinearLayout(.vert)superFooterContainer.tg_width.equal(.fill)superFooterContainer.tg_height.equal(.wrap)superFooterContainer.backgroundColor = .clear//底部内容容器,安全区内superFooterContentContainer = TGLinearLayout(.vert)superFooterContentContainer.tg_height.equal(.wrap)superFooterContentContainer.tg_bottom.equal(TGLayoutPos.tg_safeAreaMargin)superFooterContentContainer.tg_leading.equal(TGLayoutPos.tg_safeAreaMargin)superFooterContentContainer.tg_trailing.equal(TGLayoutPos.tg_safeAreaMargin)superFooterContentContainer.backgroundColor = .clearsuperFooterContainer.addSubview(superFooterContentContainer)rootContainer.addSubview(superFooterContainer)}override func initViews() {super.initViews()setBackgroundColor(.colorBackground)}
}//TableView数据源和代理
extension BaseLogicController:UITableViewDataSource,UITableViewDelegate{func tableView(_ tableView: UITableView, numberOfRowsInSection section: Int) -> Int {return datum.count}func tableView(_ tableView: UITableView, cellForRowAt indexPath: IndexPath) -> UITableViewCell {return UITableViewCell()}
}
列表UITableView实现流程
在IOS上,要实现列表UITableView的显示效果,需要以下三个流程:
1.创建UITableView;
2.创建Cell,及在使用UITableView的Controller控制器上注册Cell;
3.获取data列表数据,并调用UITableView的reloadData(),将数据更新到列表;
4.将data的Item数据绑定UITableView的每一个Cell。
1)创建UITableView
UITableView的创建已经在父类BaseLogicController上统一实现。下面重写DiscoveryController的initViews()方法,调用父类BaseLogicController创建UITableView。
override func initViews() {super.initViews()setBackgroundColor(.colorBackgroundLight)//初始化TableView结构initTableViewSafeArea()}2)创建和注册Cell
创建UITableViewCell,由于UITableViewCell在多处使用,故统一封装BaseTableViewCell来实现。默认定义个水平方向的TGLinearLayout来实现,方向也定义了方法getContainerOrientation(),子类可以重写该方法实现布局方向。为了让item自动计算高度,重写了方法systemLayoutSizeFitting(),本文使用的是纯代码和TangramKitUI框架开发,不了解的可以看前面文章:IOS 02 SnapKit 纯代码开发 和 IOS 04 TangramKit 纯代码开发
BaseTableViewCell实现:
//
//  BaseTableViewCell.swift
//  通用TableViewCell
//
//  Created by jin on 2024/8/27.
//import UIKit//提供类似Android中更高层级布局框架
import TangramKitclass BaseTableViewCell:UITableViewCell{//对于需要动态评估高度的UITableViewCell来说可以把布局视图暴露出来。用于高度评估和边界线处理。以及事件处理的设置。var container:TGBaseLayout!override init(style: UITableViewCell.CellStyle, reuseIdentifier: String?) {super.init(style: style, reuseIdentifier: reuseIdentifier)innerInit()}required init?(coder: NSCoder) {super.init(coder: coder)innerInit()}func innerInit() {initViews()initDatum()initListeners()}/// 找控件func initViews() {//背景透明backgroundColor = .clearcontentView.backgroundColor = .clear//去掉默认的选中颜色selectionStyle = .none//根容器container = TGLinearLayout(getContainerOrientation())container.tg_width.equal(.fill)container.tg_height.equal(.wrap)container.tg_space = PADDING_MEDDLEcontentView.addSubview(container)}func initDatum() {}func initListeners() {}/// 获取根容器布局方向func getContainerOrientation() -> TGOrientation {return .horz}/// 使用TangramKit后,让item自动计算高度,要重写该方法/// - Parameters:///   - targetSize: <#targetSize description#>///   - horizontalFittingPriority: <#horizontalFittingPriority description#>///   - verticalFittingPriority: <#verticalFittingPriority description#>/// - Returns: <#description#>override func systemLayoutSizeFitting(_ targetSize: CGSize, withHorizontalFittingPriority horizontalFittingPriority: UILayoutPriority, verticalFittingPriority: UILayoutPriority) -> CGSize {return self.container.systemLayoutSizeFitting(targetSize)}
}
轮播图Cell BannerCell实现
轮播图实现效果稍微复杂,我们先显示一个图片来代替,等UITableView的完整效果实现出来,我们再来实现Cell的轮播图效果,图片BannerCell实现:
//
//  BannerCell.swift
//  轮播图cell
//
//  Created by jin on 2024/8/27.
//import UIKit//提供类似Android中更高层级布局框架
import TangramKitclass BannerCell:BaseTableViewCell{var bannerData:BannerData!var datum:[String] = []override func initViews() {super.initViews()//底部的距离,由下一个控件设置,除非不方便设置container.tg_padding = UIEdgeInsets(top: 16, left: 16, bottom: 0, right: 16)//轮播图let imageView = UIImageView()imageView.tg_width.equal(.fill)imageView.tg_height.equal(UIScreen.main.bounds.width * 0.389)imageView.image = R.image.placeholder()container.addSubview(imageView)}/// 绑定数据/// - Parameter data: <#data description#>func bind(_ data:BannerData) {bannerData = data}
}
注册BannerCell
重写DiscoveryController的initViews()方法,注册cell。
override func initViews() {super.initViews()setBackgroundColor(.colorBackgroundLight)//初始化TableView结构initTableViewSafeArea()//注册celltableView.register(BannerCell.self, forCellReuseIdentifier: Constant.CELL)}3)获取data列表数据
定义Banner数据模型BannerData
//
//  BannerData.swift
//  发现界面轮播图模型
//
//  Created by jin on 2024/8/27.
//import Foundationclass BannerData{var data:Array<Ad>!init(data: Array<Ad>!) {self.data = data}
}
在DiscoveryController控制器中,重写initDatum()方法,通过接口获取后端Banner数据。获取完数据后,一定要调用tableView.reloadData(),列表才会真正加载数据。网络请求还不熟悉的可以看文章:IOS 14 封装网络请求框架
override func initDatum() {super.initDatum()loadData()}func loadData() {DefaultRepository.shared.bannerAds().subscribeSuccess { [weak self] data in//清除原来的数据self?.datum.removeAll()//添加轮播图self?.datum.append(BannerData(data:data.data!.data!))self?.tableView.reloadData()}.disposed(by: rx.disposeBag)}由于父类BaseLogicController已统一实现TableView数据源和代理扩展,将数据绑定列表,子类DiscoveryController不需要再操作。
//TableView数据源和代理
extension BaseLogicController:UITableViewDataSource,UITableViewDelegate{func tableView(_ tableView: UITableView, numberOfRowsInSection section: Int) -> Int {return datum.count}func tableView(_ tableView: UITableView, cellForRowAt indexPath: IndexPath) -> UITableViewCell {return UITableViewCell()}
}
4)Item数据绑定Cell
DiscoveryController控制器重写父类的扩展 cellForRowAt方法,创建对应的Cell,并将Item数据绑定到Cell。
extension DiscoveryController{// 返回当前位置cell/// - Parameters:/// - tableView: <#tableView description#>/// - indexPath: <#indexPath description#>/// - Returns: <#description#>override func tableView(_ tableView: UITableView, cellForRowAt indexPath: IndexPath) -> UITableViewCell {let data = datum[indexPath.row]//获取当前Cell的类型let type = typeForItemAtData(data)switch(type){default://banner//取出一个Celllet cell = tableView.dequeueReusableCell(withIdentifier: Constant.CELL, for: indexPath) as! BannerCell//绑定数据cell.bind(data as! BannerData)return cell}}
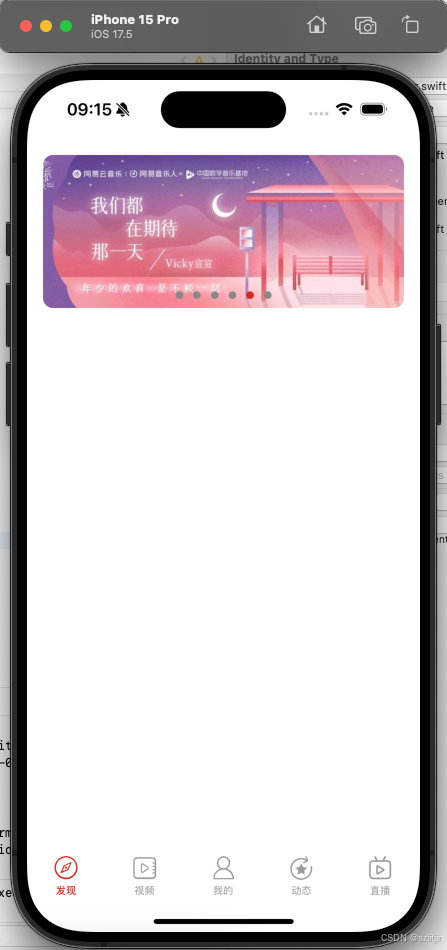
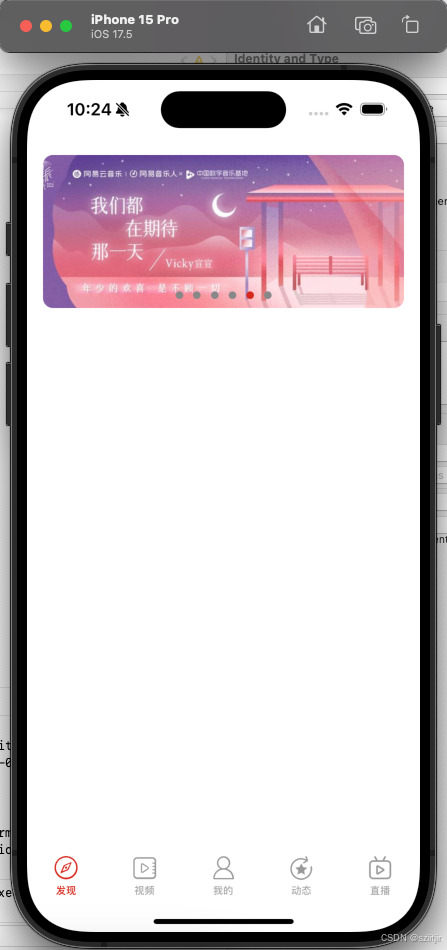
}此时已实现Banner图片效果:
Banner轮播图实现
Banner轮播图实现是使用的一个第三方框架YJBannerView,这里也可以替换成自己常用的三方框架。完整实现代码如下:
//
//  BannerCell.swift
//  轮播图cell
//
//  Created by jin on 2024/8/27.
//import UIKit//提供类似Android中更高层级布局框架
import TangramKitclass BannerCell:BaseTableViewCell{var bannerView:YJBannerView!var bannerData:BannerData!var datum:[String] = []var bannerClick:((Ad)->Void)!override func initViews() {super.initViews()//底部的距离,由下一个控件设置,除非不方便设置container.tg_padding = UIEdgeInsets(top: 16, left: 16, bottom: 0, right: 16)//轮播图bannerView = YJBannerView()bannerView.backgroundColor = .clearbannerView.dataSource = selfbannerView.delegate = selfbannerView.tg_width.equal(.fill)//SCREEN_WIDTH是QMUI提供的宏//直接在initViews里面这样获取self.contentView.frame.size.width是默认值//而不是应用了自动布局后的值bannerView.tg_height.equal(UIScreen.main.bounds.width * 0.389)bannerView.clipsToBounds = truebannerView.layer.cornerRadius = 10//设置如果找不到图片显示的图片bannerView.emptyImage=R.image.placeholder()//设置占位图bannerView.placeholderImage=R.image.placeholder()//设置轮播图内部显示图片的时候调用什么方法bannerView.bannerViewSelectorString="sd_setImageWithURL:placeholderImage:"//设置指示器默认颜色bannerView.pageControlNormalColor = .black80//高亮的颜色bannerView.pageControlHighlightColor = .colorPrimarycontainer.addSubview(bannerView)}/// 绑定数据/// - Parameter data: <#data description#>func bind(_ data:BannerData) {bannerData = data//清除原来的数据datum.removeAll()//循环每一个广告//取出广告的地址//放到一个数组中for it in data.data {datum.append(ResourceUtil.resourceUri(it.icon))}//通知轮播图框架从新加载数据bannerView.reloadData()}
}// MARK: - banner数据源和代理
extension BannerCell:YJBannerViewDataSource,YJBannerViewDelegate{/// 返回BannerView要显示的数据////// - Parameter bannerView: <#bannerView description#>/// - Returns: <#return value description#>func bannerViewImages(_ bannerView: YJBannerView!) -> [Any]! {return datum}/// 自定义Cell/// 复写该方法的目的是/// 设置图片的缩放模式////// - Parameters:///   - bannerView: <#bannerView description#>///   - customCell: <#customCell description#>///   - index: <#index description#>/// - Returns: <#return value description#>func bannerView(_ bannerView: YJBannerView!, customCell: UICollectionViewCell!, index: Int) -> UICollectionViewCell! {//将cell类型转为YJBannerViewCelllet cell = customCell as! YJBannerViewCell//设置图片的缩放模式为//从中心填充//多余的裁剪掉cell.showImageViewContentMode = .scaleAspectFillreturn cell}/// banner点击回调方法////// - Parameters:///   - bannerView: <#bannerView description#>///   - index: <#index description#>func bannerView(_ bannerView: YJBannerView!, didSelectItemAt index: Int) {//获取当前点击的广告对象let r = bannerData.data[index]bannerClick(r)}
}
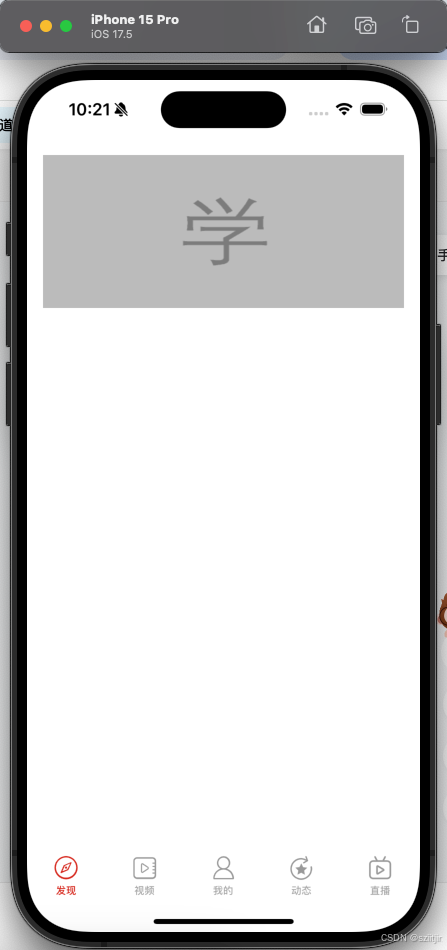
banner轮播图效果实现完成:
本文主要学习UITableView的使用,后续内容会慢慢实现 发现页面的全部内容。