NVIDIA Driver
进入英伟达官网下载页面
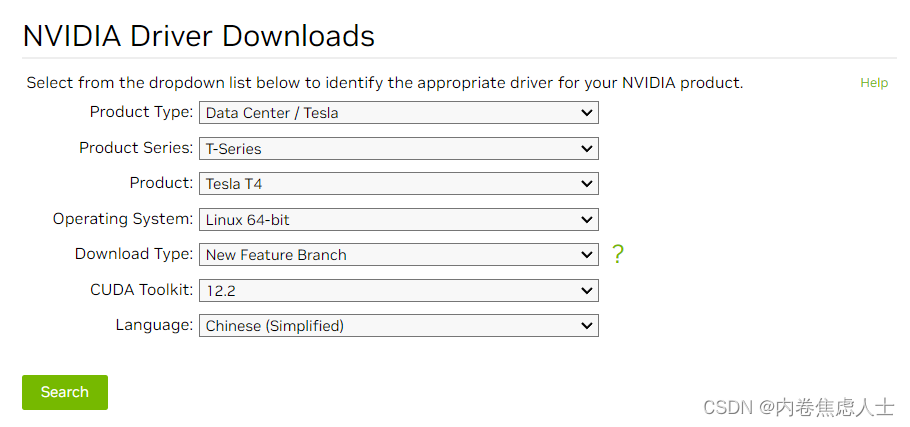
按照以上方式选择即可得到>535.113.01版本的驱动,可以实现多卡推理,小于这个版本会导致多卡训练以及推理报错
虽然最新版本为550.54.15,但是535版本更加稳定,并且pytorch目前只支持到12.1,而在CUDA Toolkit选择栏中没有这个版本,所以选择12.2最稳妥
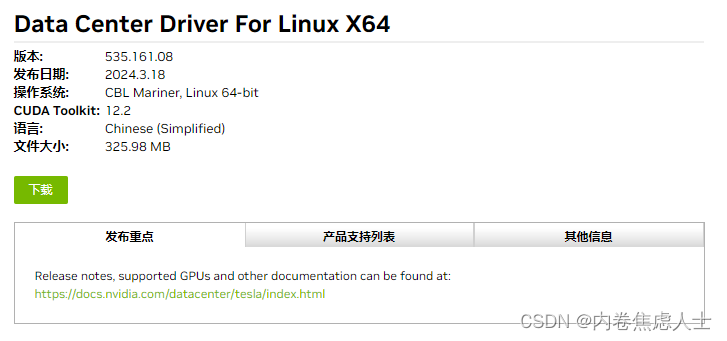
下载后上传至服务器,在安装驱动前先安装一些依赖
sudo yum install epel-release
sudo yum update
sudo yum install pkgconfig libglvnd-devel
赋予权限后运行
chmod +x NVIDIA-Linux-x86_64-535.161.08.run
sh ./NVIDIA-Linux-x86_64-535.161.08.run -s --no-x-check
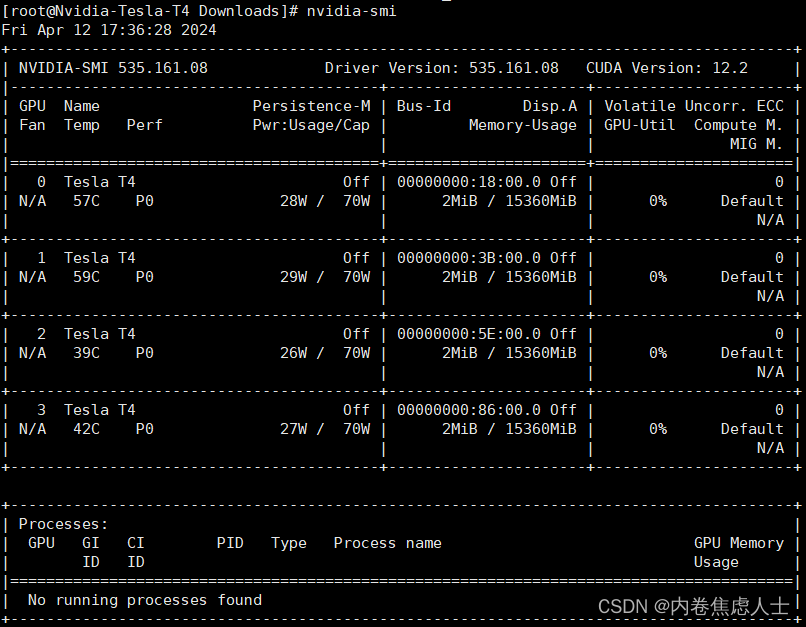
nvidia-smi
CUDA
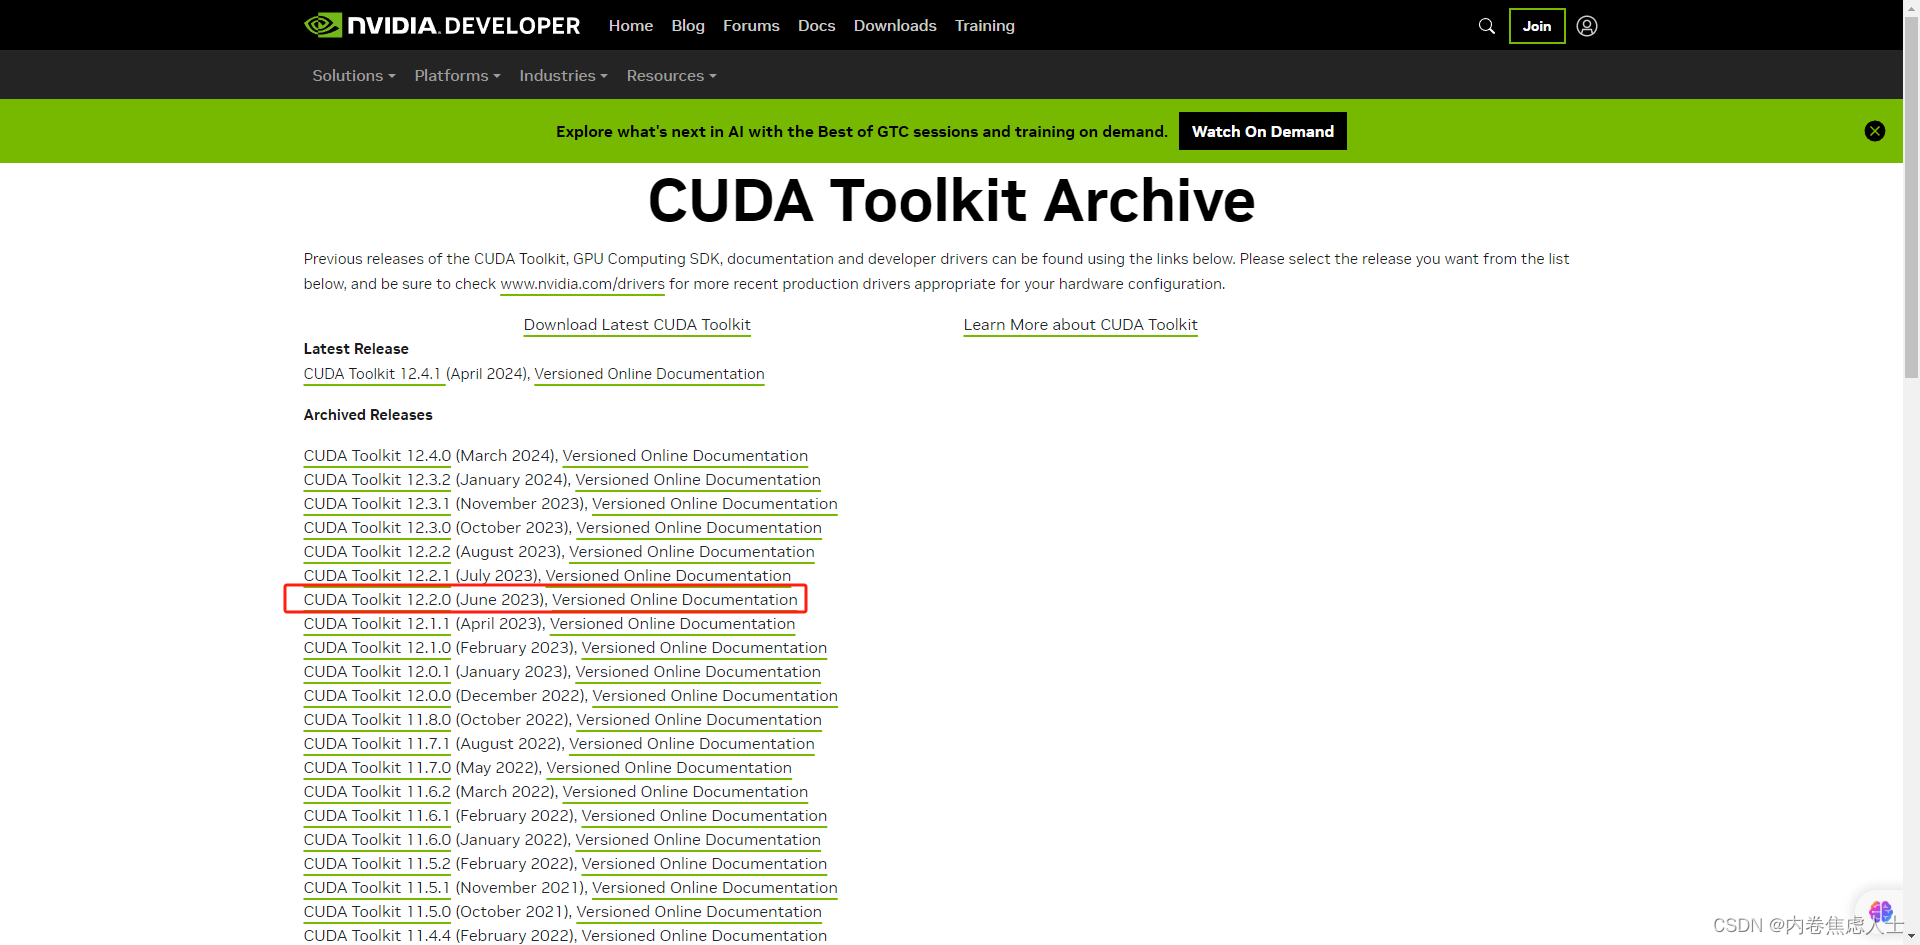
进入CUDA官网下载页面
在服务器中输入uname -a查看服务器系统
然后选择对应的版本
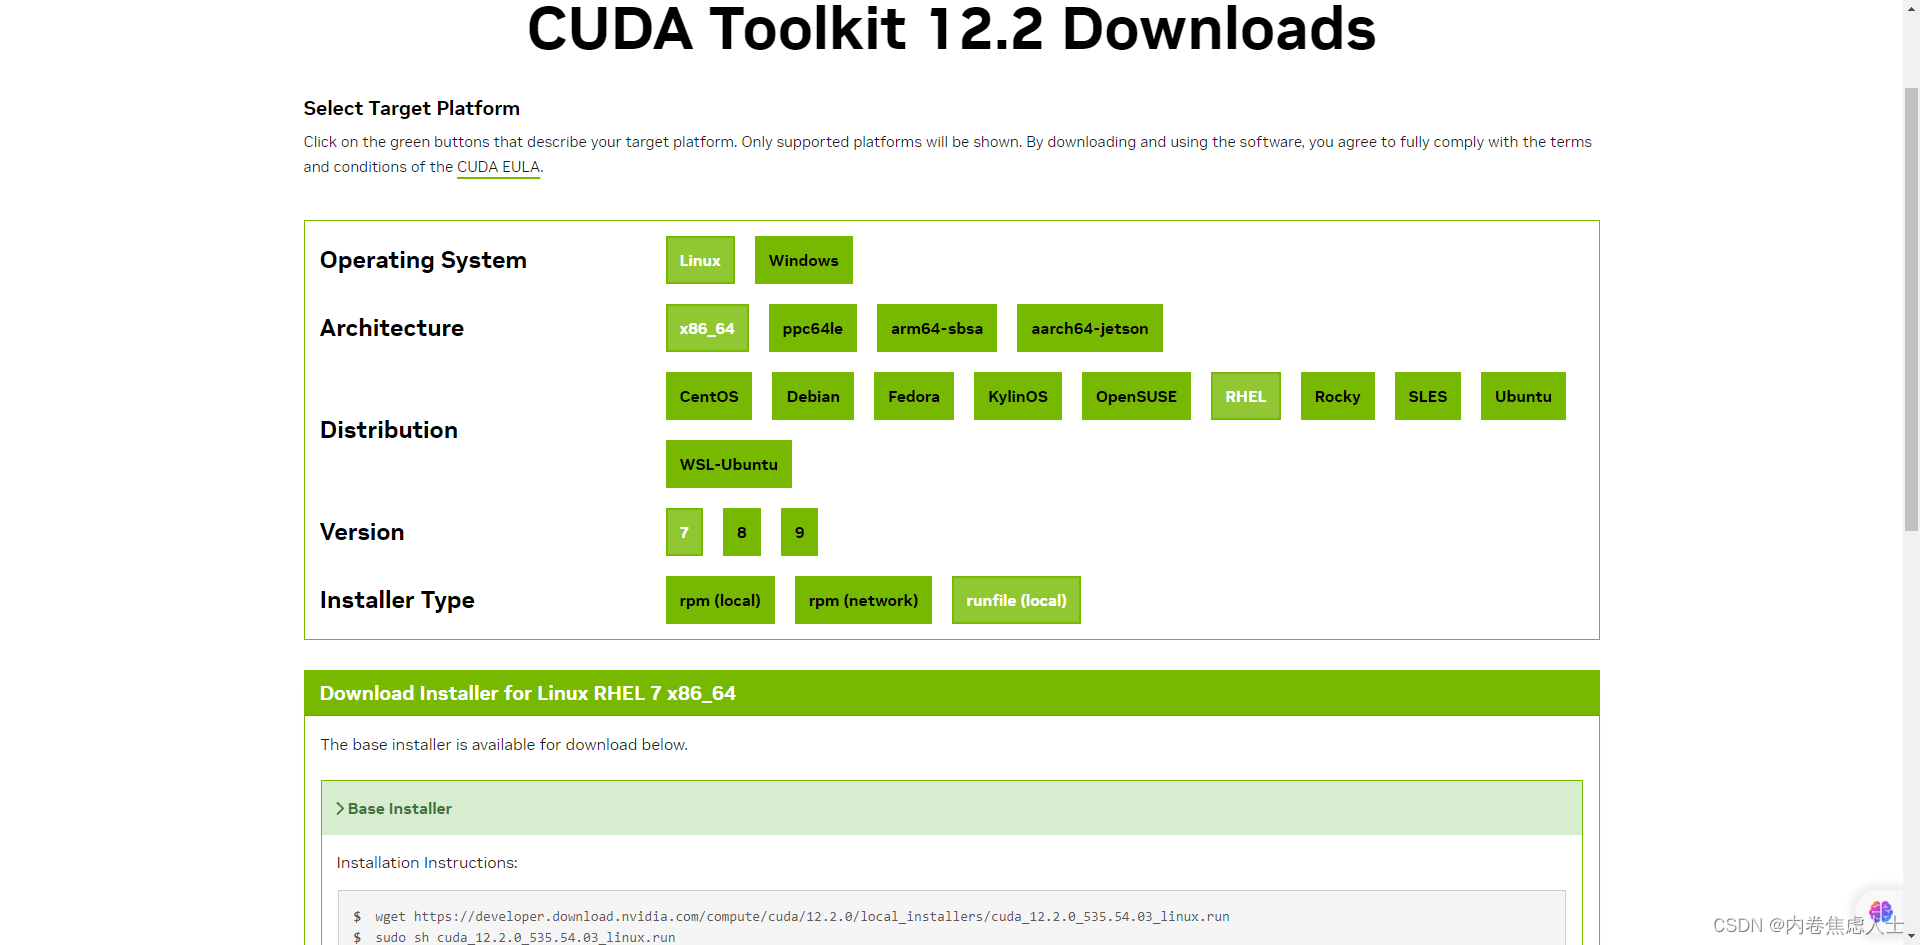
在Base Installer的Installation Instructions这里,对wget之后的内容选中-右键-转到这个网址,或者复制后在新的标签页打开即可下载,下载后上传至服务器,执行(4个G大小)
sudo sh cuda_12.2.0_535.54.03_linux.run
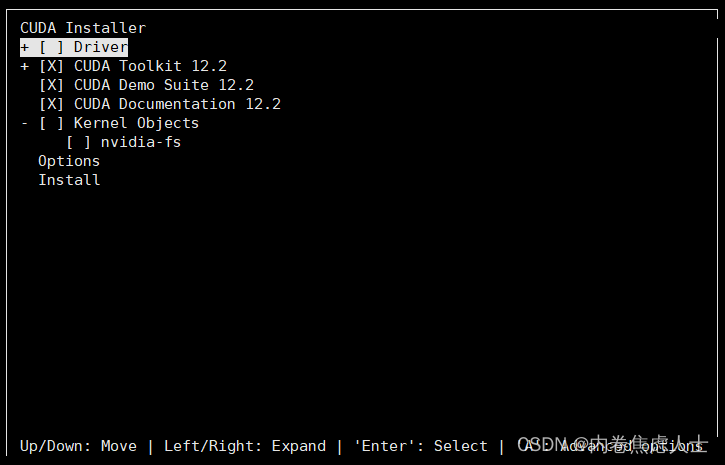
运行后在出现的页面中以下操作
1.输入accept
2. - [×] Driver 取消×
按回车进行取消,然后按↓到Install进行回车进行安装
安装完成后显示
===========
= Summary =
===========Driver:   Not Selected
Toolkit:  Installed in /usr/local/cuda-12.2/Please make sure that-   PATH includes /usr/local/cuda-12.2/bin-   LD_LIBRARY_PATH includes /usr/local/cuda-12.2/lib64, or, add /usr/local/cuda-12.2/lib64 to /etc/ld.so.conf and run ldconfig as rootTo uninstall the CUDA Toolkit, run cuda-uninstaller in /usr/local/cuda-12.2/bin
***WARNING: Incomplete installation! This installation did not install the CUDA Driver. A driver of version at least 535.00 is required for CUDA 12.2 functionality to work.
To install the driver using this installer, run the following command, replacing <CudaInstaller> with the name of this run file:sudo <CudaInstaller>.run --silent --driverLogfile is /var/log/cuda-installer.log
根据上面的提示信息设置路径
export PATH=/usr/local/cuda-12.2/bin${PATH:+:${PATH}}
export LD_LIBRARY_PATH=/usr/local/cuda-12.2/lib64${LD_LIBRARY_PATH:+:${LD_LIBRARY_PATH}}
输入命令nvcc -V进行检验
[root@Nvidia-Tesla-T4 Downloads]# nvcc -V
nvcc: NVIDIA (R) Cuda compiler driver
Copyright (c) 2005-2023 NVIDIA Corporation
Built on Tue_Jun_13_19:16:58_PDT_2023
Cuda compilation tools, release 12.2, V12.2.91
Build cuda_12.2.r12.2/compiler.32965470_0
CuDNN
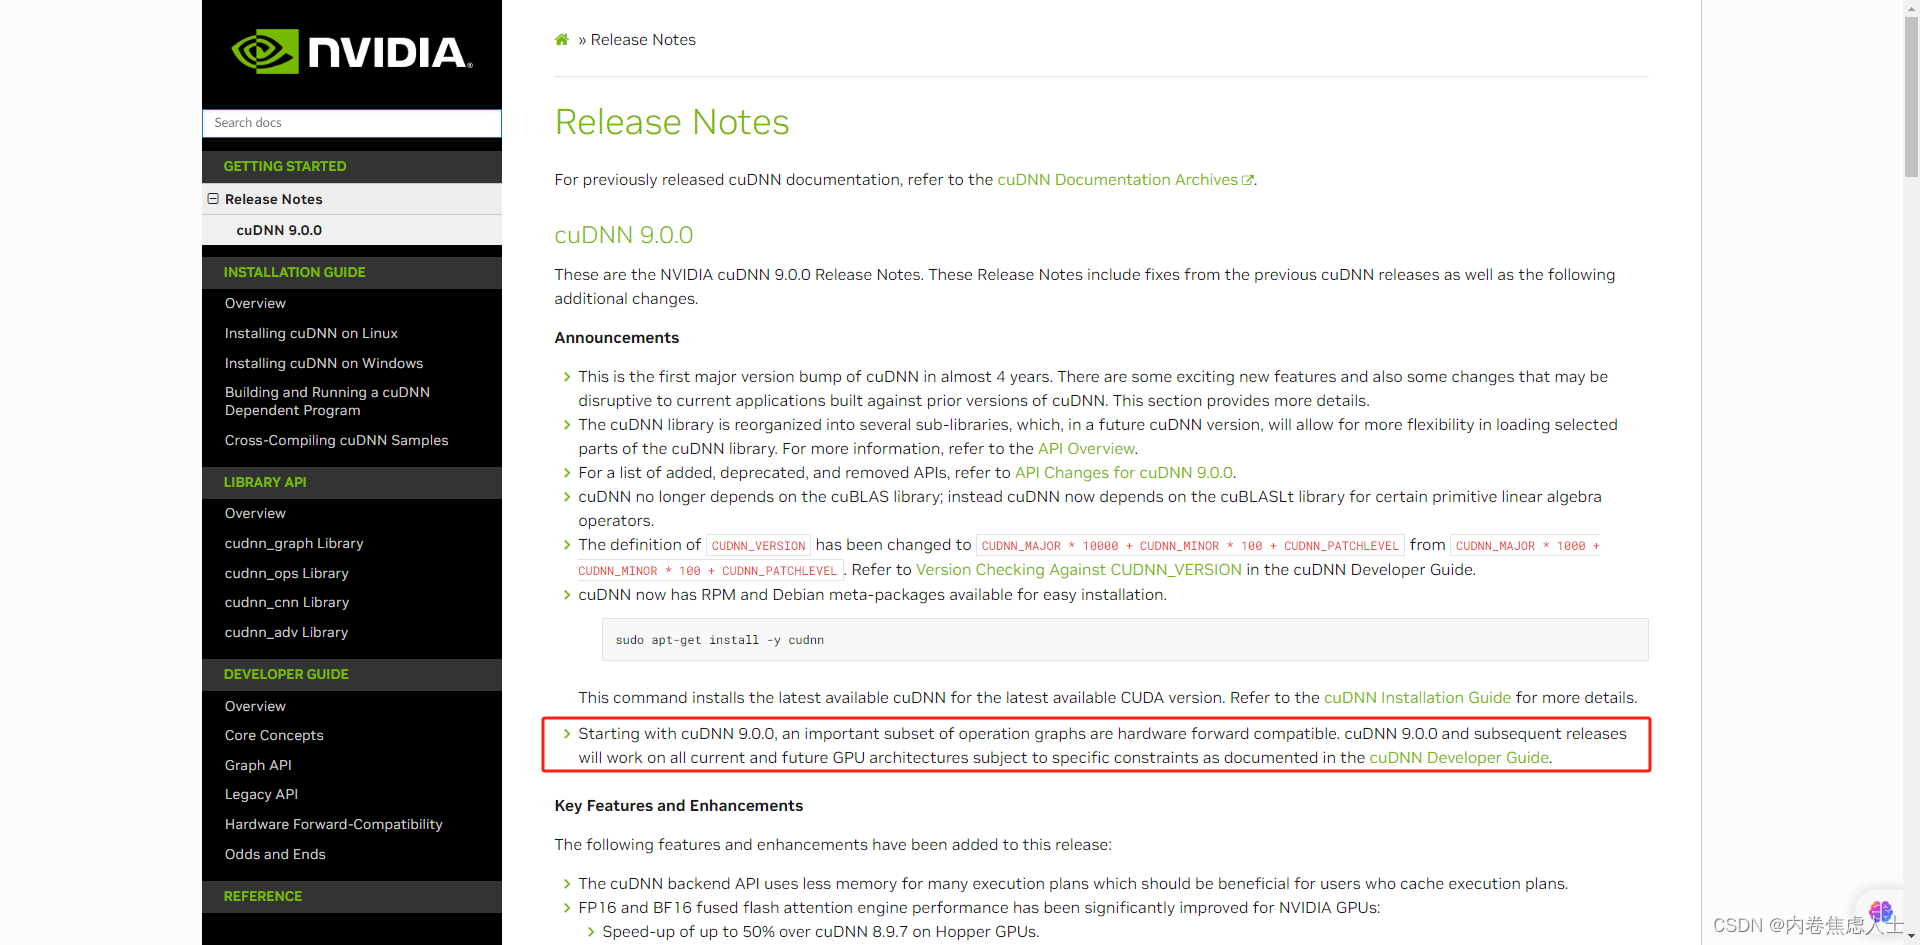
最新的9.0.0版本支持以前的所有版本以及未来的版本,安装即可,cuDNN网址

https://developer.download.nvidia.com/compute/cudnn/9.0.0/local_installers/cudnn-local-repo-rhel7-9.0.0-1.0-1.x86_64.rpm
和之前一样,点开链接下载
sudo rpm -i cudnn-local-repo-rhel7-9.0.0-1.0-1.x86_64.rpm
sudo yum clean all
sudo yum -y install cudnn
Anaconda
进入官网下载
sh Anaconda3-2024.02-1-Linux-x86_64.sh
一直按回车最后输入yes,再按一次回车,最后配置是否在进入服务器时就启动base_conda,我选择no
设置一下环境变量
export PATH="/root/anaconda3/bin:$PATH"
然后配置conda源
conda config --add channels https://mirrors.tuna.tsinghua.edu.cn/anaconda/pkgs/main/
conda config --add channels https://mirrors.tuna.tsinghua.edu.cn/anaconda/pkgs/free/
conda config --set show_channel_urls yes
conda config --show channels
创建自己的虚拟环境
conda create -n sakura python=3.10
安装完成后添加pip源
pip config set global.index-url https://pypi.tuna.tsinghua.edu.cn/simple
Pytorch
根据pytorch官方的配置选择
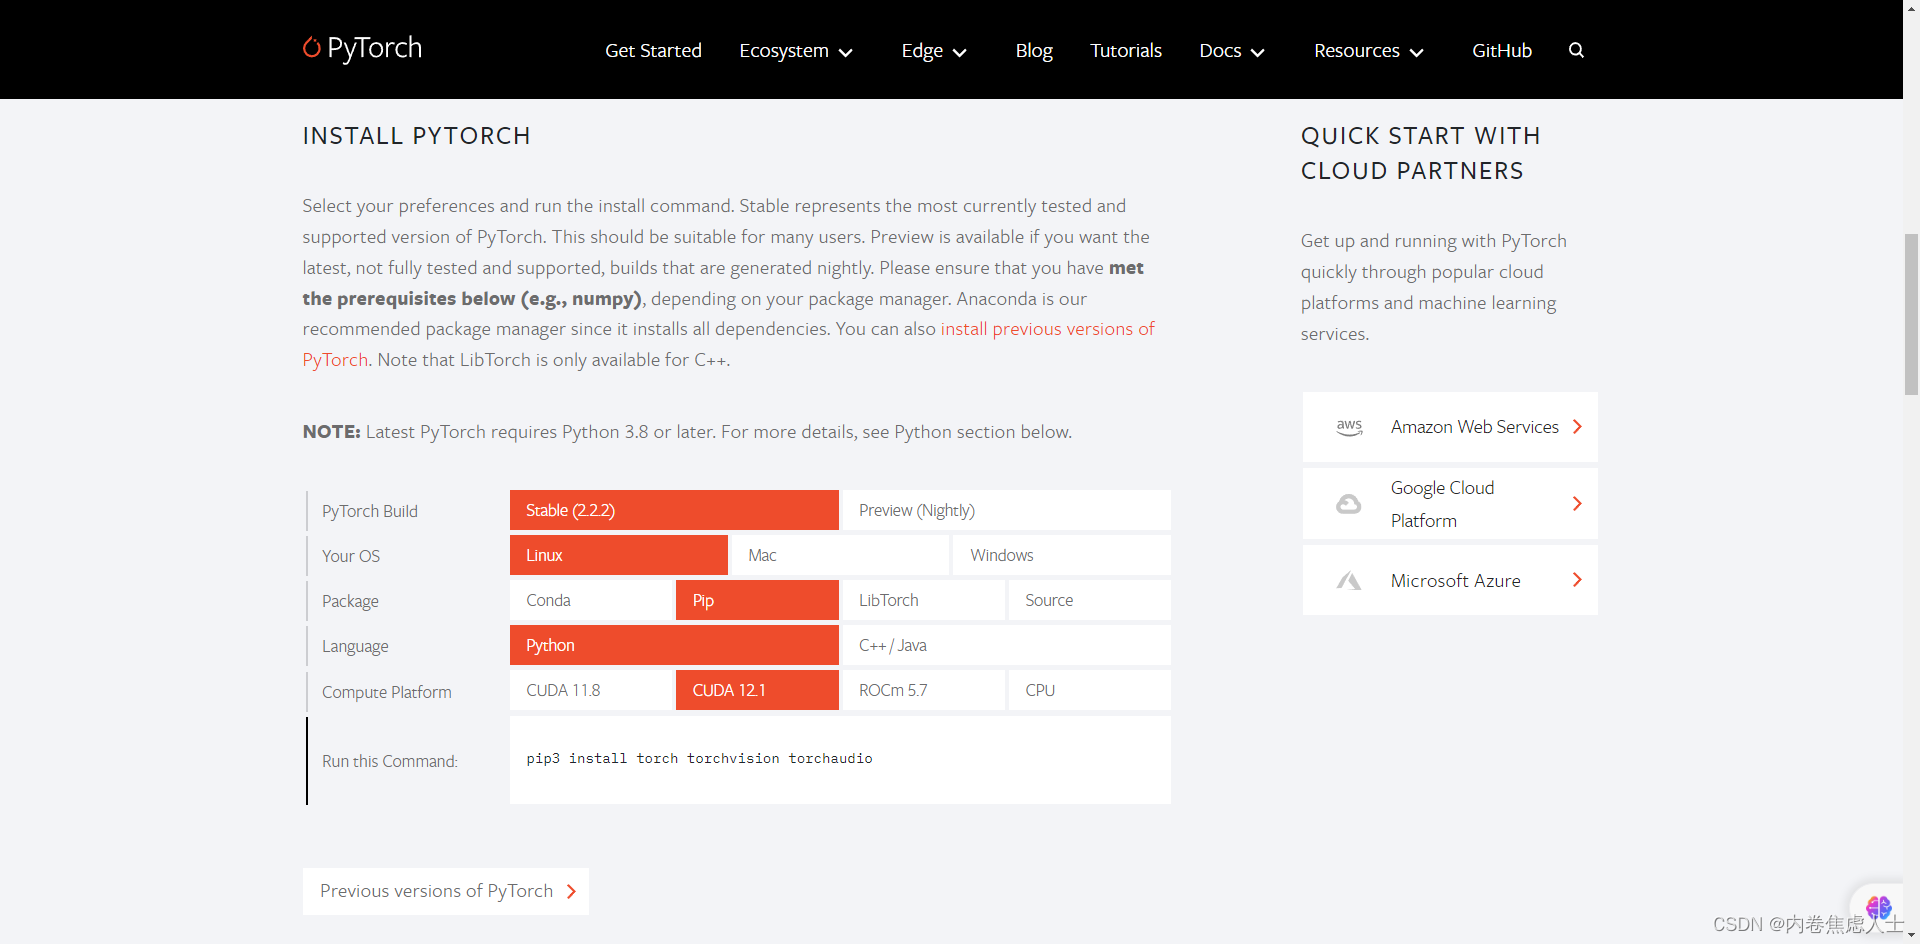
pip3 install torch torchvision torchaudio
验证一下
python
import torch
print("torch.__version__        ",torch.__version__)
# torch.__version__         2.2.2+cu121
print("torch.version.cuda       ",torch.version.cuda)
# torch.version.cuda        12.1
print("torch.cuda.is_available  ",torch.cuda.is_available())
# torch.cuda.is_available   True
print('torch.cuda.get_device_name       '+ str(torch.cuda.get_device_name()))
# torch.cuda.get_device_name       Tesla T4
print('torch.cuda.device_count  '+ str(torch.cuda.device_count()))
# torch.cuda.device_count  4