1. RESTful
1.1. RESTful简介
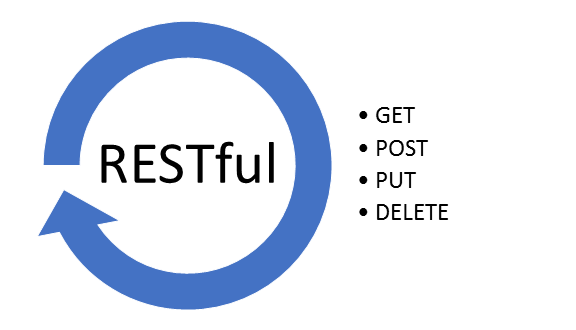
REST:Representational State Transfer,表现层资源状态转移。
RESTful是一种网络架构风格,它定义了如何通过网络进行数据的交互。这种风格基于HTTP协议,使得网络应用之间的通信变得更加简洁和高效。
- 资源(Resource):
-
- 想象一下,服务器上存储了很多信息,比如文章、图片、用户信息等。在RESTful架构中,我们把这些信息称为“资源”。
- 每个资源都有一个唯一的标识,这个标识通常是URL。就像每个人的身份证号一样,通过这个URL我们可以准确地找到对应的资源。
- 资源的表述(Representation):
-
- 资源的表述就是资源的一种表现形式。比如一篇文章,可以用纯文本表示,也可以用HTML或者Markdown等格式表示。
- 客户端(比如浏览器)和服务器之间传输的,就是这些表述。我们通过这些表述来了解资源的内容。
- 状态转移(State Transfer):
-
- 这是RESTful的核心概念。当我们通过网络与服务器交互时,我们实际上是在发送和接收资源的表述。
- 比如,我们通过GET请求获取一个资源的表述,这就是“读取”操作。我们通过POST请求发送一个新的表述给服务器,服务器根据这个表述创建或更新资源,这就是“创建”或“更新”操作。
- 通过这种方式,我们通过网络对资源进行操作,就像是直接在服务器上操作一样,但实际上我们只是在发送和接收表述。
在SpringMVC中,我们使用RESTful风格来设计和实现Web应用。这意味着我们会定义一系列的URL来表示资源,然后通过HTTP请求(如GET、POST、PUT、DELETE等)来对这些资源进行操作。SpringMVC框架提供了很多工具和方法来帮助我们更容易地实现这种设计。
可以举个例子类比一下
我们可以用一个现实生活中的图书馆来做一个类比。
想象一下,你去了一家非常大的图书馆,这家图书馆里有成千上万的书籍。每本书都有一个唯一的编号,你可以通过这个编号找到你想要的书。在RESTful架构中,这些书籍就像是服务器上的资源,每个资源都有一个唯一的URL标识。
- 资源(Resource):
就像图书馆里的每一本书,网络应用中的资源可以是一篇文章、一张图片、一段用户信息等。每个资源都可以通过一个URL来访问,就像通过书籍编号找到图书馆里的书一样。 - 资源的表述(Representation):
当你拿到一本书时,你实际上是在阅读这本书的内容,也就是它的表述。同样地,在网络应用中,资源的表述就是资源的内容,比如一篇文章的内容可以是纯文本、HTML或者Markdown格式。当你通过浏览器访问一个网页时,你看到的就是资源的表述。 - 状态转移(State Transfer):
现在,想象你要借一本书。你需要告诉图书馆工作人员这本书的编号,他们会帮你找到这本书并交给你。这个过程就像是通过网络发送一个GET请求来获取资源的表述。当你想把书还回去时,你把书交给图书馆工作人员,他们把书放回原位。这个过程就像是发送一个DELETE请求来删除资源。如果你想借一本还没有的书,你可以写一个书单给图书馆,图书馆会根据你的书单去采购新书。这个过程就像是发送一个POST请求来创建新的资源。
在SpringMVC中,我们使用RESTful风格来设计Web应用,定义一系列的URL来表示资源,然后通过HTTP请求(GET、POST、PUT、DELETE等)来对这些资源进行操作,就像在图书馆里通过告诉工作人员书籍编号来借阅和管理书籍一样。SpringMVC框架提供了很多工具和方法来帮助我们更容易地实现这种设计,就像图书馆的自动化系统帮助工作人员高效地管理和检索书籍。
1.2. RESTful的实现
当然可以。RESTful是一种网络应用程序的架构风格,它通过HTTP协议来进行资源的交互。这种风格的核心在于将网络上的所有内容都视为“资源”,并通过统一的接口进行操作。这些操作主要分为四种类型,分别对应HTTP协议中的四个动词:GET、POST、PUT和DELETE。
GET 用来获取资源,POST 用来新建资源,PUT 用来更新资源,DELETE 用来删除资源。
- GET操作:当我们想要从服务器上获取某个资源的信息时,我们会使用GET请求。例如,如果我们想要获取用户的信息,我们可以通过访问
/user/1这样的URL来实现。这里的/user/1就是资源的标识,1表示用户ID为1的特定用户信息。 - POST操作:当我们需要在服务器上创建一个新的资源时,我们会使用POST请求。例如,如果我们想要添加一个新的用户,我们可以发送一个POST请求到
/user这个URL,请求的内容中包含了新用户的信息。 - PUT操作:当我们需要更新服务器上已有的资源时,我们会使用PUT请求。例如,如果用户的信息发生了变化,我们可以通过发送一个PUT请求到
/user/1这个URL来更新用户ID为1的信息。 - DELETE操作:当我们需要删除服务器上的某个资源时,我们会使用DELETE请求。例如,如果我们想要删除用户ID为1的信息,我们可以发送一个DELETE请求到
/user/1这个URL。
在RESTful风格中,URL的设计遵循一定的规则,通常是以资源的名称来命名,并且使用斜杠/来分隔不同的资源。请求参数一般不通过URL的查询字符串传递,而是将数据作为请求体的一部分发送给服务器,这样可以保持URL的清晰和一致性。
| 操作 | 传统方式 | REST风格 |
| 查询操作 | getUserById?id=1 | user/1-->get请求方式 |
| 保存操作 | saveUser | user-->post请求方式 |
| 删除操作 | deleteUser?id=1 | user/1-->delete请求方式 |
| 更新操作 | updateUser | user-->put请求方式 |
总结一下,RESTful架构通过使用HTTP协议的GET、POST、PUT和DELETE动词来对资源进行增删改查的操作,并通过设计清晰的URL来标识不同的资源,使得网络应用的开发和维护变得更加高效和规范。
1.3. HiddenHttpMethodFilter
在Web开发中,我们经常需要使用HTTP协议的各种方法(如GET、POST、PUT、DELETE)来与服务器进行交互。然而,大多数浏览器默认只支持GET和POST方法,而不支持PUT和DELETE方法。为了解决这个问题,SpringMVC框架提供了一个名为HiddenHttpMethodFilter的过滤器,它可以帮助我们将POST请求“伪装”成PUT或DELETE请求。
HiddenHttpMethodFilter 处理 put 和 delete 请求条件:
- 当前请求的请求方式必须为post
- 当前请求必须传输请求参数_method
这个过滤器的工作原理是,当我们通过POST方法发送请求时,我们可以在请求的参数中包含一个名为_method的特殊参数。这个参数的值可以是PUT或DELETE,这样HiddenHttpMethodFilter就可以根据这个参数的值来识别我们实际想要执行的是哪种HTTP方法。
在 web.xml 中注册 HiddenHttpMethodFilter:
要使用HiddenHttpMethodFilter,我们需要在Web应用的web.xml文件中进行注册和配置。首先,我们需要声明这个过滤器,并为其指定一个名称,比如HiddenHttpMethodFilter。然后,我们需要将这个过滤器与应用程序中的URL模式关联起来,通常是/*,表示对所有的URL都应用这个过滤器。
<filter><filter-name>HiddenHttpMethodFilter</filter-name><filter-class>org.springframework.web.filter.HiddenHttpMethodFilter</filter-class>
</filter>
<filter-mapping><filter-name>HiddenHttpMethodFilter</filter-name><url-pattern>/*</url-pattern>
</filter-mapping>
额外注意点:
在web.xml中注册时,必须先注册CharacterEncodingFilter,再注册HiddenHttpMethodFilter
在SpringMVC中,CharacterEncodingFilter(用于处理字符编码的过滤器)必须在HiddenHttpMethodFilter之前注册。这是因为CharacterEncodingFilter需要设置请求的字符编码,而这个过程要求在获取任何请求参数之前完成。如果先注册了HiddenHttpMethodFilter,它可能会在CharacterEncodingFilter之前获取请求参数,从而导致编码设置失败。
- 配置springMVC的编码过滤器
<!-- 配置springMVC的编码过滤器 -->
<filter><filter-name>CharacterEncodingFilter</filter-name><filter-class>org.springframework.web.filter.CharacterEncodingFilter</filter-class><init-param><param-name>encoding</param-name><param-value>UTF-8</param-value></init-param><init-param><param-name>forceResponseEncoding</param-name><param-value>true</param-value></init-param>
</filter>
<filter-mapping><filter-name>CharacterEncodingFilter</filter-name><url-pattern>/*</url-pattern>
</filter-mapping>- 配置HiddenHttpMethodFilter
<!-- 配置HiddenHttpMethodFilter -->
<filter><filter-name>HiddenHttpMethodFilter</filter-name><filter-class>org.springframework.web.filter.HiddenHttpMethodFilter</filter-class>
</filter>
<filter-mapping><filter-name>HiddenHttpMethodFilter</filter-name><url-pattern>/*</url-pattern>
</filter-mapping>
1.4. 模拟测试
建议结合视频一起看,P53 --> P56
52_尚硅谷_SpringMVC_模拟get和post请求_哔哩哔哩_bilibili
1.4.1. 准备工作
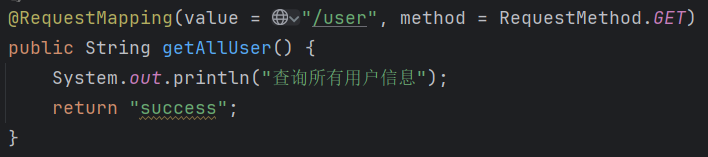
UserController 控制器
package com.sakurapaid.mvc.controller;import org.springframework.stereotype.Controller;
import org.springframework.web.bind.annotation.RequestMapping;
import org.springframework.web.bind.annotation.RequestMethod;@Controller
public class UserController {/*使用RESTFUL模拟用户资源的增删改查查询所有用户信息/user   GET     查询所有用户信息/user/1  GET     查询用户信息 id=1/user   POST    添加用户信息/user/1  DELETE  删除用户信息 id=1/user   PUT     修改用户信息*/@RequestMapping(value = "/user", method = RequestMethod.GET)public String getAllUser() {System.out.println("查询所有用户信息");return "success";}@RequestMapping(value = "/user/{id}", method = RequestMethod.GET)public String getUserById() {System.out.println("查询用户信息 id=1");return "success";}@RequestMapping(value = "/user", method = RequestMethod.POST)public String addUser(String username, String password) {System.out.println("添加用户信息 username=" + username);System.out.println("添加用户信息 password=" + password);return "success";}
}
web.xml 配置前端控制器和编码过滤器
<!--前端控制器-->
<servlet><servlet-name>dispatcherServlet</servlet-name><servlet-class>org.springframework.web.servlet.DispatcherServlet</servlet-class><init-param><param-name>contextConfigLocation</param-name><param-value>classpath:springmvc.xml</param-value></init-param><load-on-startup>1</load-on-startup>
</servlet>
<servlet-mapping><servlet-name>dispatcherServlet</servlet-name><url-pattern>/</url-pattern>
</servlet-mapping>
<!-- 配置springMVC的编码过滤器 -->
<filter><filter-name>CharacterEncodingFilter</filter-name><filter-class>org.springframework.web.filter.CharacterEncodingFilter</filter-class><init-param><param-name>encoding</param-name><param-value>UTF-8</param-value></init-param><init-param><param-name>forceResponseEncoding</param-name><param-value>true</param-value></init-param>
</filter>
<filter-mapping><filter-name>CharacterEncodingFilter</filter-name><url-pattern>/*</url-pattern>
</filter-mapping>Spring 配置文件开启组件扫描和视图解析器
<!-- 开启组件扫描,自动发现并注册Bean到Spring容器中 -->
<context:component-scan base-package="com.sakurapaid.mvc"/><!-- 配置Thymeleaf视图解析器,用于将控制器返回的逻辑视图名解析为实际的HTML页面 -->
<bean id="viewResolver" class="org.thymeleaf.spring5.view.ThymeleafViewResolver"><property name="order" value="1"/> <!-- 解析器的优先级 --><property name="characterEncoding" value="UTF-8"/> <!-- 解析结果的字符编码 --><property name="templateEngine"><bean class="org.thymeleaf.spring5.SpringTemplateEngine"><property name="templateResolver"><bean class="org.thymeleaf.spring5.templateresolver.SpringResourceTemplateResolver"><!-- 设置视图的前缀,例如:如果逻辑视图名为home,则实际查找的路径为/WEB-INF/templates/home.html --><property name="prefix" value="/WEB-INF/html/"/><!-- 设置视图的后缀,即视图文件的扩展名 --><property name="suffix" value=".html"/><property name="templateMode" value="HTML5"/> <!-- 指定模板解析模式为HTML5 --><property name="characterEncoding" value="UTF-8"/> <!-- 模板的字符编码 --></bean></property></bean></property>
</bean>1.4.2. 模拟 get 和 post 请求
index.html
<!DOCTYPE html>
<html lang="en" xmlns:th="http://www.thymeleaf.org">
<head><meta charset="UTF-8"><title>Title</title>
</head>
<body><h1>我是index界面</h1><a th:href="@{/user}">查询所有用户信息</a><a th:href="@{/user/1}">根据id查询用户信息</a><form th:action="@{/user}" method="post">用户名:<input type="text" name="username"><br>密码:<input type="password" name="password"><br><input type="submit" value="注册"><br></form>
</body>
</html>测试输出

1.4.3. HiddenHttpMethodFilter处理PUT和DELETE请求
大多数浏览器默认只支持GET和POST方法,而不支持PUT和DELETE方法
所以我们先测试一下是不是的
index.jsp
<!DOCTYPE html>
<html lang="en" xmlns:th="http://www.thymeleaf.org">
<head><meta charset="UTF-8"><title>Title</title>
</head>
<body><h1>我是index界面</h1><a th:href="@{/user}">查询所有用户信息</a><a th:href="@{/user/1}">根据id查询用户信息</a><form th:action="@{/user}" method="post">用户名:<input type="text" name="username"><br>密码:<input type="password" name="password"><br><input type="submit" value="注册"><br></form><br><form th:action="@{/user}" method="put">用户名:<input type="text" name="username"><br>密码:<input type="password" name="password"><br><input type="submit" value="修改"><br></form><br>
</body>
</html>
控制类添加对应的方法
package com.sakurapaid.mvc.controller;import org.springframework.stereotype.Controller;
import org.springframework.web.bind.annotation.RequestMapping;
import org.springframework.web.bind.annotation.RequestMethod;@Controller
public class UserController {/*使用RESTFUL模拟用户资源的增删改查查询所有用户信息/user GET 查询所有用户信息/user/1 GET 查询用户信息 id=1/user POST 添加用户信息/user/1 DELETE 删除用户信息 id=1/user PUT 修改用户信息*/@RequestMapping(value = "/user", method = RequestMethod.GET)public String getAllUser() {System.out.println("查询所有用户信息");return "success";}@RequestMapping(value = "/user/{id}", method = RequestMethod.GET)public String getUserById() {System.out.println("查询用户信息 id=1");return "success";}@RequestMapping(value = "/user", method = RequestMethod.POST)public String addUser(String username, String password) {System.out.println("添加用户信息 username=" + username);System.out.println("添加用户信息 password=" + password);return "success";}@RequestMapping(value = "/user", method = RequestMethod.PUT)public String modifyUser(String username, String password) {System.out.println("修改用户信息username=" + username);System.out.println("修改用户信息password=" + password);return "success";}
}
但是测试完发现,它控制台输出的是这个方法
就是因为大多数浏览器默认只支持GET和POST方法,而不支持PUT和DELETE方法
使用HiddenHttpMethodFilter处理PUT和DELETE请求
web.xml 添加过滤器和HiddenHttpMethodFilter
<!-- 配置springMVC的编码过滤器 -->
<filter><filter-name>CharacterEncodingFilter</filter-name><filter-class>org.springframework.web.filter.CharacterEncodingFilter</filter-class><init-param><param-name>encoding</param-name><param-value>UTF-8</param-value></init-param><init-param><param-name>forceResponseEncoding</param-name><param-value>true</param-value></init-param>
</filter>
<filter-mapping><filter-name>CharacterEncodingFilter</filter-name><url-pattern>/*</url-pattern>
</filter-mapping>
<!-- 配置HiddenHttpMethodFilter -->
<filter><filter-name>HiddenHttpMethodFilter</filter-name><filter-class>org.springframework.web.filter.HiddenHttpMethodFilter</filter-class>
</filter>
<filter-mapping><filter-name>HiddenHttpMethodFilter</filter-name><url-pattern>/*</url-pattern>
</filter-mapping>再 index.html 的表单添加一个隐藏域,表示真正要提交的请求方式
<!DOCTYPE html>
<html lang="en" xmlns:th="http://www.thymeleaf.org">
<head><meta charset="UTF-8"><title>Title</title>
</head>
<body><h1>我是index界面</h1><a th:href="@{/user}">查询所有用户信息</a><a th:href="@{/user/1}">根据id查询用户信息</a><form th:action="@{/user}" method="post">用户名:<input type="text" name="username"><br>密码:<input type="password" name="password"><br><input type="submit" value="注册"><br></form><br><form th:action="@{/user}" method="post"><input type="hidden" name="_method" value="PUT">用户名:<input type="text" name="username"><br>密码:<input type="password" name="password"><br><input type="submit" value="修改"><br></form><br>
</body>
</html>
测试输出成功
delete 请求方式到后面再演示
2. RESTful案例
对于员工表达的增删改查
参考视频 --> 56_尚硅谷_SpringMVC_RESTFul案例:准备工作_哔哩哔哩_bilibili
2.1. 准备工作
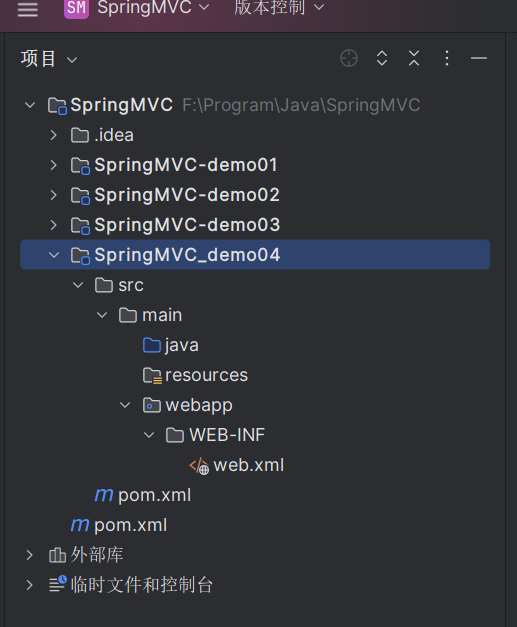
创建新模块 demo04
配置 web.xml
要按顺序,编码过滤器、HiddenHttpMethodFilter、前端控制器
<?xml version="1.0" encoding="UTF-8"?>
<web-app xmlns="http://xmlns.jcp.org/xml/ns/javaee"xmlns:xsi="http://www.w3.org/2001/XMLSchema-instance"xsi:schemaLocation="http://xmlns.jcp.org/xml/ns/javaee http://xmlns.jcp.org/xml/ns/javaee/web-app_4_0.xsd"version="4.0"><!-- 编码过滤器:设置请求与响应的字符集为UTF-8 --><filter><filter-name>CharacterEncodingFilter</filter-name><filter-class>org.springframework.web.filter.CharacterEncodingFilter</filter-class><init-param><param-name>encoding</param-name><param-value>UTF-8</param-value></init-param><init-param><param-name>forceEncoding</param-name><param-value>true</param-value></init-param></filter><filter-mapping><filter-name>CharacterEncodingFilter</filter-name><url-pattern>/*</url-pattern></filter-mapping><!-- HiddenHttpMethodFilter:支持PUT、DELETE等HTTP方法通过POST方式模拟提交 --><filter><filter-name>HiddenHttpMethodFilter</filter-name><filter-class>org.springframework.web.filter.HiddenHttpMethodFilter</filter-class></filter><filter-mapping><filter-name>HiddenHttpMethodFilter</filter-name><servlet-name>dispatcherServlet</servlet-name></filter-mapping><!-- 前端控制器:Spring MVC的核心,负责拦截与分发请求 --><servlet><servlet-name>dispatcherServlet</servlet-name><servlet-class>org.springframework.web.servlet.DispatcherServlet</servlet-class><init-param><param-name>contextConfigLocation</param-name><param-value>classpath:SpringMVC-config.xml</param-value></init-param><load-on-startup>1</load-on-startup></servlet><servlet-mapping><servlet-name>dispatcherServlet</servlet-name><url-pattern>/</url-pattern></servlet-mapping></web-app>
对应位置创建 spring 配置文件和 controlller 控制器


spring 配置文件配置 Thymeleaf 视图解析器
完整 spring 配置文件如下
<?xml version="1.0" encoding="UTF-8"?>
<!-- Spring核心 beans 命名空间 -->
<beans xmlns="http://www.springframework.org/schema/beans"xmlns:xsi="http://www.w3.org/2001/XMLSchema-instance"xmlns:context="http://www.springframework.org/schema/context"xmlns:aop="http://www.springframework.org/schema/aop"xmlns:tx="http://www.springframework.org/schema/tx"xmlns:mvc="http://www.springframework.org/schema/mvc"xsi:schemaLocation="http://www.springframework.org/schema/beans http://www.springframework.org/schema/beans/spring-beans.xsd http://www.springframework.org/schema/context https://www.springframework.org/schema/context/spring-context.xsdhttp://www.springframework.org/schema/aophttp://www.springframework.org/schema/aop/spring-aop.xsdhttp://www.springframework.org/schema/txhttp://www.springframework.org/schema/tx/spring-tx.xsdhttp://www.springframework.org/schema/mvchttp://www.springframework.org/schema/mvc/spring-mvc.xsd"><!-- 开启组件扫描,自动发现并注册Bean到Spring容器中 --><context:component-scan base-package="com.sakurapaid.mvc"/><!-- Thymeleaf视图解析器 --><!-- 配置Thymeleaf视图解析器,用于将控制器返回的逻辑视图名解析为实际的HTML页面 --><bean id="viewResolver" class="org.thymeleaf.spring5.view.ThymeleafViewResolver"><property name="order" value="1"/> <!-- 解析器的优先级 --><property name="characterEncoding" value="UTF-8"/> <!-- 解析结果的字符编码 --><property name="templateEngine"><bean class="org.thymeleaf.spring5.SpringTemplateEngine"><property name="templateResolver"><bean class="org.thymeleaf.spring5.templateresolver.SpringResourceTemplateResolver"><!-- 设置视图的前缀,例如:如果逻辑视图名为home,则实际查找的路径为/WEB-INF/templates/home.html --><property name="prefix" value="/WEB-INF/html/"/><!-- 设置视图的后缀,即视图文件的扩展名 --><property name="suffix" value=".html"/><property name="templateMode" value="HTML5"/> <!-- 指定模板解析模式为HTML5 --><property name="characterEncoding" value="UTF-8"/> <!-- 模板的字符编码 --></bean></property></bean></property></bean>
</beans>
准备实体类
package com.sakurapaid.mvc.bean;public class Employee {private Integer id;private String lastName;private String email;private Integer gender;getter、setter、构造....
}
准备dao模拟数据
package com.sakurapaid.mvc.dao;import com.sakurapaid.mvc.bean.Employee;
import org.springframework.stereotype.Repository;import java.util.Collection;
import java.util.HashMap;
import java.util.Map;/*** 员工数据访问对象,用于对员工信息的增删改查操作。*/
@Repository
public class EmployeeDao {// 静态Map用于存储员工数据private static Map<Integer, Employee> employees = null;// 初始化静态Map,添加示例员工数据static{employees = new HashMap<Integer, Employee>();employees.put(1001, new Employee(1001, "E-AA", "aa@163.com", 1));employees.put(1002, new Employee(1002, "E-BB", "bb@163.com", 1));employees.put(1003, new Employee(1003, "E-CC", "cc@163.com", 0));employees.put(1004, new Employee(1004, "E-DD", "dd@163.com", 0));employees.put(1005, new Employee(1005, "E-EE", "ee@163.com", 1));}// 用于为新员工生成唯一的IDprivate static Integer initId = 1006;/*** 保存员工信息。* 如果员工ID为空,则分配一个新的ID。* @param employee 要保存的员工对象*/public void save(Employee employee){if(employee.getId() == null){employee.setId(initId++);}employees.put(employee.getId(), employee);}/*** 获取所有员工信息。* @return 员工集合*/public Collection<Employee> getAll(){return employees.values();}/*** 根据ID获取员工信息。* @param id 员工ID* @return 对应的员工对象*/public Employee get(Integer id){return employees.get(id);}/*** 根据ID删除员工信息。* @param id 员工ID*/public void delete(Integer id){employees.remove(id);}
}
完整结构

2.2. 功能清单
| 功能 | URL 地址 | 请求方式 |
| 访问首页√ | / | GET |
| 查询全部数据√ | /employee | GET |
| 删除√ | /employee/2 | DELETE |
| 跳转到添加数据页面√ | /toAdd | GET |
| 执行保存√ | /employee | POST |
| 跳转到更新数据页面√ | /employee/2 | GET |
| 执行更新√ | /employee | PUT |
2.3. 具体功能:访问首页
创建页面 index.html
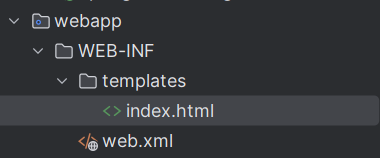
<!DOCTYPE html>
<html lang="en" xmlns:th="http://www.thymeleaf.org"><head><meta charset="UTF-8" ><title>Title</title></head><body><h1>首页</h1><a th:href="@{/employee}">访问员工信息</a></body>
</html>
配置view-controller
<mvc:view-controller path="/" view-name="index"/><mvc:annotation-driven/>测试运行

2.4. 具体功能:查询所有员工数据
控制器方法
@Controller
public class EmployeeController {@Autowiredprivate EmployeeDao employeeDao;@RequestMapping(value = "/employee", method = RequestMethod.GET)public String getEmployeeList(Model model){Collection<Employee> employeeList = employeeDao.getAll();model.addAttribute("employeeList", employeeList);return "employee_list";}
}
创建employee_list.html
加了点 css 样式
<!DOCTYPE html>
<html lang="en" xmlns:th="http://www.thymeleaf.org">
<head><meta charset="UTF-8"><title>Employee Info</title><style type="text/css">#dataTable {width: 100%;border-collapse: collapse;margin-bottom: 2rem;}#dataTable th,#dataTable td {padding: 0.75rem;vertical-align: middle;border: 1px solid #ccc;text-align: center;}#dataTable th {background-color: #f2f2f2;font-weight: bold;color: #333;}#dataTable tr:nth-child(even) {background-color: #f9f9f9;}#dataTable tr:hover {background-color: #eaeaea;}/* 删除按钮样式 */.deleteA {color: red;text-decoration: none;cursor: pointer;margin-right: 0.5rem;}/* 表格标题样式 */#dataTable tr:first-child th {text-align: left;font-size: 1.2rem;border-top: none;}/* 分割线样式 */#dataTable tr:first-child th[colspan="5"] {border-bottom: 2px solid #333;}</style>
<!--    <script type="text/javascript" th:src="@{/static/js/vue.js}"></script>-->
</head>
<body><table border="1" cellpadding="0" cellspacing="0" style="text-align: center;" id="dataTable"><tr><th colspan="5">Employee Info</th></tr><tr><th>id</th><th>lastName</th><th>email</th><th>gender</th><th>options(<a th:href="@{/toAdd}">add</a>)</th></tr><tr th:each="employee : ${employeeList}"><td th:text="${employee.id}"></td><td th:text="${employee.lastName}"></td><td th:text="${employee.email}"></td><td th:text="${employee.gender}"></td><td><a class="deleteA" @click="deleteEmployee" th:href="@{'/employee/'+${employee.id}}">delete</a><a th:href="@{'/employee/'+${employee.id}}">update</a></td></tr>
</table>
</body>
</html>
测试输出
2.5. 具体功能:删除
创建处理delete请求方式的表单
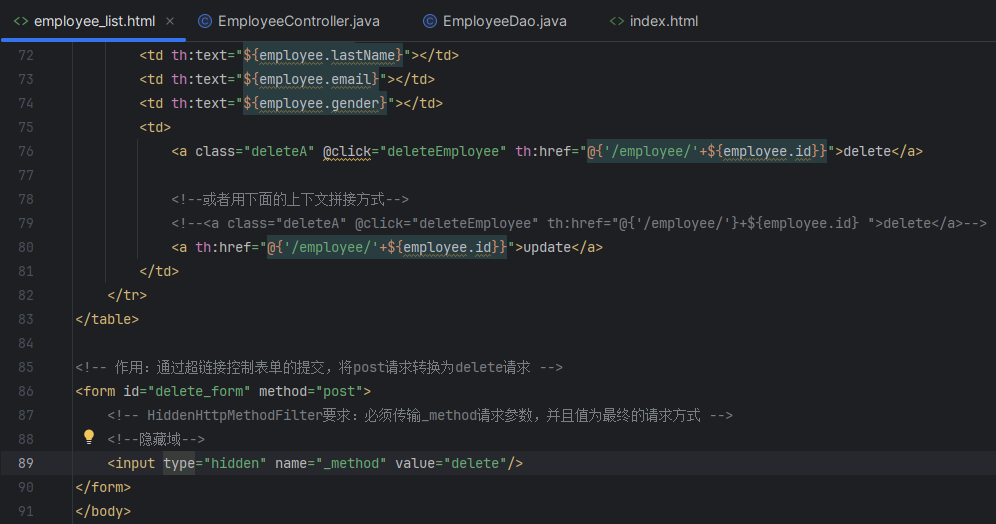
<!-- 作用:通过超链接控制表单的提交,将post请求转换为delete请求 -->
<form id="delete_form" method="post"><!-- HiddenHttpMethodFilter要求:必须传输_method请求参数,并且值为最终的请求方式 --><input type="hidden" name="_method" value="delete"/>
</form>
删除超链接绑定点击事件
引入vue.js,通过vue处理点击事件
<script src="https://cdn.jsdelivr.net/npm/vue@2.6.14/dist/vue.js">var vue = new Vue({el:"#dataTable",methods:{//event表示当前事件deleteEmployee:function (event) {//通过id获取表单标签var delete_form = document.getElementById("delete_form");//将触发事件的超链接的href属性为表单的action属性赋值delete_form.action = event.target.href;//提交表单delete_form.submit();//阻止超链接的默认跳转行为event.preventDefault();}}});
</script>
控制器方法
@RequestMapping(value = "/employee/{id}", method = RequestMethod.DELETE)
public String deleteEmployee(@PathVariable("id") Integer id){employeeDao.delete(id);return "redirect:/employee";
}
2.6. 具体功能:跳转到添加数据页面
配置view-controller
<mvc:view-controller path="/toAdd" view-name="employee_add"></mvc:view-controller>创建employee_add.html
<!DOCTYPE html>
<html lang="en" xmlns:th="http://www.thymeleaf.org">
<head><meta charset="UTF-8"><title>Add Employee</title>
</head>
<body><form th:action="@{/employee}" method="post">lastName:<input type="text" name="lastName"><br>email:<input type="text" name="email"><br>gender:<input type="radio" name="gender" value="1">male<input type="radio" name="gender" value="0">female<br><input type="submit" value="add"><br>
</form></body>
</html>
2.7. 具体功能:执行保存
控制器方法
@RequestMapping(value = "/employee", method = RequestMethod.POST)
public String addEmployee(Employee employee){employeeDao.save(employee);return "redirect:/employee";
}
2.8. 具体功能:跳转到更新数据页面
修改超链接
<a th:href="@{'/employee/'+${employee.id}}">update</a>控制器方法
@RequestMapping(value = "/employee/{id}", method = RequestMethod.GET)
public String getEmployeeById(@PathVariable("id") Integer id, Model model){Employee employee = employeeDao.get(id);model.addAttribute("employee", employee);return "employee_update";
}
创建employee_update.html
<!DOCTYPE html>
<html lang="en" xmlns:th="http://www.thymeleaf.org">
<head><meta charset="UTF-8"><title>Update Employee</title>
</head>
<body><form th:action="@{/employee}" method="post"><input type="hidden" name="_method" value="put"><input type="hidden" name="id" th:value="${employee.id}">lastName:<input type="text" name="lastName" th:value="${employee.lastName}"><br>email:<input type="text" name="email" th:value="${employee.email}"><br><!--th:field="${employee.gender}"可用于单选框或复选框的回显若单选框的value和employee.gender的值一致,则添加checked="checked"属性-->gender:<input type="radio" name="gender" value="1" th:field="${employee.gender}">male<input type="radio" name="gender" value="0" th:field="${employee.gender}">female<br><input type="submit" value="update"><br>
</form></body>
</html>
2.9. 具体功能:执行更新
控制器方法
@RequestMapping(value = "/employee", method = RequestMethod.PUT)
public String updateEmployee(Employee employee){employeeDao.save(employee);return "redirect:/employee";
}

![[2024更新]如何从Android恢复已删除的相机照片?](https://img-blog.csdnimg.cn/direct/3c0f9cd2ecb747a48c1886bd0e1e31a7.png)