上一节中我们讲到如何使用Labelimg工具标注自己的数据集,链接:YOLOv5利用Labelimg标注自己数据集,完成1658张数据集的预处理,接下来将进一步处理这批数据,通常是先划分再做数据增强。
一、统计txt文件各标签类型的数量
第一步:查看txt文件,将类别与索引值对应
green-circle--0
green-left--1
green-straight--2
green-right--3
red-circle--4
red-left--5
red-straight--6
red-right--7
yellow-circle--8
yellow-left--9
yellow-straight--10
yellow-right--11
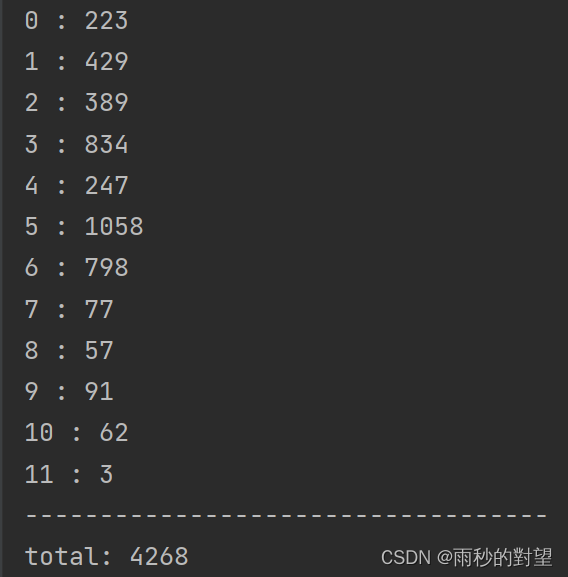
第二步:根据以上索引运行代码
import osdef get_every_class_num(txt_folder_path):# 需修改,根据自己的类别,注意一一对应class_categories = ['0', '1', '2', '3', '4','5', '6', '7', '8', '9','10', '11']class_num = len(class_categories) # 样本类别数class_num_list = [0] * class_num# 获取文件夹下所有txt文件txt_files = [file for file in os.listdir(txt_folder_path) if file.endswith('.txt')]for txt_file in txt_files:file_path = os.path.join(txt_folder_path, txt_file)with open(file_path, 'r') as file:file_data = file.readlines() # 读取所有行for every_row in file_data:class_str = every_row.split(' ')[0].strip() # 去除换行符if class_str in class_categories:class_ind = class_categories.index(class_str)class_num_list[class_ind] += 1# 输出每一类的数量以及总数result = dict(zip(class_categories, class_num_list))for name, num in result.items():print(name, ":", num)print("-----------------------------------")print('total:', sum(class_num_list))if __name__ == '__main__':# 需修改,txt文件夹所在路径txt_folder_path = r'F:\yolov5\红绿灯多属性数据集\labels'get_every_class_num(txt_folder_path)结果如下~
二、数据准备
1、txt转xml格式
from xml.dom.minidom import Document
import os
import cv2def makexml(picPath, txtPath, xmlPath):  # txt所在文件夹路径,xml文件保存路径,图片所在文件夹路径"""此函数用于将yolo格式txt标注文件转换为voc格式xml标注文件"""dic = {'0': "green-circle",  # 创建字典用来对类型进行转换'1': "green-left",  # 此处的字典要与自己的classes.txt文件中的类对应,且顺序要一致'2': "green-straight",'3': "green-right",'4': "red-circle",'5': "red-left",'6': "red-straight",'7': "red-right",'8': "yellow-circle",'9': "yellow-left",'10': "yellow-straight",'11': "yellow-right",}files = os.listdir(txtPath)for i, name in enumerate(files):xmlBuilder = Document()annotation = xmlBuilder.createElement("annotation")  # 创建annotation标签xmlBuilder.appendChild(annotation)txtFile = open(txtPath + name)txtList = txtFile.readlines()img = cv2.imread(picPath + name[0:-4] + ".jpg")Pheight, Pwidth, Pdepth = img.shapefolder = xmlBuilder.createElement("folder")  # folder标签foldercontent = xmlBuilder.createTextNode("driving_annotation_dataset")folder.appendChild(foldercontent)annotation.appendChild(folder)  # folder标签结束filename = xmlBuilder.createElement("filename")  # filename标签filenamecontent = xmlBuilder.createTextNode(name[0:-4] + ".jpg")filename.appendChild(filenamecontent)annotation.appendChild(filename)  # filename标签结束size = xmlBuilder.createElement("size")  # size标签width = xmlBuilder.createElement("width")  # size子标签widthwidthcontent = xmlBuilder.createTextNode(str(Pwidth))width.appendChild(widthcontent)size.appendChild(width)  # size子标签width结束height = xmlBuilder.createElement("height")  # size子标签heightheightcontent = xmlBuilder.createTextNode(str(Pheight))height.appendChild(heightcontent)size.appendChild(height)  # size子标签height结束depth = xmlBuilder.createElement("depth")  # size子标签depthdepthcontent = xmlBuilder.createTextNode(str(Pdepth))depth.appendChild(depthcontent)size.appendChild(depth)  # size子标签depth结束annotation.appendChild(size)  # size标签结束for j in txtList:oneline = j.strip().split(" ")object = xmlBuilder.createElement("object")  # object 标签picname = xmlBuilder.createElement("name")  # name标签namecontent = xmlBuilder.createTextNode(dic[oneline[0]])picname.appendChild(namecontent)object.appendChild(picname)  # name标签结束pose = xmlBuilder.createElement("pose")  # pose标签posecontent = xmlBuilder.createTextNode("Unspecified")pose.appendChild(posecontent)object.appendChild(pose)  # pose标签结束truncated = xmlBuilder.createElement("truncated")  # truncated标签truncatedContent = xmlBuilder.createTextNode("0")truncated.appendChild(truncatedContent)object.appendChild(truncated)  # truncated标签结束difficult = xmlBuilder.createElement("difficult")  # difficult标签difficultcontent = xmlBuilder.createTextNode("0")difficult.appendChild(difficultcontent)object.appendChild(difficult)  # difficult标签结束bndbox = xmlBuilder.createElement("bndbox")  # bndbox标签xmin = xmlBuilder.createElement("xmin")  # xmin标签mathData = int(((float(oneline[1])) * Pwidth + 1) - (float(oneline[3])) * 0.5 * Pwidth)xminContent = xmlBuilder.createTextNode(str(mathData))xmin.appendChild(xminContent)bndbox.appendChild(xmin)  # xmin标签结束ymin = xmlBuilder.createElement("ymin")  # ymin标签mathData = int(((float(oneline[2])) * Pheight + 1) - (float(oneline[4])) * 0.5 * Pheight)yminContent = xmlBuilder.createTextNode(str(mathData))ymin.appendChild(yminContent)bndbox.appendChild(ymin)  # ymin标签结束xmax = xmlBuilder.createElement("xmax")  # xmax标签mathData = int(((float(oneline[1])) * Pwidth + 1) + (float(oneline[3])) * 0.5 * Pwidth)xmaxContent = xmlBuilder.createTextNode(str(mathData))xmax.appendChild(xmaxContent)bndbox.appendChild(xmax)  # xmax标签结束ymax = xmlBuilder.createElement("ymax")  # ymax标签mathData = int(((float(oneline[2])) * Pheight + 1) + (float(oneline[4])) * 0.5 * Pheight)ymaxContent = xmlBuilder.createTextNode(str(mathData))ymax.appendChild(ymaxContent)bndbox.appendChild(ymax)  # ymax标签结束object.appendChild(bndbox)  # bndbox标签结束annotation.appendChild(object)  # object标签结束f = open(xmlPath + name[0:-4] + ".xml", 'w')xmlBuilder.writexml(f, indent='\t', newl='\n', addindent='\t', encoding='utf-8')f.close()
if __name__ == "__main__":picPath = "F:/yolov5/datasets/images/"  # 图片所在文件夹路径,后面的/一定要带上txtPath = "F:/yolov5/datasets/labels_txt/"  # txt所在文件夹路径,后面的/一定要带上xmlPath = "F:/yolov5/datasets/labels_xml/"  # xml文件保存路径,后面的/一定要带上makexml(picPath, txtPath, xmlPath)
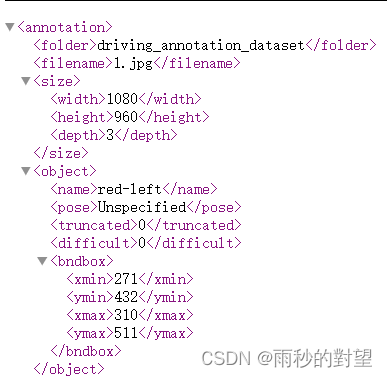
转换成以下内容的xml文件~
三、数据集划分
对数据集进行预处理之后,就可以开始对数据集划分,这里一定要在数据增强之前,我们一般将数据集划分为:训练集、验证集、测试集三类。
以下这个比喻很恰当:模型的训练与学习,类似与老师教学生知识的过程。* 1、训练集(train):用于训练模型以及确定参数。类似于老师教学生知识的过程。
* 2、验证集(vaild):用于确定网络结构以及调整模型的超参数。相当于月考等小测验,用于对学生查漏补缺。
* 3、测试机(test):用于检验模型的泛化能力。相当于大考,上战场一样,检验学生的学习效果。
参数(parameters):指由模型通过学习得到的变量,如权重w和偏置b.
超参数(hypeparameters):指根据经验进行设定的参数,如迭代次数,隐层的层数,每层神经元的个数,学习率等。
根据自己实际需求,数据量不是很大的时候(万级别以下)将训练集、验证集、测试集划分为6:2:2;若是数据很大,可以将训练集、验证集、测试集划分为8:1:1。
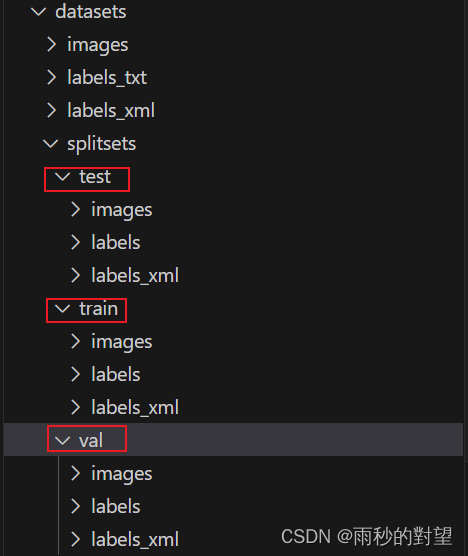
1、在YOLOv5/datasets下创建对应文件夹
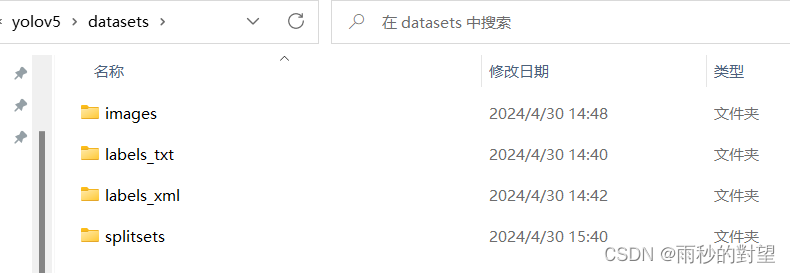
images:原始图像
labels_txt:txt标注格式
labels_xml:xml标注格式
splitsets:保存划分好的训练集、测试集和验证集
2、划分代码
import os
import shutil
import randomrandom.seed(0)def split_data(file_path, xml_path, new_file_path, train_rate, val_rate, test_rate):each_class_image = []each_class_label = []for image in os.listdir(file_path):each_class_image.append(image)for label in os.listdir(xml_path):each_class_label.append(label)data = list(zip(each_class_image, each_class_label))total = len(each_class_image)random.shuffle(data)  #使用函数打乱顺序each_class_image, each_class_label = zip(*data) #将两个列表解绑#分别获取train、val、test这三个文件夹对应的图片和标签train_images = each_class_image[0:int(train_rate * total)]val_images = each_class_image[int(train_rate * total):int((train_rate + val_rate) * total)]test_images = each_class_image[int((train_rate + val_rate) * total):]train_labels = each_class_label[0:int(train_rate * total)]val_labels = each_class_label[int(train_rate * total):int((train_rate + val_rate) * total)]test_labels = each_class_label[int((train_rate + val_rate) * total):]#设置相应的路径保存格式,将图片和标签对应保存下来for image in train_images:print(image)old_path = file_path + '/' + imagenew_path1 = new_file_path + '/' + 'train' + '/' + 'images'if not os.path.exists(new_path1):os.makedirs(new_path1)new_path = new_path1 + '/' + imageshutil.copy(old_path, new_path)for label in train_labels:print(label)old_path = xml_path + '/' + labelnew_path1 = new_file_path + '/' + 'train' + '/' + 'labels'if not os.path.exists(new_path1):os.makedirs(new_path1)new_path = new_path1 + '/' + labelshutil.copy(old_path, new_path)for image in val_images:old_path = file_path + '/' + imagenew_path1 = new_file_path + '/' + 'val' + '/' + 'images'if not os.path.exists(new_path1):os.makedirs(new_path1)new_path = new_path1 + '/' + imageshutil.copy(old_path, new_path)for label in val_labels:old_path = xml_path + '/' + labelnew_path1 = new_file_path + '/' + 'val' + '/' + 'labels'if not os.path.exists(new_path1):os.makedirs(new_path1)new_path = new_path1 + '/' + labelshutil.copy(old_path, new_path)for image in test_images:old_path = file_path + '/' + imagenew_path1 = new_file_path + '/' + 'test' + '/' + 'images'if not os.path.exists(new_path1):os.makedirs(new_path1)new_path = new_path1 + '/' + imageshutil.copy(old_path, new_path)for label in test_labels:old_path = xml_path + '/' + labelnew_path1 = new_file_path + '/' + 'test' + '/' + 'labels'if not os.path.exists(new_path1):os.makedirs(new_path1)new_path = new_path1 + '/' + labelshutil.copy(old_path, new_path)if __name__ == '__main__':file_path = r"F:\yolov5\datasets\images"xml_path = r"F:\yolov5\datasets\labels_xml"new_file_path = r"F:\yolov5\datasets\splitsets"split_data(file_path, xml_path, new_file_path, train_rate=0.6, val_rate=0.2, test_rate=0.2)
下面为划分之后文件夹的效果,并查看对应比例~
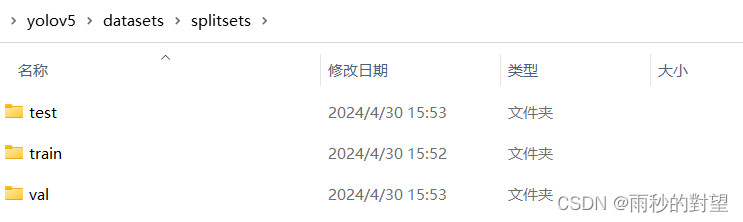
训练集、测试集和验证集文件夹对应的数量分别为1988、664和664。到这一步就完成数据集的基本操作,达到训练要求
四、数据增强
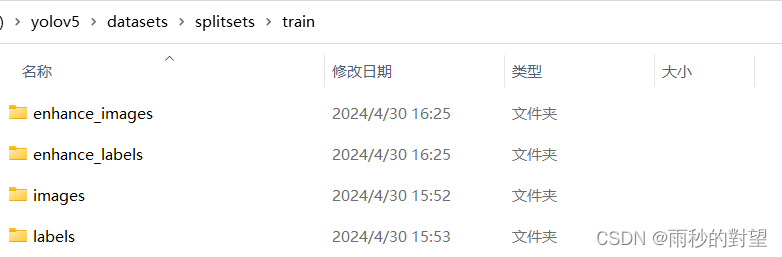
1、创建图像增强后保存的文件夹
在划分好后的训练集(train)文件夹下分别创建增强后的图片和标签文件夹
2、图像增强代码
代码中包含加噪声、改变亮度、裁剪、平移、旋转、镜像、cutout等方法。选用特定方法,只需修改代码中的参数设置。
# -*- coding=utf-8 -*-import time
import random
import copy
import cv2
import os
import math
import numpy as np
from skimage.util import random_noise
from lxml import etree, objectify
import xml.etree.ElementTree as ET
import argparse# 显示图片
def show_pic(img, bboxes=None):'''输入:img:图像arraybboxes:图像的所有boudning box list, 格式为[[x_min, y_min, x_max, y_max]....]names:每个box对应的名称'''for i in range(len(bboxes)):bbox = bboxes[i]x_min = bbox[0]y_min = bbox[1]x_max = bbox[2]y_max = bbox[3]cv2.rectangle(img, (int(x_min), int(y_min)), (int(x_max), int(y_max)), (0, 255, 0), 3)cv2.namedWindow('pic', 0)  # 1表示原图cv2.moveWindow('pic', 0, 0)cv2.resizeWindow('pic', 1200, 800)  # 可视化的图片大小cv2.imshow('pic', img)cv2.waitKey(0)cv2.destroyAllWindows()# 图像均为cv2读取
class DataAugmentForObjectDetection():def __init__(self, rotation_rate=0.5, max_rotation_angle=5,crop_rate=0.5, shift_rate=0.5, change_light_rate=0.5,add_noise_rate=0.5, flip_rate=0.5,cutout_rate=0.5, cut_out_length=50, cut_out_holes=1, cut_out_threshold=0.5,is_addNoise=True, is_changeLight=True, is_cutout=True, is_rotate_img_bbox=True,is_crop_img_bboxes=True, is_shift_pic_bboxes=True, is_filp_pic_bboxes=True):# 配置各个操作的属性self.rotation_rate = rotation_rateself.max_rotation_angle = max_rotation_angleself.crop_rate = crop_rateself.shift_rate = shift_rateself.change_light_rate = change_light_rateself.add_noise_rate = add_noise_rateself.flip_rate = flip_rateself.cutout_rate = cutout_rateself.cut_out_length = cut_out_lengthself.cut_out_holes = cut_out_holesself.cut_out_threshold = cut_out_threshold# 是否使用某种增强方式self.is_addNoise = is_addNoiseself.is_changeLight = is_changeLightself.is_cutout = is_cutoutself.is_rotate_img_bbox = is_rotate_img_bboxself.is_crop_img_bboxes = is_crop_img_bboxesself.is_shift_pic_bboxes = is_shift_pic_bboxesself.is_filp_pic_bboxes = is_filp_pic_bboxes# ----1.加噪声---- #def _addNoise(self, img):'''输入:img:图像array输出:加噪声后的图像array,由于输出的像素是在[0,1]之间,所以得乘以255'''# return cv2.GaussianBlur(img, (11, 11), 0)return random_noise(img, mode='gaussian', seed=int(time.time()), clip=True) * 255# ---2.调整亮度--- #def _changeLight(self, img):alpha = random.uniform(0.35, 1)blank = np.zeros(img.shape, img.dtype)return cv2.addWeighted(img, alpha, blank, 1 - alpha, 0)# ---3.cutout--- #def _cutout(self, img, bboxes, length=100, n_holes=1, threshold=0.5):'''原版本:https://github.com/uoguelph-mlrg/Cutout/blob/master/util/cutout.pyRandomly mask out one or more patches from an image.Args:img : a 3D numpy array,(h,w,c)bboxes : 框的坐标n_holes (int): Number of patches to cut out of each image.length (int): The length (in pixels) of each square patch.'''def cal_iou(boxA, boxB):'''boxA, boxB为两个框,返回iouboxB为bouding box'''# determine the (x, y)-coordinates of the intersection rectanglexA = max(boxA[0], boxB[0])yA = max(boxA[1], boxB[1])xB = min(boxA[2], boxB[2])yB = min(boxA[3], boxB[3])if xB <= xA or yB <= yA:return 0.0# compute the area of intersection rectangleinterArea = (xB - xA + 1) * (yB - yA + 1)# compute the area of both the prediction and ground-truth# rectanglesboxAArea = (boxA[2] - boxA[0] + 1) * (boxA[3] - boxA[1] + 1)boxBArea = (boxB[2] - boxB[0] + 1) * (boxB[3] - boxB[1] + 1)iou = interArea / float(boxBArea)return iou# 得到h和wif img.ndim == 3:h, w, c = img.shapeelse:_, h, w, c = img.shapemask = np.ones((h, w, c), np.float32)for n in range(n_holes):chongdie = True  # 看切割的区域是否与box重叠太多while chongdie:y = np.random.randint(h)x = np.random.randint(w)y1 = np.clip(y - length // 2, 0,h)  # numpy.clip(a, a_min, a_max, out=None), clip这个函数将将数组中的元素限制在a_min, a_max之间,大于a_max的就使得它等于 a_max,小于a_min,的就使得它等于a_miny2 = np.clip(y + length // 2, 0, h)x1 = np.clip(x - length // 2, 0, w)x2 = np.clip(x + length // 2, 0, w)chongdie = Falsefor box in bboxes:if cal_iou([x1, y1, x2, y2], box) > threshold:chongdie = Truebreakmask[y1: y2, x1: x2, :] = 0.img = img * maskreturn img# ---4.旋转--- #def _rotate_img_bbox(self, img, bboxes, angle=5, scale=1.):'''参考:https://blog.csdn.net/u014540717/article/details/53301195crop_rate输入:img:图像array,(h,w,c)bboxes:该图像包含的所有boundingboxs,一个list,每个元素为[x_min, y_min, x_max, y_max],要确保是数值angle:旋转角度scale:默认1输出:rot_img:旋转后的图像arrayrot_bboxes:旋转后的boundingbox坐标list'''# 旋转图像w = img.shape[1]h = img.shape[0]# 角度变弧度rangle = np.deg2rad(angle)  # angle in radians# now calculate new image width and heightnw = (abs(np.sin(rangle) * h) + abs(np.cos(rangle) * w)) * scalenh = (abs(np.cos(rangle) * h) + abs(np.sin(rangle) * w)) * scale# ask OpenCV for the rotation matrixrot_mat = cv2.getRotationMatrix2D((nw * 0.5, nh * 0.5), angle, scale)# calculate the move from the old center to the new center combined# with the rotationrot_move = np.dot(rot_mat, np.array([(nw - w) * 0.5, (nh - h) * 0.5, 0]))# the move only affects the translation, so update the translationrot_mat[0, 2] += rot_move[0]rot_mat[1, 2] += rot_move[1]# 仿射变换rot_img = cv2.warpAffine(img, rot_mat, (int(math.ceil(nw)), int(math.ceil(nh))), flags=cv2.INTER_LANCZOS4)# 矫正bbox坐标# rot_mat是最终的旋转矩阵# 获取原始bbox的四个中点,然后将这四个点转换到旋转后的坐标系下rot_bboxes = list()for bbox in bboxes:xmin = bbox[0]ymin = bbox[1]xmax = bbox[2]ymax = bbox[3]point1 = np.dot(rot_mat, np.array([(xmin + xmax) / 2, ymin, 1]))point2 = np.dot(rot_mat, np.array([xmax, (ymin + ymax) / 2, 1]))point3 = np.dot(rot_mat, np.array([(xmin + xmax) / 2, ymax, 1]))point4 = np.dot(rot_mat, np.array([xmin, (ymin + ymax) / 2, 1]))# 合并np.arrayconcat = np.vstack((point1, point2, point3, point4))# 改变array类型concat = concat.astype(np.int32)# 得到旋转后的坐标rx, ry, rw, rh = cv2.boundingRect(concat)rx_min = rxry_min = ryrx_max = rx + rwry_max = ry + rh# 加入list中rot_bboxes.append([rx_min, ry_min, rx_max, ry_max])return rot_img, rot_bboxes# ---5.裁剪--- #def _crop_img_bboxes(self, img, bboxes):'''裁剪后的图片要包含所有的框输入:img:图像arraybboxes:该图像包含的所有boundingboxs,一个list,每个元素为[x_min, y_min, x_max, y_max],要确保是数值输出:crop_img:裁剪后的图像arraycrop_bboxes:裁剪后的bounding box的坐标list'''# 裁剪图像w = img.shape[1]h = img.shape[0]x_min = w  # 裁剪后的包含所有目标框的最小的框x_max = 0y_min = hy_max = 0for bbox in bboxes:x_min = min(x_min, bbox[0])y_min = min(y_min, bbox[1])x_max = max(x_max, bbox[2])y_max = max(y_max, bbox[3])d_to_left = x_min  # 包含所有目标框的最小框到左边的距离d_to_right = w - x_max  # 包含所有目标框的最小框到右边的距离d_to_top = y_min  # 包含所有目标框的最小框到顶端的距离d_to_bottom = h - y_max  # 包含所有目标框的最小框到底部的距离# 随机扩展这个最小框crop_x_min = int(x_min - random.uniform(0, d_to_left))crop_y_min = int(y_min - random.uniform(0, d_to_top))crop_x_max = int(x_max + random.uniform(0, d_to_right))crop_y_max = int(y_max + random.uniform(0, d_to_bottom))# 随机扩展这个最小框 , 防止别裁的太小# crop_x_min = int(x_min - random.uniform(d_to_left//2, d_to_left))# crop_y_min = int(y_min - random.uniform(d_to_top//2, d_to_top))# crop_x_max = int(x_max + random.uniform(d_to_right//2, d_to_right))# crop_y_max = int(y_max + random.uniform(d_to_bottom//2, d_to_bottom))# 确保不要越界crop_x_min = max(0, crop_x_min)crop_y_min = max(0, crop_y_min)crop_x_max = min(w, crop_x_max)crop_y_max = min(h, crop_y_max)crop_img = img[crop_y_min:crop_y_max, crop_x_min:crop_x_max]# 裁剪boundingbox# 裁剪后的boundingbox坐标计算crop_bboxes = list()for bbox in bboxes:crop_bboxes.append([bbox[0] - crop_x_min, bbox[1] - crop_y_min, bbox[2] - crop_x_min, bbox[3] - crop_y_min])return crop_img, crop_bboxes# ---6.平移--- #def _shift_pic_bboxes(self, img, bboxes):'''平移后的图片要包含所有的框输入:img:图像arraybboxes:该图像包含的所有boundingboxs,一个list,每个元素为[x_min, y_min, x_max, y_max],要确保是数值输出:shift_img:平移后的图像arrayshift_bboxes:平移后的bounding box的坐标list'''# 平移图像w = img.shape[1]h = img.shape[0]x_min = w  # 裁剪后的包含所有目标框的最小的框x_max = 0y_min = hy_max = 0for bbox in bboxes:x_min = min(x_min, bbox[0])y_min = min(y_min, bbox[1])x_max = max(x_max, bbox[2])y_max = max(y_max, bbox[3])d_to_left = x_min  # 包含所有目标框的最大左移动距离d_to_right = w - x_max  # 包含所有目标框的最大右移动距离d_to_top = y_min  # 包含所有目标框的最大上移动距离d_to_bottom = h - y_max  # 包含所有目标框的最大下移动距离x = random.uniform(-(d_to_left - 1) / 3, (d_to_right - 1) / 3)y = random.uniform(-(d_to_top - 1) / 3, (d_to_bottom - 1) / 3)M = np.float32([[1, 0, x], [0, 1, y]])  # x为向左或右移动的像素值,正为向右负为向左; y为向上或者向下移动的像素值,正为向下负为向上shift_img = cv2.warpAffine(img, M, (img.shape[1], img.shape[0]))#  平移boundingboxshift_bboxes = list()for bbox in bboxes:shift_bboxes.append([bbox[0] + x, bbox[1] + y, bbox[2] + x, bbox[3] + y])return shift_img, shift_bboxes# ---7.镜像--- #def _filp_pic_bboxes(self, img, bboxes):'''平移后的图片要包含所有的框输入:img:图像arraybboxes:该图像包含的所有boundingboxs,一个list,每个元素为[x_min, y_min, x_max, y_max],要确保是数值输出:flip_img:平移后的图像arrayflip_bboxes:平移后的bounding box的坐标list'''# 翻转图像flip_img = copy.deepcopy(img)h, w, _ = img.shapesed = random.random()if 0 < sed < 0.33:  # 0.33的概率水平翻转,0.33的概率垂直翻转,0.33是对角反转flip_img = cv2.flip(flip_img, 0)  # _flip_xinver = 0elif 0.33 < sed < 0.66:flip_img = cv2.flip(flip_img, 1)  # _flip_yinver = 1else:flip_img = cv2.flip(flip_img, -1)  # flip_x_yinver = -1# 调整boundingboxflip_bboxes = list()for box in bboxes:x_min = box[0]y_min = box[1]x_max = box[2]y_max = box[3]if inver == 0:# 0:垂直翻转flip_bboxes.append([x_min, h - y_max, x_max, h - y_min])elif inver == 1:# 1:水平翻转flip_bboxes.append([w - x_max, y_min, w - x_min, y_max])elif inver == -1:# -1:水平垂直翻转flip_bboxes.append([w - x_max, h - y_max, w - x_min, h - y_min])return flip_img, flip_bboxes# 图像增强方法def dataAugment(self, img, bboxes):'''图像增强输入:img:图像arraybboxes:该图像的所有框坐标输出:img:增强后的图像bboxes:增强后图片对应的box'''change_num = 0  # 改变的次数# print('------')while change_num < 1:  # 默认至少有一种数据增强生效if self.is_rotate_img_bbox:if random.random() > self.rotation_rate:  # 旋转change_num += 1angle = random.uniform(-self.max_rotation_angle, self.max_rotation_angle)scale = random.uniform(0.7, 0.8)img, bboxes = self._rotate_img_bbox(img, bboxes, angle, scale)if self.is_shift_pic_bboxes:if random.random() < self.shift_rate:  # 平移change_num += 1img, bboxes = self._shift_pic_bboxes(img, bboxes)if self.is_changeLight:if random.random() > self.change_light_rate:  # 改变亮度change_num += 1img = self._changeLight(img)if self.is_addNoise:if random.random() < self.add_noise_rate:  # 加噪声change_num += 1img = self._addNoise(img)if self.is_cutout:if random.random() < self.cutout_rate:  # cutoutchange_num += 1img = self._cutout(img, bboxes, length=self.cut_out_length, n_holes=self.cut_out_holes,threshold=self.cut_out_threshold)if self.is_filp_pic_bboxes:if random.random() < self.flip_rate:  # 翻转change_num += 1img, bboxes = self._filp_pic_bboxes(img, bboxes)return img, bboxes# xml解析工具
class ToolHelper():# 从xml文件中提取bounding box信息, 格式为[[x_min, y_min, x_max, y_max, name]]def parse_xml(self, path):'''输入:xml_path: xml的文件路径输出:从xml文件中提取bounding box信息, 格式为[[x_min, y_min, x_max, y_max, name]]'''tree = ET.parse(path)root = tree.getroot()objs = root.findall('object')coords = list()for ix, obj in enumerate(objs):name = obj.find('name').textbox = obj.find('bndbox')x_min = int(box[0].text)y_min = int(box[1].text)x_max = int(box[2].text)y_max = int(box[3].text)coords.append([x_min, y_min, x_max, y_max, name])return coords# 保存图片结果def save_img(self, file_name, save_folder, img):cv2.imwrite(os.path.join(save_folder, file_name), img)# 保持xml结果def save_xml(self, file_name, save_folder, img_info, height, width, channel, bboxs_info):''':param file_name:文件名:param save_folder:#保存的xml文件的结果:param height:图片的信息:param width:图片的宽度:param channel:通道:return:'''folder_name, img_name = img_info  # 得到图片的信息E = objectify.ElementMaker(annotate=False)anno_tree = E.annotation(E.folder(folder_name),E.filename(img_name),E.path(os.path.join(folder_name, img_name)),E.source(E.database('Unknown'),),E.size(E.width(width),E.height(height),E.depth(channel)),E.segmented(0),)labels, bboxs = bboxs_info  # 得到边框和标签信息for label, box in zip(labels, bboxs):anno_tree.append(E.object(E.name(label),E.pose('Unspecified'),E.truncated('0'),E.difficult('0'),E.bndbox(E.xmin(box[0]),E.ymin(box[1]),E.xmax(box[2]),E.ymax(box[3]))))etree.ElementTree(anno_tree).write(os.path.join(save_folder, file_name), pretty_print=True)if __name__ == '__main__':need_aug_num = 5  # 每张图片需要增强的次数is_endwidth_dot = True  # 文件是否以.jpg或者png结尾dataAug = DataAugmentForObjectDetection()  # 数据增强工具类toolhelper = ToolHelper()  # 工具# 获取相关参数parser = argparse.ArgumentParser()parser.add_argument('--source_img_path', type=str, default=r'F:\yolov5\datasets\splitsets\train\images')parser.add_argument('--source_xml_path', type=str, default=r'F:\yolov5\datasets\splitsets\train\labels')parser.add_argument('--save_img_path', type=str, default=r'F:\yolov5\datasets\splitsets\train\enhance_images')parser.add_argument('--save_xml_path', type=str, default=r'F:\yolov5\datasets\splitsets\train\enhance_labels')args = parser.parse_args()source_img_path = args.source_img_path  # 图片原始位置source_xml_path = args.source_xml_path  # xml的原始位置save_img_path = args.save_img_path  # 图片增强结果保存文件save_xml_path = args.save_xml_path  # xml增强结果保存文件# 如果保存文件夹不存在就创建if not os.path.exists(save_img_path):os.mkdir(save_img_path)if not os.path.exists(save_xml_path):os.mkdir(save_xml_path)for parent, _, files in os.walk(source_img_path):files.sort()for file in files:cnt = 0pic_path = os.path.join(parent, file)xml_path = os.path.join(source_xml_path, file[:-4] + '.xml')values = toolhelper.parse_xml(xml_path)  # 解析得到box信息,格式为[[x_min,y_min,x_max,y_max,name]]coords = [v[:4] for v in values]  # 得到框labels = [v[-1] for v in values]  # 对象的标签# 如果图片是有后缀的if is_endwidth_dot:# 找到文件的最后名字dot_index = file.rfind('.')_file_prefix = file[:dot_index]  # 文件名的前缀_file_suffix = file[dot_index:]  # 文件名的后缀img = cv2.imread(pic_path)# show_pic(img, coords)  # 显示原图while cnt < need_aug_num:  # 继续增强auged_img, auged_bboxes = dataAug.dataAugment(img, coords)auged_bboxes_int = np.array(auged_bboxes).astype(np.int32)height, width, channel = auged_img.shape  # 得到图片的属性img_name = '{}_{}{}'.format(_file_prefix, cnt + 1, _file_suffix)  # 图片保存的信息toolhelper.save_img(img_name, save_img_path,auged_img)  # 保存增强图片toolhelper.save_xml('{}_{}.xml'.format(_file_prefix, cnt + 1),save_xml_path, (save_img_path, img_name), height, width, channel,(labels, auged_bboxes_int))  # 保存xml文件# show_pic(auged_img, auged_bboxes)  # 强化后的图print(img_name)cnt += 1  # 继续增强下一张
3、修改运行
- 修改文件路径

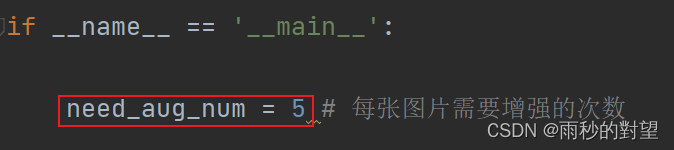
- 这里设置增强5次
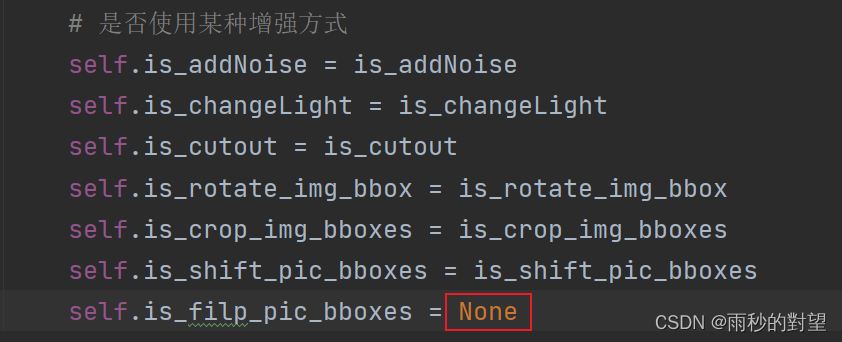
- 选用特定方法,这里选择不使用镜像,修改格式如下:
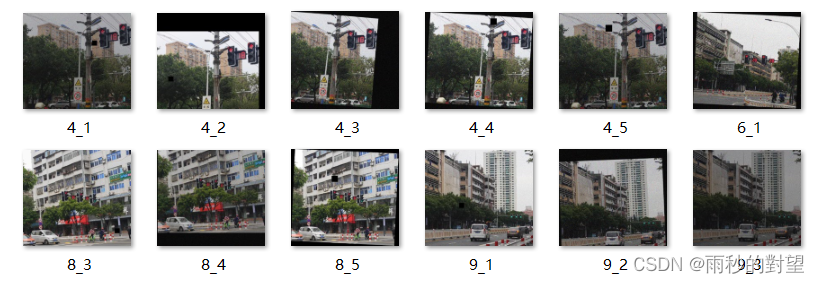
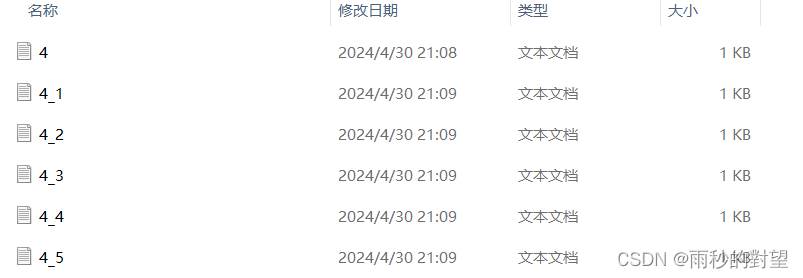
下面为增强之后的图片效果,这里可以看到每张图片增强5次
注意事项
深度学习中训练集需要数据增强,验证集和测试集不需要做数据增强
1、验证集和测试集不需要扩充,数据扩充指针对训练集。2、比例指的是对原始数据划分的比例,不考虑增强后的。3、首先要明白做数据增强的意义,是为了利用现有训练集的数据,通过增强变换获得更丰富的信息,从而在测试集(验证机)上获得更好的泛化能力;4、如果先做增强再进行数据集的划分,那么会出现信息泄露的问题,导致同一张图片增强后的多张图片分别出现在训练集和测试集(验证集),那么由于在训练集里见过相似度很高的图片,测试(验证)的准确率就会很高,这时的测试准确率结果是不可靠的。
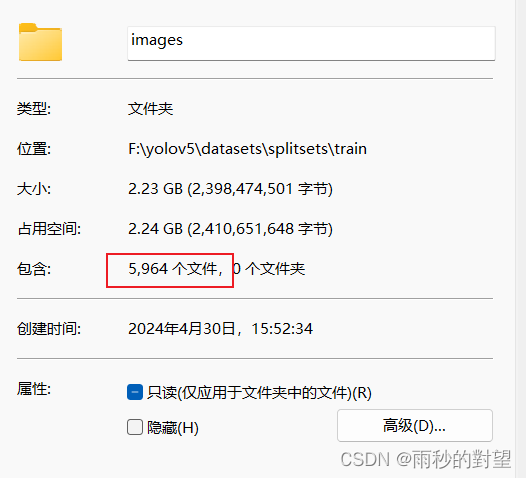
将增强后的数据与原数据合并,最终得到5964张照片
4、将xml文件转为txt文件
YOLO识别的格式为txt,这里将xml转成txt,代码如下:
import xml.etree.ElementTree as ET
import os
from os import getcwd
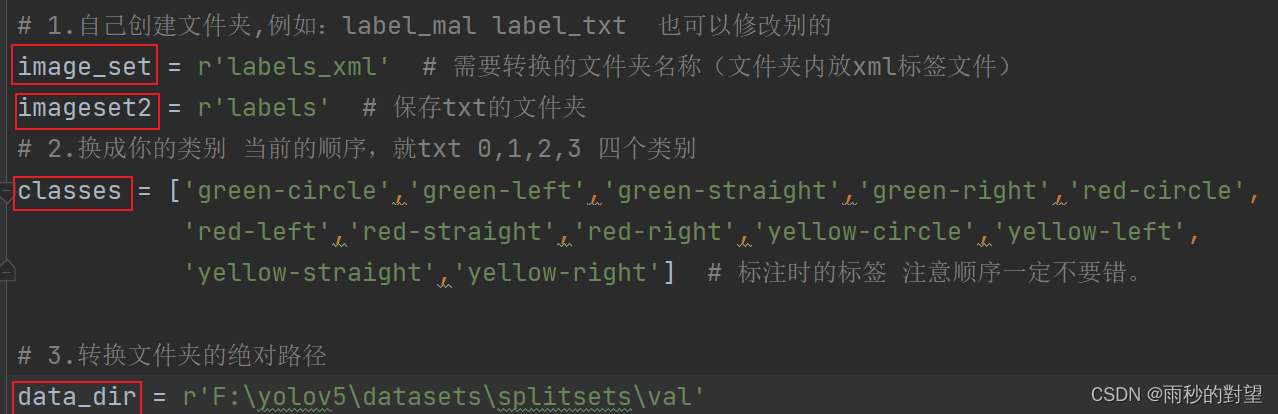
import glob# 1.自己创建文件夹,例如:label_mal label_txt 也可以修改别的
image_set = r'labels_xml' # 需要转换的文件夹名称(文件夹内放xml标签文件)
imageset2 = r'labels' # 保存txt的文件夹
# 2.换成你的类别 当前的顺序,就txt 0,1,2,3 四个类别
classes = ['green-circle','green-left','green-straight','green-right','red-circle','red-left','red-straight','red-right','yellow-circle','yellow-left','yellow-straight','yellow-right'] # 标注时的标签 注意顺序一定不要错。# 3.转换文件夹的绝对路径
data_dir = r'F:\yolov5\datasets\splitsets\train''''
xml中框的左上角坐标和右下角坐标(x1,y1,x2,y2)
》》txt中的中心点坐标和宽和高(x,y,w,h),并且归一化
'''def convert(size, box):dw = 1. / size[0]dh = 1. / size[1]x = (box[0] + box[1]) / 2.0y = (box[2] + box[3]) / 2.0w = box[1] - box[0]h = box[3] - box[2]x = x * dww = w * dwy = y * dhh = h * dhreturn (x, y, w, h)def convert_annotation(data_dir, imageset1, imageset2, image_id):in_file = open(data_dir + '/%s/%s.xml' % (imageset1, image_id), encoding='UTF-8') # 读取xmlout_file = open(data_dir + '/%s/%s.txt' % (imageset2, image_id), 'w', encoding='UTF-8') # 保存txttree = ET.parse(in_file)root = tree.getroot()size = root.find('size')w = int(size.find('width').text)h = int(size.find('height').text)for obj in root.iter('object'):difficult = obj.find('difficult').textcls = obj.find('name').textif cls not in classes or int(difficult) == 1:continuecls_id = classes.index(cls) # 获取类别索引xmlbox = obj.find('bndbox')b = (float(xmlbox.find('xmin').text), float(xmlbox.find('xmax').text), float(xmlbox.find('ymin').text),float(xmlbox.find('ymax').text))bb = convert((w, h), b)out_file.write(str(cls_id) + " " + " ".join([str('%.6f' % a) for a in bb]) + '\n')image_ids = []
for x in glob.glob(data_dir + '/%s' % image_set + '/*.xml'):image_ids.append(os.path.basename(x)[:-4])
print('\n%s数量:' % image_set, len(image_ids)) # 确认数量
i = 0
for image_id in image_ids:i = i + 1convert_annotation(data_dir, image_set, imageset2, image_id)print("%s 数据:%s/%s文件完成!" % (image_set, i, len(image_ids)))print("Done!!!")
修改代码中的路径与类别数量
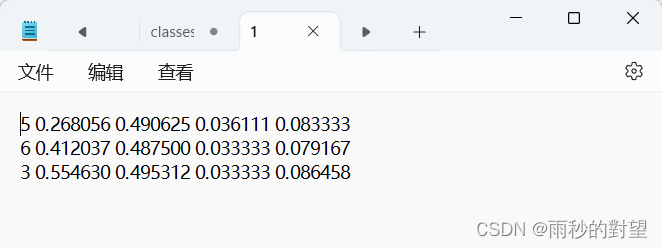
最终将格式转成txt格式!
操作完成之后,文件夹的结构如下所示:
好了,到这一步关于数据集的处理到此结束,接下来就是开始训练的阶段!