目录
项目搭建
初始化three.js基础代码
添加汽车模型展示
动态修改汽车模型
今天简单实现一个three.js的小Demo,加强自己对three知识的掌握与学习,只有在项目中才能灵活将所学知识运用起来,话不多说直接开始。
项目搭建
本案例还是借助框架书写three项目,借用vite构建工具搭建vue项目,vite这个构建工具如果有不了解的朋友,可以参考我之前对其讲解的文章:vite脚手架的搭建与使用 。搭建完成之后,用编辑器打开该项目,在终端执行 npm i 安装一下依赖,安装完成之后终端在安装 npm i three 即可。
因为我搭建的是vue3项目,为了便于代码的可读性,所以我将three.js代码单独抽离放在一个组件当中,在App根组件中进入引入该组件。具体如下:
<template><!-- 汽车展览 --><autoShow></autoShow>
</template><script setup>
import autoShow from './components/autoShow.vue';
</script><style lang="less">*{margin: 0;padding: 0;}
</style>
初始化three.js基础代码
three.js开启必须用到的基础代码如下:
导入three库:
import * as THREE from 'three'初始化场景:
const scene = new THREE.Scene()初始化相机:
const camera = new THREE.PerspectiveCamera(75,window.innerWidth / window.innerHeight,0.1,1000)
camera.position.set(0,2,6)初始化渲染器:
const renderer = new THREE.WebGLRenderer({antialias: true // 设置抗锯齿
})
renderer.setSize(window.innerWidth,window.innerHeight)监听屏幕大小的改变,修改渲染器的宽高和相机的比例:
window.addEventListener("resize",()=>{ renderer.setSize(window.innerWidth,window.innerHeight)camera.aspect = window.innerWidth/window.innerHeightcamera.updateProjectionMatrix()
})导入控制器:
import { OrbitControls } from "three/examples/jsm/controls/OrbitControls"
// 实例化控制器
const controls = new OrbitControls(camera,renderer.domElement)设置渲染函数:
const render = () =>{ renderer.render(scene,camera) // 渲染场景requestAnimationFrame(render) // 循环渲染
}进行挂载:
在html代码处创建一个div,然后通过ref获取其dom元素,在页面刚挂载的时候将渲染器插入到dom当中去,如下:

onMounted(()=>{// 添加控制器const controls = new OrbitControls(camera,canvas.value)controls.enableDamping = true canvas.value.appendChild(renderer.domElement) // 将渲染器插入到dom中// 初始化渲染器,渲染背景scene.background = new THREE.Color("#ccc")scene.environment = new THREE.Color("#ccc")render()
})
添加汽车模型展示
在添加汽车模型之前,我们可以先创建一个网格地面,然后让汽车模型更具有立体效果:
// 添加网格地面
const gridHelper = new THREE.GridHelper(10,10)
gridHelper.material.opacity = 0.2
gridHelper.material.transparent = true
scene.add(gridHelper)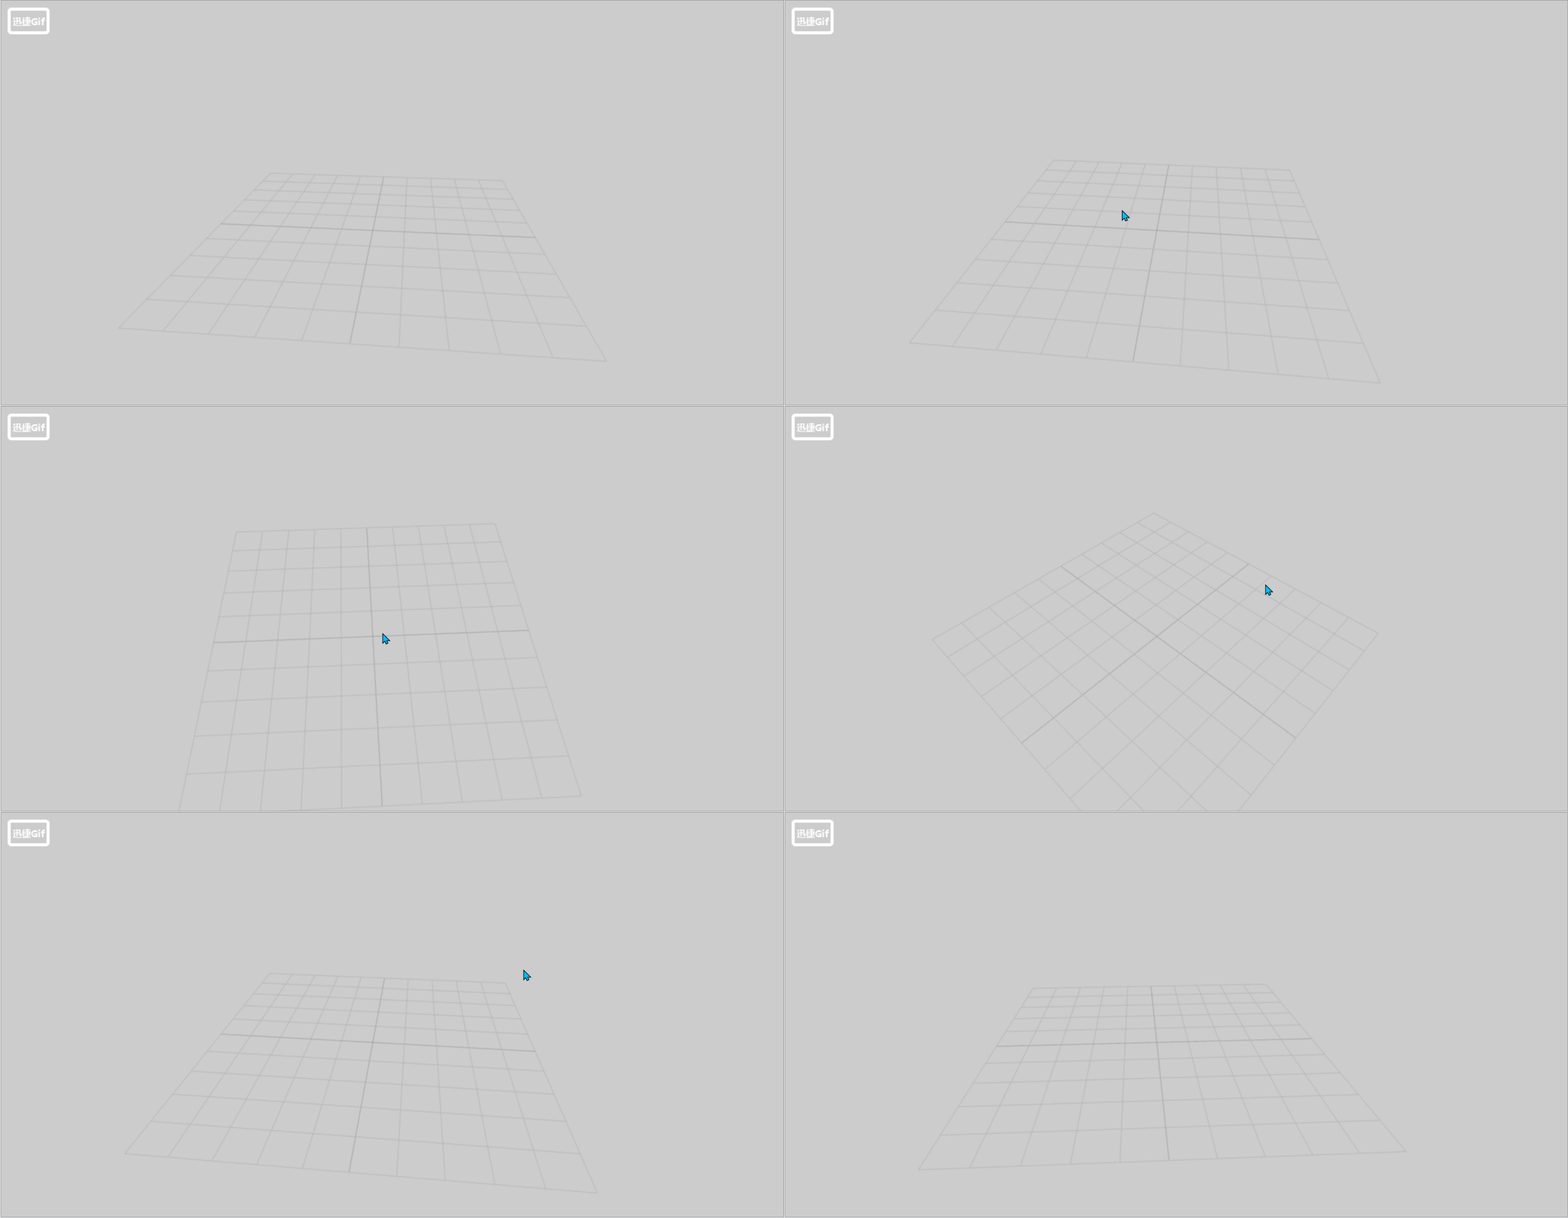
接下来就可以添加汽车模型,让汽车模型在网格地面上展示,如下:
// 先导入加载gltf模型和压缩模型的库
import { GLTFLoader } from "three/examples/jsm/loaders/GLTFLoader";
import { DRACOLoader } from "three/examples/jsm/loaders/DRACOLoader";// 添加gltf汽车模型
const loader = new GLTFLoader()
const dracoLoader = new DRACOLoader()
dracoLoader.setDecoderPath("/draco/")
loader.setDRACOLoader(dracoLoader)
loader.load("src/assets/model/bmw01.glb",(gltf)=>{scene.add(gltf.scene)
})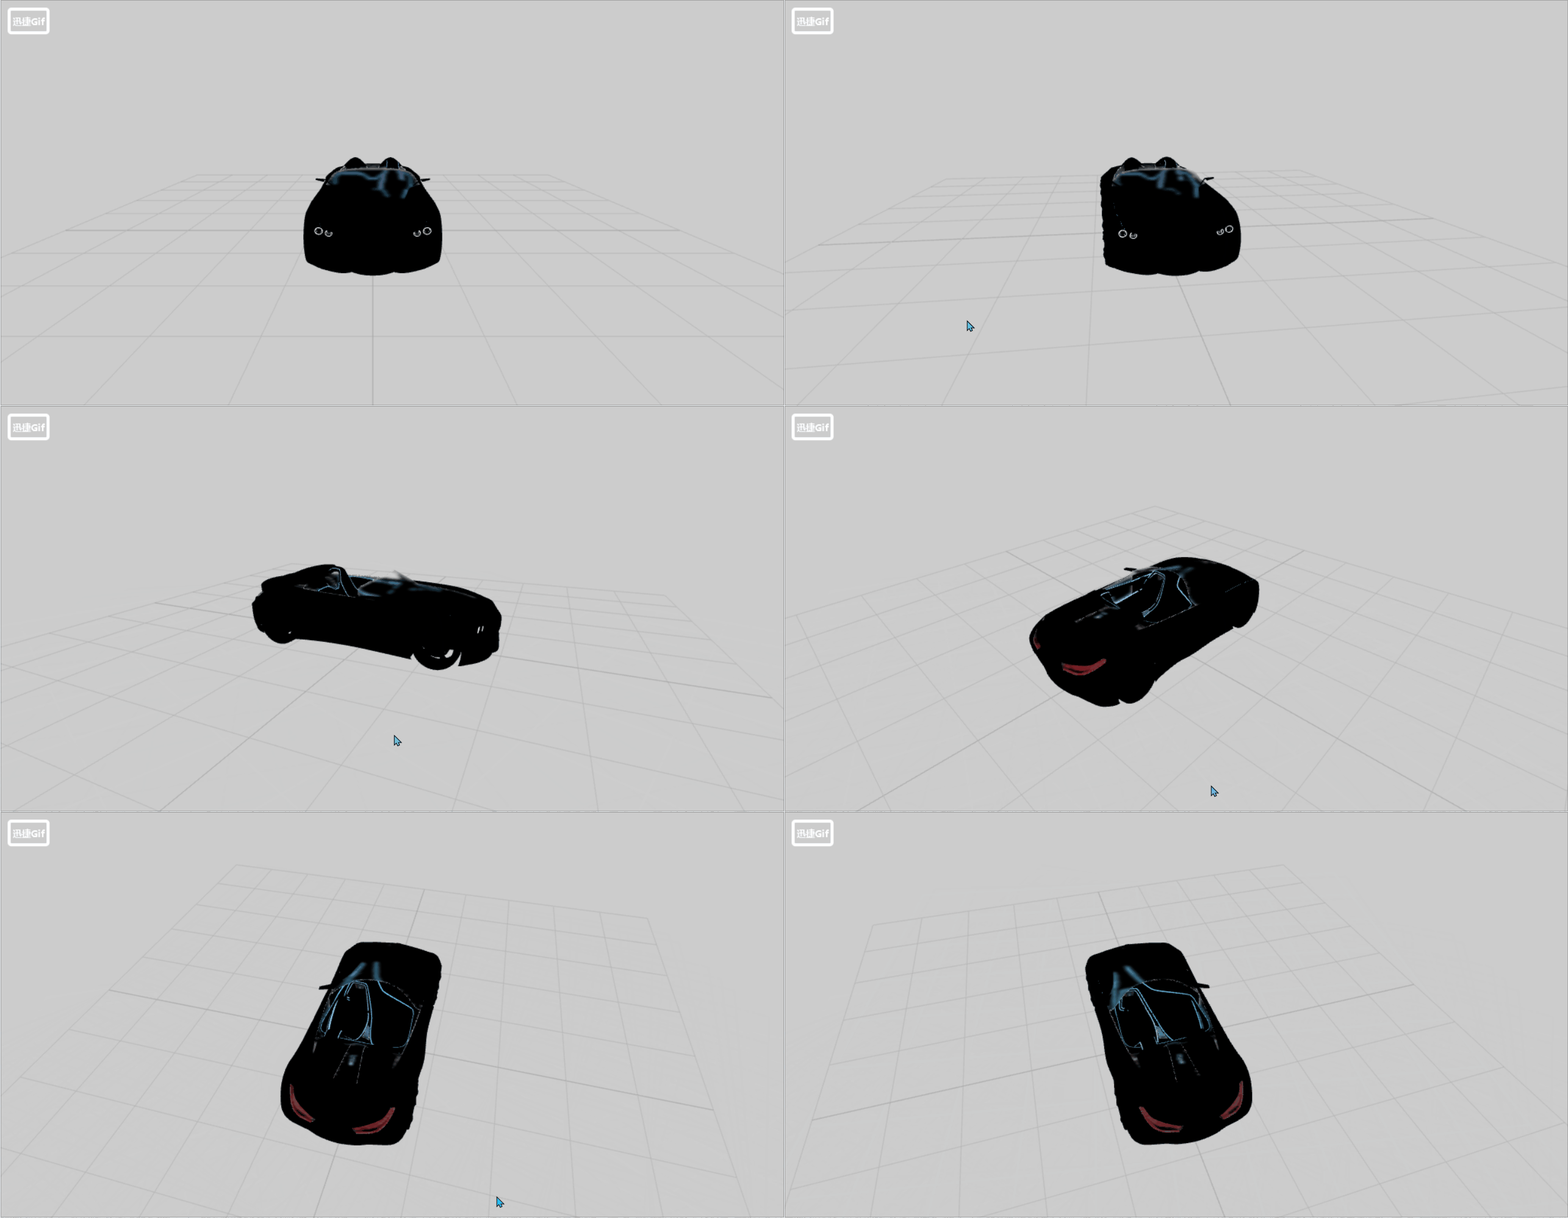
因为汽车展览的话,推荐平行光更具有立体效果,不建议直接使用环境光:
// 添加灯光
const light1 = new THREE.DirectionalLight(0xffffff, 0.7);
light1.position.set(0, 0, 10);
scene.add(light1);
const light2 = new THREE.DirectionalLight(0xffffff, 0.7);
light2.position.set(0, 0, -10);
scene.add(light2);
const light3 = new THREE.DirectionalLight(0xffffff, 0.7);
light3.position.set(10, 0, 0);
scene.add(light3);
const light4 = new THREE.DirectionalLight(0xffffff, 0.7);
light4.position.set(-10, 0, 0);
scene.add(light4);
const light5 = new THREE.DirectionalLight(0xffffff, 0.7);
light5.position.set(0, 10, 0);
scene.add(light5);
const light6 = new THREE.DirectionalLight(0xffffff, 0.3);
light6.position.set(5, 10, 0);
scene.add(light6);
const light7 = new THREE.DirectionalLight(0xffffff, 0.3);
light7.position.set(0, 10, 5);
scene.add(light7);
const light8 = new THREE.DirectionalLight(0xffffff, 0.3);
light8.position.set(0, 10, -5);
scene.add(light8);
const light9 = new THREE.DirectionalLight(0xffffff, 0.3);
light9.position.set(-5, 10, 0);
scene.add(light9);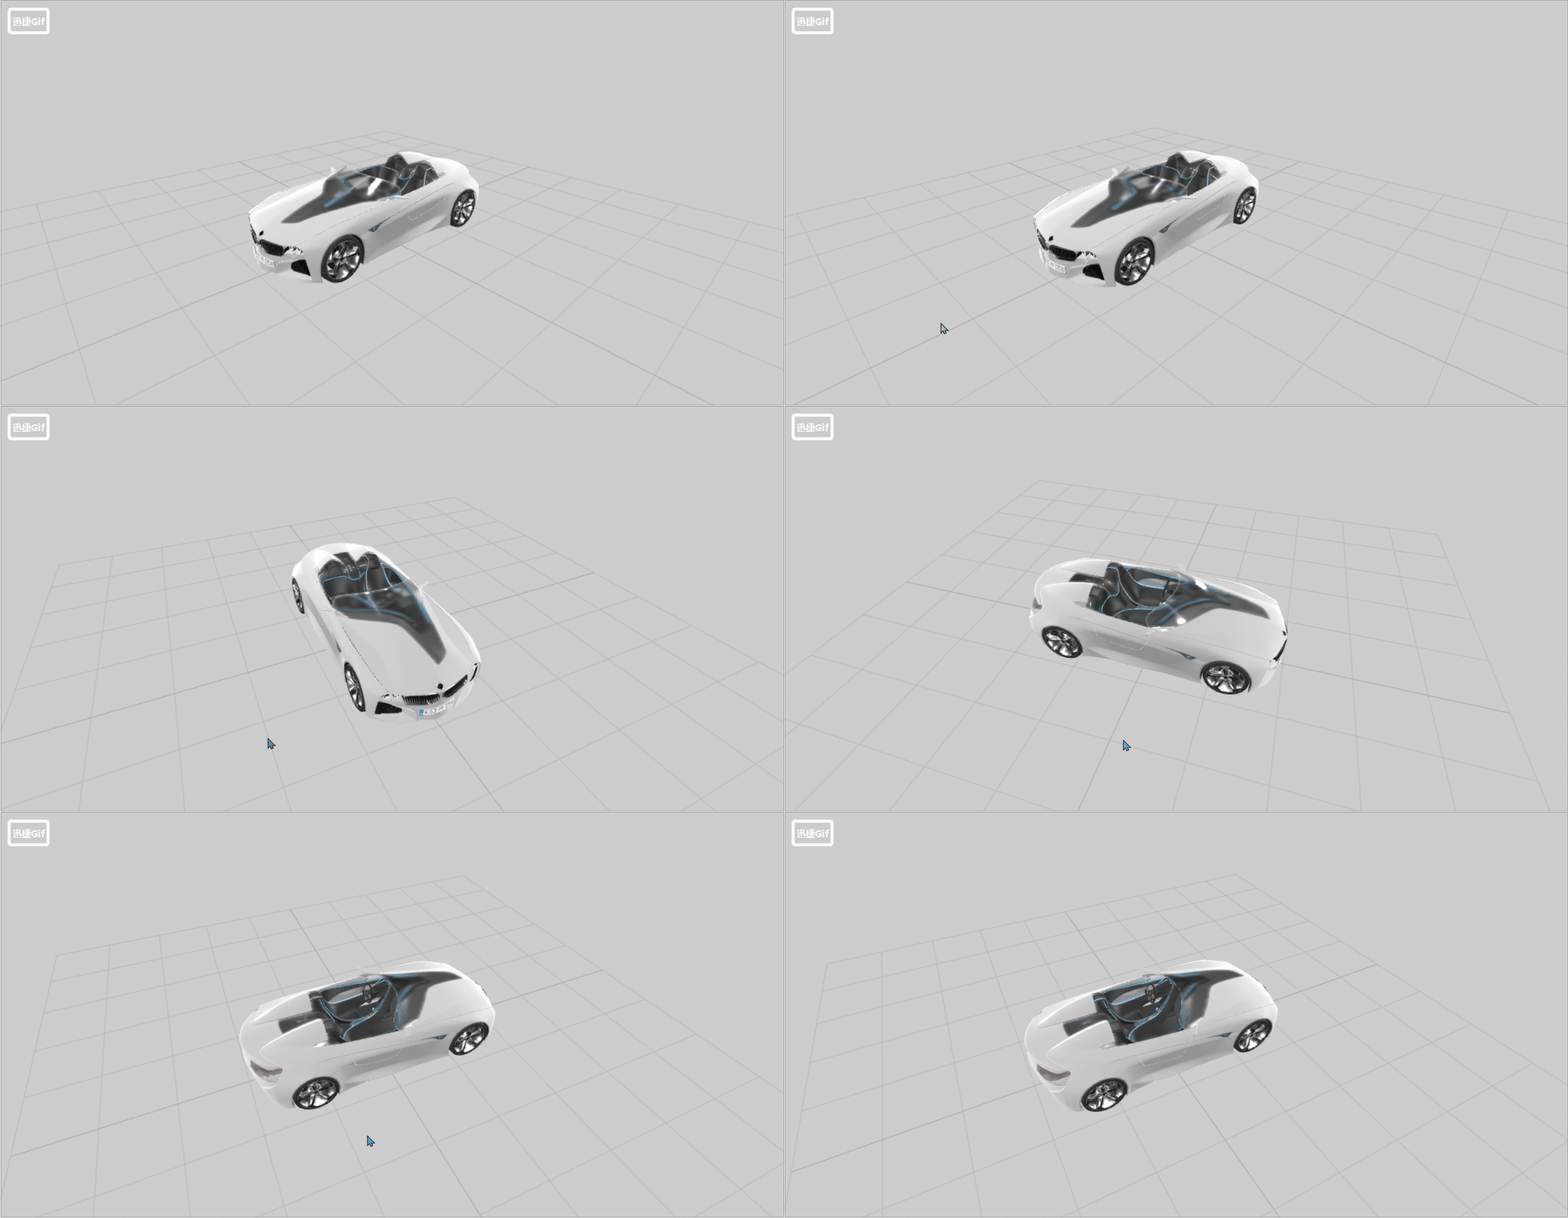
动态修改汽车模型
因为3d建模生成的gltf模型会给我们标记好名字,所以我们只需要找到并拿来使用即可,如下:

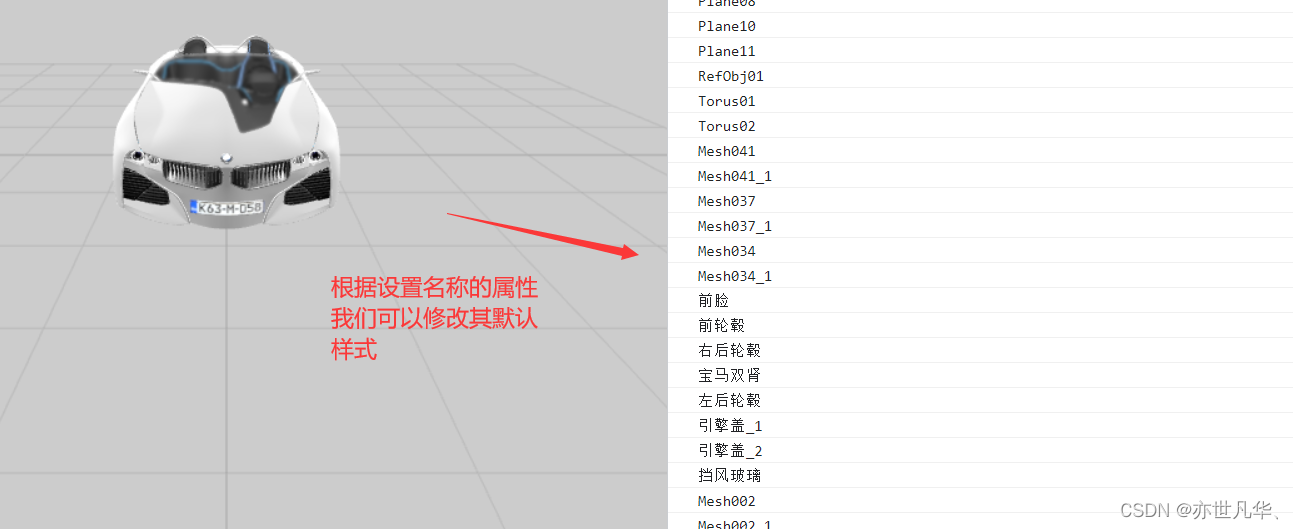
如果想动态修改数据的话,可以借助一个gui库,关于gui库的讲解可以参看我之前讲解的文章:Gui.js库的使用讲解 ,在这里就不再赘述,这里我们为每一个汽车模型部位都创建一个物理材质然后进行动态的修改:
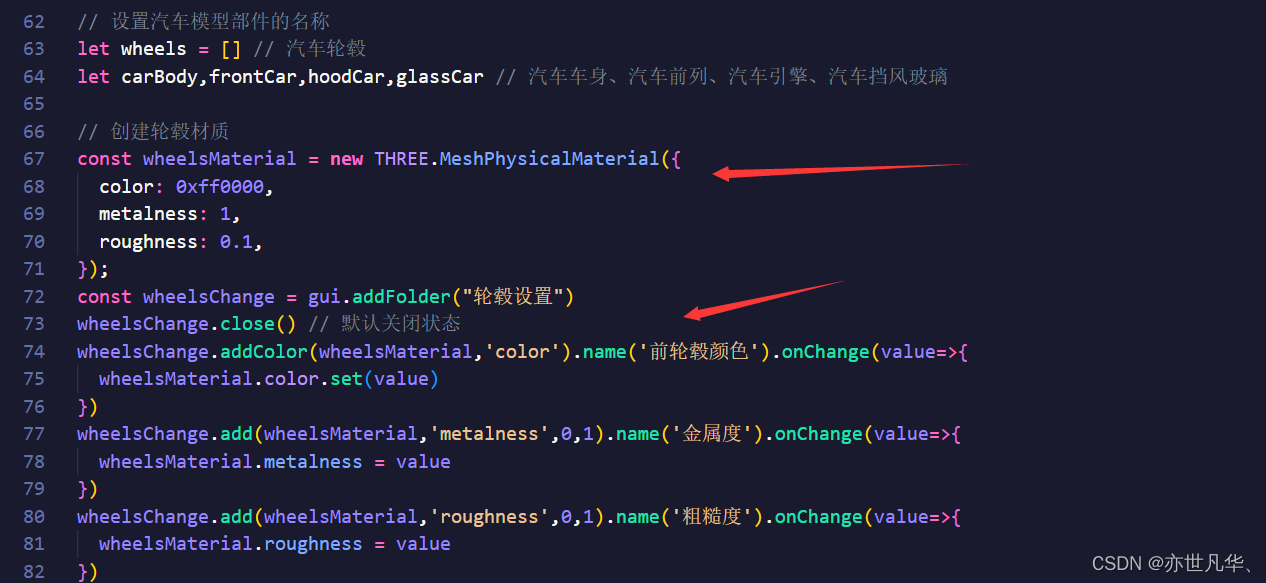
将动态修改材质的数据添加到汽车模型材质上去,这里我用switch动态的去判断各种情况,如下:
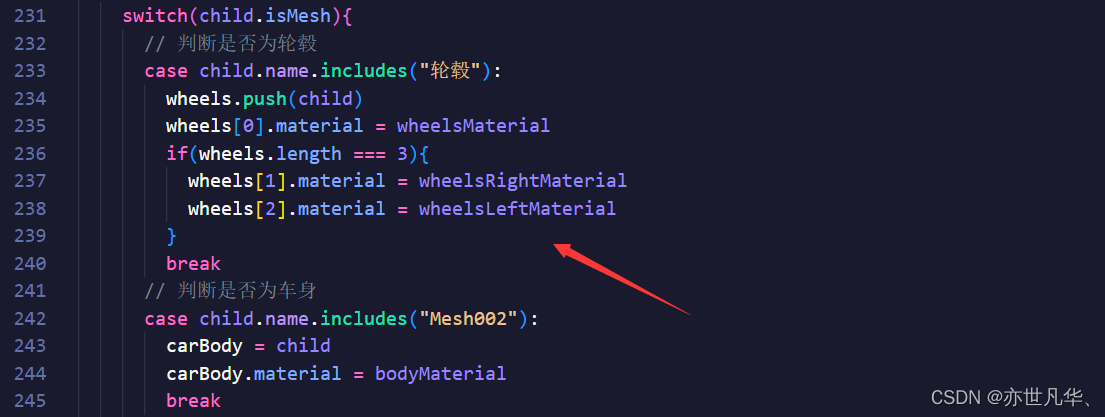
大体的思路就是上面了,ok可以简单看一下最后呈现的效果是啥,如下:
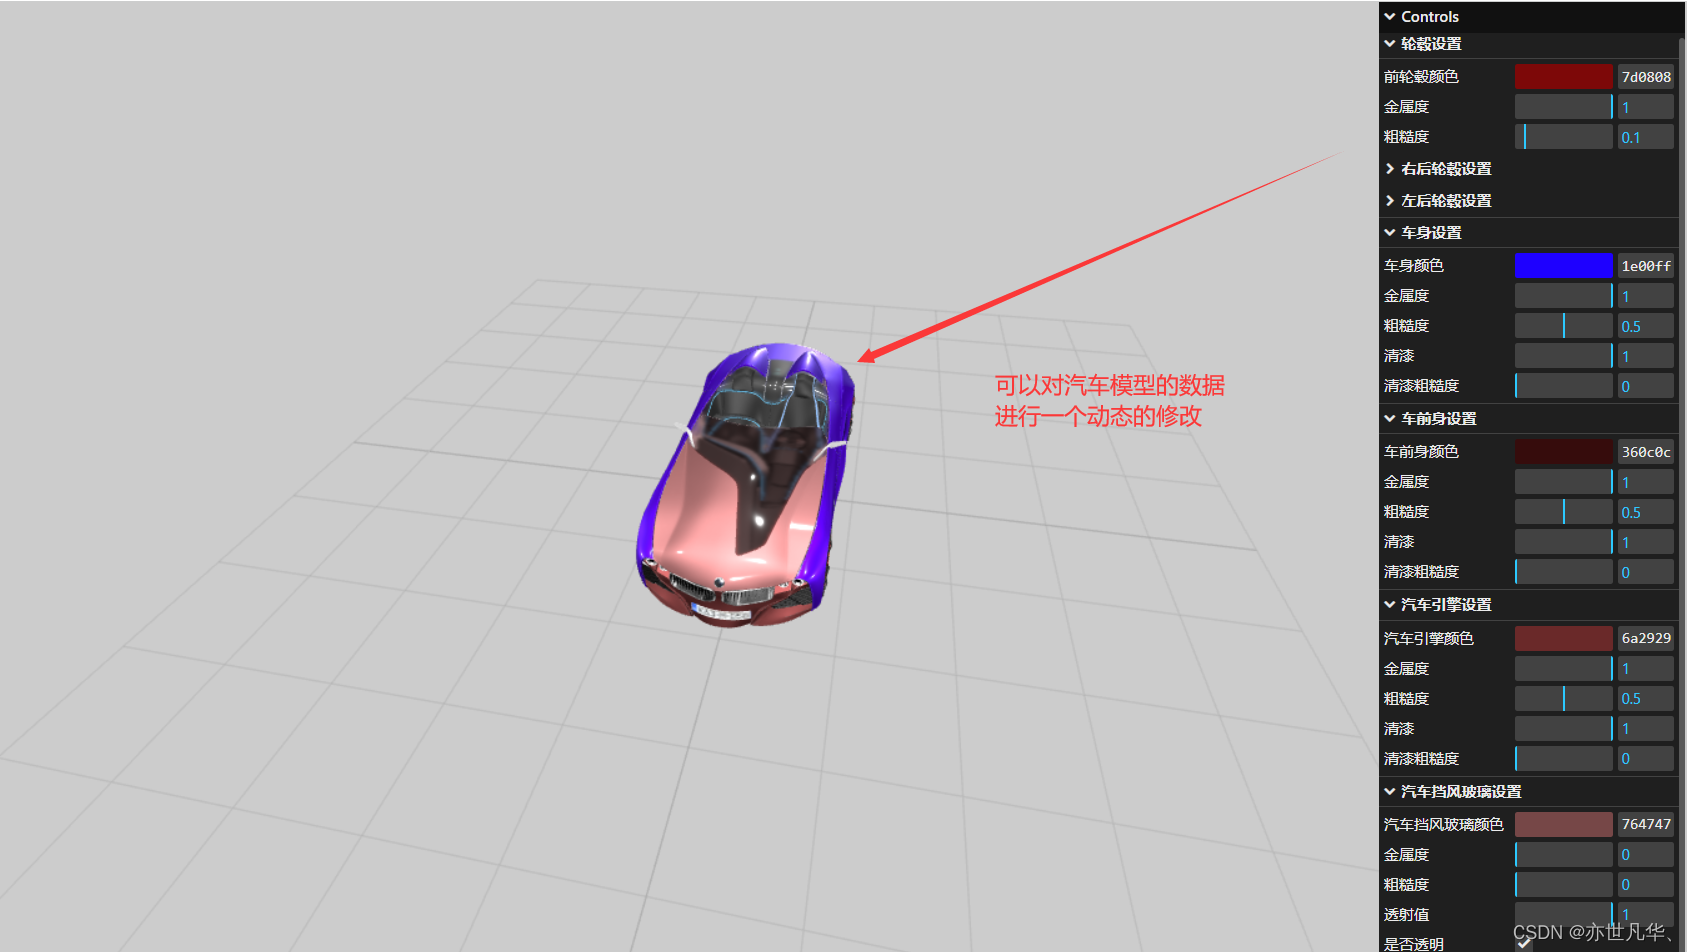
demo做完,给出本案例的完整代码:(获取素材也可以私信博主)
<template><div class="home"><div class="canvas-container" ref="canvas"></div></div>
</template><script setup>
import * as THREE from "three"
import { onMounted,ref } from "vue";
// 添加轨道控制器
import { OrbitControls } from 'three/examples/jsm/controls/OrbitControls'
import { GLTFLoader } from "three/examples/jsm/loaders/GLTFLoader";
import { DRACOLoader } from "three/examples/jsm/loaders/DRACOLoader";
// 引入gui.js库
import { GUI } from 'three/examples/jsm/libs/lil-gui.module.min.js'
// 实例化一个gui对象
const gui = new GUI()let canvas = ref(null)// 创建场景
const scene = new THREE.Scene()
// 创建相机
const camera = new THREE.PerspectiveCamera(75,window.innerWidth / window.innerHeight,0.1,1000)
camera.position.set(0,2,6)
// 创建渲染器
const renderer = new THREE.WebGLRenderer({antialias: true // 设置抗锯齿
})
renderer.setSize(window.innerWidth,window.innerHeight)// 设置渲染函数
const render = () =>{ renderer.render(scene,camera)requestAnimationFrame(render)
}// 监听页面变化
window.addEventListener("resize",()=>{ renderer.setSize(window.innerWidth,window.innerHeight)camera.aspect = window.innerWidth/window.innerHeightcamera.updateProjectionMatrix()
})onMounted(()=>{// 添加控制器const controls = new OrbitControls(camera,canvas.value)controls.enableDamping = true canvas.value.appendChild(renderer.domElement) // 将渲染器插入到dom中// 初始化渲染器,渲染背景scene.background = new THREE.Color("#ccc")scene.environment = new THREE.Color("#ccc")render()
})// 添加网格地面
const gridHelper = new THREE.GridHelper(10,10)
gridHelper.material.opacity = 0.2
gridHelper.material.transparent = true
scene.add(gridHelper)// 设置汽车模型部件的名称
let wheels = [] // 汽车轮毂
let carBody,frontCar,hoodCar,glassCar // 汽车车身、汽车前列、汽车引擎、汽车挡风玻璃// 创建轮毂材质
const wheelsMaterial = new THREE.MeshPhysicalMaterial({color: 0xff0000,metalness: 1,roughness: 0.1,
});
const wheelsChange = gui.addFolder("轮毂设置")
wheelsChange.close() // 默认关闭状态
wheelsChange.addColor(wheelsMaterial,'color').name('前轮毂颜色').onChange(value=>{wheelsMaterial.color.set(value)
})
wheelsChange.add(wheelsMaterial,'metalness',0,1).name('金属度').onChange(value=>{wheelsMaterial.metalness = value
})
wheelsChange.add(wheelsMaterial,'roughness',0,1).name('粗糙度').onChange(value=>{wheelsMaterial.roughness = value
})
// 创建右后轮毂材质
const wheelsRightMaterial = new THREE.MeshPhysicalMaterial({color: 0xff0000,metalness: 1,roughness: 0.1,
});
const wheelsRightChange = wheelsChange.addFolder("右后轮毂设置")
wheelsRightChange.close() // 默认关闭状态
wheelsRightChange.addColor(wheelsRightMaterial,'color').name('右后轮毂颜色').onChange(value=>{wheelsRightMaterial.color.set(value)
})
wheelsRightChange.add(wheelsRightMaterial,'metalness',0,1).name('金属度').onChange(value=>{wheelsRightMaterial.metalness = value
})
wheelsRightChange.add(wheelsRightMaterial,'roughness',0,1).name('粗糙度').onChange(value=>{wheelsRightMaterial.roughness = value
})
// 创建轮毂材质
const wheelsLeftMaterial = new THREE.MeshPhysicalMaterial({color: 0xff0000,metalness: 1,roughness: 0.1,
});
const wheelsLeftChange = wheelsChange.addFolder("左后轮毂设置")
wheelsLeftChange.close() // 默认关闭状态
wheelsLeftChange.addColor(wheelsLeftMaterial,'color').name('左后轮毂颜色').onChange(value=>{wheelsLeftMaterial.color.set(value)
})
wheelsLeftChange.add(wheelsLeftMaterial,'metalness',0,1).name('金属度').onChange(value=>{wheelsLeftMaterial.metalness = value
})
wheelsLeftChange.add(wheelsLeftMaterial,'roughness',0,1).name('粗糙度').onChange(value=>{wheelsLeftMaterial.roughness = value
})// 创建车身材质
const bodyMaterial = new THREE.MeshPhysicalMaterial({color: 0xff0000,metalness: 1,roughness: 0.5,clearcoat: 1,clearcoatRoughness: 0,
})
const carBodyChange = gui.addFolder("车身设置")
carBodyChange.close() // 默认关闭状态
carBodyChange.addColor(bodyMaterial,'color').name('车身颜色').onChange(value=>{bodyMaterial.color.set(value)
})
carBodyChange.add(bodyMaterial,'metalness',0,1).name('金属度').onChange(value=>{bodyMaterial.metalness = value
})
carBodyChange.add(bodyMaterial,'roughness',0,1).name('粗糙度').onChange(value=>{bodyMaterial.roughness = value
})
carBodyChange.add(bodyMaterial,'clearcoat',0,1).name('清漆').onChange(value=>{bodyMaterial.clearcoat = value
})
carBodyChange.add(bodyMaterial,'clearcoatRoughness',0,1).name('清漆粗糙度').onChange(value=>{bodyMaterial.clearcoatRoughness = value
})// 创建车前列材质
const frontMaterial = new THREE.MeshPhysicalMaterial({color: 0xff0000,metalness: 1,roughness: 0.5,clearcoat: 1,clearcoatRoughness: 0,
})
const frontCarChange = gui.addFolder("车前身设置")
frontCarChange.close() // 默认关闭状态
frontCarChange.addColor(frontMaterial,'color').name('车前身颜色').onChange(value=>{frontMaterial.color.set(value)
})
frontCarChange.add(frontMaterial,'metalness',0,1).name('金属度').onChange(value=>{frontMaterial.metalness = value
})
frontCarChange.add(frontMaterial,'roughness',0,1).name('粗糙度').onChange(value=>{frontMaterial.roughness = value
})
frontCarChange.add(frontMaterial,'clearcoat',0,1).name('清漆').onChange(value=>{frontMaterial.clearcoat = value
})
frontCarChange.add(frontMaterial,'clearcoatRoughness',0,1).name('清漆粗糙度').onChange(value=>{frontMaterial.clearcoatRoughness = value
})// 创建汽车引擎材质
const hoodMaterial = new THREE.MeshPhysicalMaterial({color: 0xff0000,metalness: 1,roughness: 0.5,clearcoat: 1,clearcoatRoughness: 0,
});
const hoodCarChange = gui.addFolder("汽车引擎设置")
hoodCarChange.close() // 默认关闭状态
hoodCarChange.addColor(hoodMaterial,'color').name('汽车引擎颜色').onChange(value=>{hoodMaterial.color.set(value)
})
hoodCarChange.add(hoodMaterial,'metalness',0,1).name('金属度').onChange(value=>{hoodMaterial.metalness = value
})
hoodCarChange.add(hoodMaterial,'roughness',0,1).name('粗糙度').onChange(value=>{hoodMaterial.roughness = value
})
hoodCarChange.add(hoodMaterial,'clearcoat',0,1).name('清漆').onChange(value=>{hoodMaterial.clearcoat = value
})
hoodCarChange.add(hoodMaterial,'clearcoatRoughness',0,1).name('清漆粗糙度').onChange(value=>{hoodMaterial.clearcoatRoughness = value
})// 创建汽车挡风玻璃材质
const glassMaterial = new THREE.MeshPhysicalMaterial({color: 0xffffff,metalness: 0,roughness: 0,transmission: 1,transparent: true,
});
const glassCarChange = gui.addFolder("汽车挡风玻璃设置")
glassCarChange.close() // 默认关闭状态
glassCarChange.addColor(glassMaterial,'color').name('汽车挡风玻璃颜色').onChange(value=>{glassMaterial.color.set(value)
})
glassCarChange.add(glassMaterial,'metalness',0,1).name('金属度').onChange(value=>{glassMaterial.metalness = value
})
glassCarChange.add(glassMaterial,'roughness',0,1).name('粗糙度').onChange(value=>{glassMaterial.roughness = value
})
glassCarChange.add(glassMaterial,'transmission',0,1).name('透射值').onChange(value=>{glassMaterial.transmission = value
})
glassCarChange.add(glassMaterial,'transparent',0,1).name('是否透明').onChange(value=>{glassMaterial.transparent = value
})// 添加gltf汽车模型
const loader = new GLTFLoader()
const dracoLoader = new DRACOLoader()
dracoLoader.setDecoderPath("/draco/")
loader.setDRACOLoader(dracoLoader)
loader.load("src/assets/model/bmw01.glb",(gltf)=>{// traverse函数是一种用于遍历Object3D及其子对象的函数,可以访问场景中所有的Object3D类型对象(包括Mesh、Group、Object等)gltf.scene.traverse((child)=>{switch(child.isMesh){// 判断是否为轮毂case child.name.includes("轮毂"):wheels.push(child)wheels[0].material = wheelsMaterialif(wheels.length === 3){wheels[1].material = wheelsRightMaterialwheels[2].material = wheelsLeftMaterial}break// 判断是否为车身case child.name.includes("Mesh002"):carBody = childcarBody.material = bodyMaterialbreak// 判断是否是车前列case child.name.includes("前脸"):frontCar = childfrontCar.material = frontMaterialbreak// 判断是否为引擎盖case child.name.includes("引擎盖_1"):hoodCar = childhoodCar.material = hoodMaterialbreak// 判断是否为挡风玻璃case child.name.includes("挡风玻璃"):glassCar = childglassCar.material = glassMaterialbreakdefault:return }})scene.add(gltf.scene)
})// 添加灯光
const light1 = new THREE.DirectionalLight(0xffffff, 0.7);
light1.position.set(0, 0, 10);
scene.add(light1);
const light2 = new THREE.DirectionalLight(0xffffff, 0.7);
light2.position.set(0, 0, -10);
scene.add(light2);
const light3 = new THREE.DirectionalLight(0xffffff, 0.7);
light3.position.set(10, 0, 0);
scene.add(light3);
const light4 = new THREE.DirectionalLight(0xffffff, 0.7);
light4.position.set(-10, 0, 0);
scene.add(light4);
const light5 = new THREE.DirectionalLight(0xffffff, 0.7);
light5.position.set(0, 10, 0);
scene.add(light5);
const light6 = new THREE.DirectionalLight(0xffffff, 0.3);
light6.position.set(5, 10, 0);
scene.add(light6);
const light7 = new THREE.DirectionalLight(0xffffff, 0.3);
light7.position.set(0, 10, 5);
scene.add(light7);
const light8 = new THREE.DirectionalLight(0xffffff, 0.3);
light8.position.set(0, 10, -5);
scene.add(light8);
const light9 = new THREE.DirectionalLight(0xffffff, 0.3);
light9.position.set(-5, 10, 0);
scene.add(light9);
</script>

