前言
同步/异步的概念:
同步是指完成事务的逻辑,先执行第一个事务,如果阻塞了,会一直等待,直到这个事务完成,再执行第二个事务,顺序执行
异步是和同步相对的,异步是指在处理调用这个事务的之后,不会等待这个事务的处理结果,直接处理第二个事务去了,通过状态、通知、回调来通知调用者处理结果。
asyncio是python3.4版本引入到标准库
python3.5又加入了async/await特性。
背景
因为业务需求需要写一个接口,然后返回数据。但是这个接口需要执行程序,需要1分钟左右。
1、当接口需要执行长时间的程序时,浏览器必须等待程序运行结束并返回结果才能响应请求。
2、如果程序执行时间过长,浏览器会一直等待,这将影响用户的体验,因为用户需要等待很长时间才能得到响应。
3、改造成异步执行可以避免这种情况,因为异步执行可以使得程序不需要等待长时间的 IO 操作完成,而是让程序在进行这些操作时可以进行其他的计算任务,从而提高程序的效率和响应速度,从而提高用户体验。
原理
当我们使用 Python 进行异步编程时,使用异步调用可以提高程序的效率。异步调用是指程序在执行过程中可以在某些操作等待的时候切换到其他任务,从而提高程序的并发性能,简单来说就是通过利用 I/O 等待时间提高程序的执行效率。在 Python 中,通常我们使用 asyncio 库来实现异步调用。
介绍在 Python 中使用 asyncio 实现异步调用的一些常见操作和技巧
1. 使用 async/await
使用 async/await 是使用 asyncio 库的首选方法。使用这种方法可以把异步代码看作是顺序执行的代码,让代码更加易于编写和阅读。以下是使用 async/await 进行异步调用的一个简单示例:
import asyncioasync def my_coroutine():print('开始执行协程')await asyncio.sleep(1)print('协程执行完毕')async def main():print('开始执行主程序')await asyncio.gather(my_coroutine(),my_coroutine(),my_coroutine())print('主程序执行完毕')asyncio.run(main())
在上面的示例中,我们定义了一个
名为 my_coroutine 的协程,其中使用了 await asyncio.sleep(1) 来模拟等待 1 秒钟的操作。在主程序中,我们使用 asyncio.gather() 函数并行执行了 3 个 my_coroutine 协程,并等待它们全部执行完后输出了主程序执行完毕的提示。注意,在 Python 中使用 asyncio 进行异步编程,程序的入口点必须是一个协程,这个协程通常被称为主程序。
2. 使用 asyncio.ensure_future() 等价于 await
asyncio.ensure_future() 函数可以将协程或者一个 Future 对象封装成另一个 Future 对象,并触发其执行。相比于 Awaitable 协议,Future 有更广泛的用途,Future 可以由标准库中的其他库或者第三方库引入,可以在未来的时间点以其他方式进行操作。
以下是使用 asyncio.ensure_future() 函数并发执行多个协程的示例:
import asyncioasync def my_coroutine(i):print(f'协程 {i} 开始执行')await asyncio.sleep(1)print(f'协程 {i} 执行完毕')async def main():tasks = []for i in range(3):task = asyncio.ensure_future(my_coroutine(i))tasks.append(task)await asyncio.gather(*tasks)print('主程序执行完毕')asyncio.run(main())
·同步代码:
import timedef hello():time.sleep(1)def run():for i in range(5):hello()print('Hello World:%s' % time.time())  # 任何伟大的代码都是从Hello World 开始的!
if __name__ == '__main__':run()
·异步代码
import time
import asyncio# 定义异步函数
async def hello():await asyncio.sleep(1)print('Hello World:%s' % time.time())if __name__ =='__main__':loop = asyncio.get_event_loop()tasks = [hello() for i in range(5)]loop.run_until_complete(asyncio.wait(tasks))
async def 用来定义异步函数,await 表示当前协程任务等待睡眠时间,允许其他任务运行。然后获得一个事件循环,主线程调用asyncio.get_event_loop()时会创建事件循环,你需要把异步的任务丢给这个循环的run_until_complete()方法,事件循环会安排协同程序的执行。
3. 使用 asyncio.Queue
asyncio.Queue 类是一个基于协程的生产者-消费者队列,它可以让生产者和消费者通过异步编程方式交换数据。以下是使用 asyncio.Queue 实现生产者-消费者模式的示例:
import asyncio
import randomasync def producer(queue):while True:print('生产者正在生产数据...')data = random.randint(1, 100)await queue.put(data)await asyncio.sleep(1)async def consumer(queue):while True:print('消费者正在等待数据...')data = await queue.get()print(f'消费者消费了数据: {data}')async def main():queue = asyncio.Queue()producer_task = asyncio.ensure_future(producer(queue))consumer_task = asyncio.ensure_future(consumer(queue))await asyncio.gather(producer_task, consumer_task)asyncio.run(main())
在上面的示例中,我们定义了一个生产者协程和一个消费者协程,生产者负责往队列中生产数据,消费者则负责从队列中消费数据。在主程序中,我们使用 asyncio.Queue() 创建了一个队列,然后使用 asyncio.ensure_future() 来创建了生产者和消费者 task,最后使用 asyncio.gather() 同时执行了这两个 task。
使用 asyncio.Queue 不仅可以实现生产者-消费者模式,还可以实现多任务并发处理场景,例如使用多个生产者往队列中添加数据,使用多个消费者从队列中取数据进行处理等。
综上所述,Python 中的异步调用是通过 asyncio 库来实现的,通过 async/await 语法或者 asyncio.ensure_future() 函数可以创建协程对象,并使用 asyncio.gather() 函数并行执行这些协程,从而实现异步调用的目的。此外,asyncio.Queue 类可以用于实现生产者-消费者模式等多种异步编程场景。
异步数据返回
from flask import Flask, jsonify, request
import time
import threadingapp = Flask(__name__)# Dictionary to store task status and results
tasks = {}def perform_task(task_id):# Simulating a time-consuming tasktime.sleep(5)# Update task status and resulttasks[task_id]['status'] = 'completed'tasks[task_id]['result'] = 'Task completed successfully'@app.route('/task', methods=['GET'])
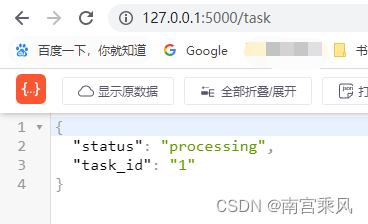
def create_task():# Generate a unique task IDtask_id = str(len(tasks) + 1)# Create a new task with initial status as 'processing'tasks[task_id] = {'status': 'processing', 'result': None}# Start a new thread to perform the task asynchronouslythread = threading.Thread(target=perform_task, args=(task_id,))thread.start()return jsonify({'task_id': task_id, 'status': 'processing'})@app.route('/task/<task_id>', methods=['GET'])
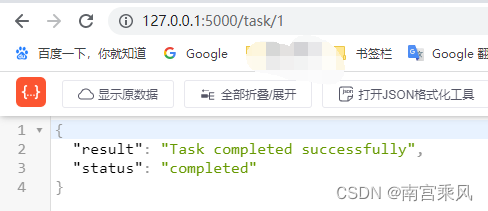
def get_task_status(task_id):if task_id in tasks:task_status = tasks[task_id]['status']task_result = tasks[task_id]['result']if task_status == 'completed':# Task completed, return the resultreturn jsonify({'status': task_status, 'result': task_result})else:# Task still processing, return the statusreturn jsonify({'status': task_status})else:# Invalid task IDreturn jsonify({'error': 'Invalid task ID'}), 404if __name__ == '__main__':app.run(debug=True)
在访问接口task时,会生成一个信息存入到{},然后异步执行任务。网页会自动跳转到/task/id 等待数据返回。
其实也可以使用Flask 的Celery 更加方便 简单。
参考文档:
https://juejin.cn/post/6992116138398187533
https://www.cnblogs.com/shenh/p/9090586.html
https://www.cnblogs.com/shenh/p/15401891.html
实战代码
from flask import Flask, jsonify, request, make_responsefrom testrunner import LabourRunnerapp = Flask(__name__)
app.config["SEND_FILE_MAX_AGE_DEFAULT"] = 300
app.config["timeout"] = 60@app.errorhandler(400)def par_err(error):return make_response(jsonify({'code': '400', 'msg': '请求参数不合法'}), 400)@app.errorhandler(404)def page_not_found(error):return make_response(jsonify({'code': '404', 'msg': '请求参数不合法'}), 404)@app.route('/actuator/health', methods=['GET', 'HEAD'])
def health():return jsonify({'online': True})@app.route('/api/autotest')
def autotest():dir_path = request.args.get('dir_path')print(dir_path)# TODO: 在这里添加对 path 和 file 参数的处理逻辑# ...if not dir_path:# return make_response(jsonify({'code': '404', 'msg': '请求参数不合法'}), 404)return "请传入数据"s = LabourRunner()dest_name = s.runner(dir_path)file_url = "https://uat-xxx.xxxx.com/static/" + dest_nameresult = {'path': dir_path, 'dest_name': file_url}return resultif __name__ == "__main__":app.run(host="0.0.0.0", port=5000, debug=True)
实战代码异步优化
import threading
import timefrom flask import Flask, jsonify, request, make_response, url_for, redirectfrom testrunner import LabourRunnerapp = Flask(__name__)
app.config["SEND_FILE_MAX_AGE_DEFAULT"] = 300
app.config["timeout"] = 60
tasks = {}@app.errorhandler(400)def par_err(error):return make_response(jsonify({'code': '400', 'msg': '请求参数不合法'}), 400)@app.errorhandler(404)def page_not_found(error):return make_response(jsonify({'code': '404', 'msg': '请求参数不合法'}), 404)@app.route('/actuator/health', methods=['GET', 'HEAD'])
def health():return jsonify({'online': True})def perform_task(task_id, dir_path):# Simulating a time-consuming tasks = LabourRunner()dest_name = s.runner(dir_path)file_url = "https://uat-xxxx.xxxx.com/static/" + dest_name# Update task status and resulttasks[task_id]['status'] = file_urltasks[task_id]['result'] = dir_path@app.route('/api/autotest', methods=['GET'])
def autotest():task_id = str(len(tasks) + 1)tasks[task_id] = {'status': 'processing', 'result': None}dir_path = request.args.get('dir_path')# TODO: 在这里添加对 path 和 file 参数的处理逻辑# ...if not dir_path:error_msg = {'code': 400, 'msg': '请求参数不合法或者文件夹不存在'}return jsonify(error_msg), 400# return "请传入数据"thread = threading.Thread(target=perform_task, args=(task_id, dir_path,))thread.start()return redirect(url_for('get_task_status', task_id=task_id))@app.route('/api/autotest/<task_id>', methods=['GET'])
def get_task_status(task_id):if task_id in tasks:task_status = tasks[task_id]['status']task_result = tasks[task_id]['result']if task_status == 'completed':# Task completed, return the resultreturn jsonify({'status': task_status, 'result': task_result})else:# Task still processing, return the statusreturn jsonify({'status': task_status})else:# Invalid task IDreturn jsonify({'error': 'Invalid task ID'}), 404if __name__ == "__main__":app.run(host="0.0.0.0", port=5000, debug=True)