读书笔记,来自于:《android 群英传》第六章
并非原创,只是把书中的例子敲了一遍,做个记录。
关键类: ColorMatrix --颜色矩阵
关键方法:
↓1, ColorMatrix.setRotate(int axis, float degree);
<span style="font-family:Comic Sans MS;">/*** 设置色调* int axis:RGB标志,0 代表 RED, 1 代表 GREEN, 2 代表BLUE* 如果需要分别设置RGB的话,就需要调用三次,传入不同的 axis值* * float degree: 控制具体的颜色,这里取值范围并非0-255,系统用了角度计算颜色值,* 所以取值的时候是以0-360为颜色变化范围,取值超出此范围,呈周期性变化*/ColorMatrix rotateMatrix = new ColorMatrix();rotateMatrix.setRotate(0, rotate);rotateMatrix.setRotate(1, rotate);rotateMatrix.setRotate(2, rotate);</span>↓2, ColorMatrix.setSaturation(float sat);
<span style="font-family:Comic Sans MS;"> /*** 设置饱和度* float set:取值范围未知,* 0 为灰度图,纯黑白, 1 为与原图一样,但是取值可以更大*/ColorMatrix saturatinoMatrix = new ColorMatrix();saturatinoMatrix.setSaturation(saturation);</span>↓3, ColorMatrix.setScale();
</pre><pre name="code" class="java"><span style="font-family:Comic Sans MS;">/*** 设置亮度* 原理是光的三原色同比例混合最终效果为白色,因此在在亮度上将* RGB的值等比例混合,值给到足够大时,就会变成纯白效果,* 同样,没有亮度的时候就是黑色* float rScale:红* float gScale:绿* float bScale:蓝* float aScale:透明度* 取值范围未知,0时为纯黑,但是1时不一定纯白*/ColorMatrix scaleMatrix = new ColorMatrix();scaleMatrix.setScale(scale, scale, scale, 1);</span>
↓4, ColorMatrix.postContant(ColorMatrix colorMatrix);
<span style="font-family:Comic Sans MS;">/*** postConcat(ColorMatrix colorMatrix)* 将多个ColorMatrix效果混合* 之前试过将饱和度,亮度,色调设置到同一个ColorMatrix对象里面,* 从而可以不使用postConcat()方法混合多个ColorMatrix对象,* 但是色调和亮度设置会失效,原因还没研究*/ColorMatrix colorMatrix = new ColorMatrix();colorMatrix.postConcat(rotateMatrix);colorMatrix.postConcat(saturatinoMatrix);colorMatrix.postConcat(scaleMatrix);</span>
简单应用示例:
效果图:
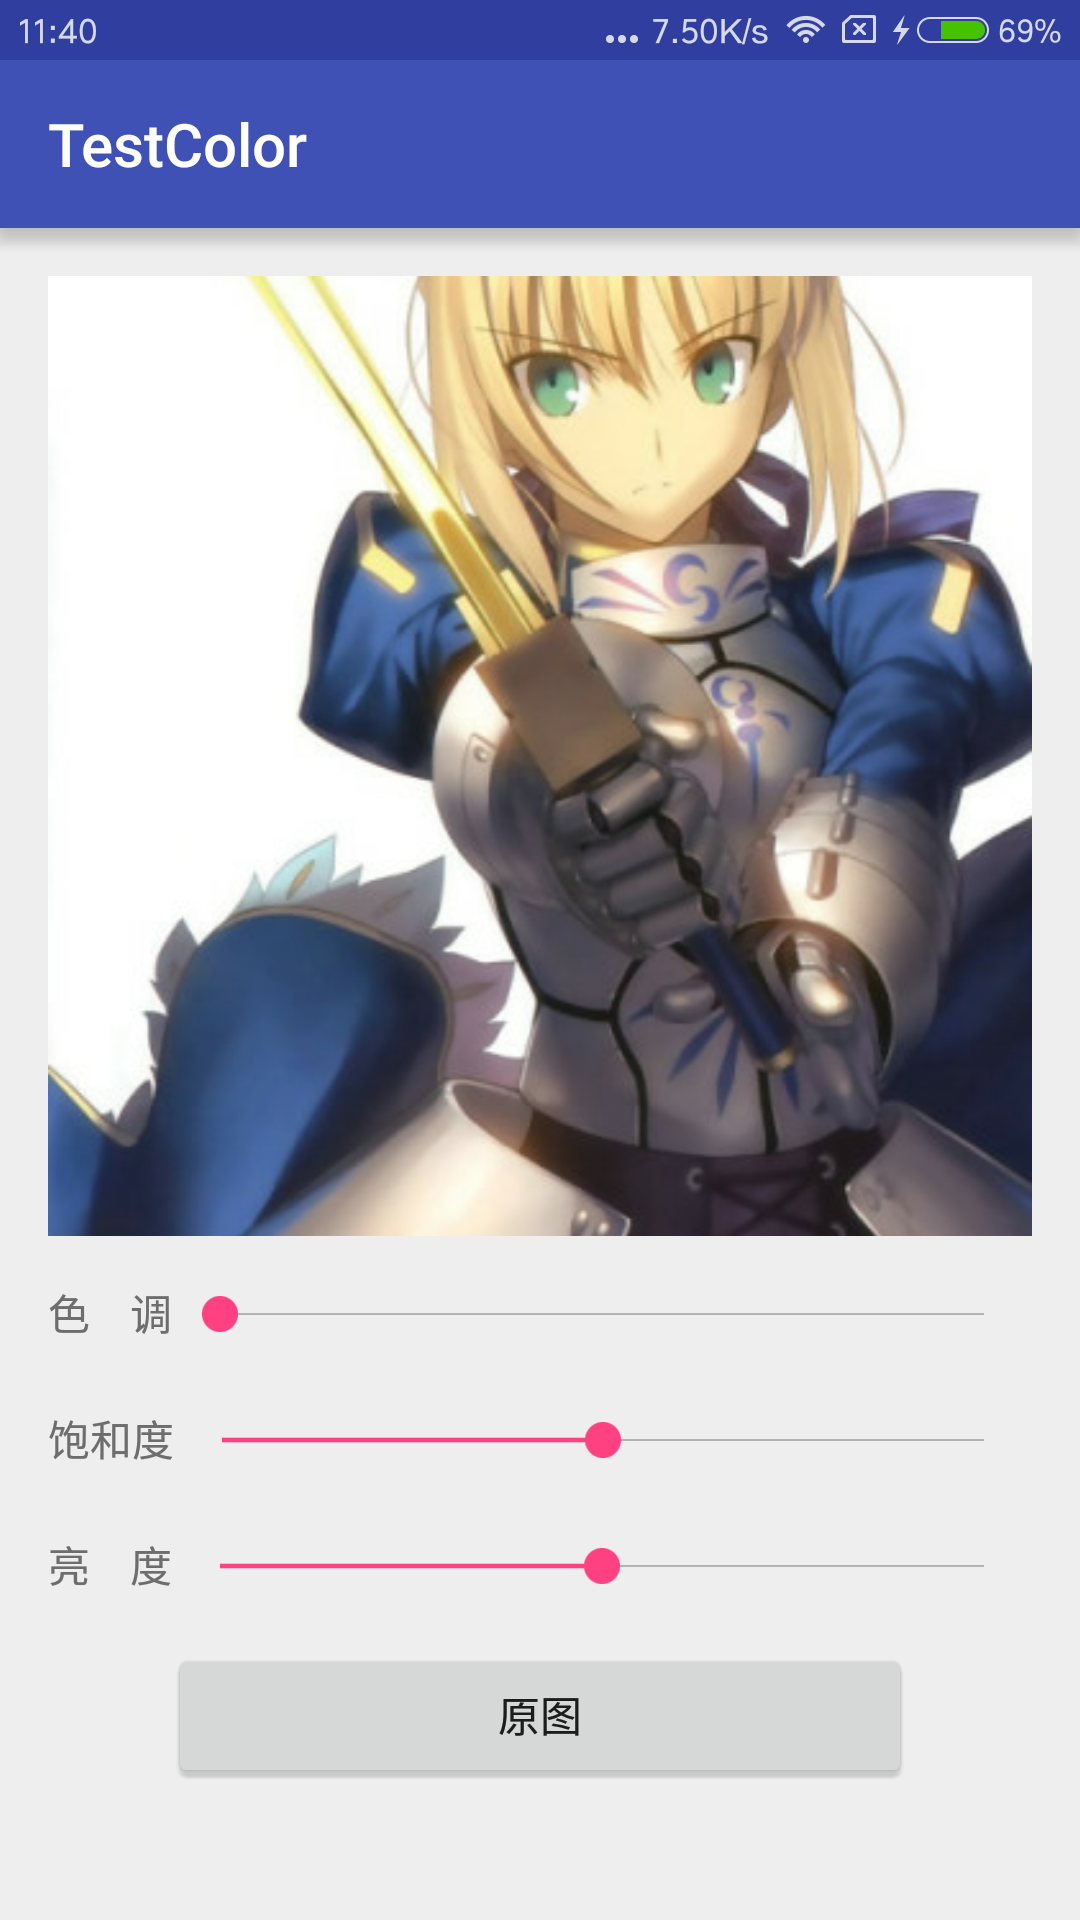
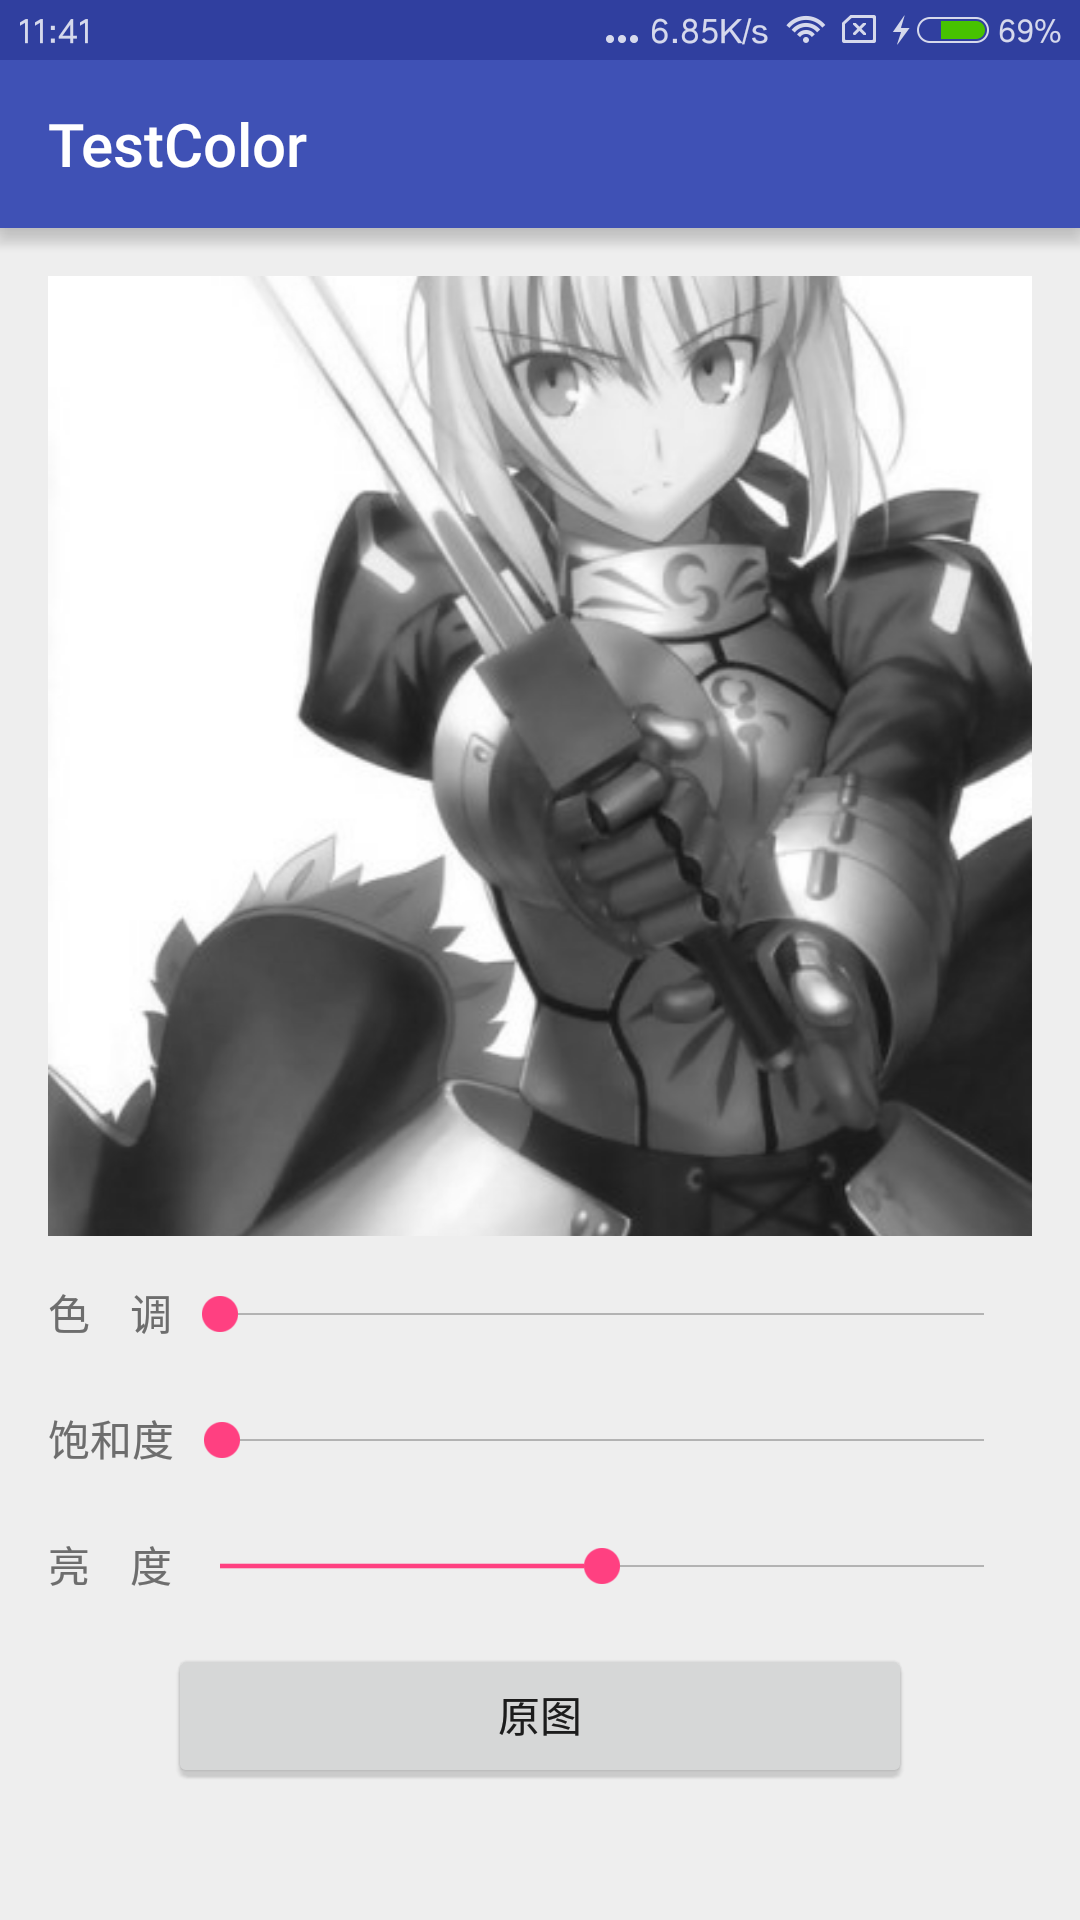
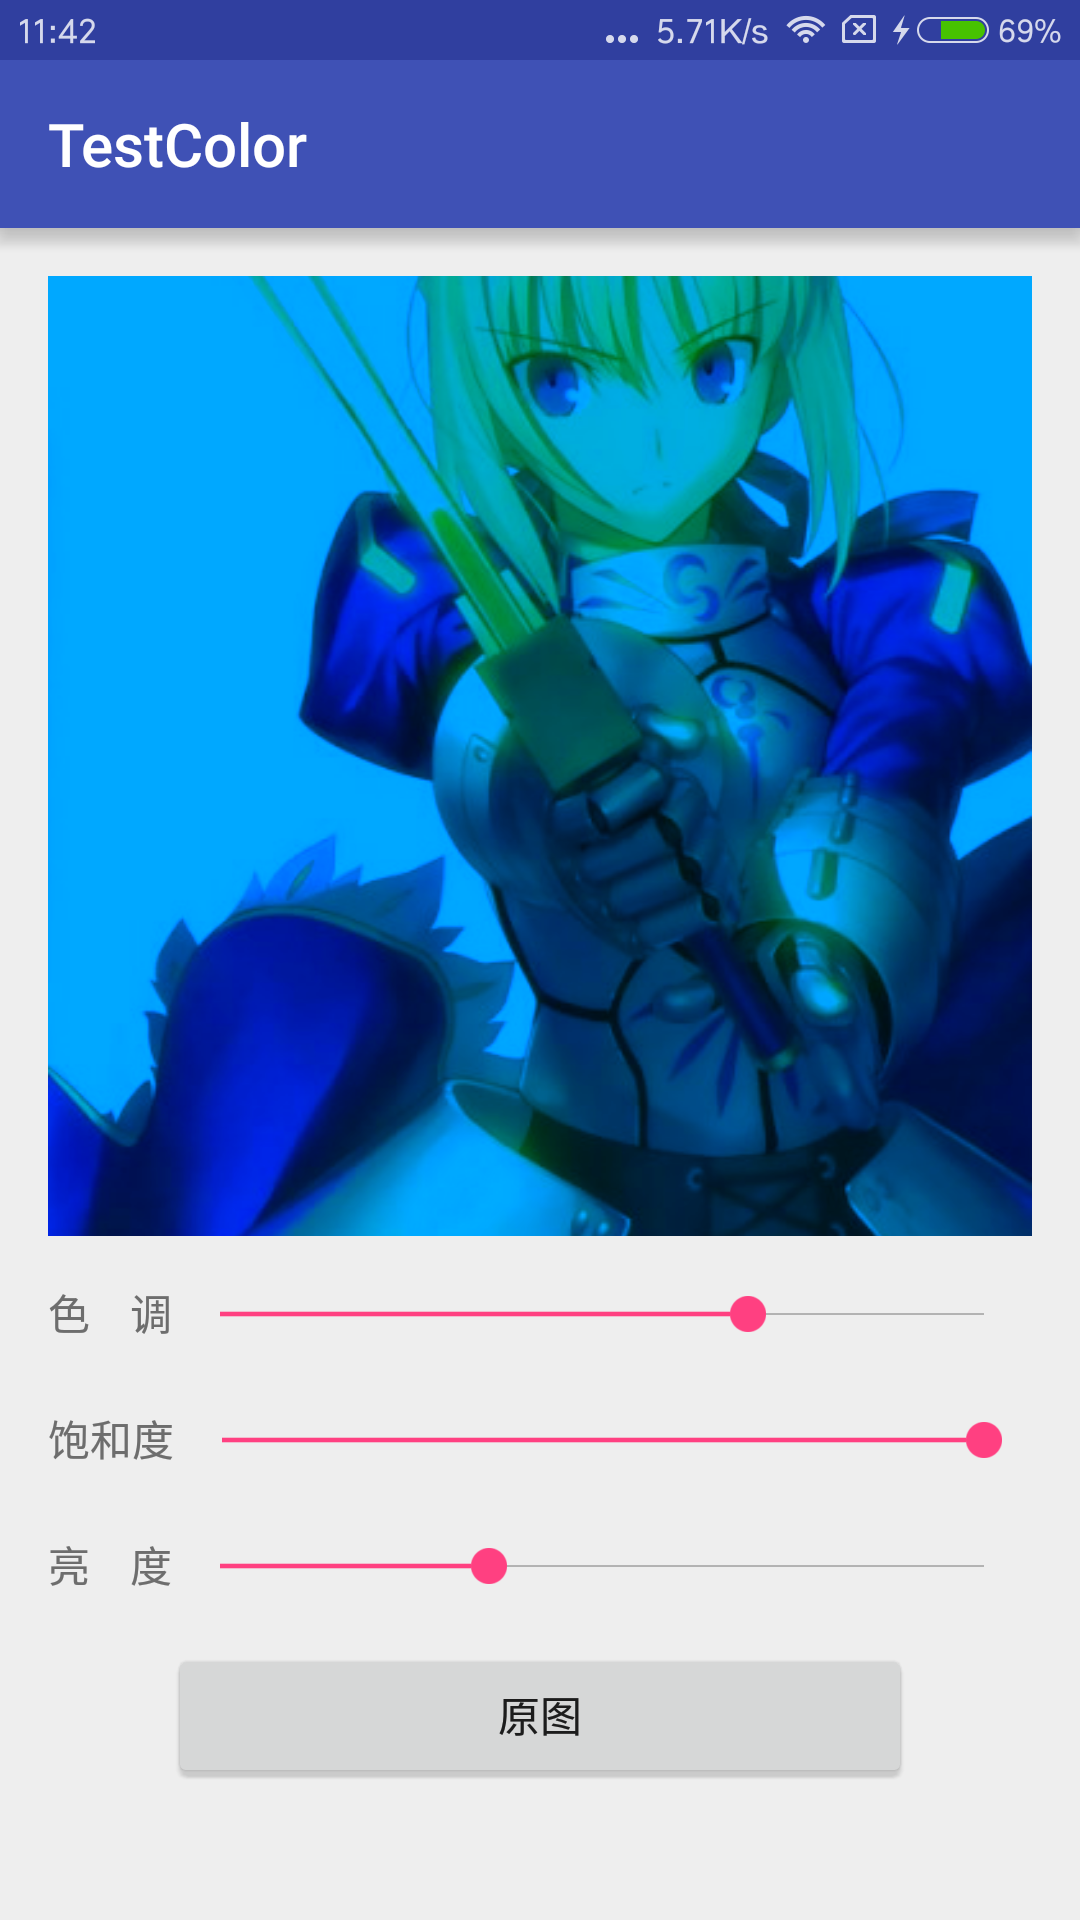
布局文件:activity_main.xml
<span style="font-family:Comic Sans MS;font-size:10px;"><?xml version="1.0" encoding="utf-8"?>
<LinearLayout xmlns:android="http://schemas.android.com/apk/res/android"xmlns:tools="http://schemas.android.com/tools"android:layout_width="match_parent"android:layout_height="match_parent"android:paddingBottom="@dimen/activity_vertical_margin"android:paddingLeft="@dimen/activity_horizontal_margin"android:paddingRight="@dimen/activity_horizontal_margin"android:paddingTop="@dimen/activity_vertical_margin"android:orientation="vertical"tools:context="com.cc.testcolor.MainActivity"><ImageViewandroid:id="@+id/image"android:layout_width="match_parent"android:layout_height="320dp"android:scaleType="centerCrop"/><LinearLayoutandroid:layout_width="match_parent"android:layout_height="wrap_content"android:layout_marginTop="10dp"android:orientation="horizontal"android:gravity="center"><TextViewandroid:text="色    调"android:textSize="14sp"android:layout_width="wrap_content"android:layout_height="wrap_content" /><SeekBarandroid:id="@+id/rotate"android:minHeight="4dp"android:maxHeight="4dp"android:max="3600"android:layout_weight="1"android:layout_width="0dp"android:layout_height="wrap_content" /></LinearLayout><LinearLayoutandroid:layout_width="match_parent"android:layout_height="wrap_content"android:layout_marginTop="10dp"android:orientation="horizontal"android:gravity="center"><TextViewandroid:text="饱和度"android:textSize="14sp"android:layout_width="wrap_content"android:layout_height="wrap_content" /><SeekBarandroid:id="@+id/saturation"android:minHeight="4dp"android:maxHeight="4dp"android:max="2000"android:layout_weight="1"android:layout_width="0dp"android:layout_height="wrap_content" /></LinearLayout><LinearLayoutandroid:layout_width="match_parent"android:layout_height="wrap_content"android:layout_marginTop="10dp"android:orientation="horizontal"android:gravity="center"><TextViewandroid:text="亮    度"android:textSize="14sp"android:layout_width="wrap_content"android:layout_height="wrap_content" /><SeekBarandroid:id="@+id/scale"android:minHeight="4dp"android:maxHeight="4dp"android:max="2000"android:layout_weight="1"android:layout_width="0dp"android:layout_height="wrap_content" /></LinearLayout><Buttonandroid:id="@+id/constant"android:layout_gravity="center"android:text="原图"android:layout_marginLeft="40dp"android:layout_marginRight="40dp"android:layout_marginTop="10dp"android:layout_width="match_parent"android:layout_height="wrap_content" />
</LinearLayout></span>
<span style="font-family:Comic Sans MS;font-size:10px;">package com.cc.testcolor;import android.graphics.Bitmap;
import android.graphics.BitmapFactory;
import android.graphics.Canvas;
import android.graphics.ColorMatrix;
import android.graphics.ColorMatrixColorFilter;
import android.graphics.Paint;
import android.support.v7.app.AppCompatActivity;
import android.os.Bundle;
import android.view.View;
import android.widget.Button;
import android.widget.ImageView;
import android.widget.SeekBar;public class MainActivity extends AppCompatActivity implements SeekBar.OnSeekBarChangeListener, View.OnClickListener {private ImageView image;private SeekBar rotate;private SeekBar saturation;private SeekBar scale;private float rotateParam;private float scaleParam = 1f;private float saturationParam = 1f;private Button constant;@Overrideprotected void onCreate(Bundle savedInstanceState) {super.onCreate(savedInstanceState);setContentView(R.layout.activity_main);initView();}private void initView() {image = ((ImageView) findViewById(R.id.image));image.setImageResource(R.mipmap.saber);//调节色调rotate = ((SeekBar) findViewById(R.id.rotate));//调节饱和度saturation = ((SeekBar) findViewById(R.id.saturation));//调节亮度scale = ((SeekBar) findViewById(R.id.scale));//初始化饱和度与亮度为与原图一样saturation.setProgress(1000);scale.setProgress(1000);rotate.setOnSeekBarChangeListener(this);saturation.setOnSeekBarChangeListener(this);scale.setOnSeekBarChangeListener(this);//恢复原图按钮constant = ((Button) findViewById(R.id.constant));constant.setOnClickListener(this);}private Bitmap setBitmap(float rotate, float saturation, float scale) {Bitmap bit = BitmapFactory.decodeResource(getResources(), R.mipmap.saber);/*** android机制中不允许对原图进行修改操作,如果需要修改的话,只能创建这个bitmap的一个副本,对这个副本进行操作* android群英传中用注释掉的方法来设置新的图片bitmmap,我在调用这个方法的时候,处理后的图片一直就是一片白,* 啥也没有,这个方法貌似只是创建了与一个原bitmap宽高一样大的空间,而内容并没有复制过去*/
//        Bitmap bmp = Bitmap.createBitmap(bit.getWidth(), bit.getHeight(), Bitmap.Config.ARGB_8888);Bitmap bmp = bit.copy(Bitmap.Config.ARGB_8888, true);Canvas canvas = new Canvas(bmp);Paint paint = new Paint();/*** 设置色调* int axis:RGB标志,0 代表 RED, 1 代表 GREEN, 2 代表BLUE* 如果需要分别设置RGB的话,就需要调用三次,传入不同的 axis值** float degree: 控制具体的颜色,这里取值范围并非0-255,系统用了角度计算颜色值,*      所以取值的时候是以0-360为颜色取值范围,超出此范围,呈周期性变化*/ColorMatrix rotateMatrix = new ColorMatrix();rotateMatrix.setRotate(0, rotate);rotateMatrix.setRotate(1, rotate);rotateMatrix.setRotate(2, rotate);/*** 设置饱和度* float set:取值范围未知,*  0 为灰度图,纯黑白, 1 为与原图一样,但是取值可以更大*/ColorMatrix saturatinoMatrix = new ColorMatrix();saturatinoMatrix.setSaturation(saturation);/*** 设置亮度* 原理是光的三原色同比例混合最终效果为白色,因此在在亮度上将*  RGB的值等比例混合,值给到足够大时,就会变成纯白效果,*  同样,没有亮度的时候就是黑色* float rScale:红* float gScale:绿* float bScale:蓝* float aScale:透明度* 取值范围未知,0时为纯黑,但是1时不一定纯白*/ColorMatrix scaleMatrix = new ColorMatrix();scaleMatrix.setScale(scale, scale, scale, 1);/*** postConcat(ColorMatrix colorMatrix)* 将多个ColorMatrix效果混合* 之前试过将饱和度,亮度,色调设置到同一个ColorMatrix对象里面,*  从而可以不使用postConcat()方法混合多个ColorMatrix对象,*  但是色调和亮度设置会失效,原因还没研究*/ColorMatrix colorMatrix = new ColorMatrix();colorMatrix.postConcat(rotateMatrix);colorMatrix.postConcat(saturatinoMatrix);colorMatrix.postConcat(scaleMatrix);ColorMatrixColorFilter colorFilter = new ColorMatrixColorFilter(colorMatrix);paint.setColorFilter(colorFilter);canvas.drawBitmap(bmp, 0, 0, paint);return bmp;}@Overridepublic void onProgressChanged(SeekBar seekBar, int progress, boolean fromUser) {switch (seekBar.getId()) {case R.id.rotate://progress 范围是0-3600,目的增大调节精度rotateParam = progress / 10f;break;case R.id.saturation://progress 范围是0-1000, 目的增大调节精度saturationParam = progress / 1000f;break;case R.id.scale://progress 范围是0-1000, 目的增大调节精度scaleParam = progress / 1000f;break;}image.setImageBitmap(setBitmap(rotateParam, saturationParam, scaleParam));}@Overridepublic void onStartTrackingTouch(SeekBar seekBar) {}@Overridepublic void onStopTrackingTouch(SeekBar seekBar) {}@Overridepublic void onClick(View v) {rotate.setProgress(0);scale.setProgress(1000);saturation.setProgress(1000);}
}</span><span style="font-size:14px;">
</span>


