docker-registry的搭建
有时候使用Docker Hub这样的公共仓库可能不方便,用户可以创建一个本地仓库供私人使用。比如,基于公司内部项目构建的镜像。
docker-registry是官方提供的工具,可以用于构建私有的镜像仓库。
安装运行docker-registry
可以通过获取官方registry镜像来运行。默认情况下,仓库会被创建在容器的/var/lib/registry目录下。可以通过-v参数来将镜像文件存放在本地的指定路径。
docker run --name registry -d -p 5000:5000 --restart=always -v /opt/data/registry:/var/lib/registry registry
在私有仓库上传、搜索、下载镜像
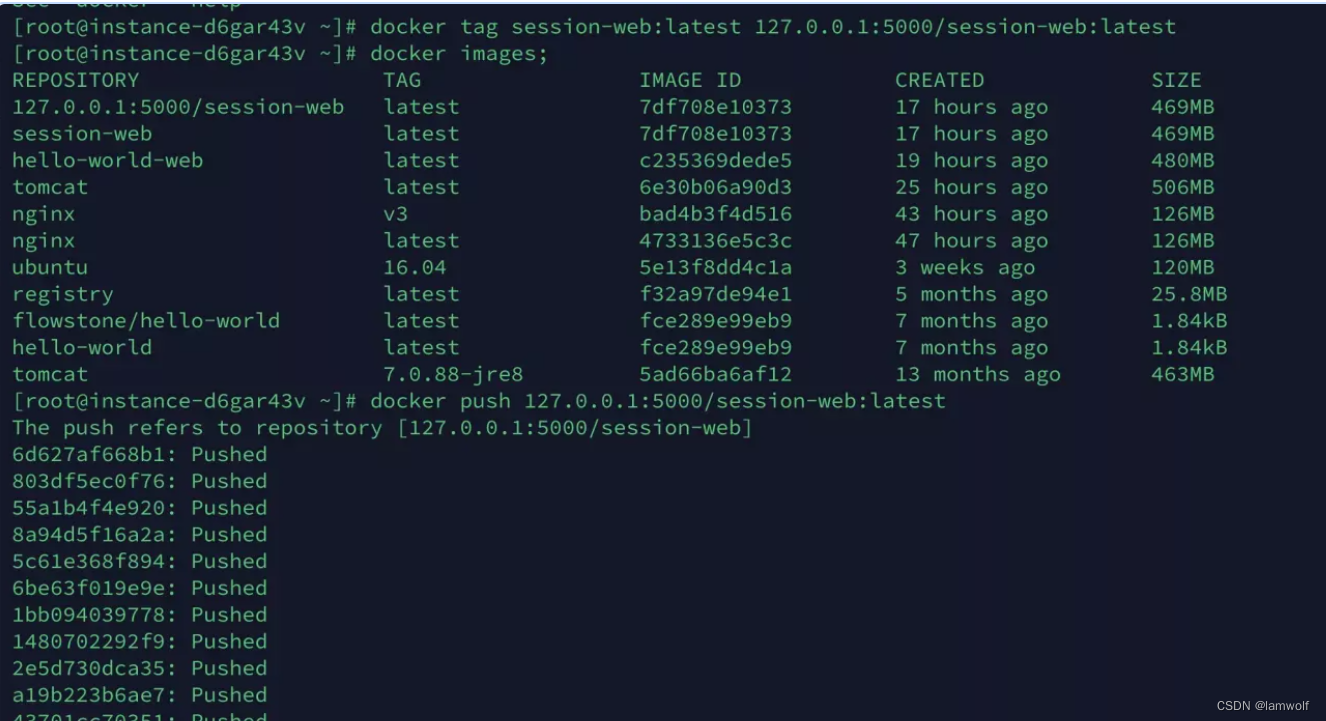
创建好私有仓库之后,就可以使用docker tag来标记一个镜像,然后推送它到仓库。先在本机查看已有的镜像。
docker image ls
使用docker tag将session-web:latest这个镜像标记为127.0.0.1:5000/session-web:latest格式为docker tag IMAGE[:TAG][REGISTRY_HOST[:REGISTRY_PORT]/]REPOSITORY[:TAG]
docker tag session-web:latest 127.0.0.1:5000/session-web:latest
使用docker push上传标记的镜像
docker push 127.0.0.1:5000/session-web:latest
用curl查看仓库中的镜像
curl 127.0.0.1:5000/v2/_catlog
如果可以看到{“repositories”:[“session-web”]},表明镜像已经被成功上传了。

先删除已有镜像,再尝试从私有仓库中下载这个镜像。
docker image rm 127.0.0.1:5000/session-web:latest
docker pull 127.0.0.1:5000/session-web:latest
注意事项
如果不想使用127.0.0.1:5000作为仓库地址,比如想让本网段的其他主机也能把镜像推送到私有仓库。你就得把例如192.168.1.1:5000这样的内网地址作为私有仓库地址,这时你会发现无法成功推送镜像。
可以用下面方式解决
对于使用systemd的系统,请在/etc/docker/daemon.json中写入如下内容(如果文件不存在请新建该文件)
{"registry-mirror":["http://hub-mirror.c.163.com"],"insecure-registries":["192.168.1.1:5000"]
}
镜像registry(仓库)和registry-web(用于访问仓库的UI界面)的配置
docker的仓库在小组作战中比较重要,但是并不是每个人都需要有权限进行操作仓库,所有对于仓库的认证比较重要,本篇文章主要创建带有可视化界面和用户认证的私有仓库,搭建过程参考了博文:https://www.cnblogs.com/atcloud/p/10642078.html,创建可视化的管理界面需要registry-web,镜像为:hyper/docker-registry-web:latest
整体需要两个环境:镜像registry(仓库)和registry-web(用于访问仓库的UI界面)
相关内容可参考官网===https://hub.docker.com/r/hyper/docker-registry-web/
拉取镜像:
docker pull hyper/docker-registry-web
docker pull registry
安装docker-compose
yum install docker-compose
搭建过程
(1)创建存放配置文件和私有仓库镜像的存储目录
mkdir -p /root/docker-registry/conf/registry   #存放仓库的配置信息
mkdir -p /root/docker-registry/conf/registry-web #存放仓库UI界面的配置信息
mkdir -p /root/docker-registry/registry  #存放仓库的镜像
mkdir -p /root/docker-registry/db  #仓库的访问信息
(2)生成证书
openssl req -new -newkey rsa:4096 -days 365 \-subj "/CN=192.168.177.132" \ #/CN=192.168.177.132 你的仓库所在的IP-nodes -x509 \-keyout /root/docker-registry/conf/registry-web/auth.key \ #存放仓库UI界面的配置信息-out /root/docker-registry/conf/registry/auth.cert #存放仓库的配置信息

(3)创建仓库的配置文件
vi /root/docker-registry/conf/registry/config.yml内容如下:version: 0.1storage:filesystem:rootdirectory: /var/lib/registryhttp:addr: 0.0.0.0:5000auth:token:# external url to docker-web authentication endpointrealm: http://192.168.177.132:8099/api/auth# should be same as registry.name of registry-webservice: 192.168.177.132:5000# should be same as registry.auth.issuer of registry-webissuer: 'admin'# path to auth certificate rootcertbundle: /etc/docker/registry/auth.cert
(4)创建仓库UI的配置文件
vi /root/docker-registry/conf/registry-web/config.yml
内容如下:
registry:# Docker registry urlurl: http://192.168.177.132:5000/v2# Docker registry fqdnname: 192.168.177.132:5000# To allow image delete, should be falsereadonly: false# Enable authenticationauth:# Enable authenticationenabled: true# Token issuer# should equals to auth.token.issuer of docker registryissuer: 'admin'# Private key for token signing# certificate used on auth.token.rootcertbundle should signed by this keykey: /conf/auth.key
(5)安装docker-compose
官网下载地址——慢:
sudo curl -L "https://github.com/docker/compose/releases/download/1.29.2/docker-compose-$(uname -s)-$(uname -m)" -o /usr/local/bin/docker-compose
国内镜像加速下载地址——快:
sudo curl -L "https://get.daocloud.io/docker/compose/releases/download/1.27.4/docker-compose-$(uname -s)-$(uname -m)" -o /usr/local/bin/docker-compose
赋予执行权限:
sudo chmod +x /usr/local/bin/docker-compose
使用命令 docker-compose -v 查看 compose 版本:出现版本号说明安装成功

在/opt/docker_reg目录下创建docker-compose.yml文件,内容如下:
version: '2'
services:registry-web:image: hyper/docker-registry-web:latestports:- 8099:8080volumes:- /root/docker-registry/conf/registry-web:/conf:ro- /root/docker-registry/db:/datanetworks:- registry-netdepends_on:- registryrestart: alwaysregistry:image: registry:2.4.1ports:- 5000:5000volumes:- /root/docker-registry/conf/registry:/etc/docker/registry:ro- /root/docker-registry/registry:/var/lib/registryenvironment:- REGISTRY_STORAGE_DELETE_ENABLED=truenetworks:- registry-netrestart: always
networks:registry-net:#driver: default #如果报错就注掉
(6)通过docker-compose拉取镜像启动容器
docker-compose -f docker-compose.yml up -d
使用仓库
(1)访问ui页面http://192.168.177.132:8099(端口是安装时配置的端口)
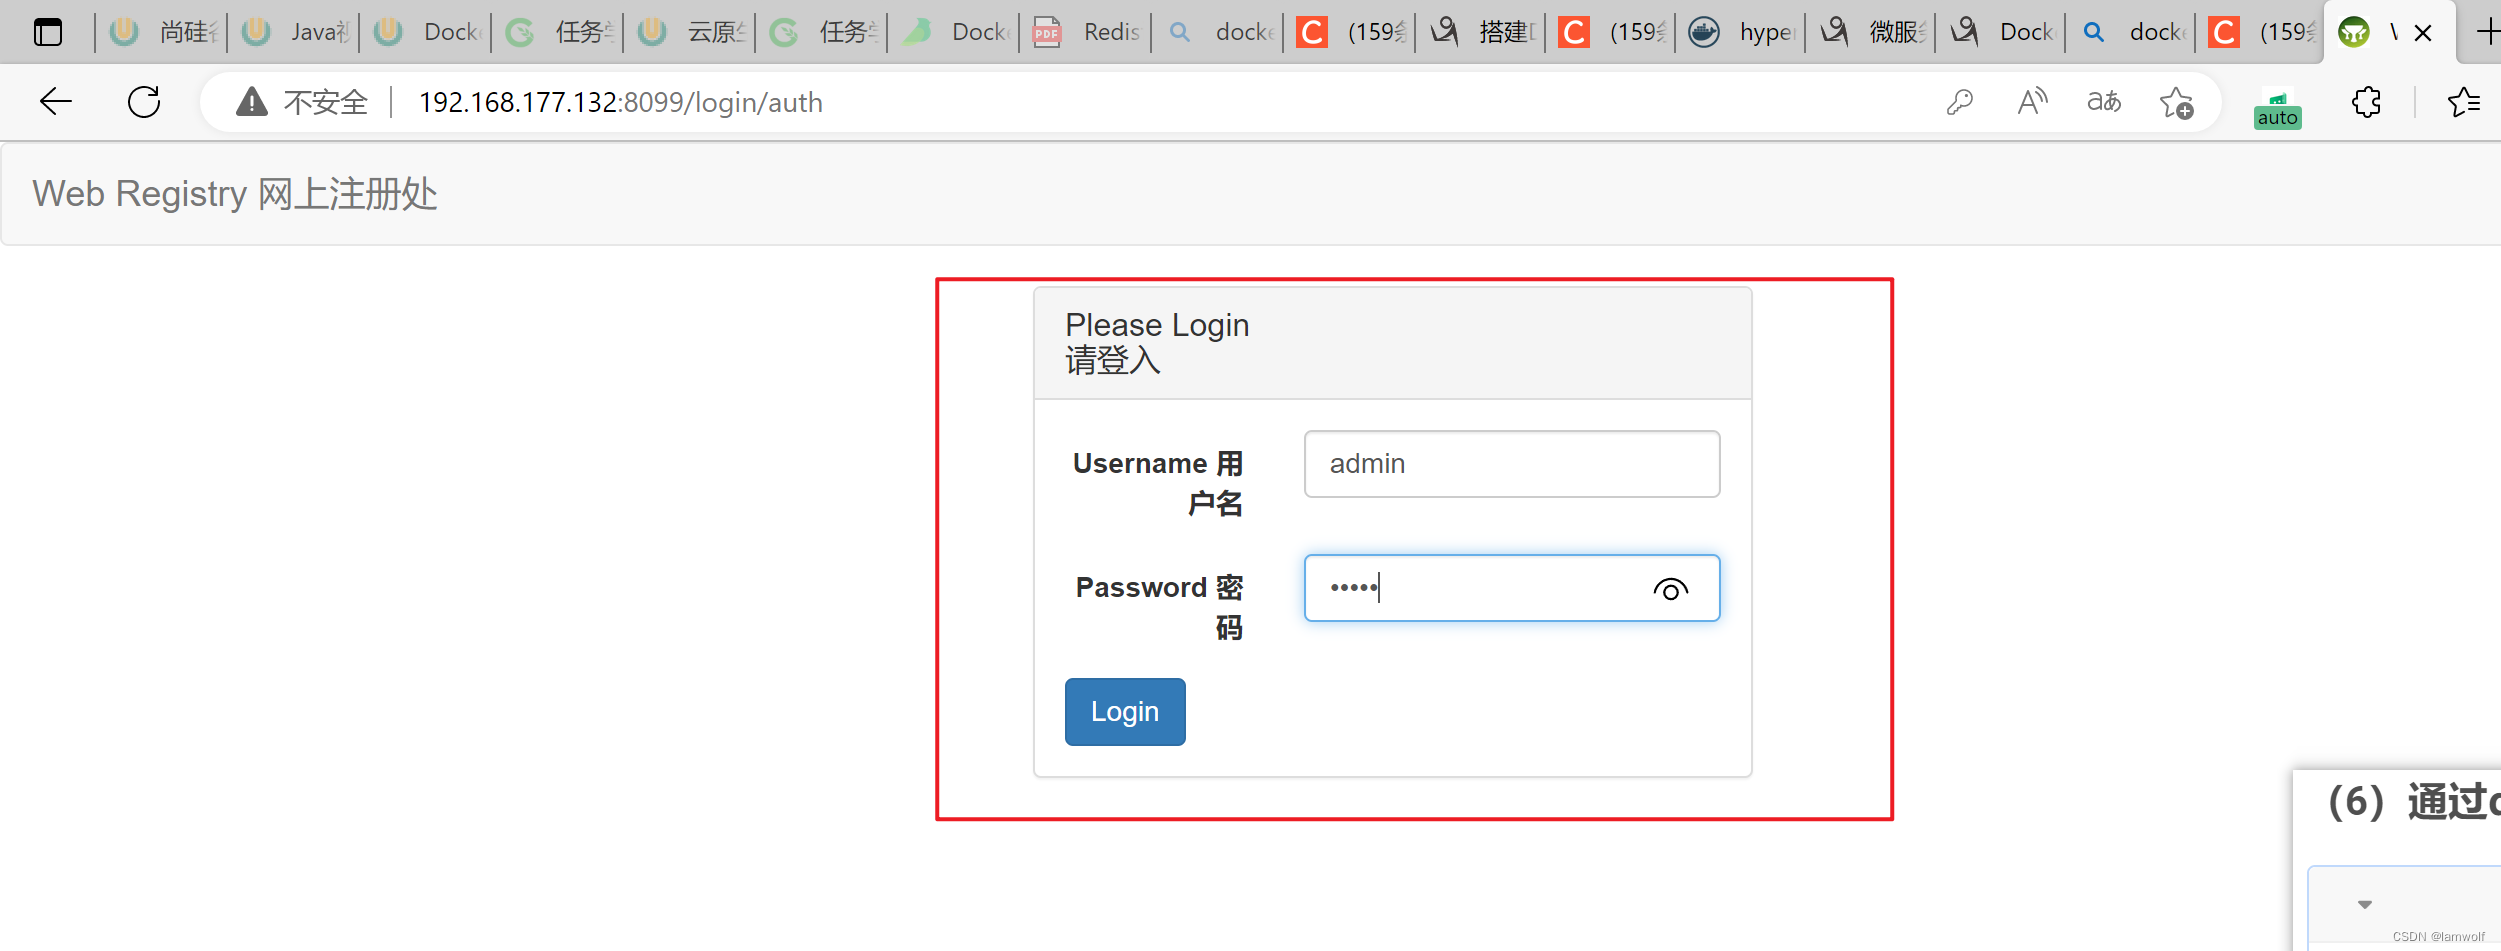
默认用户为admin/admin
创建新的账户为yangjunxing/yangjunxing
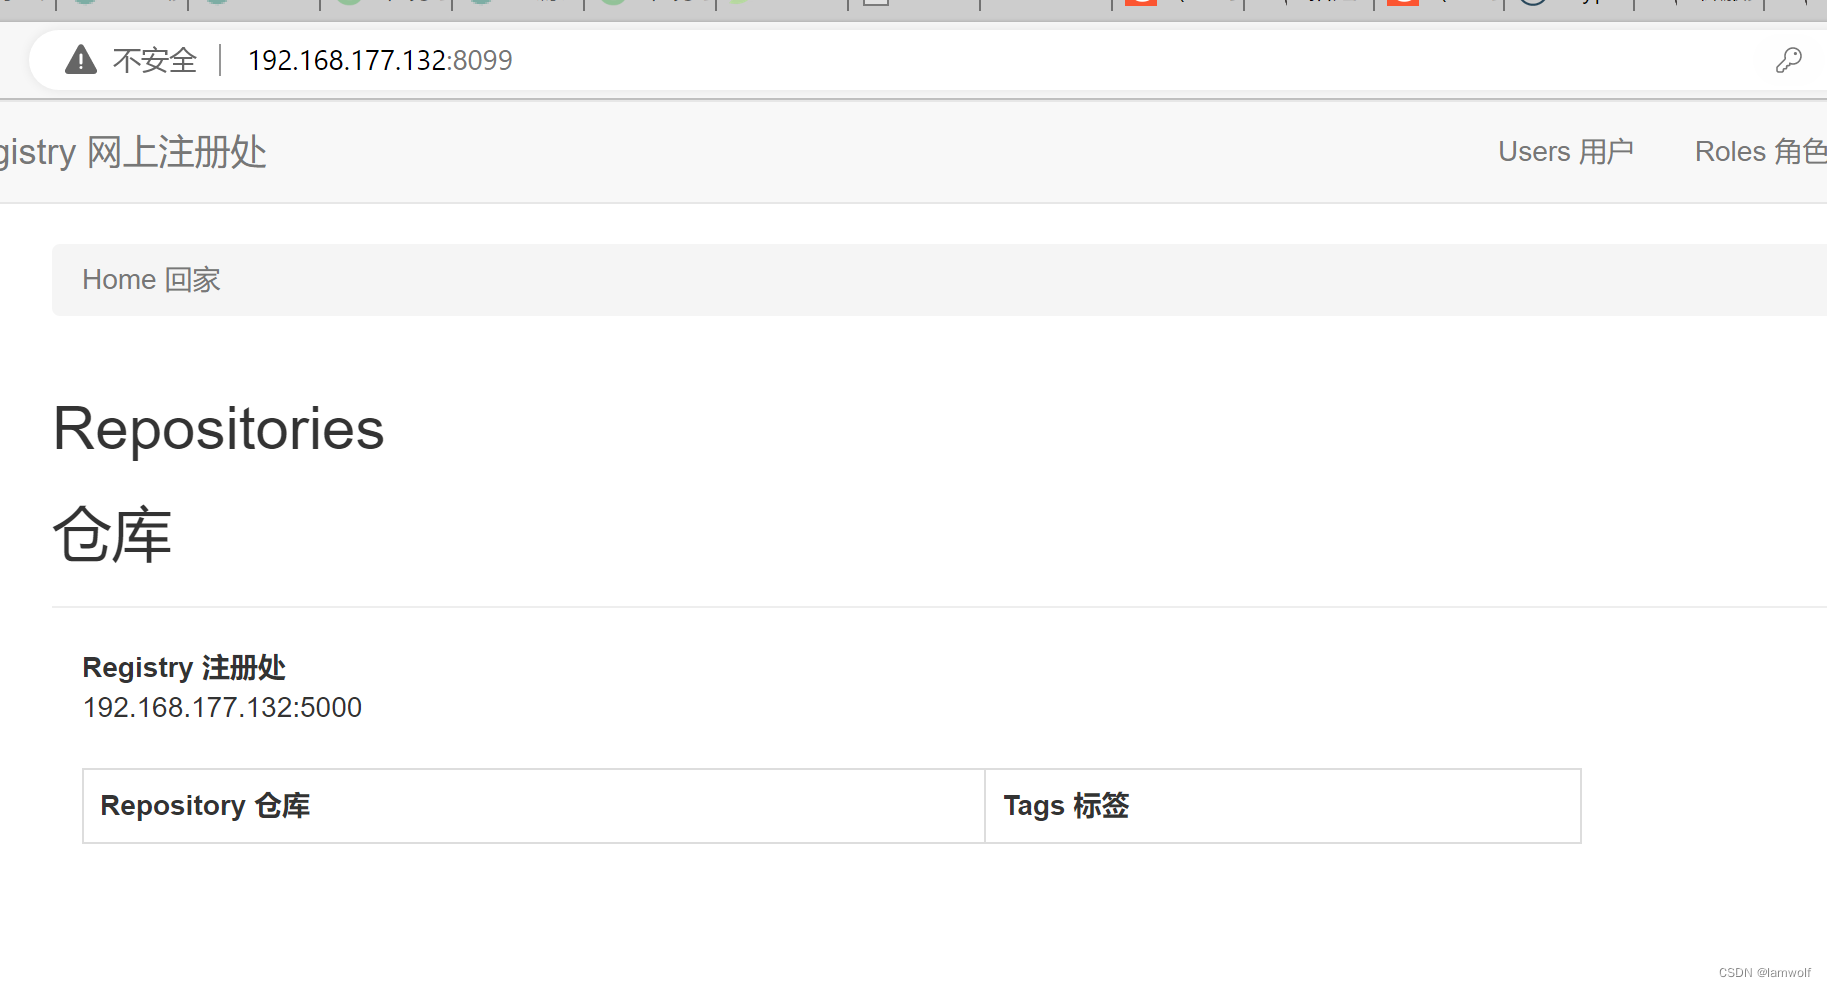
(2)登录用后可以创建的新的用户,修改密码等操作
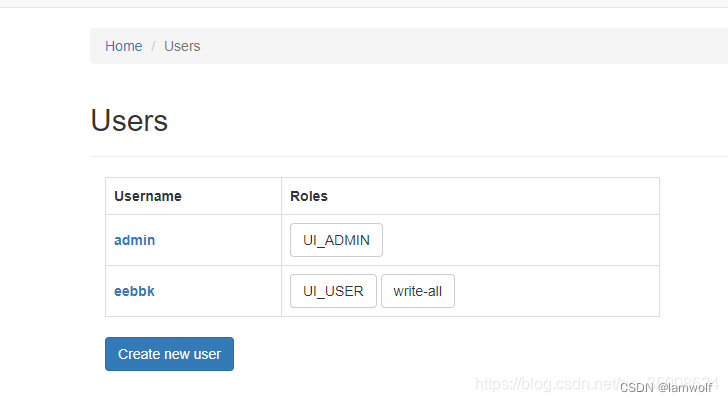
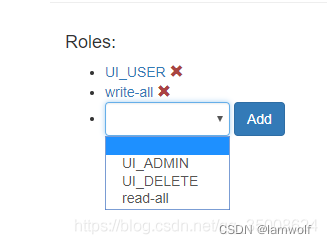
(3)admin用户是没有推送和拉取镜像的权限,建立用户需要分配write-all和UI-USER权限,才可以进行镜像的操作
(4)删除仓库的镜像
方式一:直接删除挂载目录
docker exec registry rm -rf /root/docker-registry/registry/docker/registry/v2/repositories/eebbk-content/user-service-test
方式二:删除容器里的数据
docker exec registry rm -rf /var/lib/registry/docker/registry/v2/repositories/eebbk-content/user-service-test
删除后在界面发现没有了
(5)推送镜像
通过docker命令推送(推送前使用dockerFile构建镜像:docker build -t xxx)
登录仓库:docker login 172.28.162.xx:5000      #用户名和密码使用yangjunxing/yangjunxing就行
username: xx
password:xx创建tag
docker tag cf6e2471e36f 172.28.162.xx:5000/eebbk-content/content-microservice-questions-ui:3.2.0-SNAPSH
OT .
上传仓库:
docker push 172.28.162.113:5000/eebbk-content/content-microservice-questions-ui:3.2.0-SNAPSH
OT
拉取镜像:
docker pull 172.28.162.113:5000/eebbk-content/monitor-service:3.2.0-SNAPSHOT
