目录
1、文件上传和下载
1.1、文件上传介绍
1.2、文件下载介绍
1.3、文件上传实现
1.3.1、分析
1.3.2、代码
1.4、文件下载实现
2、新增菜品
2.1、分析
2.1.1、需求分析
2.1.2、数据模型给
2.1.3、准备工作
2.1.4、页面与服务端的交互过程
2.1.5、前端代码分析
2.2、代码
2.2.1、获取菜品分类信息
2.2.2、DishDTO
2.2.3、保存页面发来的数据
3、菜品信息分页查询
3.1、分析
3.1.1、需求分析
3.1.2、页面与服务端的交互过程
3.2、代码
4、修改菜品
4.1、分析
4.1.1、需求分析
4.1.2、页面与服务端的交互过程
4.2、代码
4.2.1、菜品信息回显
4.2.2、修改商品实现
5、菜品停售与起售(批量)
5.1、分析
5.2、代码
6、(批量)删除
6.1、分析
6.2、代码
6.2.1、添加逻辑删除注解
1、文件上传和下载
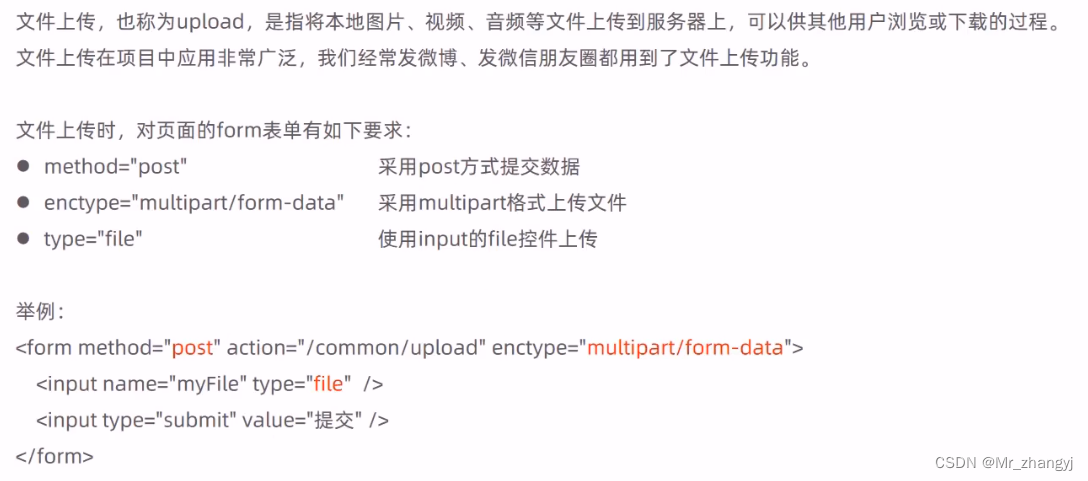
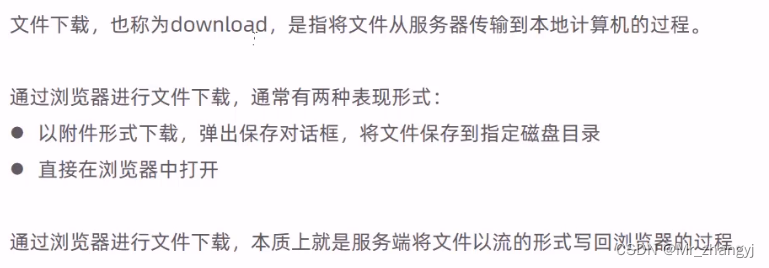
1.1、文件上传介绍

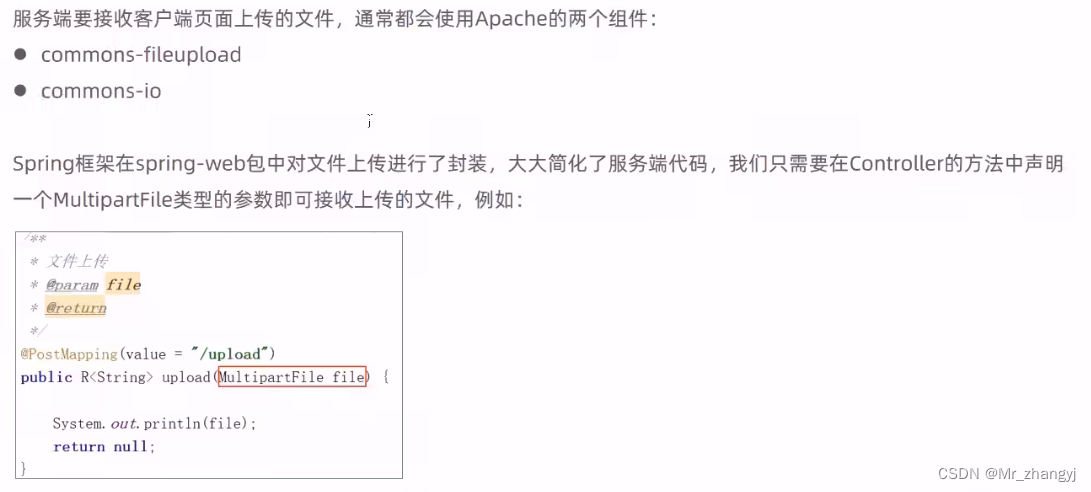
1.2、文件下载介绍
1.3、文件上传实现
1.3.1、分析
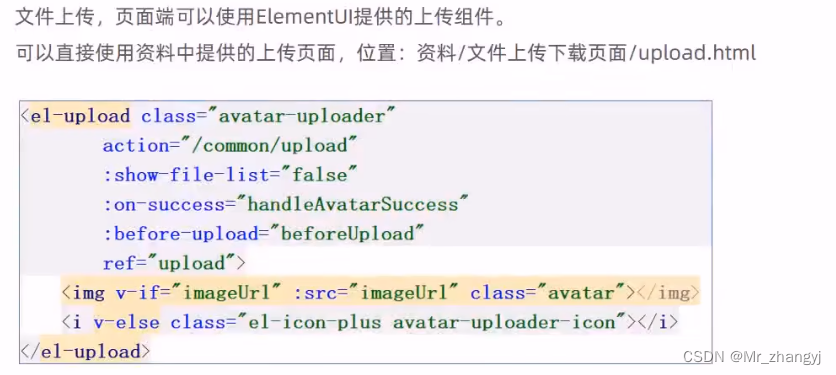
将 upload.html 放在 backend/page/demo 目录下,上传图片的接口如下
1.3.2、代码
① 将文件上传和下载页面取消检查登录:在 LoginCheckFilter 中将对应路径加入免查数组
// 定义不需要处理的请求路径String[] urls = new String[]{"/employee/login", // 登录请求"/employee/logout", // 登出请求"/backend/**", // 前端资源"/front/**", // 前端资源"/common/**" // 文件上传和下载//"/employee/page" // 前端资源};② 在 application.yml 中设置文件存放位置
reggie:path: C:\Users\zhang\Desktop\2\③ 创建 CommonController 处理文件上传请求
package com.itheima.reggie.controller;import com.itheima.reggie.common.R;
import lombok.extern.slf4j.Slf4j;
import org.springframework.beans.factory.annotation.Value;
import org.springframework.stereotype.Controller;
import org.springframework.web.bind.annotation.PostMapping;
import org.springframework.web.bind.annotation.RequestMapping;
import org.springframework.web.bind.annotation.RestController;
import org.springframework.web.multipart.MultipartFile;import java.io.File;
import java.io.IOException;
import java.util.UUID;/*** @Author zhang* @Date 2022/9/2 - 21:54* @Version 1.0*/
// 文件上传和下载
@RestController
@Slf4j
@RequestMapping("/common")
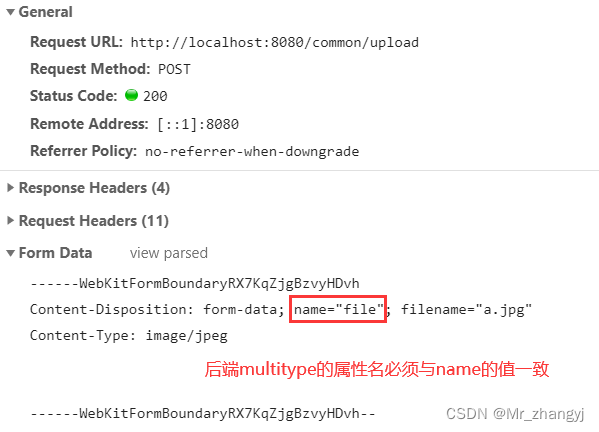
public class CommonController {@Value("${reggie.path}")private String basePath;/*** 文件上传* @param file 这个参数名字必须与前端保持一直* @return*/@PostMapping("/upload")public R<String> upload(MultipartFile file){//log.info(file.toString());// file是一个临时文件,需要转存到指定位置,否则本次请求完后临时文件会删除// 原始文件名String originalFilename = file.getOriginalFilename();// 获取原始文件的后缀名String suffix = originalFilename.substring(originalFilename.lastIndexOf("."));// 使用UUID生成文件名String fileName = UUID.randomUUID().toString() + suffix;// 创建一个目录对象File dir = new File(basePath);if(!dir.exists()){// 目录不存在,需要创建dir.mkdirs();}try {// 将临时文件转存到指定位置file.transferTo(new File(basePath + fileName));} catch (IOException e) {e.printStackTrace();}return R.success(fileName);}}
1.4、文件下载实现

前端在文件上传成功后,通过 handleAvatarSuccess 方法使自定义的参数 imageUrl 存储服务器保存图片的路径,再通过 imageUrl 发送请求下载文件
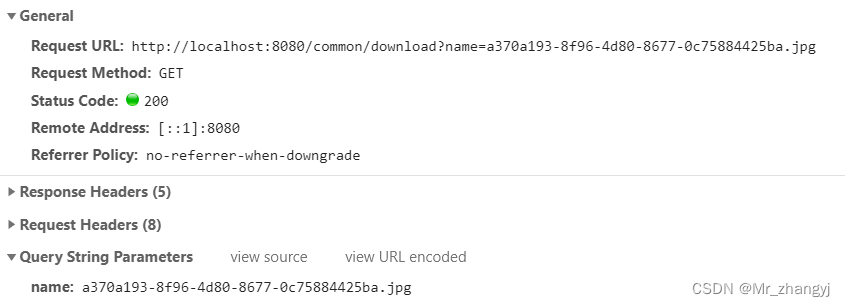
/*** 文件下载* @param name* @param response*/@GetMapping("/download")public void download(String name,HttpServletResponse response){try {// 通过输入流读取文件内容FileInputStream fileInputStream = new FileInputStream(new File(basePath + name));// 通过输出流将文件写回浏览器ServletOutputStream outputStream = response.getOutputStream();response.setContentType("image/jpeg"); // 设置文件格式byte[] bytes = new byte[1024];int len = 0;while((len = fileInputStream.read(bytes)) != -1){outputStream.write(bytes, 0, len);outputStream.flush();}// 关闭资源outputStream.close();fileInputStream.close();} catch (FileNotFoundException e) {e.printStackTrace();} catch (IOException e) {e.printStackTrace();}}2、新增菜品
2.1、分析
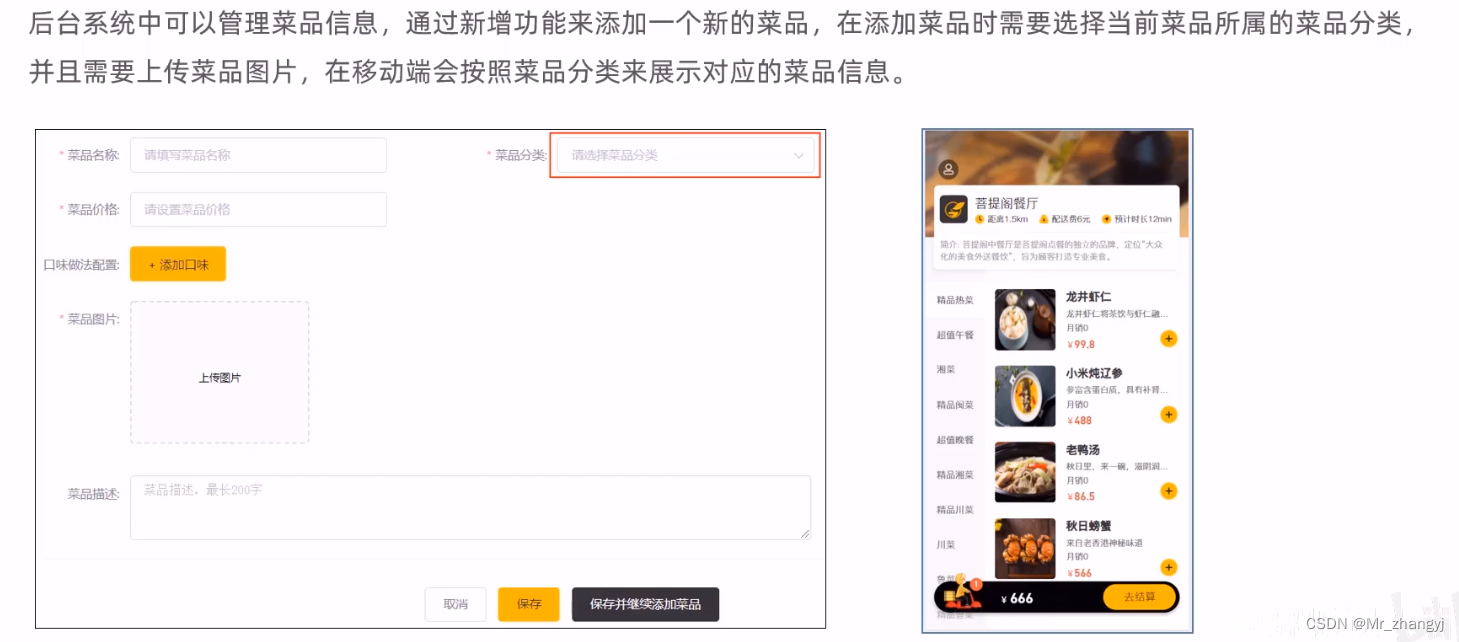
2.1.1、需求分析
2.1.2、数据模型给

dish 表

dish_flavor 表

2.1.3、准备工作

2.1.4、页面与服务端的交互过程

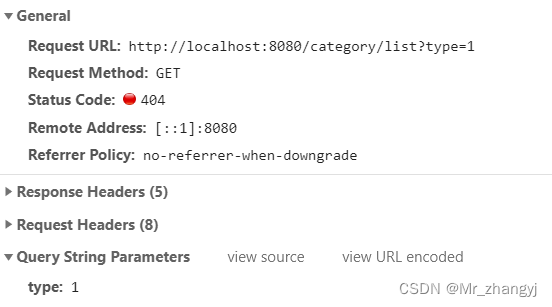
获取菜品分类数据:
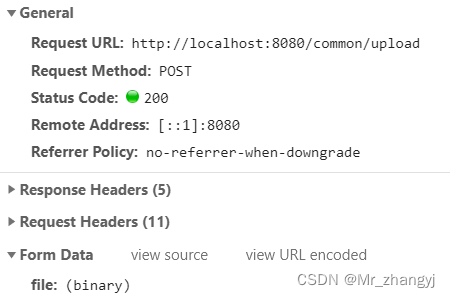
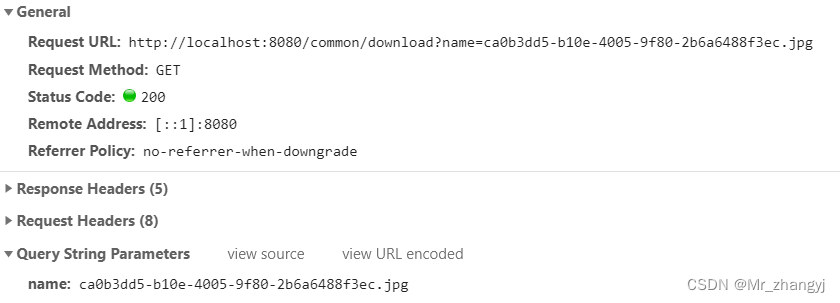
图片上传与下载与上面使用的接口相同,所以已经实现
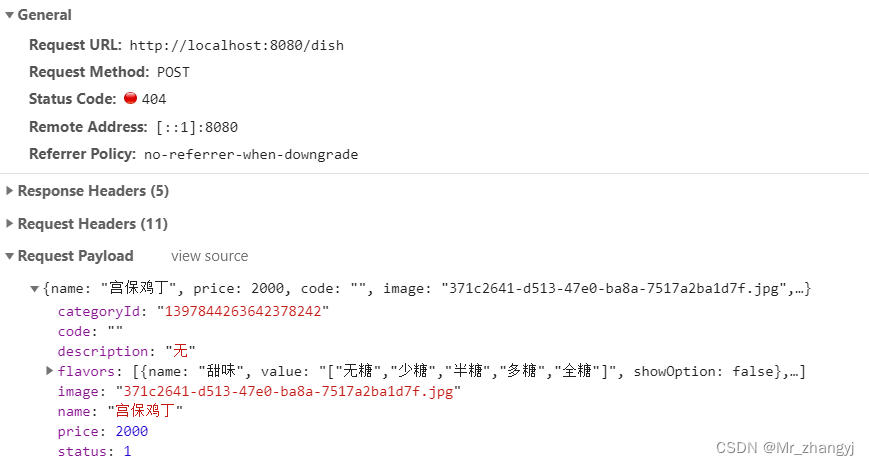
保存菜品信息:
2.1.5、前端代码分析
在 created 生命周期,先通过 getDishList 方法获取菜品分类信息并存储到自定义数据 dishList
2.2、代码
2.2.1、获取菜品分类信息
在 CategoryController 中添加方法
/*** 根据条件查询分类数据* @param category* @return*/@GetMapping("list")public R<List<Category>> list(Category category){LambdaQueryWrapper<Category> queryWrapper = new LambdaQueryWrapper<>();queryWrapper.eq(category.getType() != null, Category::getType, category.getType());queryWrapper.orderByAsc(Category::getSort).orderByDesc(Category::getUpdateTime);List<Category> categoryList = categoryService.list(queryWrapper);return R.success(categoryList);}2.2.2、DishDTO
DTO,全称为 Data Transfer Object,即数据传输对象,一般用于展示层与服务层之间的数据传输。
由于保存菜品信息时,页面发送了 flavors 信息,而在 Dish 中没有该属性,无法匹配,所以导入 DishDto(位置:资料/dto) ,用于封装页面提交的数据
@Data
public class DishDto extends Dish {private List<DishFlavor> flavors = new ArrayList<>();private String categoryName;private Integer copies;
}
2.2.3、保存页面发来的数据
页面发来的数据不仅有菜品信息,还有对应的口味信息
① 在 DishSerivce 中添加同时存储两种信息的方法
public interface DishSerivce extends IService<Dish> {// 新增菜品,同时插入菜品对应的口味数据,需要操作两张表:dish、dish_flavorpublic void saveWithFlavor(DishDto dishDto);}② 在 DishServiceImpl 添加实现方法
@Service
public class DishServiceImpl extends ServiceImpl<DishMapper, Dish> implements DishSerivce {@Autowiredprivate DishFlavorService dishFlavorService;/*** 新增菜品,同时插入菜品对应的口味数据,需要操作两张表:dish、dish_flavor* @param dishDto*/@Transactional@Overridepublic void saveWithFlavor(DishDto dishDto) {// 保存菜品的基本信息this.save(dishDto);Long dishId = dishDto.getId();  // 菜品idList<DishFlavor> flavors = dishDto.getFlavors();    // 菜品口味flavors.stream().map((item) -> {item.setDishId(dishId);return item;}).collect(Collectors.toList());// 保存菜品口味信息到dish_flavordishFlavorService.saveBatch(flavors);}}
③ 在启动类添加注解开启事务
@EnableTransactionManagement // 开启事务④ 在 DishController 中添加方法
@RestController
@Slf4j
@RequestMapping("/dish")
public class DishController {@Autowiredprivate DishSerivce dishSerivce;@Autowiredprivate DishFlavorService dishFlavorService;/*** 新增菜品* @param dishDto* @return*/@PostMappingpublic R<String> save(@RequestBody DishDto dishDto){//log.info(dishDto.toString());dishSerivce.saveWithFlavor(dishDto);return R.success("新增菜品成功");}}
3、菜品信息分页查询
3.1、分析
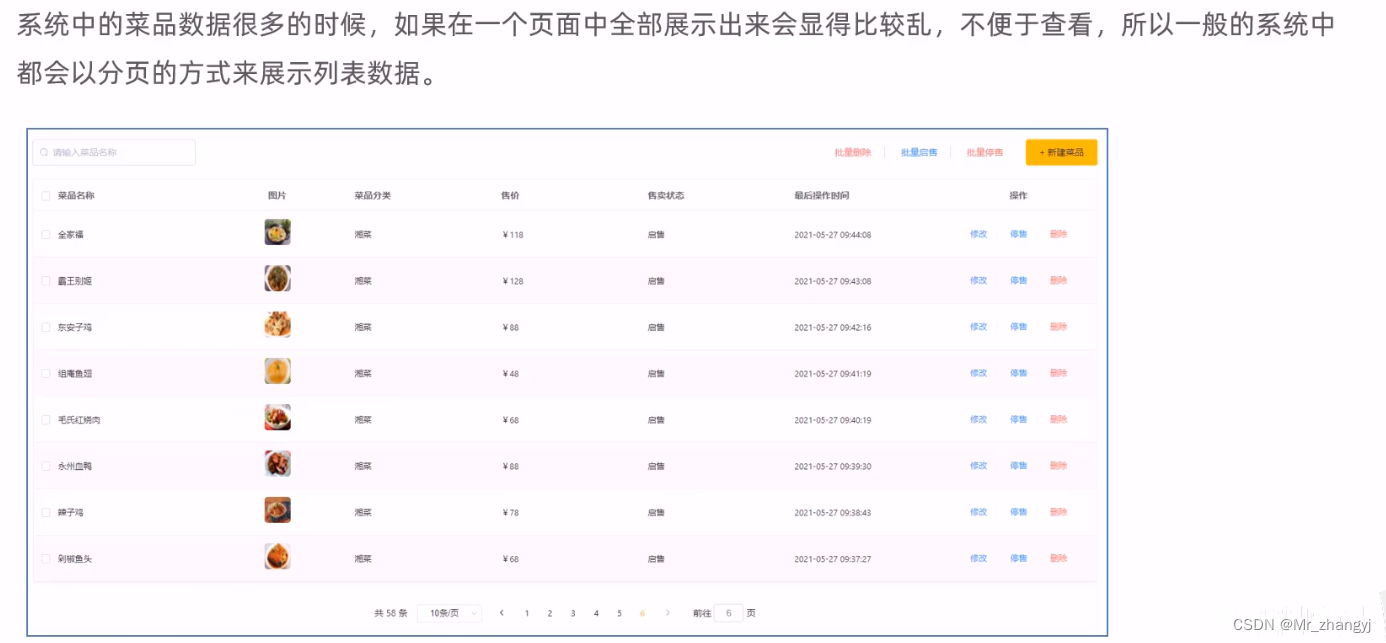
3.1.1、需求分析
3.1.2、页面与服务端的交互过程

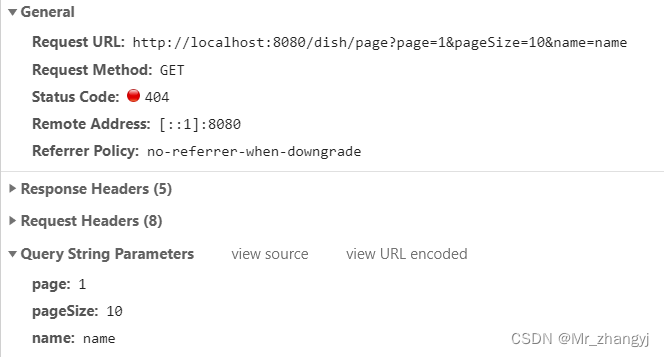
分页获取菜品信息请求:
3.2、代码
/*** 菜品信息分页查询* @param page* @param pageSize* @param name* @return*/@GetMapping("/page")public R<Page> page(int page,int pageSize,String name){// 分页构造器对象Page<Dish> pageInfo = new Page<>(page, pageSize);Page<DishDto> dishDtoPage = new Page<>();// 添加条件LambdaQueryWrapper<Dish> queryWrapper = new LambdaQueryWrapper<>();queryWrapper.like(name != null && !"".equals(name), Dish::getName, name);queryWrapper.orderByDesc(Dish::getUpdateTime);// 分页查询dishSerivce.page(pageInfo, queryWrapper);// 对象拷贝,不拷贝records属性BeanUtils.copyProperties(pageInfo, dishDtoPage, "records");// 将对应的分类名称填入List<Dish> records = pageInfo.getRecords();List<DishDto> list = records.stream().map((item) -> {DishDto dishDto = new DishDto();BeanUtils.copyProperties(item, dishDto);Long categoryId = item.getCategoryId(); // 分类idCategory category = categoryService.getById(categoryId);if(category != null) {String categoryName = category.getName();dishDto.setCategoryName(categoryName);}return dishDto;}).collect(Collectors.toList());dishDtoPage.setRecords(list);return R.success(dishDtoPage);}4、修改菜品
4.1、分析
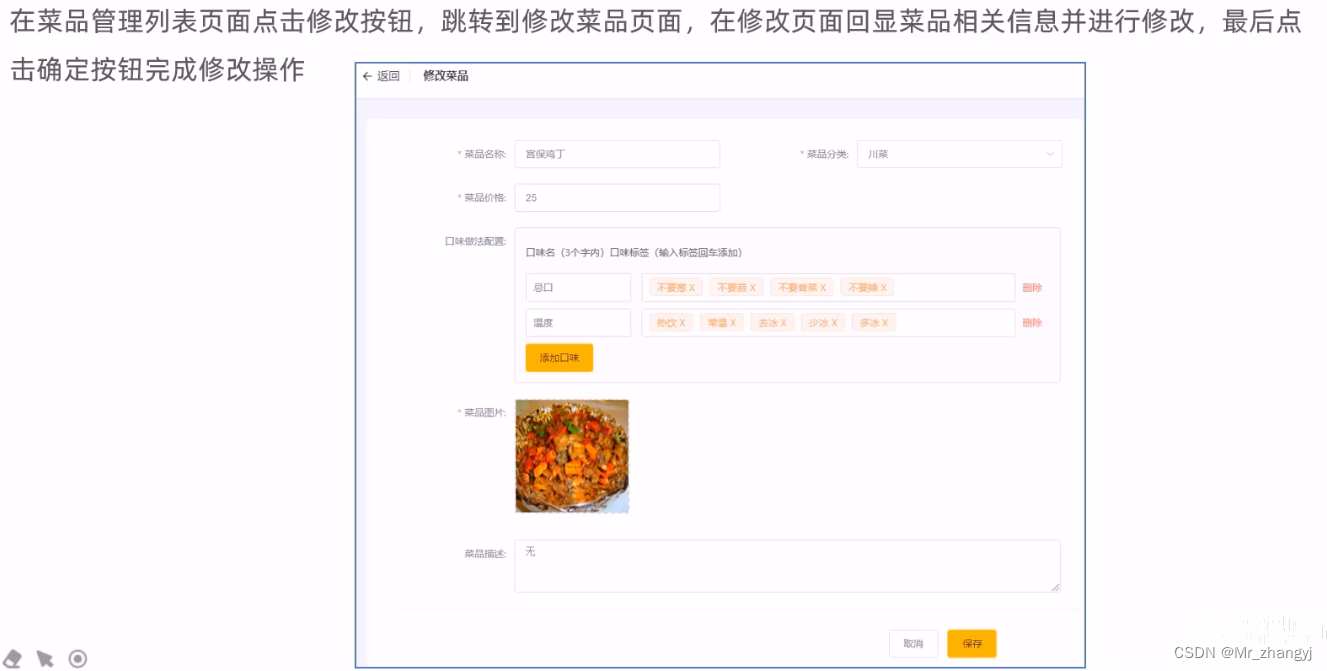
4.1.1、需求分析
4.1.2、页面与服务端的交互过程

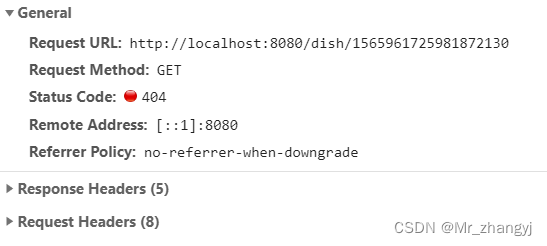
根据 id 查询当前菜品信息的请求:
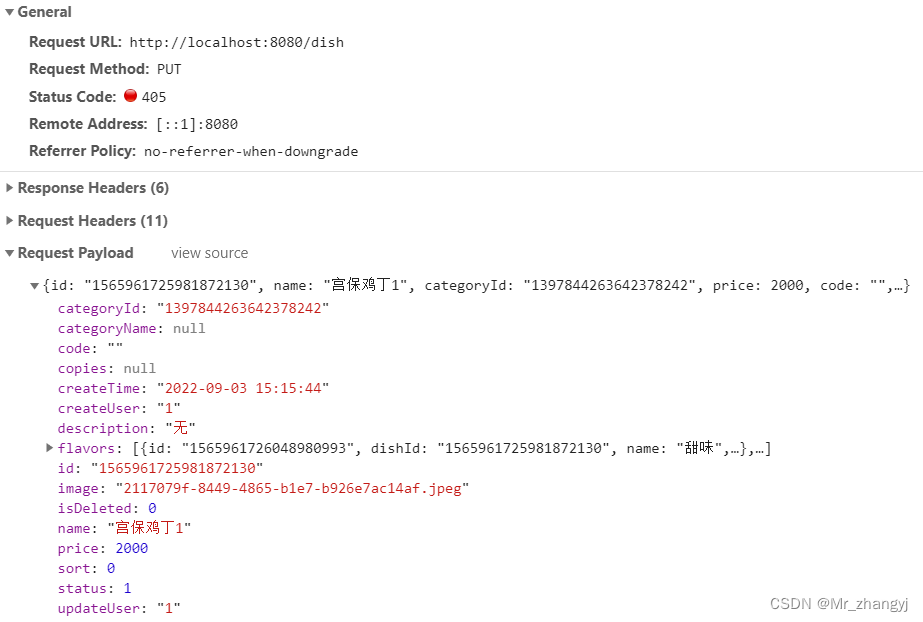
保存修改后的信息的请求:
4.2、代码
4.2.1、菜品信息回显
菜品信息的回显需要获取菜品的基本信息及其口味
① 在 DishSerivce 添加方法
// 根据id查询菜品信息及其口味信息public DishDto getByIdWithFlavor(Long id);② 在 DishServiceImpl 实现方法
/*** 根据id查询菜品信息及其口味信息* @param id* @return*/@Overridepublic DishDto getByIdWithFlavor(Long id) {DishDto dishDto = new DishDto();// 查询菜品基本信息Dish dish = this.getById(id);// 查询菜品对应的口味信息LambdaQueryWrapper<DishFlavor> queryWrapper = new LambdaQueryWrapper<>();queryWrapper.eq(DishFlavor::getDishId, id);List<DishFlavor> flavors = dishFlavorService.list(queryWrapper);// 将查询到的数据封装BeanUtils.copyProperties(dish, dishDto);dishDto.setFlavors(flavors);return dishDto;}③ 在 DishController 中使用方法
/*** 根据id查询菜品信息及其口味信息* @param id* @return*/@GetMapping("/{id}")public R<DishDto> get(@PathVariable Long id){DishDto dishDto = dishSerivce.getByIdWithFlavor(id);return R.success(dishDto);}4.2.2、修改商品实现
① 在 DishSerivce 添加方法
// 更新菜品,同时更新对应的口味信息public void updateWithFlavor(DishDto dishDto);② 在 DishServiceImpl 实现方法
/*** 更新菜品,同时更新对应的口味信息* @param dishDto*/@Override@Transactionalpublic void updateWithFlavor(DishDto dishDto) {// 更新dish菜品表信息this.updateById(dishDto);// 清理当前菜品对应的口味LambdaQueryWrapper<DishFlavor> queryWrapper = new LambdaQueryWrapper<>();queryWrapper.eq(DishFlavor::getDishId, dishDto.getCategoryId());dishFlavorService.remove(queryWrapper);// 添加当前提交过来的口味信息List<DishFlavor> flavors = dishDto.getFlavors();flavors = flavors.stream().map((item) -> {item.setDishId(dishDto.getCategoryId());return item;}).collect(Collectors.toList());dishFlavorService.saveBatch(flavors);}③ 在 DishController 中使用方法
/*** 修改菜品* @return*/@PutMappingpublic R<String> update(@RequestBody DishDto dishDto){dishSerivce.updateWithFlavor(dishDto);return R.success("修改菜品成功");}5、菜品停售与起售(批量)
5.1、分析
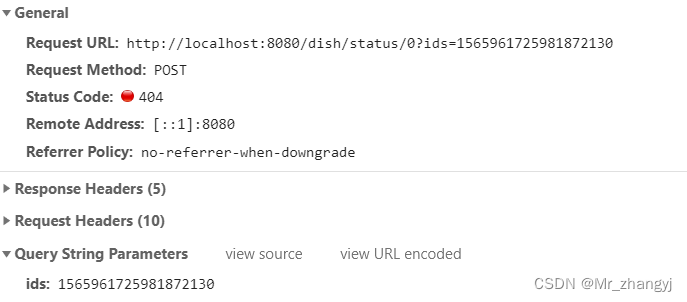
首先查看单个停售或起售的请求
再看一下批量的请求
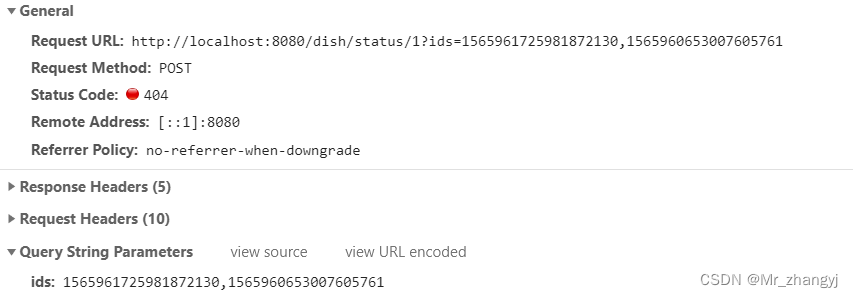
可以将他们写为一个方法
5.2、代码
在 DishController 添加方法
@PostMapping("/status/{status}")public R<String> updateStatus(@PathVariable("status") int status,@RequestParam List<Long> ids){List<Dish> dishes = new ArrayList<>();for (Long id : ids) {Dish dish = new Dish();dish.setStatus(status);dish.setId(id);dishes.add(dish);}dishSerivce.updateBatchById(dishes, dishes.size());return R.success("菜品状态修改成功");}6、(批量)删除
6.1、分析
首先看一下单个删除的请求
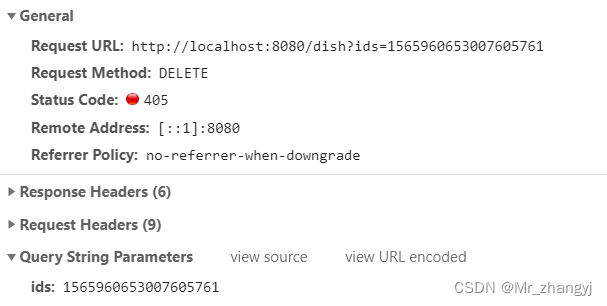
再来看一下批量删除的请求
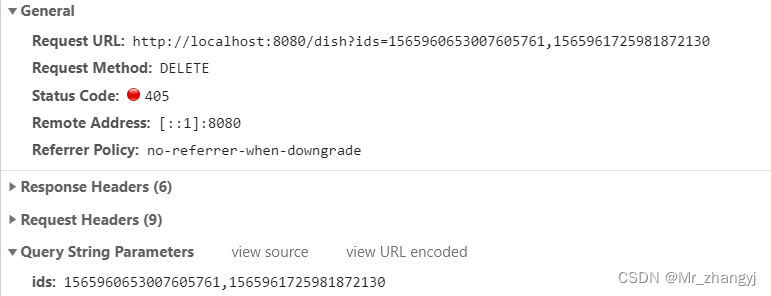
可以看到与修改售卖状态的请求大致相同。
流程:
1、获取请求中要删除的 id,并获取他们的基本信息
2、逐个判断他们的售卖状态,若在启售状态,则无法删除
6.2、代码
6.2.1、添加逻辑删除注解
由于 Dish 和 DishFlavor 中有逻辑删除的字段,所以这里使用逻辑删除。
在 Dish 和 DishFlavor 类的 isDeleted 字段加上 @TableLogic 注解
//是否删除@TableLogic // 逻辑删除private Integer isDeleted;
