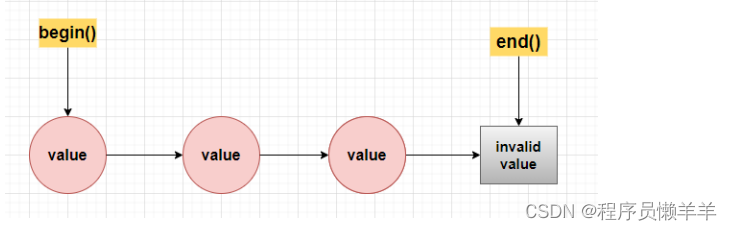
属性填充
属性填充只有 3 种方式
-
根据名称填充
-
根据类型填充
思考什么时候会出现呢???
多见于第三方框架与 Spring集成,举例:Mybatis 与 Spring集成,把 Mapper 接口注册为 BeanDefinition 时候就指定了自动注入模式为『
按类型注入』// 代码位置:org.mybatis.spring.mapper.ClassPathMapperScanner#processBeanDefinitions方法 definition.setAutowireMode(AbstractBeanDefinition.AUTOWIRE_BY_TYPE); -
后置处理器,基本近似认为是
AutowiredAnnotationBeanPostProcessor类多见于自己开发的时候,如通过注解@Autowired 注入,或通过注解@Value 注入
1. 总体流程
protected void populateBean(String beanName, RootBeanDefinition mbd, @Nullable BeanWrapper bw) {boolean continueWithPropertyPopulation = true;// <1> 应用InstantiationAwareBeanPostProcessor的postProcessAfterInstantiation方法if (!mbd.isSynthetic() && hasInstantiationAwareBeanPostProcessors()) {for (BeanPostProcessor bp : getBeanPostProcessors()) {if (bp instanceof InstantiationAwareBeanPostProcessor) {InstantiationAwareBeanPostProcessor ibp = (InstantiationAwareBeanPostProcessor) bp;if (!ibp.postProcessAfterInstantiation(bw.getWrappedInstance(), beanName)) {continueWithPropertyPopulation = false;break;}}}}if (!continueWithPropertyPopulation) {return;}PropertyValues pvs = (mbd.hasPropertyValues() ? mbd.getPropertyValues() : null);// <2> 根据名称自动注入 或者 根据类型自动注入if (mbd.getResolvedAutowireMode() == AUTOWIRE_BY_NAME || mbd.getResolvedAutowireMode() == AUTOWIRE_BY_TYPE) {MutablePropertyValues newPvs = new MutablePropertyValues(pvs);// Add property values based on autowire by name if applicable// <2.1> 根据名称添加属性值if (mbd.getResolvedAutowireMode() == AUTOWIRE_BY_NAME) {autowireByName(beanName, mbd, bw, newPvs);}// Add property values based on autowire by type if applicable// <2.2> 根据类型添加属性值if (mbd.getResolvedAutowireMode() == AUTOWIRE_BY_TYPE) {autowireByType(beanName, mbd, bw, newPvs);}pvs = newPvs;}boolean hasInstAwareBpps = hasInstantiationAwareBeanPostProcessors();boolean needsDepCheck = (mbd.getDependencyCheck() != AbstractBeanDefinition.DEPENDENCY_CHECK_NONE);PropertyDescriptor[] filteredPds = null;if (hasInstAwareBpps) {if (pvs == null) {pvs = mbd.getPropertyValues();}// <3> 应用InstantiationAwareBeanPostProcessor的postProcessProperties方法for (BeanPostProcessor bp : getBeanPostProcessors()) {if (bp instanceof InstantiationAwareBeanPostProcessor) {InstantiationAwareBeanPostProcessor ibp = (InstantiationAwareBeanPostProcessor) bp;PropertyValues pvsToUse = ibp.postProcessProperties(pvs, bw.getWrappedInstance(), beanName);if (pvsToUse == null) {if (filteredPds == null) {filteredPds = filterPropertyDescriptorsForDependencyCheck(bw, mbd.allowCaching);}pvsToUse = ibp.postProcessPropertyValues(pvs, filteredPds, bw.getWrappedInstance(), beanName);if (pvsToUse == null) {return;}}pvs = pvsToUse;}}}// <4> 设置属性值if (pvs != null) {applyPropertyValues(beanName, mbd, bw, pvs);}
}<1>处,应用InstantiationAwareBeanPostProcessor的postProcessAfterInstantiation方法,在实例化之后是否继续处理,一般都会继续处理<2>处,根据名称 或 类型自动注入<2.1>处,根据名称自动注入(重点分析)<2.2>处,根据类型自动注入(重点分析)
<3>处,应用InstantiationAwareBeanPostProcessor的postProcessProperties方法,一般的,就用应用AutowiredAnnotationBeanPostProcessor完成@Autowired或@Value注解的处理<4>处,这里 pvs 变量已经是得到的值了,这里只需要把值设置到 bw 实例中
2. 各种类型的注入
结论:无论是哪一种类型的注入,最后都会调用 getBean 方法,下面的分析只是简单的说明下如何一步一步调用到 getBean 方法的
2.1 按名称填充(autowireByName方法)
总结:这个直接调用 getBean 方法,很简单很好!
protected void autowireByName(String beanName, AbstractBeanDefinition mbd, BeanWrapper bw, MutablePropertyValues pvs) {// <1> 用内省机制查找需要注入的属性String[] propertyNames = unsatisfiedNonSimpleProperties(mbd, bw);for (String propertyName : propertyNames) {if (containsBean(propertyName)) {// <2> 既然是使用根据名称注入,那么简单了直接 getBean(String) 方法Object bean = getBean(propertyName);// <3> 添加到 pvs 中,返回后设置到pvs.add(propertyName, bean);registerDependentBean(propertyName, beanName);}}
}
-
<1>处, 用内省机制查找需要注入的属性(我们重点查看)如何用内省机制查找属性???
protected String[] unsatisfiedNonSimpleProperties(AbstractBeanDefinition mbd, BeanWrapper bw) {Set<String> result = new TreeSet<>();PropertyValues pvs = mbd.getPropertyValues();// <1>、内省机制查找属性PropertyDescriptor[] pds = bw.getPropertyDescriptors();for (PropertyDescriptor pd : pds) {// <2> 并不是所有的属性都需要注入,所以要做过滤(过滤条件:要有 write 方法;不是简单属性而是我们常见的需要注入的属性;pvs 不包含)if (pd.getWriteMethod() != null && !isExcludedFromDependencyCheck(pd) && !pvs.contains(pd.getName()) &&!BeanUtils.isSimpleProperty(pd.getPropertyType())) {result.add(pd.getName());}}return StringUtils.toStringArray(result);
}
结果一些代码会来到如下方法
private CachedIntrospectionResults(Class<?> beanClass) throws BeansException {// <1> 内省机制得到 BeanInfo 对象this.beanInfo = getBeanInfo(beanClass);this.propertyDescriptorCache = new LinkedHashMap<>();// <2> 内省机制获取属性PropertyDescriptor[] pds = this.beanInfo.getPropertyDescriptors();for (PropertyDescriptor pd : pds) {pd = buildGenericTypeAwarePropertyDescriptor(beanClass, pd);this.propertyDescriptorCache.put(pd.getName(), pd);}// <3> 循环处理父接口啊Class<?> currClass = beanClass;while (currClass != null && currClass != Object.class) {introspectInterfaces(beanClass, currClass);currClass = currClass.getSuperclass();}}-
<1>处,使用内省机制获取到 beanClass 的 BeanInfo 信息内省机制:Introspector.getBeanInfo(beanClass)
-
<2>处,获取属性会获取到父类的所有属性 -
<3>处,循环处理父接口啊,为什么不处理父类,因为不需要处理,内省机制获取属性已经包含了父类的属性
-
-
<2>处, 因为是使用名称注入,那么直接用属性的名称,然后调用 getBean(String) 方法 -
<3>处,把 bean 设置到 pvs 中返回,交由主方法调用 setXxx 方法把数据设置到目标中
2.2 按类型填充(autowireByType方法)
跟按名称注入大致一样,比它略多几个步骤(多一个解析依赖),代码如下:
protected void autowireByType(String beanName, AbstractBeanDefinition mbd, BeanWrapper bw, MutablePropertyValues pvs) {TypeConverter converter = getCustomTypeConverter();if (converter == null) {converter = bw;}Set<String> autowiredBeanNames = new LinkedHashSet<>(4);// <1> 内省机制查找注入属性String[] propertyNames = unsatisfiedNonSimpleProperties(mbd, bw);for (String propertyName : propertyNames) {PropertyDescriptor pd = bw.getPropertyDescriptor(propertyName);if (Object.class != pd.getPropertyType()) {MethodParameter methodParam = BeanUtils.getWriteMethodParameter(pd);boolean eager = !PriorityOrdered.class.isInstance(bw.getWrappedInstance());DependencyDescriptor desc = new AutowireByTypeDependencyDescriptor(methodParam, eager);// <2> 解析依赖,重点方法Object autowiredArgument = resolveDependency(desc, beanName, autowiredBeanNames, converter);if (autowiredArgument != null) {pvs.add(propertyName, autowiredArgument);}}}
}
-
<1>处,用内省机制查找注入的属性的 unsatisfiedNonSimpleProperties 方法,同前面的『按名称填充(autowireByName方法)』,略 -
<2>处,重点分析解析依赖resolveDependency 方法完成依赖解析,其实也就是最后调用 getBean 方法!!!
public Object resolveDependency(DependencyDescriptor descriptor, @Nullable String requestingBeanName,@Nullable Set<String> autowiredBeanNames, @Nullable TypeConverter typeConverter) throws BeansException {// 解析依赖result = doResolveDependency(descriptor, requestingBeanName, autowiredBeanNames, typeConverter);return result;
}
public Object doResolveDependency(DependencyDescriptor descriptor, @Nullable String beanName,@Nullable Set<String> autowiredBeanNames, @Nullable TypeConverter typeConverter) throws BeansException {InjectionPoint previousInjectionPoint = ConstructorResolver.setCurrentInjectionPoint(descriptor);try {// <1> 如果注入的类型是 Array、List、Map 等集合类型Object multipleBeans = resolveMultipleBeans(descriptor, beanName, autowiredBeanNames, typeConverter);if (multipleBeans != null) {return multipleBeans;}// <2> 注入的不是集合类型,但可能匹配了多个Map<String, Object> matchingBeans = findAutowireCandidates(beanName, type, descriptor);if (matchingBeans.isEmpty()) {if (isRequired(descriptor)) {raiseNoMatchingBeanFound(type, descriptor.getResolvableType(), descriptor);}return null;}if (matchingBeans.size() > 1) {// <2.1> 类型匹配了多个,那么就要决定使用哪一个(如在@Primary and @Priority就会出现这种情况)autowiredBeanName = determineAutowireCandidate(matchingBeans, descriptor);instanceCandidate = matchingBeans.get(autowiredBeanName);}else {// <2.2> 刚好匹配一个,更多的是这种情况Map.Entry<String, Object> entry = matchingBeans.entrySet().iterator().next();autowiredBeanName = entry.getKey();instanceCandidate = entry.getValue();}if (autowiredBeanNames != null) {autowiredBeanNames.add(autowiredBeanName);}if (instanceCandidate instanceof Class) {// <3> 解析候选值,这里会调用 getBean 方法instanceCandidate = descriptor.resolveCandidate(autowiredBeanName, type, this);}Object result = instanceCandidate;// <4> 返回 getBean 方法结果return result;}finally {ConstructorResolver.setCurrentInjectionPoint(previousInjectionPoint);} }<1>处,处理集合类型的注入(如 Array、List、Map等)<2>处,处理单个注入,但是也可能会匹配到多个此时就需要考虑优先级选择出一个(如 @Primary 注解)<3>处,调用 getBean 方法完成实际的依赖注入<4>处,返回注入的结果
public Object resolveCandidate(String beanName, Class<?> requiredType, BeanFactory beanFactory)throws BeansException {// 终于看到我们想要看的 getBean 方法了!return beanFactory.getBean(beanName);
}
2.3 AutowiredAnnotationBeanPostProcessor的postProcessProperties方法
public PropertyValues postProcessProperties(PropertyValues pvs, Object bean, String beanName) {// <1> 发现 Autowired 元数据InjectionMetadata metadata = findAutowiringMetadata(beanName, bean.getClass(), pvs);// <2> 执行实际注入metadata.inject(bean, beanName, pvs);return pvs;
}
-
<1>处,查找 beanClass 中的@Autowired 元数据信息private InjectionMetadata buildAutowiringMetadata(final Class<?> clazz) {List<InjectionMetadata.InjectedElement> elements = new ArrayList<>();Class<?> targetClass = clazz;do {final List<InjectionMetadata.InjectedElement> currElements = new ArrayList<>();// <1> 查找本地字段ReflectionUtils.doWithLocalFields(targetClass, field -> {// 是不是有@Autowired 或 @Value 这些注解AnnotationAttributes ann = findAutowiredAnnotation(field);if (ann != null) {boolean required = determineRequiredStatus(ann);currElements.add(new AutowiredFieldElement(field, required));}});// <2> 查找本地方法ReflectionUtils.doWithLocalMethods(targetClass, method -> {// 是不是有@Autowired 或 @Value 这些注解Method bridgedMethod = BridgeMethodResolver.findBridgedMethod(method);if (!BridgeMethodResolver.isVisibilityBridgeMethodPair(method, bridgedMethod)) {return;}AnnotationAttributes ann = findAutowiredAnnotation(bridgedMethod);if (ann != null && method.equals(ClassUtils.getMostSpecificMethod(method, clazz))) {boolean required = determineRequiredStatus(ann);PropertyDescriptor pd = BeanUtils.findPropertyForMethod(bridgedMethod, clazz);currElements.add(new AutowiredMethodElement(method, required, pd));}});// <3> 处理父类elements.addAll(0, currElements);targetClass = targetClass.getSuperclass();}while (targetClass != null && targetClass != Object.class);return new InjectionMetadata(clazz, elements); }<1>处,处理了本地字段是否包含了指定的注解,如果包含则加入到元数据中<2>处,处理了本地方法是否包含了指定的注解,如果包含则加入到元数据中<3>处,循环处理父类直到全部处理完毕
-
<2>处,根据前面得到的InjectionMetadata,执行实际的注入,最后会调用到 getBean 方法,以下简单代码描述如何一步一步调用到 getBean 方法public void inject(Object target, @Nullable String beanName, @Nullable PropertyValues pvs) throws Throwable {Collection<InjectedElement> checkedElements = this.checkedElements;Collection<InjectedElement> elementsToIterate =(checkedElements != null ? checkedElements : this.injectedElements);// 循环处理每个注入元数据的注入if (!elementsToIterate.isEmpty()) {for (InjectedElement element : elementsToIterate) {element.inject(target, beanName, pvs);}} }protected void inject(Object bean, @Nullable String beanName, @Nullable PropertyValues pvs) throws Throwable {// <1> 解析@Autowired 依赖value = beanFactory.resolveDependency(desc, beanName, autowiredBeanNames, typeConverter);// <2> 反射设置字段的值if (value != null) {ReflectionUtils.makeAccessible(field);field.set(bean, value);} }-
<1>处,依赖解析方法 resolveDependency 同前面的『按类型填充(autowireByType方法)』,略 -
<2> 处,使用了反射设置属性值,并没有像autowireByName 或 autowireByType 一样把属性添加到 pvs 中,最后才设置属性
-
3. 属性值设置
略