参考:
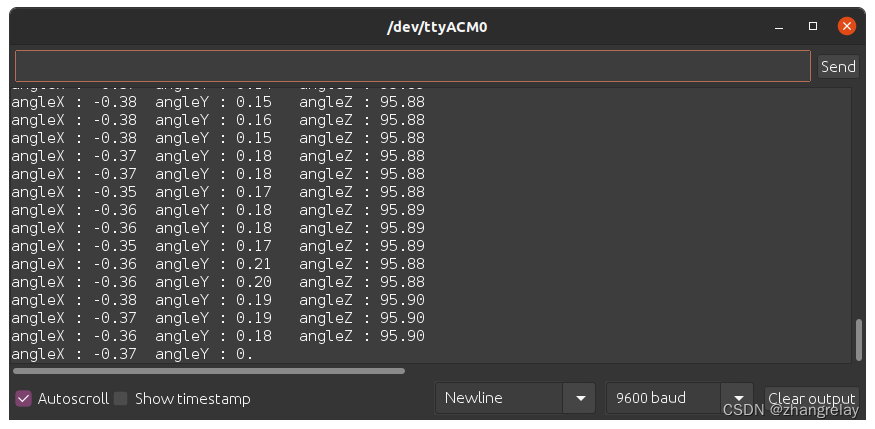
输出x,y,z角度信息:
#include <MPU6050_tockn.h>
#include <Wire.h>MPU6050 mpu6050(Wire);void setup() {Serial.begin(9600);Wire.begin();mpu6050.begin();mpu6050.calcGyroOffsets(true);
}void loop() {mpu6050.update();Serial.print("angleX : ");Serial.print(mpu6050.getAngleX());Serial.print("\tangleY : ");Serial.print(mpu6050.getAngleY());Serial.print("\tangleZ : ");Serial.println(mpu6050.getAngleZ());
}
效果如下:

发送到ROS绘制曲线或做其他用途的,晚些时候补充。
CoCube显示测试笔记
结合这一篇,使用CoCube自带显示进行姿态反馈?
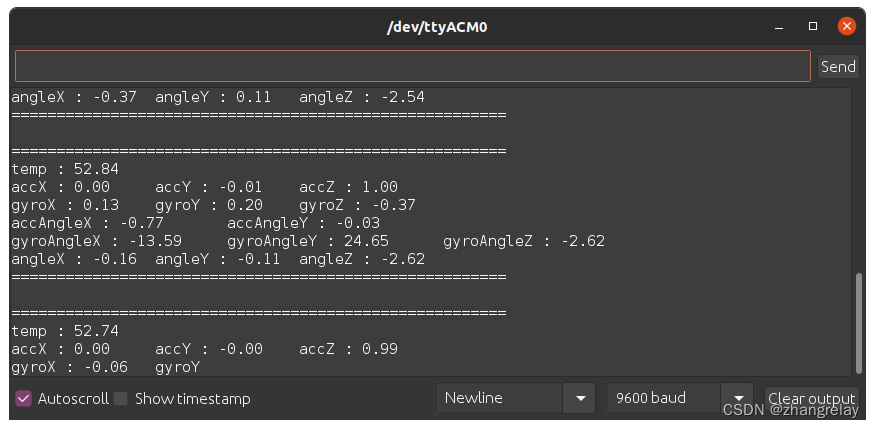
再补充一个全部信息:
#include <MPU6050_tockn.h>
#include <Wire.h>MPU6050 mpu6050(Wire);long timer = 0;void setup() {Serial.begin(9600);Wire.begin();mpu6050.begin();mpu6050.calcGyroOffsets(true);
}void loop() {mpu6050.update();if(millis() - timer > 1000){Serial.println("=======================================================");Serial.print("temp : ");Serial.println(mpu6050.getTemp());Serial.print("accX : ");Serial.print(mpu6050.getAccX());Serial.print("\taccY : ");Serial.print(mpu6050.getAccY());Serial.print("\taccZ : ");Serial.println(mpu6050.getAccZ());Serial.print("gyroX : ");Serial.print(mpu6050.getGyroX());Serial.print("\tgyroY : ");Serial.print(mpu6050.getGyroY());Serial.print("\tgyroZ : ");Serial.println(mpu6050.getGyroZ());Serial.print("accAngleX : ");Serial.print(mpu6050.getAccAngleX());Serial.print("\taccAngleY : ");Serial.println(mpu6050.getAccAngleY());Serial.print("gyroAngleX : ");Serial.print(mpu6050.getGyroAngleX());Serial.print("\tgyroAngleY : ");Serial.print(mpu6050.getGyroAngleY());Serial.print("\tgyroAngleZ : ");Serial.println(mpu6050.getGyroAngleZ());Serial.print("angleX : ");Serial.print(mpu6050.getAngleX());Serial.print("\tangleY : ");Serial.print(mpu6050.getAngleY());Serial.print("\tangleZ : ");Serial.println(mpu6050.getAngleZ());Serial.println("=======================================================\n");timer = millis();}}
程序简洁,应该直接能看懂,不需要赘述。

结合角度信息给显示赋值。
#include <MPU6050_tockn.h>
#include <Wire.h>
#include <Adafruit_NeoPixel.h>// Which pin on the Arduino is connected to the NeoPixels?
#define PIN 16 // On Trinket or Gemma, suggest changing this to 1// How many NeoPixels are attached to the Arduino?
#define NUMPIXELS 64 // Popular NeoPixel ringMPU6050 mpu6050(Wire);
Adafruit_NeoPixel pixels(NUMPIXELS, PIN, NEO_GRB + NEO_KHZ800);unsigned char DELAYVAL=1; // Time (in milliseconds) to pause between pixels
void setup() {
Serial.begin(9600);
Wire.begin();
mpu6050.begin();
mpu6050.calcGyroOffsets(true);
pixels.begin(); // INITIALIZE NeoPixel strip object (REQUIRED)
}void loop() {
mpu6050.update();
// Serial.print("angleX : ");
// Serial.print(mpu6050.getAngleX());
// Serial.print("\tangleY : ");
// Serial.print(mpu6050.getAngleY());
// Serial.print("\tangleZ : ");
// Serial.println(mpu6050.getAngleZ());
for(int i=0; i<NUMPIXELS; i++) { // For each pixel...
pixels.setPixelColor(i, pixels.Color(16*(abs(mpu6050.getAngleX())/180.0), 16*(abs(mpu6050.getAngleY())/180.0), 16*(abs(mpu6050.getAngleZ())/180.0)));
pixels.show(); // Send the updated pixel colors to the hardware.
// delay(DELAYVAL); // Pause before next pass through loop
}
}
补充:
MPU-6000(6050)的角速度全格感测范围为±250、±500、±1000与±2000°/sec (dps),可准确追踪快速与慢速动作,并且,用户可程式控制的加速器全格感测范围为±2g、±4g±8g与±16g。产品传输可透过最高至400kHz的IIC或最高达20MHz的SPI(MPU-6050没有SPI)。MPU-6000可在不同电压下工作,VDD供电电压介为2.5V±5%、3.0V±5%或3.3V±5%,逻辑接口VDDIO供电为1.8V± 5%(MPU6000仅用VDD)。MPU-6000的包装尺寸4x4x0.9mm(QFN),在业界是革命性的尺寸。其他的特征包含内建的温度感测器、包含在运作环境中仅有±1%变动的振荡器。
NeoPixels也被称为WS2812 LED彩带,是连接在一起的全彩色led灯串。你可以设置他它们的红色,绿色和蓝色值, 在0到255之间。neopixel模块可通过精确的时间控制,生成WS2812控制信号。


