一、安装router
npm i vue-router
二、路由跳转
2.1 创建路由实例
在
src目录下创建router文件夹,在其中创建一个index.js文件,创建路由实例。
通过vue-router的createRouter方法创建一个router对象。其中有history和routes
1.history:
- history是前端路由库提供的一个对象,负责管理浏览器历史记录的状态和导航。
- 它可以通过push、replace、go等方法来控制浏览器的历史记录。并相应地更新当前页面的显示内容。
- history对象根据所使用的路由类型不同,可以是浏览器原生的window.history,也可以是createBrowserHistory、createHashHistory等函数创建的自定义对象。
2.routes:
- routes表示路由配置,指定了不同URL对应的组件及其其他属性。
- 路由配置一般以树状结构的方式组织,每个路由都包含一个路径(path),和对应的路由组件(component)。
- 在路由系统中,可以根据匹配到的URL路径来渲染相应的组件,从而实现页面的切换和导航。
- 通过配置不同的路由规则,可以构建出应用程序的不同页面和导航逻辑。
src/router/index.js
/***  路由文件*///引入router
import { createRouter, createWebHistory } from 'vue-router'// 定义路由组件路径
/*这里的path和name都是自定义命名
*/
const routes = [{name: 'login',  path: '/login',component: () => import('../components/login.vue')}, {name: 'registry',path: '/registry', component: () => import('../components/registry.vue')}
];// 创建Router对象
const router = createRouter({history: createWebHistory(),routes
})// 导出对象export default router;
2.2 挂载路由实例
main.js
import { createApp } from 'vue'
import App from './App.vue'
// 引入全局路由
import router from './router'const app = createApp(App)app.use(router)
app.mount('#app')
// createApp(App).mount('#app')
2.3 创建页面组件
login.vue
<template><div class="login"><h1>我是login页面</h1></div>
</template>
export default {name: 'login',setup() {return {}}
}
registry.vue
<template><div><h1>我是registry页面</h1></div>
</template>
export default {name: 'registry',setup() {return {}}
}
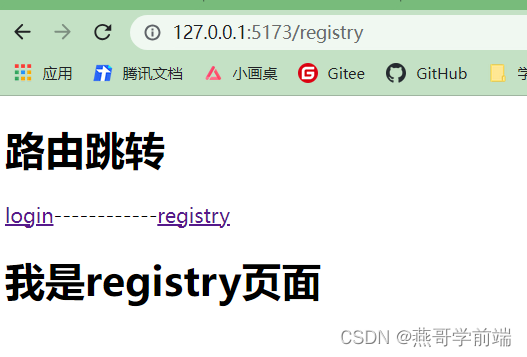
2.4 通过router-link跳转
在Vue Router中,
<router-view>是用作路由占位符的组件。它是被放置在Vue应用模板中的一个特殊标记,用于渲染当前活跃的路由组件。当使用Vue Router进行路由管理时,你可以在路由配置中定义不同的路径与对应的组件。当用户访问不同的路径时,<router-view>会自动根据当前路径匹配到的组件来展示内容。
<router-view>可以将路由地址和组件映射起来,可以使用<router-link>来进行页面跳转。它的to属性,能够跳转到对应的path,从而展示path下的component组件。
App.vue
<template><h1>路由跳转</h1><div><!-- 通过路由name、path完成跳转 --><router-link :to="{name:'login'}">login</router-link><span>------------</span><router-link to="/registry">registry</router-link><router-view ></router-view></div>
</template>

2.5 通过js方法跳转
<script setup>
import { useRouter} from 'vue-router'const router = useRouter(); // 通过路由path跳转const toLink = (path) => {router.push(path)}// 通过路由name跳转const toLink1 = (name) => {router.push({name:name})}  </script>
<template><div class="btn"><!-- 通过js方法完成路由跳转 --><button @click="toLink('/login')">按钮1--->login</button><button @click="toLink1('registry')">按钮2--->registry</button></div>
</template>
三、路由传参
3.1 query
<script setup>
import { useRouter,useRoute } from 'vue-router'const router = useRouter();const route = useRoute();// 通过路由传参const toLink2 = (path) => {router.push({name: path,query:{name:'zhangsan',pwd:'123456'}})// 截取路由参数console.log(rouet.query);
}</script><template><h1>路由传参</h1><div class="btn"><!-- 通过路由传参 --><button @click="toLink2('registry')">to registry</button></div>
</template>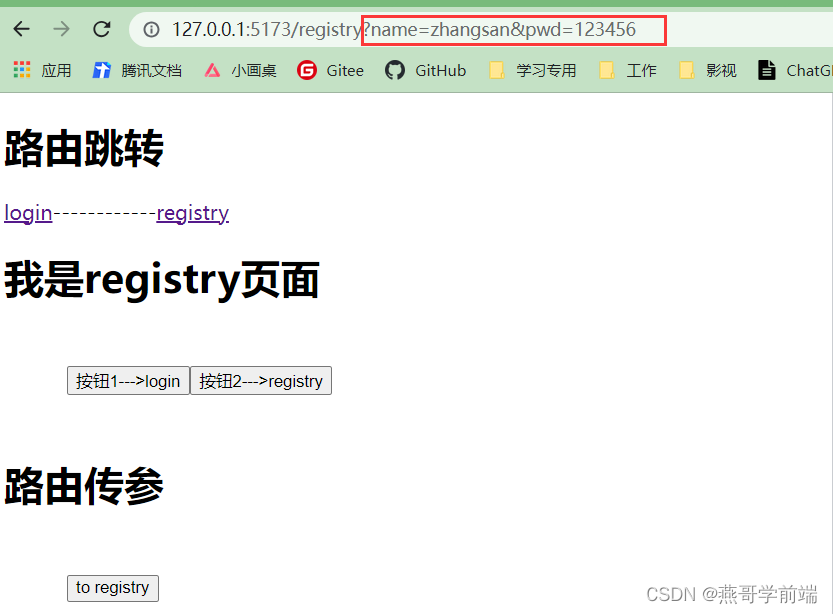

3.2 params
先修改path的值,再用params传参
router/index.js
{name: 'login',path: '/login',component: () => import('../components/login.vue')}, {name: 'registry',path: '/registry/:name', // 使用param需要修改path的形式component: () => import('../components/registry.vue')}
App.vue
<script setup>
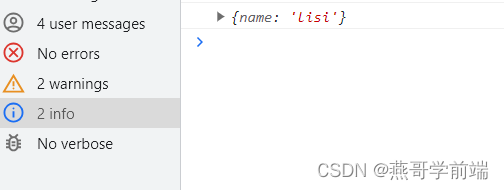
import { useRouter,useRoute } from 'vue-router'const router = useRouter();const route = useRoute();// 通过路由传参const toLink3 = (path) => {router.push({name: path,params:{name:'lisi'}})console.log(route.params);} </script><template><h1>路由传参</h1><div class="btn"><!-- param --><button @click="toLink3('registry')">param</button></div>
</template>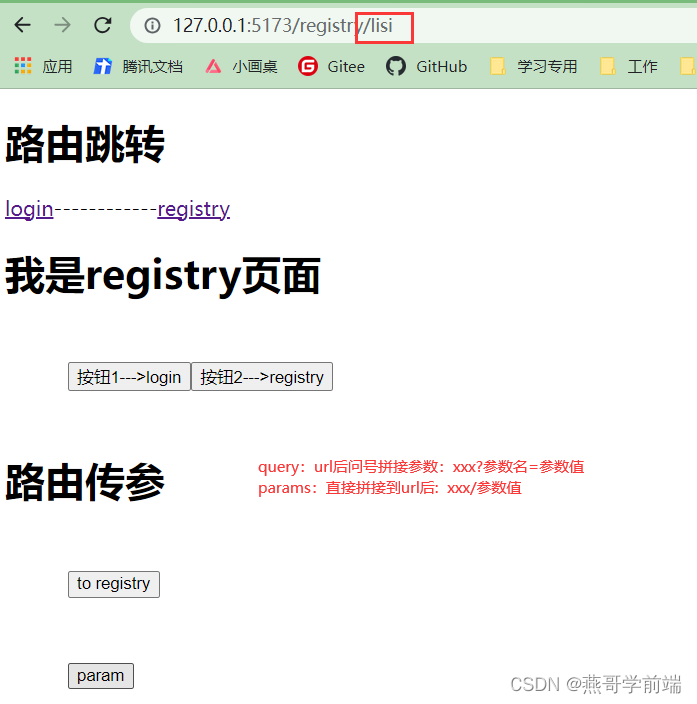
四、路由嵌套
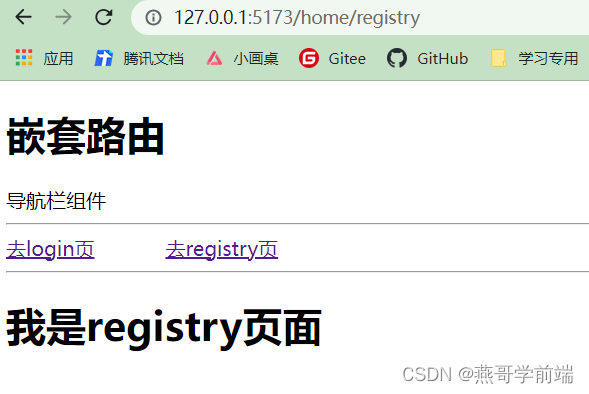
Vue的路由嵌套指的是在一个路由配置中,将多个子路由组织成一个层级结构。这样可以更好地管理和组织复杂的应用程序页面。要创建嵌套路由,需要再父路由中定义子路由,并在组件内部使用
<router-view>标签来显示子路由的内容。
/***  路由文件*///引入router
import { createRouter, createWebHistory } from 'vue-router'// 定义路由组件路径
const routes = [{path: '/',redirect: { path: '/home' }, // 重定向到path为 home 的路由},{name: 'home',path: '/home',component: () => import('../components/home.vue'),children: [{name: 'login',path: '/home/login',component: () => import('../components/login.vue')}, {name: 'registry',path: '/home/registry', component: () => import('../components/registry.vue')}]},];
home.vue
<template><div><div>导航栏组件</div><hr><router-link to="/home/login">去login页</router-link><span> </span><router-link to="/home/registry">去registry页</router-link><hr><router-view /> </div>
</template>
App.vue
<script setup></script><template><h1>嵌套路由</h1><router-view ></router-view>
</template>
五、路由重定向
在Vue Router中,路由重定向是指当用户访问某个路径时,将其重定向到另一个路径。这可以通过路由配置中的
redirect属性来实现。
const routes = [{path: '/',redirect: '/home' // 当用户访问根路径'/'时,重定向到'/home'},{path: '/home',component: Home}
]
