文章目录
- 一、进程控制
- 1.1 POSIX线程库
- 1.2 创建线程pthread_create
- 1.2.1 创建一批线程
- 1.3 终止线程pthread_exit
- 1.4 线程等待pthread_jion
- 1.4.1 线程的返回值(退出码)
- 1.5 取消线程pthread_cancel
- 1.6 C++多线程
- 1.7 分离线程pthread_detach
- 二、线程ID值
- 三、线程局部存储__thread
- 四、原生线程库的封装
一、进程控制
1.1 POSIX线程库
这是由原生线程库提供的,遵守POSIX标准。这个标准就像前面学过的system V标准。
有以下特点:
1️⃣ 与线程有关的函数构成了一个完整的系列,绝大多数函数的名字都是以
pthread_打头的。
2️⃣ 要使用这些函数库,要通过引入头文<pthread.h>。
3️⃣ 链接这些线程函数库时要使用编译器命令的-lpthread选项。
1.2 创建线程pthread_create
#include <pthread.h>int pthread_create(pthread_t *thread, const pthread_attr_t *attr,void *(*start_routine) (void *), void *arg);
Compile and link with -pthread.// 链接的时候必须加上-lpthreadRETURN VALUE
On success, pthread_create() returns 0;
on error, it returns an error number, and the contents of *thread are undefined.
参数说明:
thread:线程id
attr:线程属性,直接设为null
start_routine:函数指针
arg:这个参数会传递进start_routine的void*参数中。
这里在链接的时候要注意link到系统给的原生线程库-lpthread。
对于错误的检查:
像我们以前的函数基本都是设置进全局变量errno来指示错误,而pthreads函数出错时不会设置全局变量errno,因为全部变量会被多个线程共享。它会将错误代码通过返回值返回。
1.2.1 创建一批线程
#include <iostream>
#include <string>
#include <pthread.h>
#include <vector>
#include <unistd.h>using std::cout;
using std::endl;void* start_stream(void* str)
{std::string name = static_cast<const char*>(str);while(true){cout << "i am new thread: " << name << endl;sleep(1);}
}#define NUM 10int main()
{// 创建一批线程for(int i = 0; i < NUM; i++){pthread_t tid;pthread_create(&tid, nullptr, start_stream, (void*)"new thread");}// 创建完毕while(true){cout << "-----------create success-----------" << endl;sleep(1);}return 0;
}

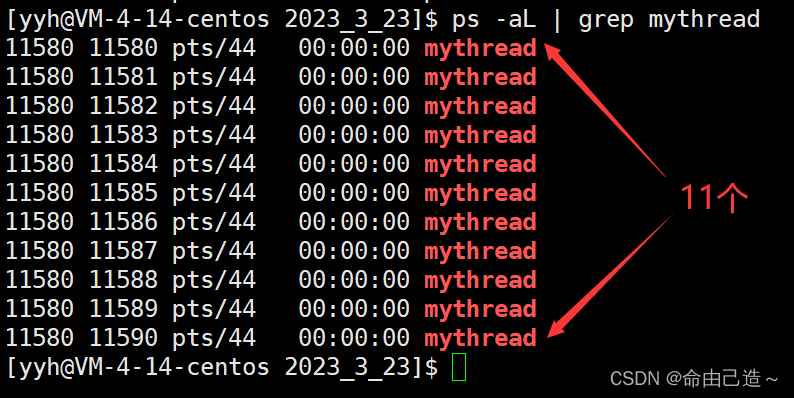
现在我们给每个线程传递进去的时候加上一个编号:
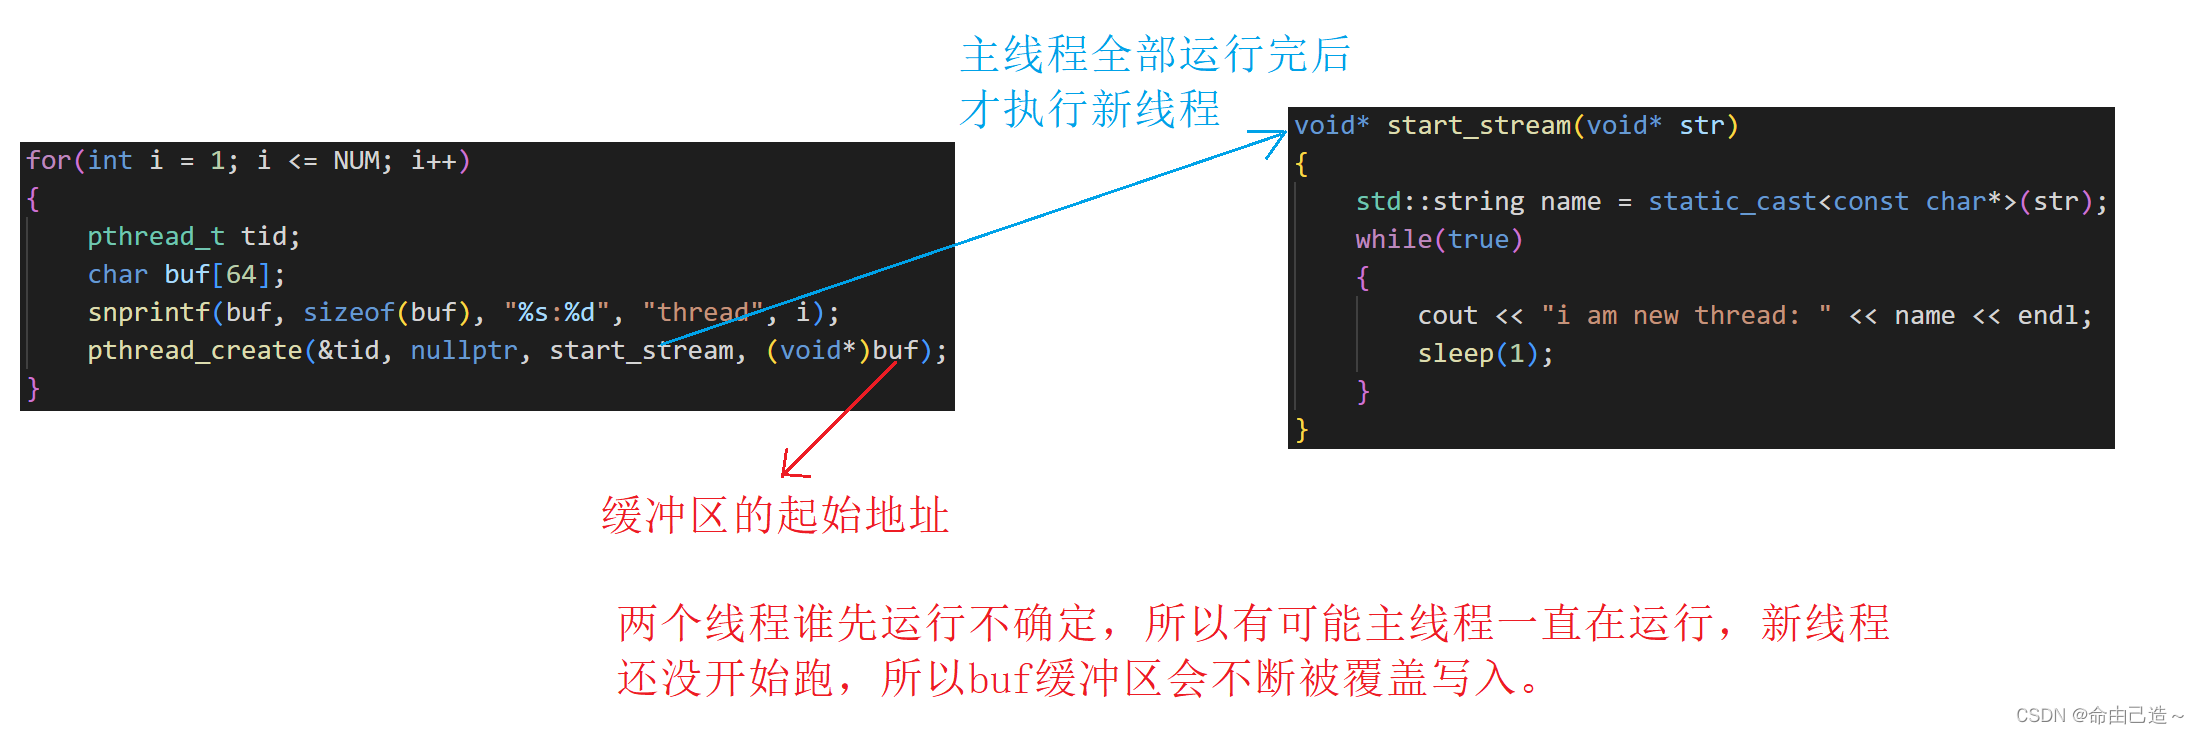
for(int i = 1; i <= NUM; i++)
{pthread_t tid;char buf[64];snprintf(buf, sizeof(buf), "%s:%d", "thread", i);pthread_create(&tid, nullptr, start_stream, (void*)buf);
}
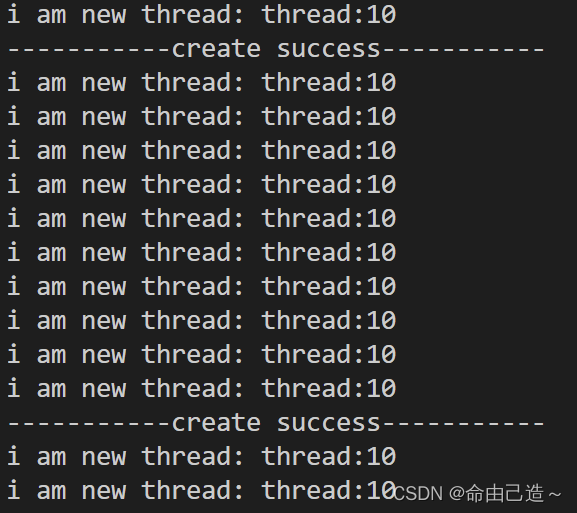
为什么会出现这个现象呢?
那么真正的写法应该是什么呢?
我们主要目的是让每个线程都不会共享buf。
class ThreadData
{
public:pthread_t _tid;char _buf[64];
};void* start_stream(void* args)
{ThreadData *ptd = static_cast<ThreadData *>(args);while(true){cout << "i am new thread: " << ptd->_buf << endl;sleep(1);}
}#define NUM 10int main()
{// 创建一批线程for(int i = 1; i <= NUM; i++){ThreadData *ptd = new ThreadData();snprintf(ptd->_buf, sizeof(ptd->_buf), "%s:%d", "thread", i);pthread_create(&ptd->_tid, nullptr, start_stream, (void*)ptd);}// 创建完毕while(true){cout << "-----------create success-----------" << endl;sleep(1);}return 0;
}
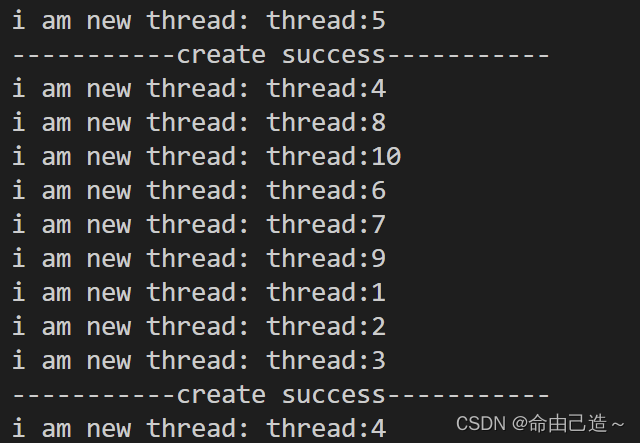
这样每个线程所获得的buf都是不同的。
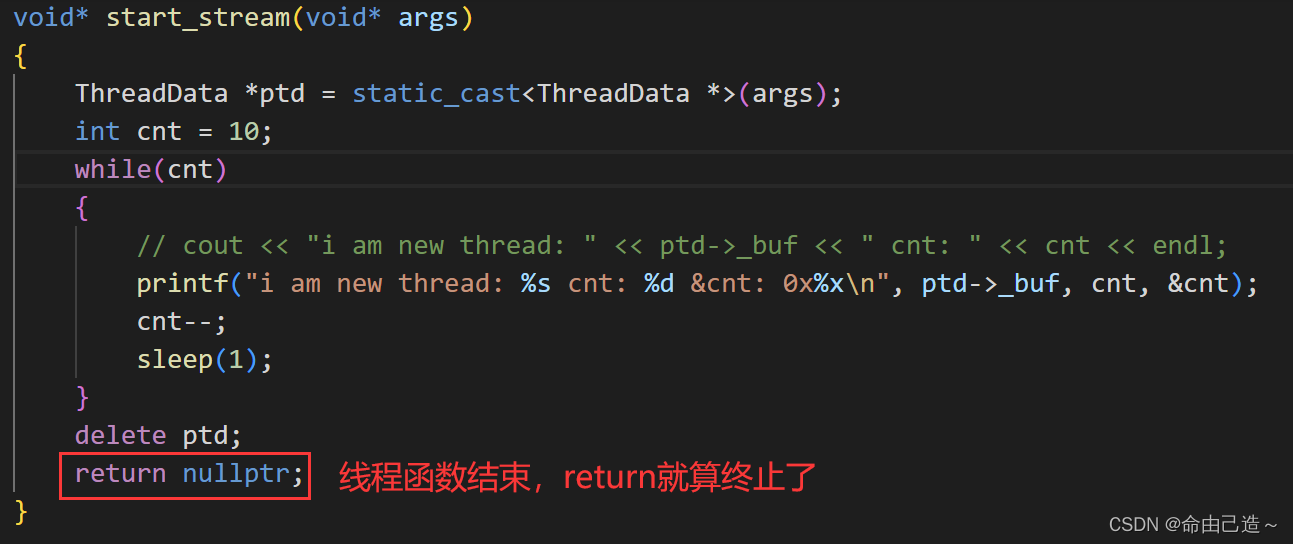
再加上一个计数器:
void* start_stream(void* args)
{ThreadData *ptd = static_cast<ThreadData *>(args);int cnt = 10;while(cnt){// cout << "i am new thread: " << ptd->_buf << " cnt: " << cnt << endl;printf("i am new thread: %s cnt: %d &cnt: 0x%x\n", ptd->_buf, cnt, &cnt);cnt--;sleep(1);}delete ptd;return nullptr;
}
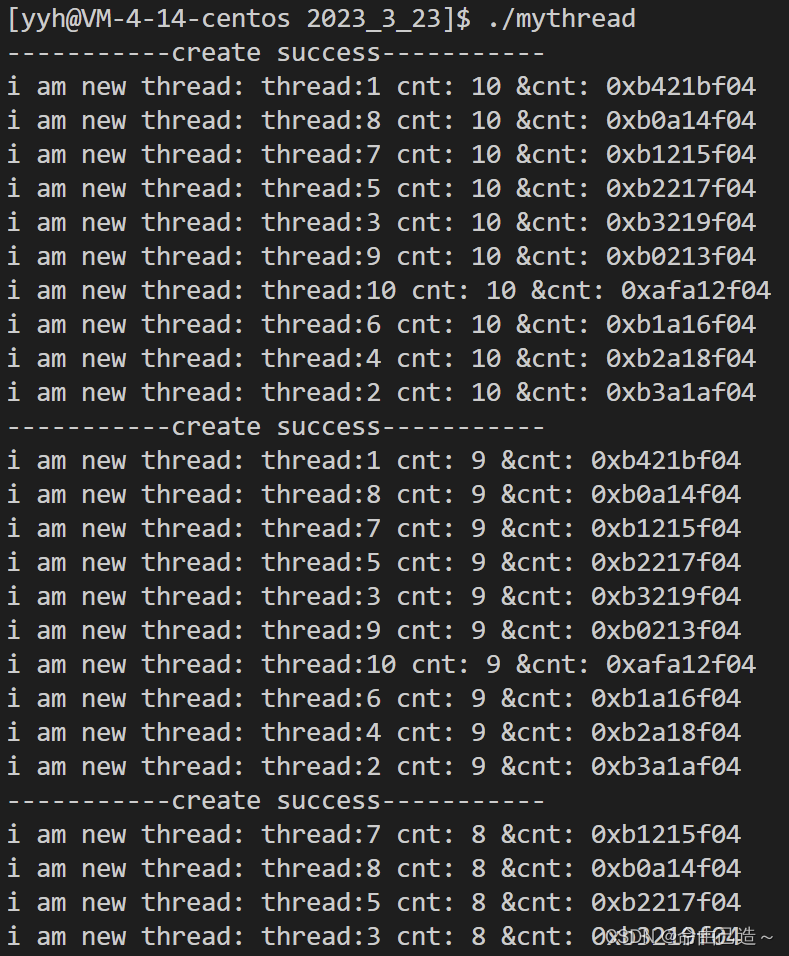
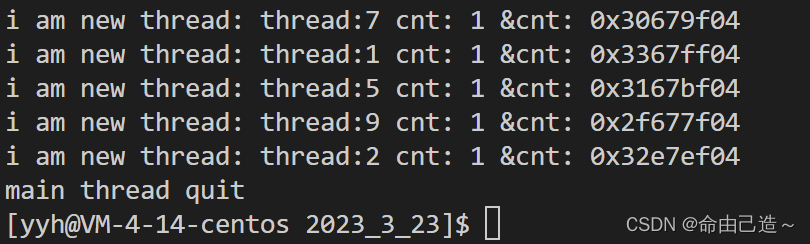
这里可以看到每个线程cnt的地址都不一样,所以每个线程都有不同的cnt,不会相互影响。
这就证明了每一个线程都有自己独立的栈结构。
这个调用方法函数就是一个可重入函数,每个线程都会形成独立的栈帧。
1.3 终止线程pthread_exit
首先要知道最基本的终止方法:
这里要注意exit不能用来终止线程,使用exit整个进程都会退出,所以exit是用来终止进程的。
POSIX线程库专门给了一个接口用来结束终止线程。
#include <pthread.h>void pthread_exit(void *retval);Compile and link with -pthread.
参数可以默认设置为nullptr。
void* start_stream(void* args)
{ThreadData *ptd = static_cast<ThreadData *>(args);int cnt = 10;while(cnt){printf("i am new thread: %s cnt: %d &cnt: 0x%x\n", ptd->_buf, cnt, &cnt);cnt--;sleep(1);}delete ptd;//return nullptr;pthread_exit(nullptr);// 结束线程
}
可以看到把新建线程结束后,主线程还在继续运行。
当然也可以使用return来终止。
1.4 线程等待pthread_jion
跟进程一样线程也是要等待的,如果不等待,就会造成内存泄漏(类似僵尸进程)。
而等待主要是要做:
- 获取新线程的退出信息。
- 回收新线程对应的PCB等内核资源,防止内存泄漏。
#include <pthread.h>int pthread_join(pthread_t thread, void **retval);Compile and link with -pthread.RETURN VALUE
On success, pthread_join() returns 0;
on error, it returns an error number.
参数说明:
thread:要等待的线程。
retval:后面1.4.1线程的返回值详细说明。
class ThreadData
{
public:pthread_t _tid;char _buf[64];
};void* start_stream(void* args)
{ThreadData *ptd = static_cast<ThreadData *>(args);int cnt = 10;while(cnt){printf("i am new thread: %s cnt: %d &cnt: 0x%x\n", ptd->_buf, cnt, &cnt);cnt--;sleep(1);}delete ptd;// return nullptr;pthread_exit(nullptr);// 结束线程
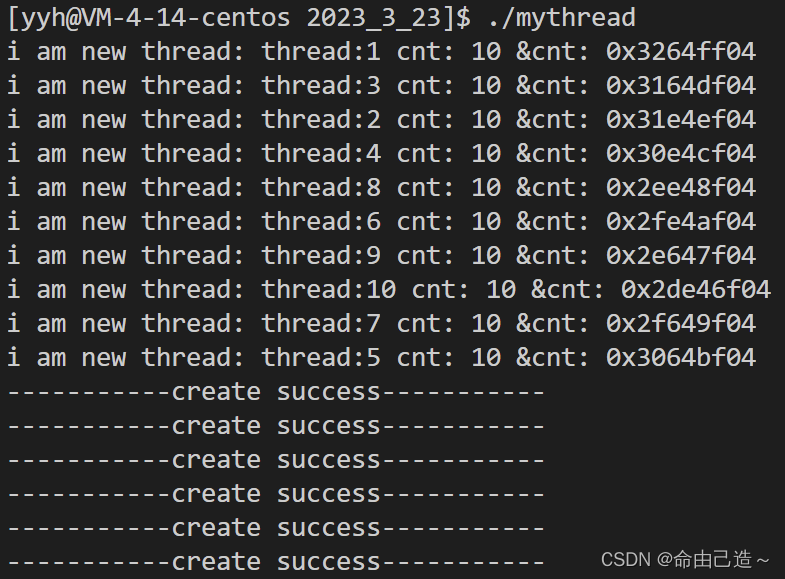
}#define NUM 10int main()
{// 创建一批线程std::vector<ThreadData*> tids;for(int i = 1; i <= NUM; i++){ThreadData *ptd = new ThreadData();snprintf(ptd->_buf, sizeof(ptd->_buf), "%s:%d", "thread", i);pthread_create(&ptd->_tid, nullptr, start_stream, (void*)ptd);tids.push_back(ptd);}for(auto& e : tids){printf("creat thread: %s : 0x%x success\n", e->_buf, e->_tid);}return 0;
}
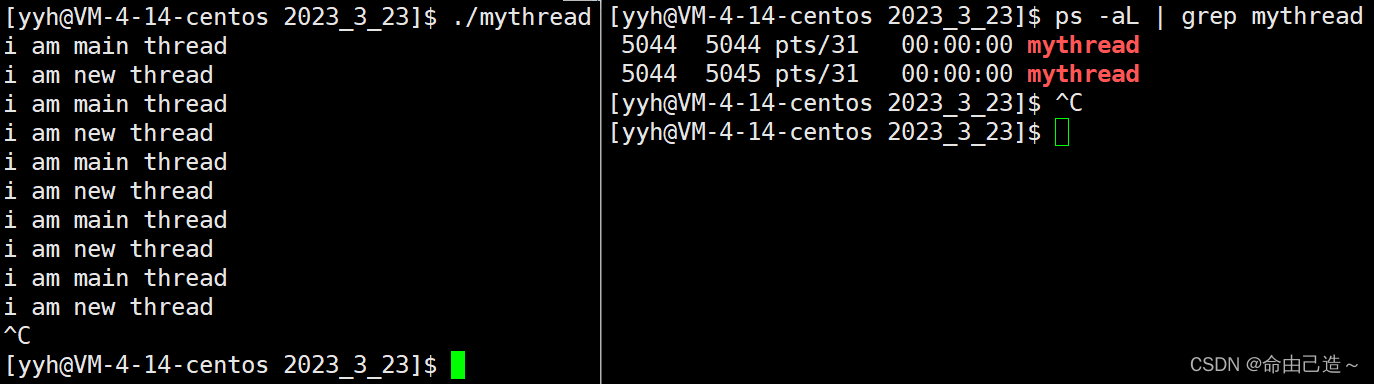
这是没有等待线程的代码
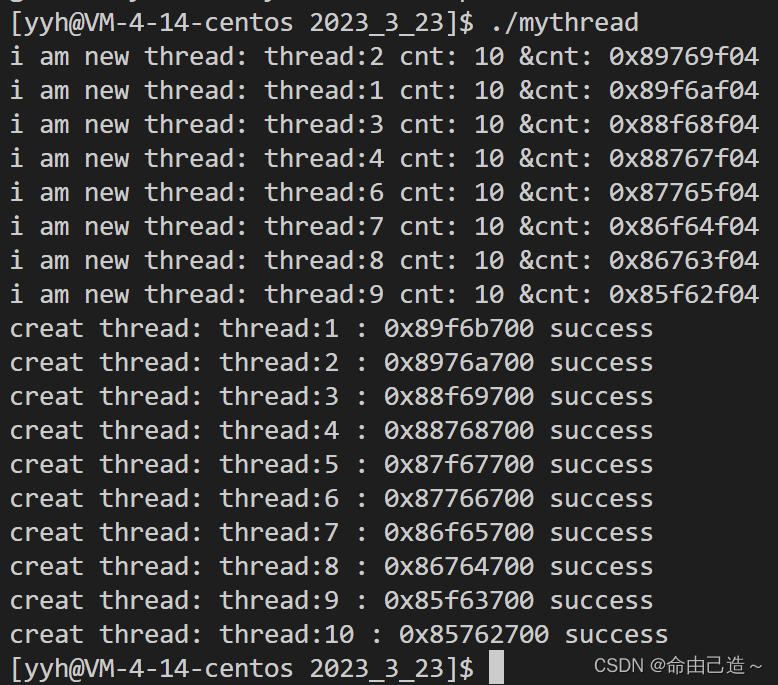
可以看到主线程运行完就直接结束了进程,所有新线程也全部结束。
进行线程等待的代码:
class ThreadData
{
public:pthread_t _tid;char _buf[64];
};void* start_stream(void* args)
{ThreadData *ptd = static_cast<ThreadData *>(args);int cnt = 5;while(cnt){printf("i am new thread: %s cnt: %d &cnt: 0x%x\n", ptd->_buf, cnt, &cnt);cnt--;sleep(1);}// return nullptr;pthread_exit(nullptr);// 结束线程
}#define NUM 10int main()
{// 创建一批线程std::vector<ThreadData*> tids;for(int i = 1; i <= NUM; i++){ThreadData *ptd = new ThreadData();snprintf(ptd->_buf, sizeof(ptd->_buf), "%s:%d", "thread", i);pthread_create(&ptd->_tid, nullptr, start_stream, (void*)ptd);tids.push_back(ptd);}for(auto& e : tids){printf("creat thread: %s : 0x%x success\n", e->_buf, e->_tid);}// 线程等待for(auto& e : tids){int n = pthread_join(e->_tid, nullptr);assert(n == 0);delete e;}cout << "main thread quit" << endl;return 0;
}
可以看到新线程也都执行到了结尾。
1.4.1 线程的返回值(退出码)

这里的返回值究竟是干什么的呢?
这样我们就可以在pthread_jion的时候来获取线程结束的返回值。
class ThreadData
{
public:int _number;pthread_t _tid;char _buf[64];
};void* start_stream(void* args)
{ThreadData *ptd = static_cast<ThreadData *>(args);int cnt = 5;while(cnt){printf("i am new thread: %s cnt: %d &cnt: 0x%x\n", ptd->_buf, cnt, &cnt);cnt--;sleep(1);}// return nullptr;pthread_exit((void*)ptd->_number);// 结束线程
}#define NUM 10int main()
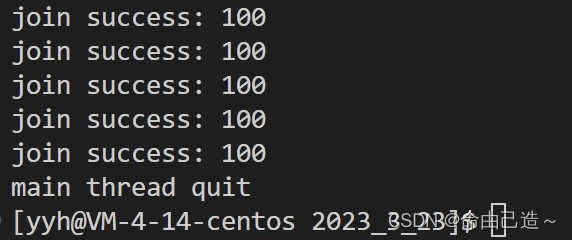
{// 创建一批线程std::vector<ThreadData*> tids;for(int i = 1; i <= NUM; i++){ThreadData *ptd = new ThreadData();ptd->_number = i;snprintf(ptd->_buf, sizeof(ptd->_buf), "%s:%d", "thread", i);pthread_create(&ptd->_tid, nullptr, start_stream, (void*)ptd);tids.push_back(ptd);}for(auto& e : tids){printf("creat thread: %s : 0x%x success\n", e->_buf, e->_tid);}// 线程等待for(auto& e : tids){void* ret = nullptr;int n = pthread_join(e->_tid, &ret);assert(n == 0);printf("join success: %d\n", (long long)(ret));delete e;}cout << "main thread quit" << endl;return 0;
}
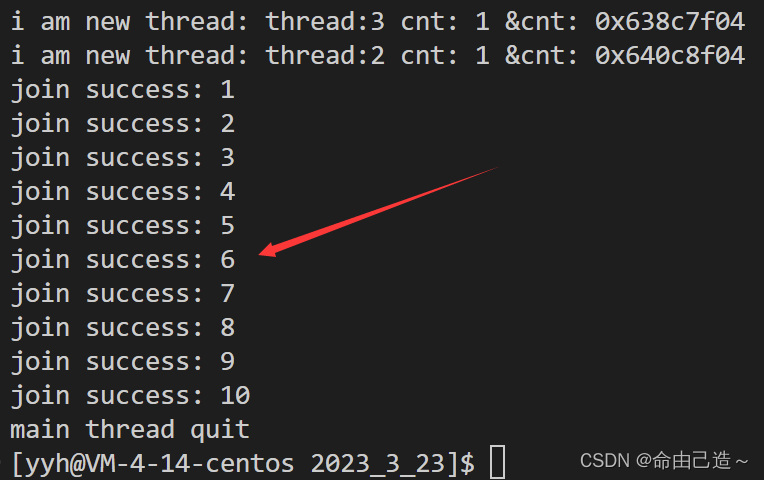
可以看到拿到了返回值(退出码)。
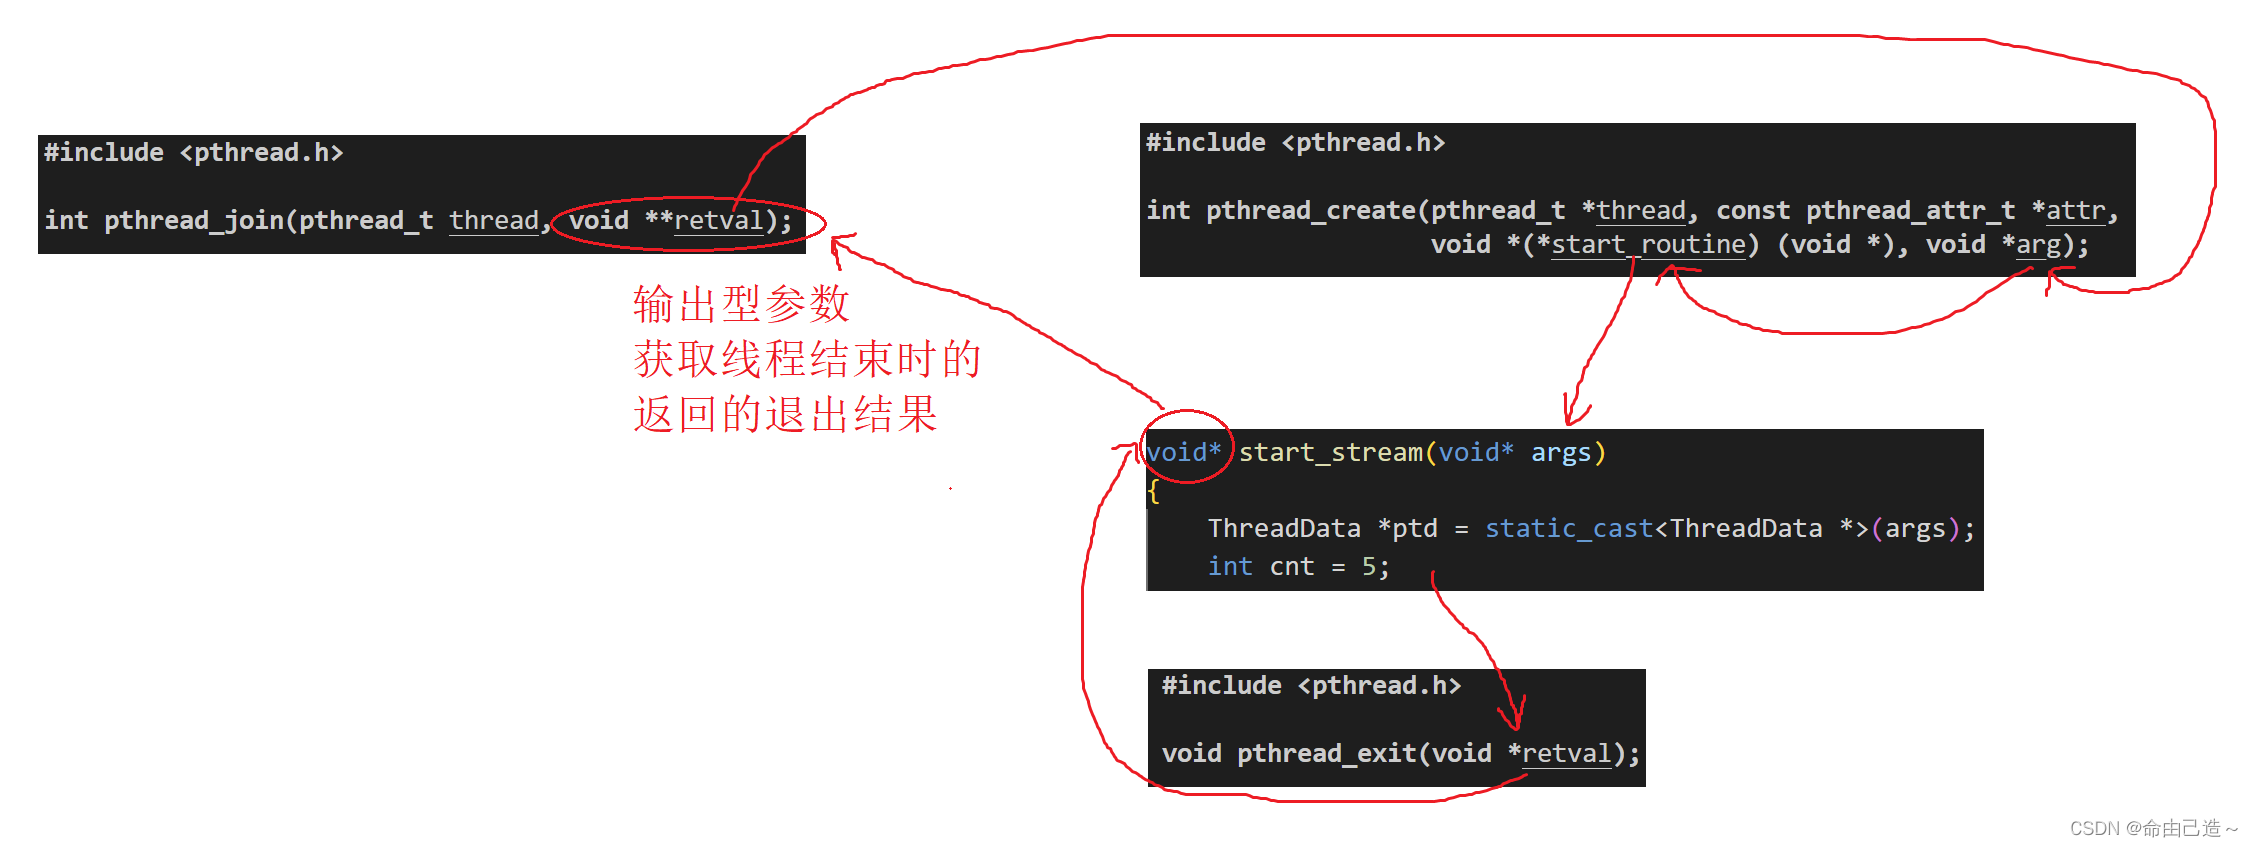
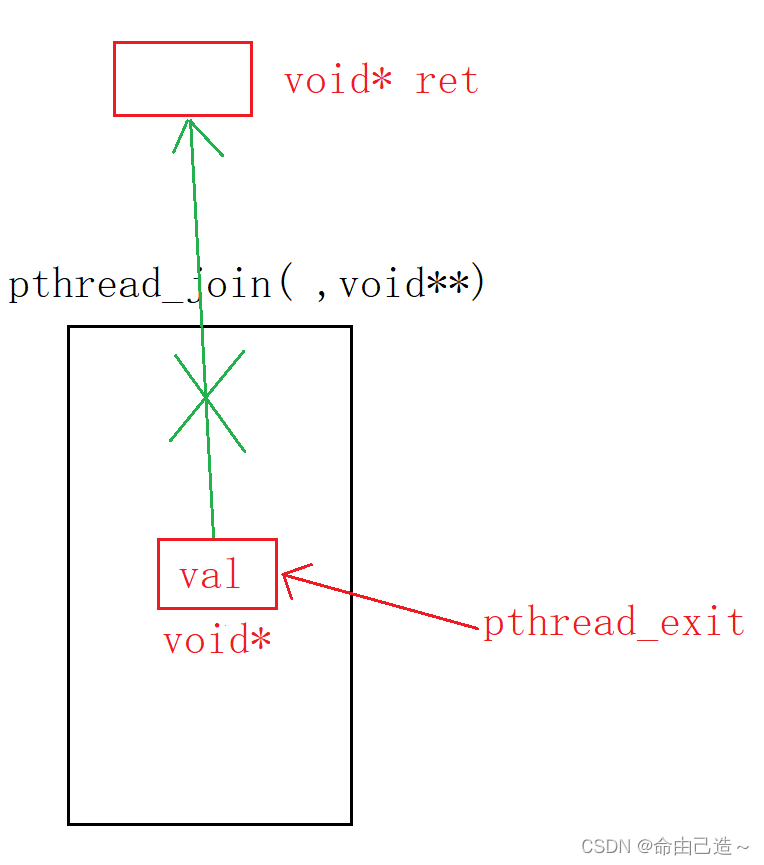
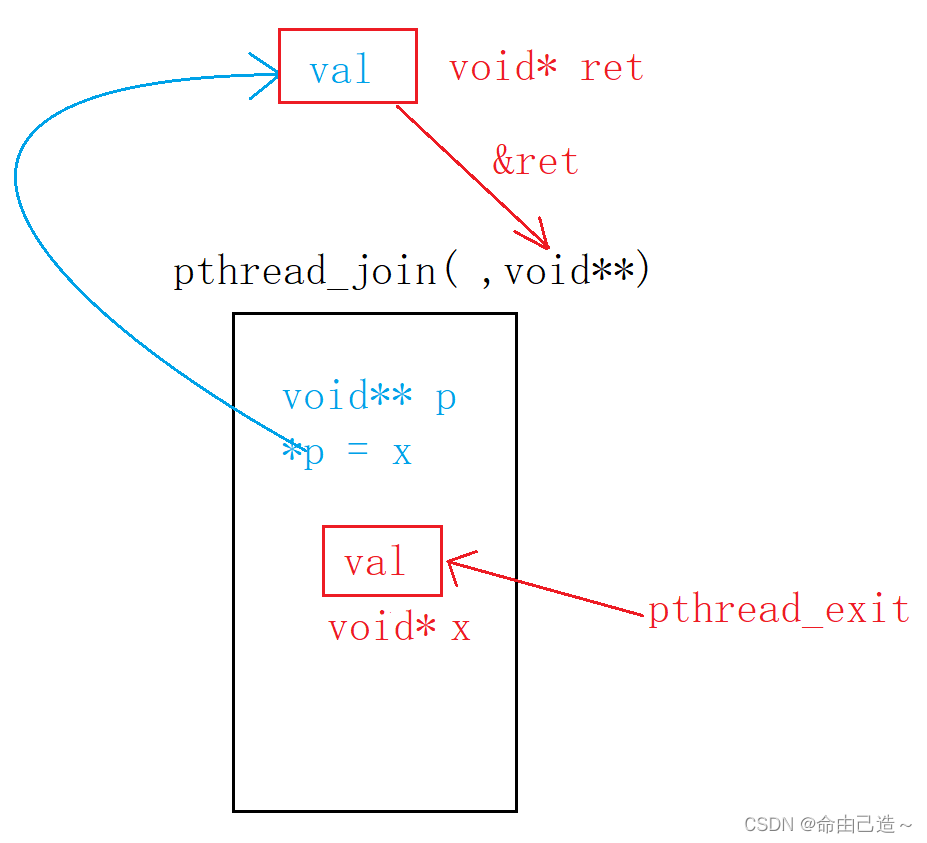
那么这个ret是怎么拿到数据的呢?
线程结束时会把返回值写入pthread库暂时保存,这时候其实我们设置的ret变量类型和库中临时保存的类型相同,但是由于这是个函数调用,我们没办法直接赋值。
所以我们吧ret的地址传进去,函数内部自己帮我们实现(蓝色)
这里我们思考一个问题:线程退出的时候为什么没有跟进程退出那样有退出信号?
因为信号是发给进程的,整个进程都会被退出,要退出信号也没有意义了。
所以pthread_jion默认认为能够调用成功,不考虑异常问题,异常应该是进程考虑的问题。
1.5 取消线程pthread_cancel
想要取消线程的前提是线程得先跑起来。
#include <pthread.h>int pthread_cancel(pthread_t thread);Compile and link with -pthread.RETURN VALUE
On success, pthread_cancel() returns 0;
on error, it returns a nonzero error number.
我们可以取消一半的线程,观察这一半和剩余一半的区别:
class ThreadData
{
public:int _number;pthread_t _tid;char _buf[64];
};void* start_stream(void* args)
{ThreadData *ptd = static_cast<ThreadData *>(args);int cnt = 5;while(cnt){printf("i am new thread: %s cnt: %d &cnt: 0x%x\n", ptd->_buf, cnt, &cnt);cnt--;sleep(1);}// return nullptr;pthread_exit((void*)100);// 结束线程
}#define NUM 10int main()
{// 创建一批线程std::vector<ThreadData*> tids;for(int i = 1; i <= NUM; i++){ThreadData *ptd = new ThreadData();ptd->_number = i;snprintf(ptd->_buf, sizeof(ptd->_buf), "%s:%d", "thread", i);pthread_create(&ptd->_tid, nullptr, start_stream, (void*)ptd);tids.push_back(ptd);}for(auto& e : tids){printf("creat thread: %s : 0x%x success\n", e->_buf, e->_tid);}// 取消一半的线程for(int i = 0; i < tids.size() / 2; i++){pthread_cancel(tids[i]->_tid);}// 线程等待for(auto& e : tids){void* ret = nullptr;int n = pthread_join(e->_tid, &ret);assert(n == 0);printf("join success: %d\n", (long long)(ret));delete e;}cout << "main thread quit" << endl;return 0;
}
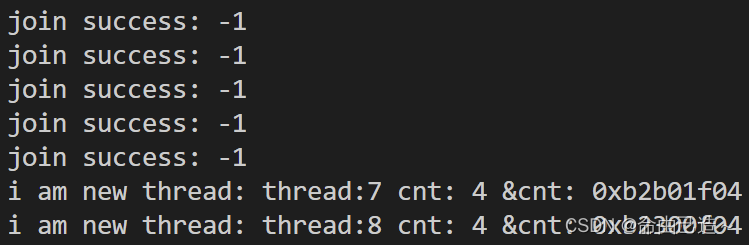
所以线程如果是被取消的,那么它的退出码是-1。它其实是一个宏:PTHREAD_CANCELED。
1.6 C++多线程
我们可以用C++给我们提供的线程库:
#include <iostream>
#include <thread>
#include <unistd.h>using std::cout;
using std::endl;int main()
{std::thread t([](){while(true){cout << "i am new thread" << endl;sleep(1);};});while(true){cout << "i am main thread" << endl;sleep(1);}t.join();return 0;
}
注意编译的时候得链接-lpthread。
因为任何语言想要在linux中实现多线程,必须要使用pthread库。而我们现在写的C++11中的多线程,本质上就是对pthread库的封装。
在后边会模拟线程库的实现。
1.7 分离线程pthread_detach
默认情况下,新创建的线程是joinable的,线程退出后,需要对其进行pthread_join操作,否则无法释放资源,从而造成系统泄漏。
如果不关心线程的返回值,join是一种负担,这个时候,我们可以告诉系统,当线程退出时,自动释放线程资源。
先写一个正常的创建线程:
#include <iostream>
#include <string>
#include <cstdio>
#include <pthread.h>
#include <unistd.h>using std::cout;
using std::endl;std::string GetId(const pthread_t& _id)
{char buf[64];snprintf(buf, sizeof(buf), " 0x%x", _id);return buf;
}void* start_stream(void* args)
{std::string name = static_cast<const char*>(args);while(true){cout << "i am new thread name: " << name << GetId(pthread_self()) << endl;sleep(1);}pthread_exit(nullptr);
}int main()
{pthread_t tid;pthread_create(&tid, nullptr, start_stream, (void*)"thread one");cout << "i am main thread, new id: " << GetId(tid) << endl;pthread_join(tid, nullptr);return 0;
}
解释一下这里的pthread_self(),哪个线程调用这个函数,就可以获得该线程的id。
#include <pthread.h>pthread_t pthread_self(void);Compile and link with -pthread.RETURN VALUE
This function always succeeds, returning the calling thread's ID.
而上面我们进过验证看到获取的确实是新线程的id。
有了获取线程id的方法接下来就可以进行线程的分离。
#include <pthread.h>int pthread_detach(pthread_t thread);Compile and link with -pthread.RETURN VALUE
On success, pthread_detach() returns 0;
on error, it returns an error number.
因为如果一个线程设置了分离,那么这个线程就不能被等待,而如果等待失败,就会返回错误码:
std::string GetId(const pthread_t& _id)
{char buf[64];snprintf(buf, sizeof(buf), " 0x%x", _id);return buf;
}void* start_stream(void* args)
{std::string name = static_cast<const char*>(args);pthread_detach(pthread_self());// 线程分离int cnt = 5;while(cnt--){cout << "i am new thread name: " << name << GetId(pthread_self()) << endl;sleep(1);}pthread_exit(nullptr);
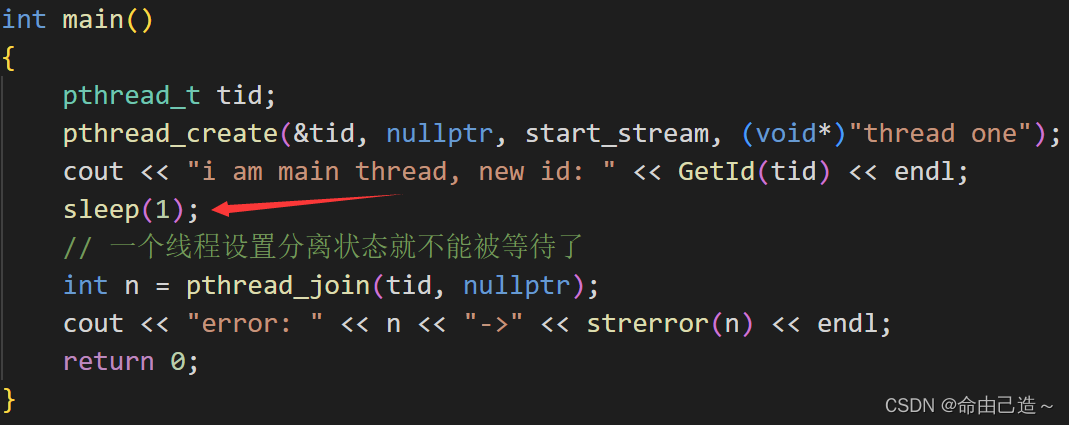
}int main()
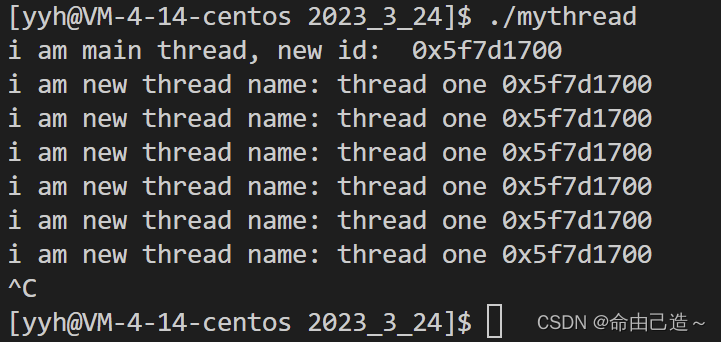
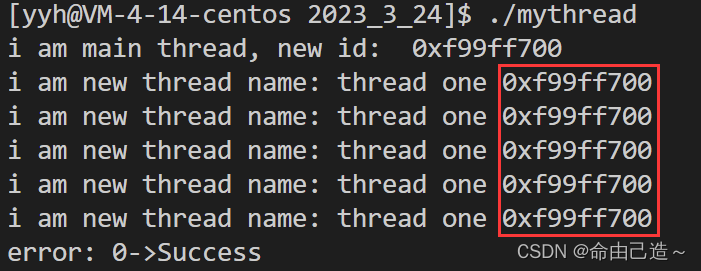
{pthread_t tid;pthread_create(&tid, nullptr, start_stream, (void*)"thread one");cout << "i am main thread, new id: " << GetId(tid) << endl;// 一个线程设置分离状态就不能被等待了int n = pthread_join(tid, nullptr);cout << "error: " << n << "->" << strerror(n) << endl;return 0;
}
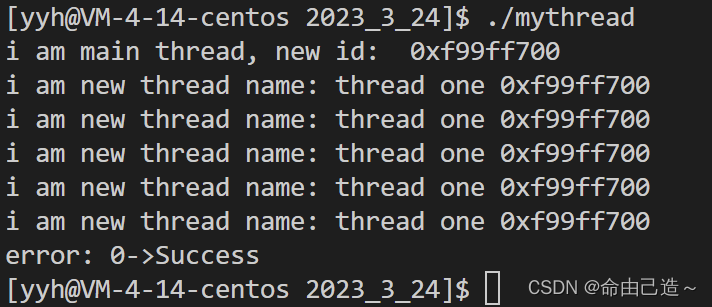
但是这里的结果显示是正确的。是什么原因呢?
因为主线程和新线程执行顺序不确定,新线程还没来得及分离,主线程就执行到jion了,主线程就开始阻塞等待了,后续新线程分离了也不知道。
所以我们让主线程慢一点执行或者让主线程进行分离:
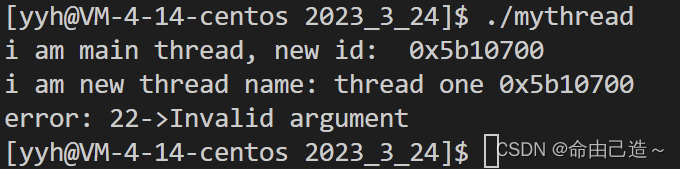
所以一旦有一个线程被分离,那么我们就可以不用管这个线程了,做自己的事情即可。
二、线程ID值
我们可以看到我们打印出来的线程ID:
那么它究竟是什么呢?
我们知道linux创建进程要通过pthread库提供的接口。所以原生库中可能存在多个线程,那么我们就必须要把这些线程管理起来。而描述这些线程的结构体是由原生线程库实现的,每一个结构体对应一个轻量级进程,所以线程是由库和OS共同实现的。
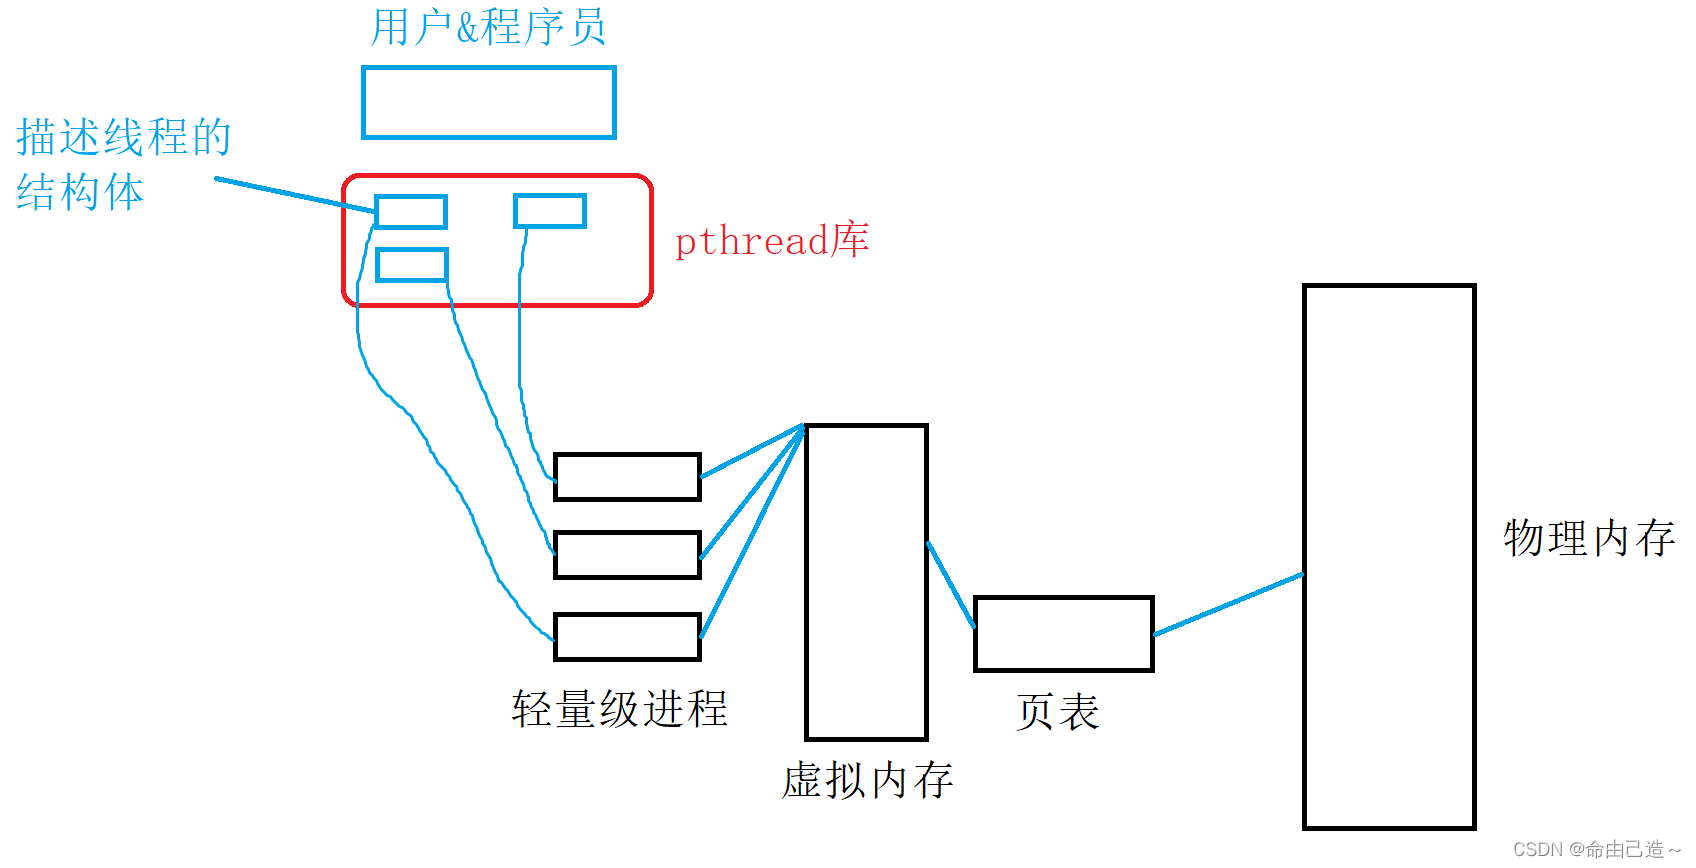
而库中描述线程的结构体到底是什么样子的呢?

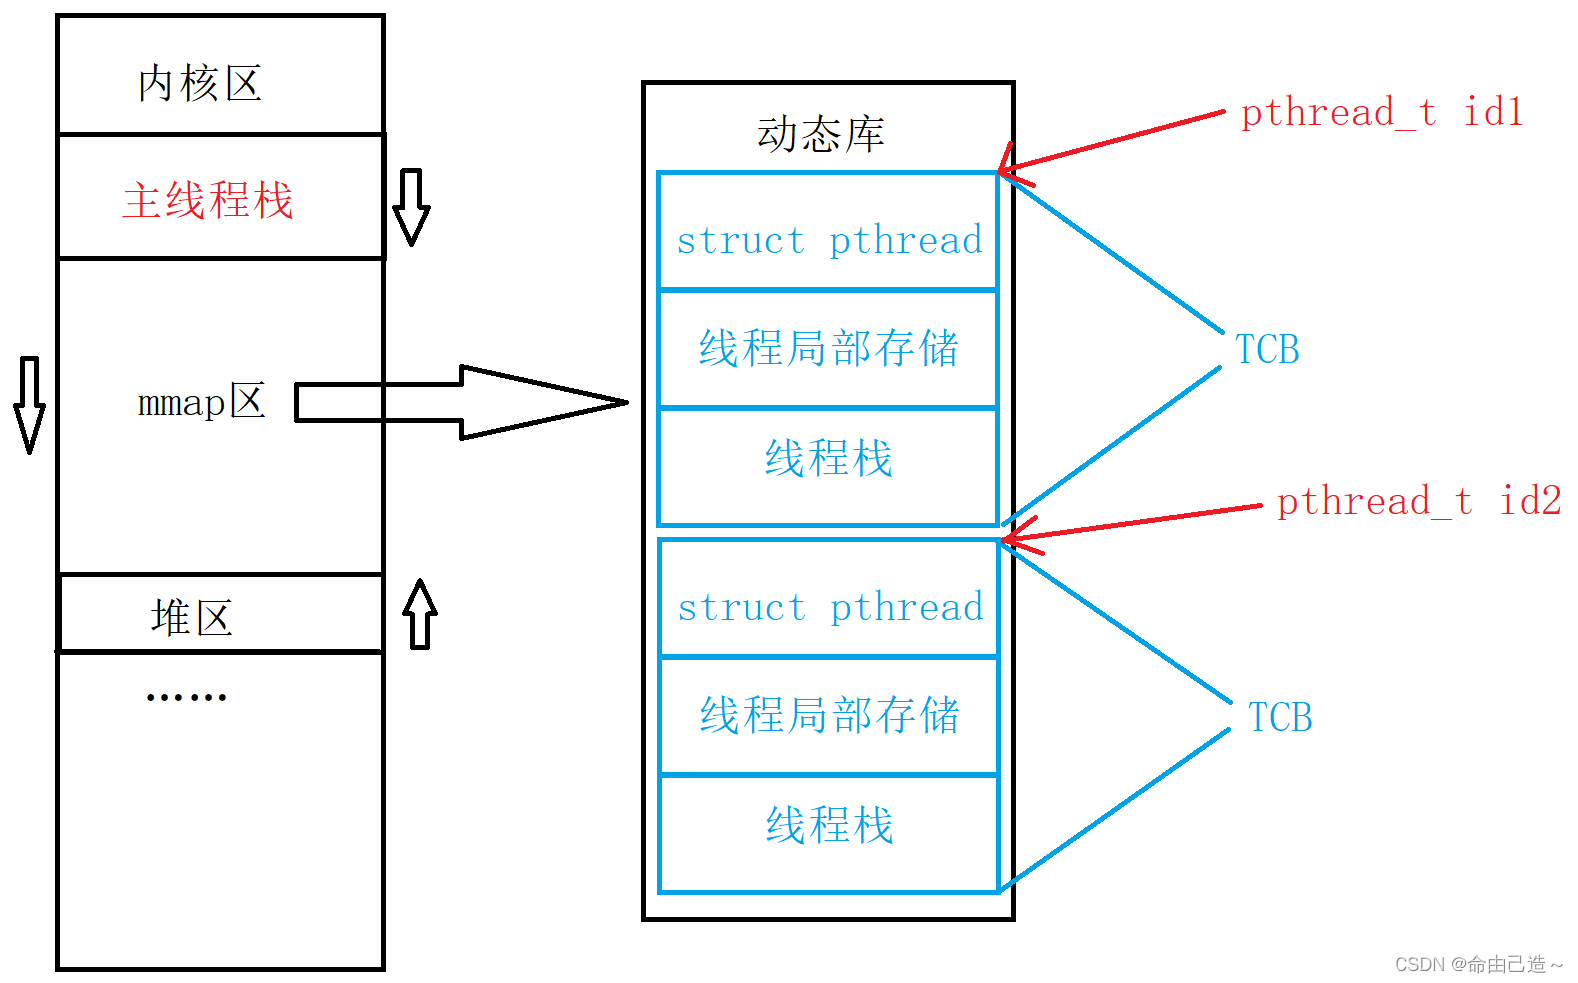
每个结构体在库中就像一个数组一样被存储起来。而每个结构体的起始位置的地址就是线程的ID值。
这里也可以看到每个线程都有自己独立的栈结构,由库来维护。
主线程也有自己独立的栈:
三、线程局部存储__thread
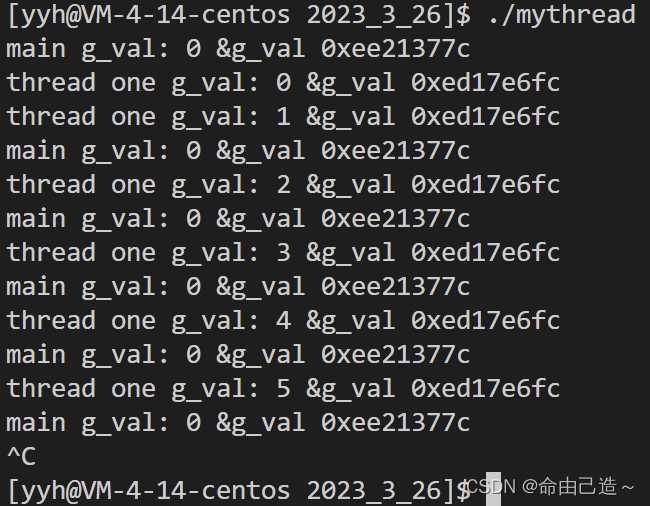
int g_val = 0;void* start_stream(void* args)
{std::string name = static_cast<const char *>(args);while(true){cout << name;printf(" g_val: %d &g_val 0x%x\n", g_val, &g_val);sleep(1);++g_val;}
}int main()
{pthread_t tid;pthread_create(&tid, nullptr, start_stream, (void*)"thread one");while(true){printf("main g_val: %d &g_val 0x%x\n", g_val, &g_val);sleep(1);}pthread_join(tid, nullptr);return 0;
}
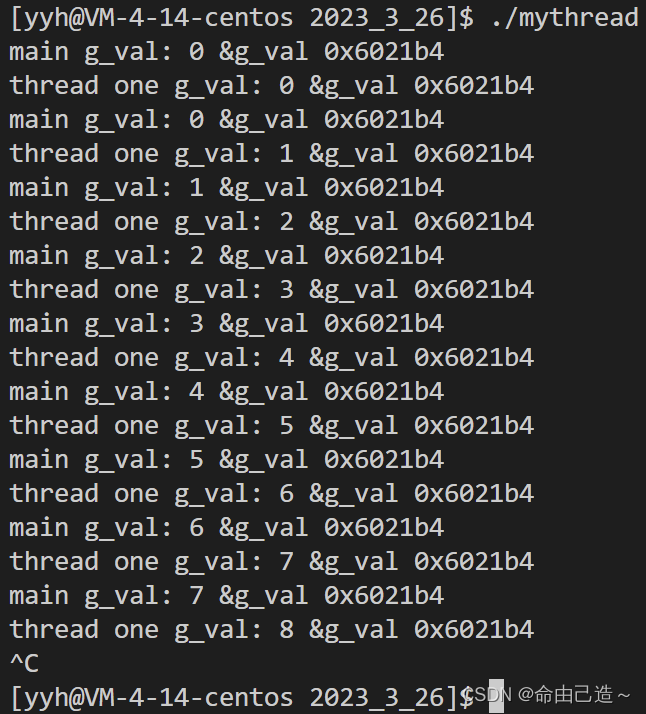
可以看到不同的线程共享一个全局变量。
但是当我们给g_val添加__thread属性后:
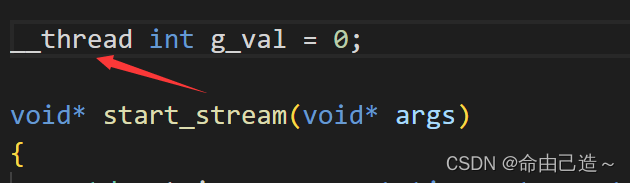
从结果看g_val不是共享的了,而是每个线程独有一个。
添加__thread,可以将一个内置类型设置为线程局部存储。给每个线程都来一份。
是介于全局变量和局部变量之间线程特有的属性。
四、原生线程库的封装
我们想像1.6C++多线程那样来使用多线程该怎么办呢?
当然是对原生线程库进行封装。
// mythread.hpp
#pragma once#include <iostream>
#include <pthread.h>
#include <cstring>
#include <string>
#include <cassert>
#include <functional>class Thread;class Context
{
public:Thread *_this;void *_args;Context(): _this(nullptr), _args(nullptr){}
};class Thread
{
public:typedef std::function<void*(void*)> func_t;Thread(func_t fun, void* args, int number): _func(fun), _args(args){char buf[64];snprintf(buf, sizeof buf, "thread-%d", number);_name = buf;}// 不加static就会有this指针static void* start_routine(void* args){//return _func(args);// 无this指针,无法调用Context* pct = static_cast<Context*>(args);pct->_this->_func(pct->_args);delete pct;return nullptr;}void start(){// int n = pthread_create(&_tid, nullptr, _func, _args);// _func是C++函数,pthread_create是C接口,不能混编Context* pct = new Context();pct->_this = this;pct->_args = _args;int n = pthread_create(&_tid, nullptr, start_routine, pct);assert(n == 0);(void)n;}void join(){int n = pthread_join(_tid, nullptr);assert(n == 0);(void)n;}
private:std::string _name;// 线程名pthread_t _tid;// 线程idfunc_t _func;// 调用方法void *_args;// 参数
};// mythread.cc
#include <iostream>
#include <string>
#include <cstdio>
#include <cstring>
#include <pthread.h>
#include <unistd.h>
#include "mythread.hpp"using std::cout;
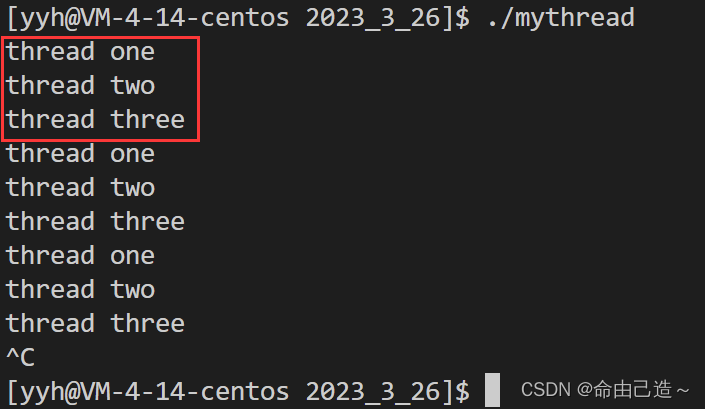
using std::endl;void* start_handler(void* args)
{std::string name = static_cast<const char *>(args);while(true){cout << name << endl;sleep(1);}
}int main()
{Thread* thread1 = new Thread(start_handler, (void*)"thread one", 1);Thread* thread2 = new Thread(start_handler, (void*)"thread two", 2);Thread* thread3 = new Thread(start_handler, (void*)"thread three", 3);thread1->start();thread2->start();thread3->start();thread1->join();thread2->join();thread3->join();return 0;
}