这篇文章主要分享给没接触过芯弛芯片的同学们,以往做项目的经验,接触一个新的芯片平台,大家通常喜欢通过设置GPIO来评估下新平台的设置使用习惯,芯弛的芯片上手还是非常快的。
以AP域GPIO配置为例:
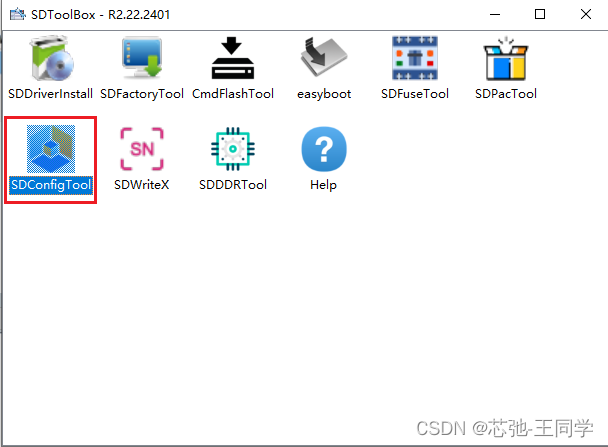
打开SDToolBox,SDConfigTool为GPIO配置的工具
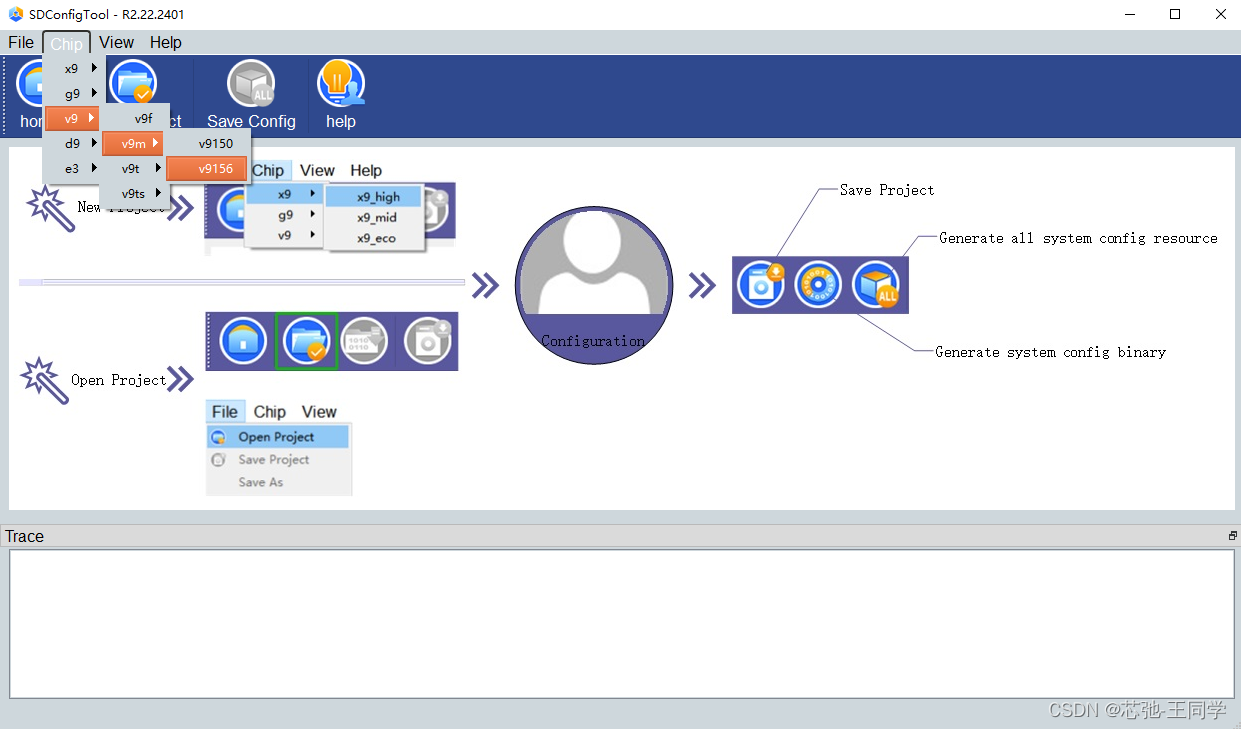
以V9M为例简单讲解使用方法
1.创建工程
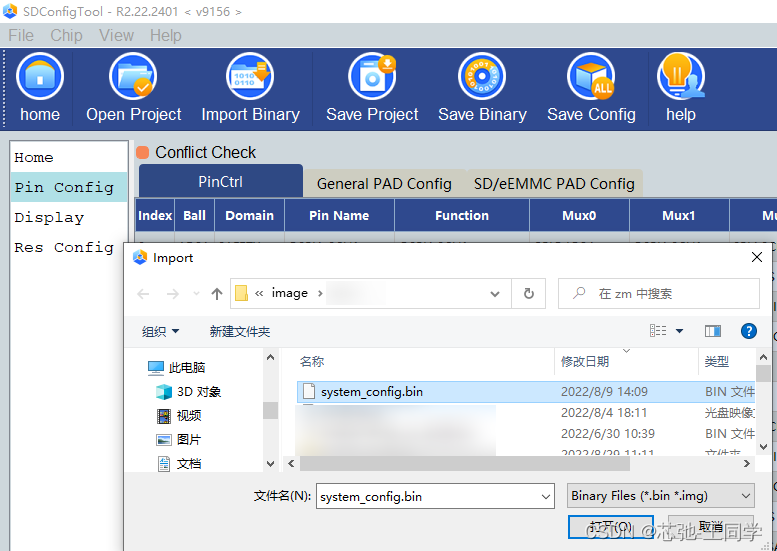
2.查找配置文件
在代码中找到system_config.bin文件,该文件为开发板默认使用的GPIO配置文件
3.加载配置文件到工程
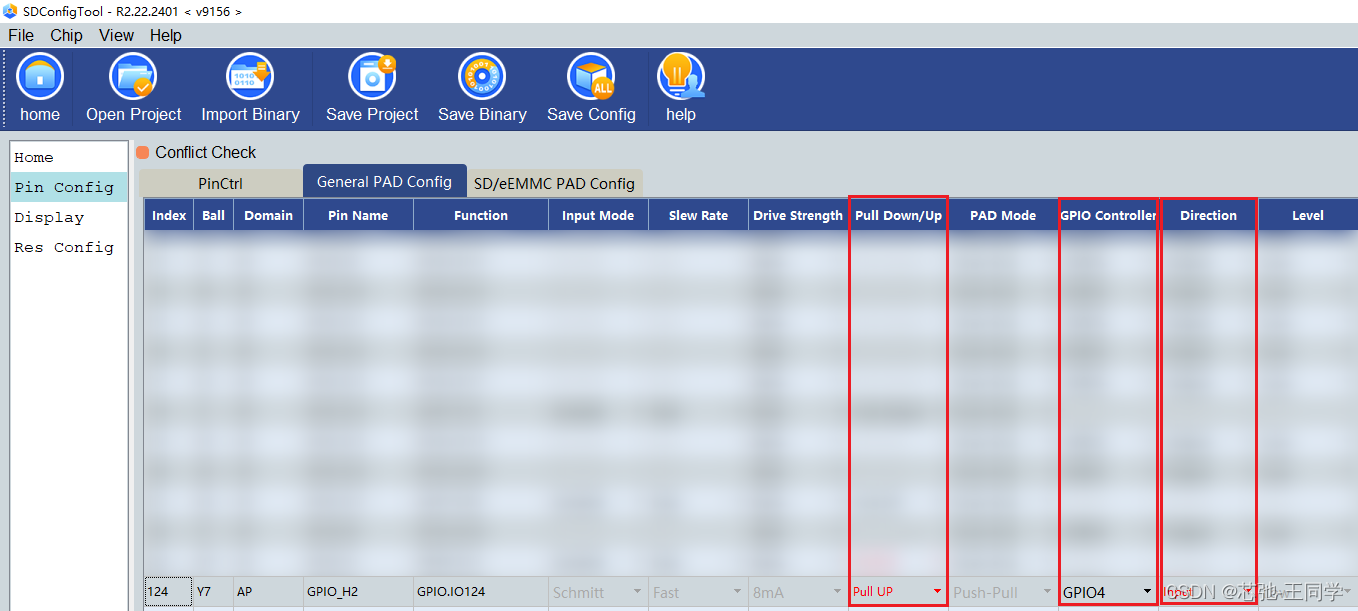
4.配置GPIO
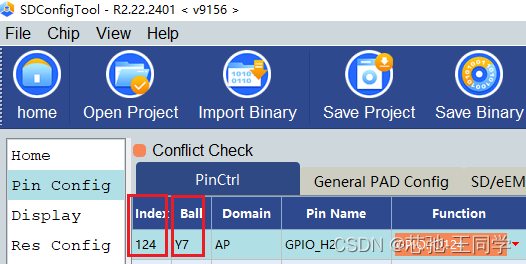
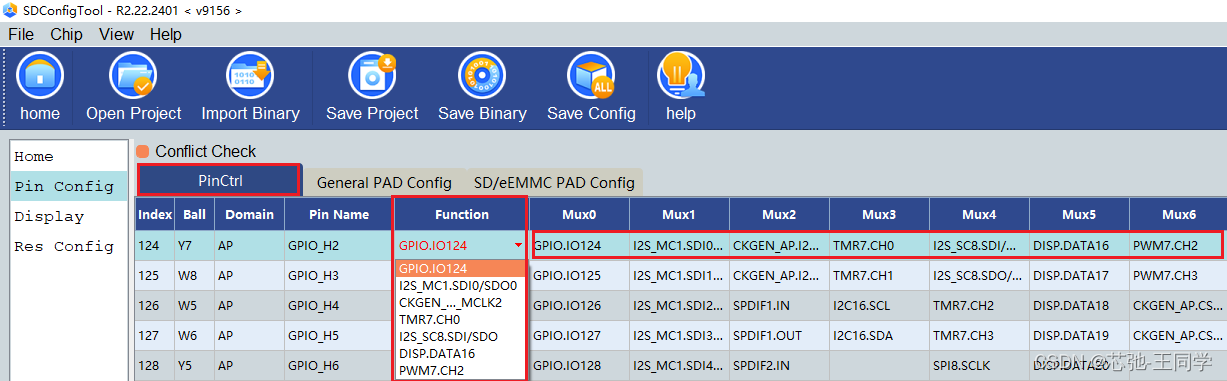
以原理图中的Y7引脚为例对应的索引值为124(文章末尾有详细讲解怎么找GPIO)

按照项目需求设置GPIO的工作模式
5.保存配置文件
选择Save Binary保存为system_config.bin,后替换代码中的配置文件system_config.bin

6.配置设备树
v9156_ms_native_linux_serdes.dts
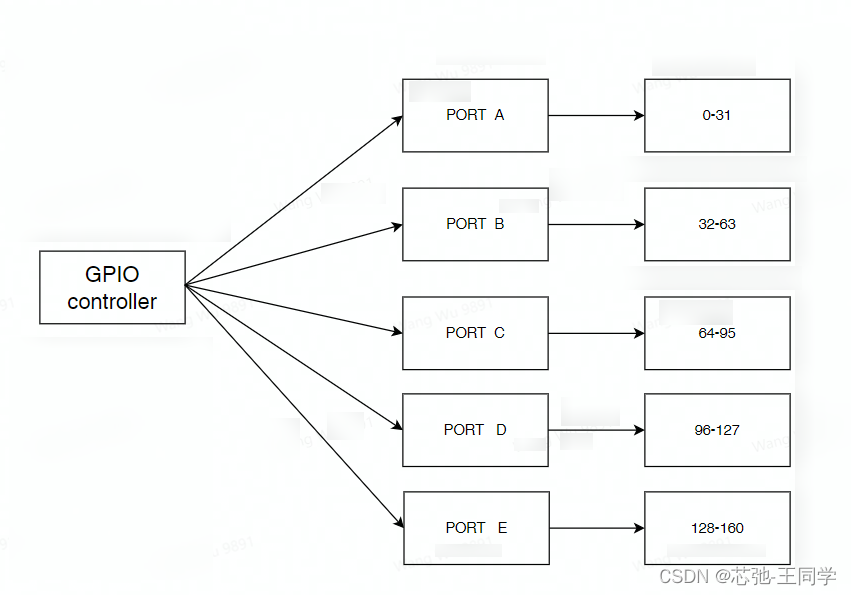
irq-gpios = <&port4d 28 0>;124在96-127之间(124-32*3=28),被GPIO CONTROLLER 4的PORT D控制,PORT D的第(124-32*3=28)28个引脚
7.代码中引用
static irqreturn_t deser_irq_handler(int irqno, void *dev_id)
{deser_dev_t *sensor = dev_id;int level = gpiod_get_value(sensor->irq_gpio);printk("deser_irq_handler gpio level %d \n", level);return IRQ_HANDLED;
}
static int deser_probe(struct i2c_client *client, const struct i2c_device_id *id)
{
/****************/gpiod = devm_gpiod_get_optional(&client->dev, "irq", GPIOD_IN);if (IS_ERR(gpiod)) {ret = PTR_ERR(gpiod);if (ret != -EPROBE_DEFER)dev_err(&client->dev, "Failed to get %s GPIO: %d\n","irq", ret);} else {sensor->irq_gpio = gpiod;}ret = gpiod_to_irq(sensor->irq_gpio);if (ret < 0) {dev_err(&client->dev, "%s(): fail to get irq (%d)\n", __func__, ret);//        return ret;}else{sensor->irq = ret;}ret = devm_request_irq(&client->dev, sensor->irq,deser_irq_handler, IRQF_TRIGGER_RISING|IRQF_TRIGGER_FALLING, "max9286-irq", sensor);if (ret < 0) {dev_err(&client->dev, "%s(): fail to request irq (%d)\n", __func__, ret);//return ret;}
/****************/
8.快速验证方法
不编译代码,在linux下快速验证gpio:
1.首先通过sdconfigtool配置引脚到AP域
2.单独替换system_config.bin
3.配置GPIO设备节点
echo 124 > /sys/class/gpio/export
echo in > /sys/class/gpio/gpio124/direction
cat /sys/class/gpio/gpio124/value
这里的124是封装上Y7引脚对应的索引
查找方法:
1.在原理图上找到要使用的GPIO对应的封装标号Y7
2.在SDConfigTool上搜索Y7

可以看到Y7对应的索引是124