目录
- 一、添加
- (1) 基本插入
- (2) 设置新插入记录的主键(id)★
- 二、更新
- 三、删除
- 四、动态 SQL
- (1) if 标签
- (2) where 标签
- (3) foreach 标签
- 五、起别名
- 六、sql 标签
- 七、在 MyBatis 中集成 druid 连接池
一、添加
(1) 基本插入
<mapper namespace="student"><insert id="insert" parameterType="com.pojo.po.Student">INSERT INTO student(name, money) VALUES (#{name}, #{money})</insert>
</mapper>
public class TestStudent {@Testpublic void testInsert() {try (SqlSession sqlSession = MyBatisUtil.openSession(true)) {Student student = new Student();student.setName("鹿晗");student.setMoney(100L);sqlSession.insert("student.insert", student);}}
}
注意:
openSession()的参数默认值是 false(不自动提交事务)
(2) 设置新插入记录的主键(id)★
🌼 设置新插入记录的主键(id)到参数对象中
<mapper namespace="student"><insert id="insert2" parameterType="com.pojo.po.Student">INSERT INTO student(name, money) VALUES (#{name}, #{money})<!-- resultType 需要和参数对象的主键的属性名的类型一样 --><!-- keyProperty 是属性名, 不是字段名 --><!-- order="AFTER" 插入语句执行完毕后才查询 --><selectKey resultType="long" keyProperty="id" order="AFTER">SELECT LAST_INSERT_ID()</selectKey></insert>
</mapper>
二、更新
<mapper namespace="student"><update id="update" parameterType="com.pojo.po.Student">UPDATE student SET money = #{money} WHERE name = #{name}</update>
</mapper>
三、删除
<mapper namespace="student"><delete id="delete">DELETE FROM student WHERE id in ${ids}</delete>
</mapper>
public class TestStudent {@Testpublic void testDelete() {try (SqlSession sqlSession = MyBatisUtil.openSession(true)) {String ids = "(4, 9, 6)";sqlSession.insert("student.delete", ids);}}}
四、动态 SQL
动态 SQL 官方文档:https://mybatis.org/mybatis-3/zh/dynamic-sql.html
(1) if 标签
<mapper namespace="student"><select id="dynamicSQL" resultType="com.pojo.po.Student">SELECT*FROMstudentWHERE 1 = 1<if test="id != null and id > 0">AND id > #{id}</if><if test="money != null">AND money > #{money}</if><if test="name != null">AND NAME LIKE #{name}</if></select>
</mapper>
public class TestStudent {@Testpublic void dynamicSql() {try (SqlSession sqlSession = MyBatisUtil.openSession(true)) {HashMap<String, Object> pMap = new HashMap<>();pMap.put("id", 3);pMap.put("name", "%杰%");// pMap.put("money", 5555);List<Student> list = sqlSession.selectList("student.dynamicSQL", pMap);for (Student student : list) {System.out.println("dynamicSql student = " + student);}}}}
(2) where 标签
<mapper namespace="student"><select id="dynamicSQL" resultType="com.pojo.po.Student">SELECT*FROMstudent<where><if test="id != null and id > 0">id > #{id}</if><if test="money != null">AND money > #{money}</if><if test="name != null">AND NAME LIKE #{name}</if></where></select>
</mapper>
(3) foreach 标签
☆ 批量插入:

<mapper namespace="student"><insert id="batchInsert1" parameterType="List">INSERT INTO student (name, money) VALUES<foreach collection="list" item="item" separator=",">(#{item.name}, #{item.money})</foreach></insert>
</mapper>
💦 批量添加的执行效率比多次单个添加的执行效率要高,但是无法获取到新插入的记录的主键
💦 可以使用 useGeneratedKeys 获取新插入的记录的主键。
💦 假如要添加的记录的字段特别多, 批量添加操作生成的 SQL 语句字符串可能会特别长,SQL 语句的长度可能会超过数据库的限制 【分批插入】
💦 如果传进来的参数是 List 类型,collection 的属性值为 list 就可以遍历这个 List
💦 如果传进来的参数是数组,collection 的属性值为 array 就可以遍历这个数组
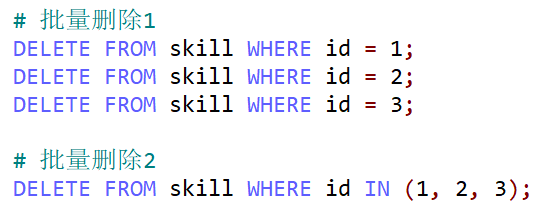
☆ 批量删除:

<mapper namespace="student"><delete id="batchDelete1" parameterType="List">DELETE FROM student<where>id IN (<foreach collection="list"separator=","item="item">#{item}</foreach>)</where></delete>
</mapper>
<mapper namespace="student"><delete id="batchDelete2">DELETE FROM student<where>id IN<foreach collection="array"separator=","open="("close=")"item="item">#{item}</foreach></where></delete>
</mapper>
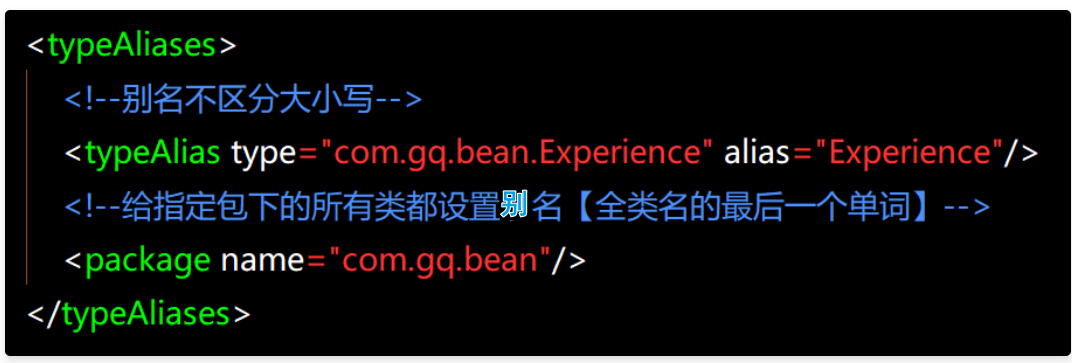
五、起别名


● <typeAliases> 标签写在 mybatis-config.xml 核心配置文件的configuration 标签中
● 写在 <settings> 标签的后面
● 用于设置类型的别名(不区分大小写)
六、sql 标签
<mapper namespace="student"><!-- 有抽取公共 SQL 语句的作用 --><sql id="sqlListAll">SELECT * FROM student</sql><resultMap id="resultMapStudent" type="com.pojo.po.Student"><id property="id" column="id"/><result property="createTime" column="create_time"/></resultMap><select id="list" resultMap="resultMapStudent"><include refid="sqlListAll"/></select><select id="getById" resultType="com.pojo.po.Student"><include refid="sqlListAll"/>WHERE id = #{id}</select><select id="listByIdAndMoney" resultType="com.pojo.po.Student"><include refid="sqlListAll"/>WHERE id < #{id} OR money >= #{money}</select><select id="getByName" resultType="com.pojo.po.Student"><include refid="sqlListAll"/>WHERE name LIKE #{name}</select><select id="dynamicSQL" resultType="com.pojo.po.Student"><include refid="sqlListAll"/><where><if test="id != null and id > 0">id > #{id}</if><if test="money != null">AND money > #{money}</if><if test="name != null">AND NAME LIKE #{name}</if></where></select></mapper>
七、在 MyBatis 中集成 druid 连接池
① 引入 Maven 依赖
<dependency><groupId>com.alibaba</groupId><artifactId>druid</artifactId><version>1.1.2</version></dependency>
② 创建连接池工厂类并继承 PooledDataSourceFactory 或UnpooledDataSourceFactory;在连接池工厂类的构造方法中设置数据源 dataSource 为 Druid 的数据源实例
/*** MyBatis 中集成 Druid 数据库连接池*/
public class DruidDataSourceFactory extends PooledDataSourceFactory {public DruidDataSourceFactory() {this.dataSource = new DruidDataSource();}
}
③ 在 mybatis-config.xml 文件中配置 Druid 数据源
<environments default="development"><environment id="development"><transactionManager type="JDBC"/><dataSource type="com.common.DruidDataSourceFactory"><property name="driverClassName" value="com.mysql.jdbc.Driver"/><property name="url"value="jdbc:mysql://localhost:3306/study_mb?useUnicode=true&characterEncoding=utf8"/><property name="username" value="root"/><property name="password" value="root"/><property name="initialSize" value="5"/><property name="maxActive" value="10"/><property name="maxWait" value="5000"/></dataSource></environment>
</environments>
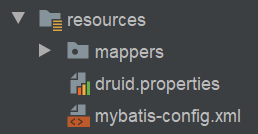
把 druid 数据库连接池的配置放在 druid.properties 文件中
dev.driverClassName=com.mysql.jdbc.Driver
dev.url=jdbc:mysql://localhost:3306/study_mb?useUnicode=true&characterEncoding=utf8
dev.username=root
dev.password=root
dev.initialSize=5
dev.maxActive=10
dev.maxWait=5000


<environment id="development"><!--采用JDBC的事务管理方法--><transactionManager type="JDBC"/><!--采取druid数据库连接池管理连接--><dataSource type="com.common.DruidDataSourceFactory"><property name="driverClassName" value="${dev.driverClassName}"/><property name="url" value="${dev.url}"/><property name="username" value="${dev.username}"/><property name="password" value="${dev.password}"/><property name="initialSize" value="${dev.initialSize}"/><property name="maxActive" value="${dev.maxActive}"/><property name="maxWait" value="${dev.maxWait}"/></dataSource>
</environment>


