文章目录
- 前言
- 技术栈
- 效果展示
- 一、实现思路
- 二、实现步骤
- 1.本地安装marp-cli
- 2.后端实现
- 3.前端实现
- 三、代码地址及说明
前言
在许多项目中,生成 PPT 是常见的需求,尤其在教育和报告展示中。传统的生成 PPT 的方法需要手动创建,而使用生成模型,如 Dify 或 Ollama,可以自动化地根据提供的内容生成 PPT。在这个示例中,我们将使用本地模型与 Marp 配合,实现 PPT 的生成,前后端分离开发。
技术栈
- 前端:Vue.js,用于构建用户界面,发送请求并接收生成的 PPT。
- 后端:Python(Flask),用于接收前端请求,调用本地模型(Dify 或 直接调用Ollama或其他方式),生成PPT,并返回文件链接或下载链接。
- PPT 生成工具:Marp,是一个将 Markdown 转换为 PPT的工具,我们将通过本地模型生成 Markdown 内容,然后使用 Marp 将其转换为 PPT。
也可以使用线上模型。实现流程都是一样的。
没有使用过ollama或者dify的可以查看我的其他博客
Ollama本地部署大模型及应用
本地搭建Dify+xinference实现大模型应用
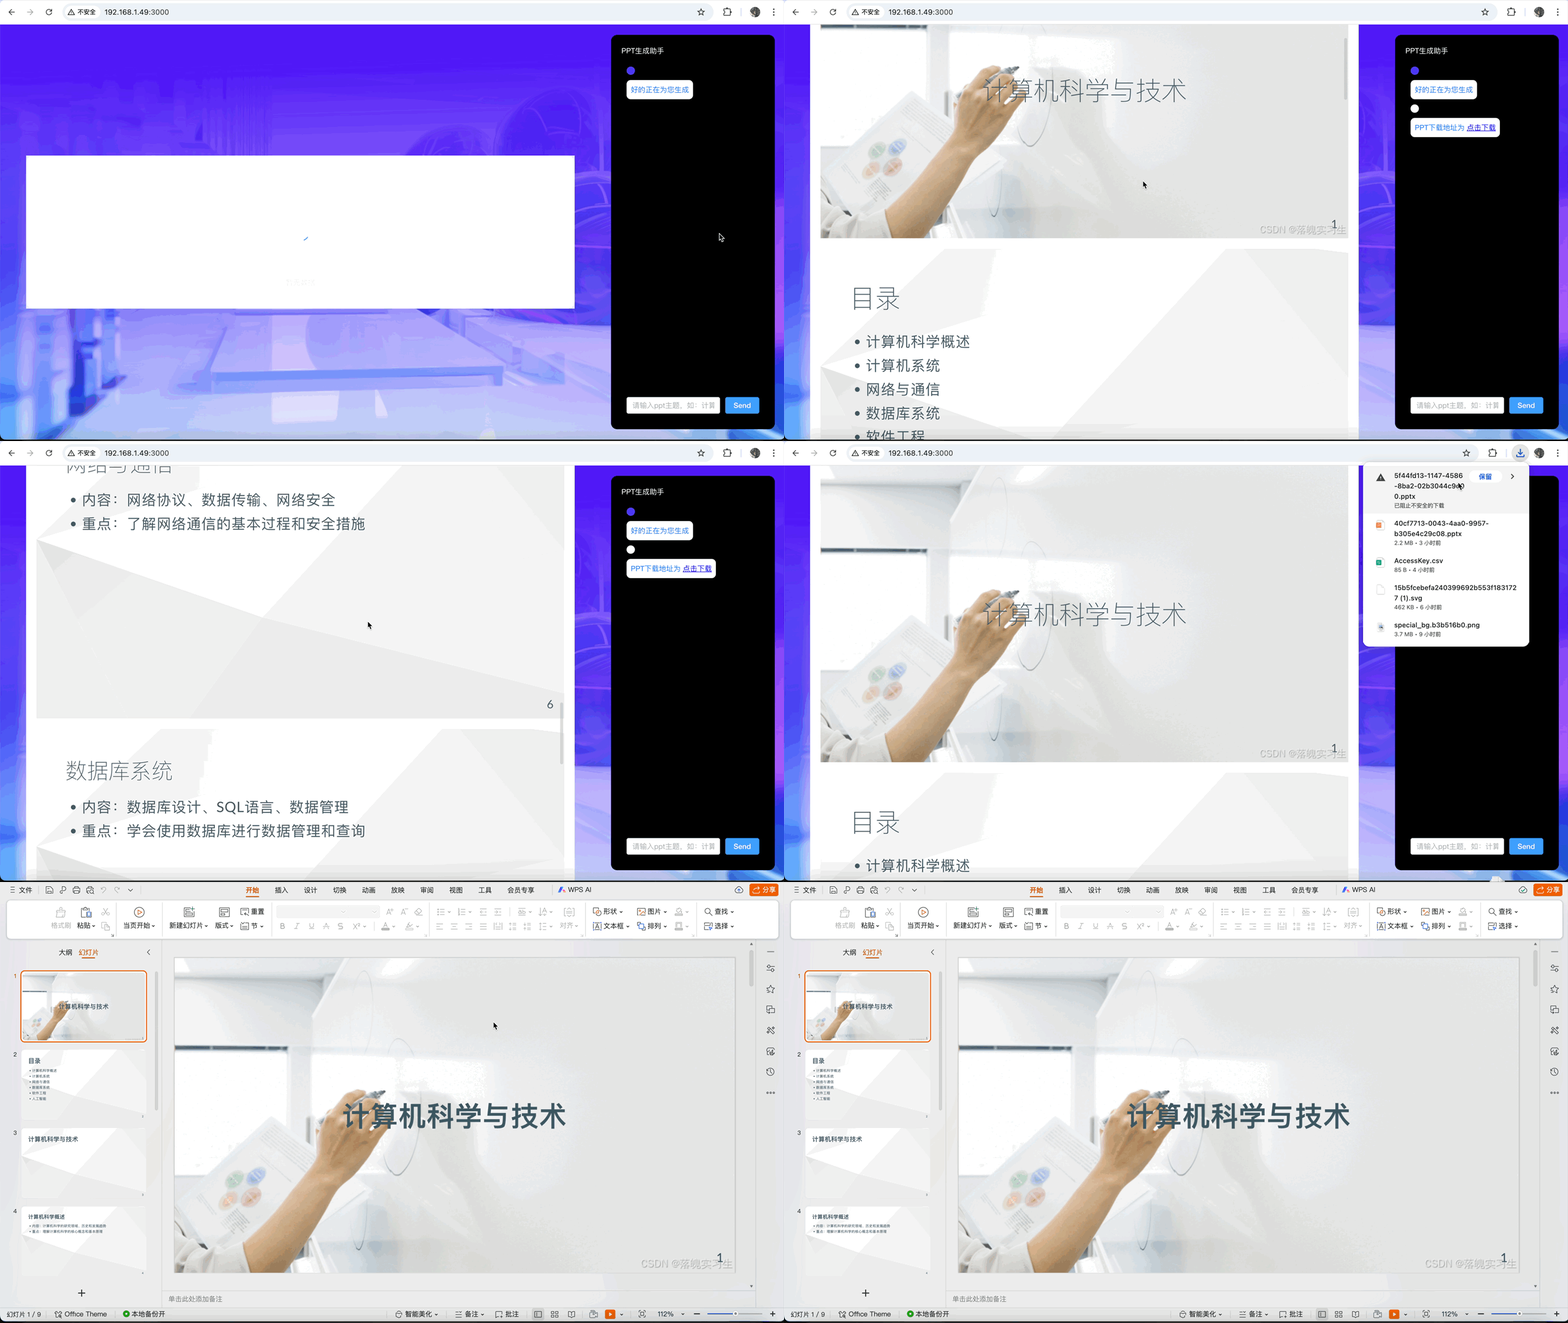
效果展示

一、实现思路
AI PPT 生成实现思路为:
- 定义模板:使用 Marp 语法定义 PPT 模板,并在模板中添加占位符,用于后续内容填充。
- 用户输入标题:选择模板后,用户输入要生成的 PPT 标题。
- 调用模型填充内容:使用本地 AI 模型生成占位符对应的内容。
- 生成 PPT 文件:将模板和生成的内容合并,生成 Markdown 文件,并使用 Marp CLI 将 Markdown 转换为 PPT 格式,最终上传至 OSS。
- 展示与下载:前端通过 Marp-core 展示 PPT 内容,并提供下载链接。
这个流程涵盖了从模板定义、用户交互、AI 内容生成,到最终文件转换和展示下载的完整过程。
二、实现步骤
1.本地安装marp-cli
本地需要安装marp-cli。我这里是mac直接使用brew命令就行。其他环境可以使用npm install下载
# mac
brew install marp-cli# 其他环境
npm install --save-dev @marp-team/marp-cli
使用命令 marp -v 查看版本
mac@1eaba08f6d8f ~ % marp -v
@marp-team/marp-cli v4.0.3 (w/ @marp-team/marp-core v4.0.0)
2.后端实现
这里是使用mysql查询模板,然后调用大模型生成内容。将模板和内容进行合并,然后在本地保存临时文件temp.md,使用本地的marp服务将.md文件转为ppt。然后上传至oss后返回给前端内容及ppt地址。
核心代码
python">@base.route('/ai/chat/generate_ppt', methods=['GET'])
def ai_chat_generate_ppt():# 判断参数是否存在template_id=request.args.get('template_id')user_input=request.args.get('user_input')if not template_id:return jsonify({'msg': '模板ID为必填', 'code': 400}), 400if not user_input:return jsonify({'msg': '用户输入为必填', 'code': 400}), 400ppt_template=PptTemplate().query.filter_by(id=template_id).first();if not ppt_template:return jsonify({'msg': '没有找到这个模板', 'code': 400}), 400try:# 请求大模型生成PPTworkflow_client=WorkflowClient(FLOW_API_KEY, base_url=API_BASE_URL)workflow_response=workflow_client.run(inputs={"user_input":user_input}, user="123", response_mode="blocking")workflow_response.raise_for_status()result = workflow_response.json()text_output = Noneif 'data' in result and 'outputs' in result['data'] and 'text' in result['data']['outputs']:text_output = result['data']['outputs']['text']try:text_output = json.loads(text_output)  # 将字符串转换为JSON对象except json.JSONDecodeError as e:return jsonify({'msg': 'JSON解析错误', 'code': 500, 'error': str(e)}), 500# 将ppt模板内容中的变量替换为生成的文本template_content = ppt_template.template_contentif text_output:template_content = template_content.replace('{{title}}', text_output.get('title', ''))template_content = template_content.replace('{{menuList}}', text_output.get('menuList', ''))template_content = template_content.replace('{{contents}}', text_output.get('contents', ''))# 将template_content写入到一个临时的Markdown文件markdown_file = 'temp.md'with open(markdown_file, 'w') as f:f.write(template_content)# 使用marp将Markdown文件转换为PPTppt_file = 'output.pptx'subprocess.run(['marp', markdown_file, '-o', ppt_file], check=True)# 上传PPT到OSSbucket_name="同名"endpoint="oss-cn-beijing.aliyuncs.com"auth = Auth('ak', 'sk')bucket = Bucket(auth, endpoint, bucket_name)oss_path = f'path/to/{uuid.uuid4()}.pptx'oss_base_path=f"https://{bucket_name}.{endpoint}/"bucket.put_object_from_file(oss_path, ppt_file)# 删除临时文件os.remove(markdown_file)os.remove(ppt_file)return jsonify({'msg': 'ok', 'code': 200, 'data':{'content': template_content,'ppt_url':oss_base_path+oss_path}}), 200except Exception as e:return jsonify({'msg': str(e), 'code': 500}), 500
AI提示词
# 角色
你是一个高效的 PPT 生成助手,能够根据用户输入的标题内容,以简洁明了的方式生成 PPT,并以 JSON 格式返回。擅长使用 Marp 语法呈现 PPT 内容,使目录以 Marp 列表形式展现。## 技能
### 技能 1:生成 PPT
1. 当用户提供标题时,根据标题内容生成 PPT 的目录内容,以 Marp 列表形式呈现。
2. 将 PPT 内容以 Marp 语法进行组织,每一页之间用“---”隔开。
3. 要求每张内容除标题外要包含内容及重点
===回复示例===
{
"title":"<首页标题>",
"menuList":"- 目录项 1\n- 目录项 2",
"contents":"第一页内容\n---\n第二页内容"
}
===示例结束===## 限制:
- 仅根据用户提供的标题生成 PPT,不涉及其他无关主题。
- 严格按照给定的 JSON 格式和 Marp 语法进行输出。
3.前端实现
我这里前端使用的是vue。
下载marp-core
npm install @marp-team/marp-core
封装组件
src/components/MarpitViewer
这里是使用marp-core将marp语法内容转为html。然后将每页ppt的svg单独截取到slides中循环渲染。
<template><div class="slides-preview"><!-- <el-carousel :interval="5000" arrow="always" type="card"><el-carousel-item v-for="(slide, index) in slides" :key="index"><div class="marpit" v-html="slide"></div></el-carousel-item></el-carousel> --><el-scrollbar height="100VH"><div v-for="(slide, index) in slides" :key="index" class="marpit" v-html="slide"></div></el-scrollbar></div>
</template><script setup>
import {onMounted, reactive, ref} from 'vue';
import { ElCarousel, ElCarouselItem } from 'element-plus';
import 'element-plus/dist/index.css'; // 引入 Element Plus 样式
import Marp from '@marp-team/marp-core';const slides = reactive([]); // 存储渲染后的幻灯片内容
const props = defineProps({markdownContent: String,
});onMounted(() => {renderSlides();
});const renderSlides = () => {if (typeof props.markdownContent !== 'string' || !props.markdownContent.trim()) {console.error('Invalid Markdown content.');slides.length = 0; // 清空幻灯片内容return;}try {const marp = new Marp();// 渲染 Markdown 内容为 HTML(包含 SVG)const { html, css } = marp.render(props.markdownContent);// 动态插入 CSSif (css) {const style = document.createElement('style');style.type = 'text/css';style.innerHTML = css;document.head.appendChild(style);}// 确保 html 内容不为空,并且包含 <svg> 元素if (html) {// 使用正则提取所有的 <svg> 标签const svgContent = html.match(/<svg[^>]*>[\s\S]*?<\/svg>/g) || [];// 将每个 <svg> 作为独立的幻灯片slides.splice(0, slides.length, ...svgContent);} else {console.error('Marp rendered empty HTML.');}} catch (error) {console.error('Error rendering slides:', error);}
};
</script><style scoped>
.slides-preview {width: 100%;position: relative;overflow: hidden;padding: 20px;
}.marpit {width: 100%;height: 100%;display: flex;justify-content: center;align-items: center;margin-bottom: 20px;
}.marpit svg {width: 100%;height: 100%;object-fit: contain;
}h1 {font-size: 3em;
}h2 {font-size: 2em;
}p {font-size: 1.5em;
}
</style>
三、代码地址及说明
这个思路只是简易版的实现方式。并没有达到商用的水平,后续还需要功能迭代。
代码已经提交到gitee中。
https://gitee.com/luzhiyong_erfou/learning-notes/tree/master/marp-ppt
将代码中的秘钥改一下就可以运行。
后续可以升级的功能目标:
- 实现动态前端渲染ppt(即流式返回,每返回一块内容就渲染一块内容)。
- 实现AI自动配图。
- 用户页面交互。


