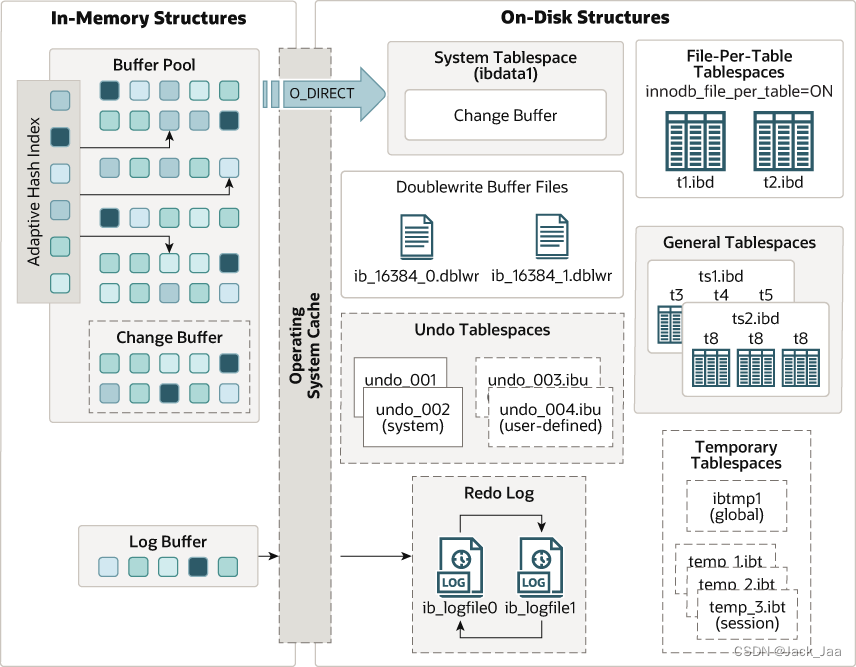
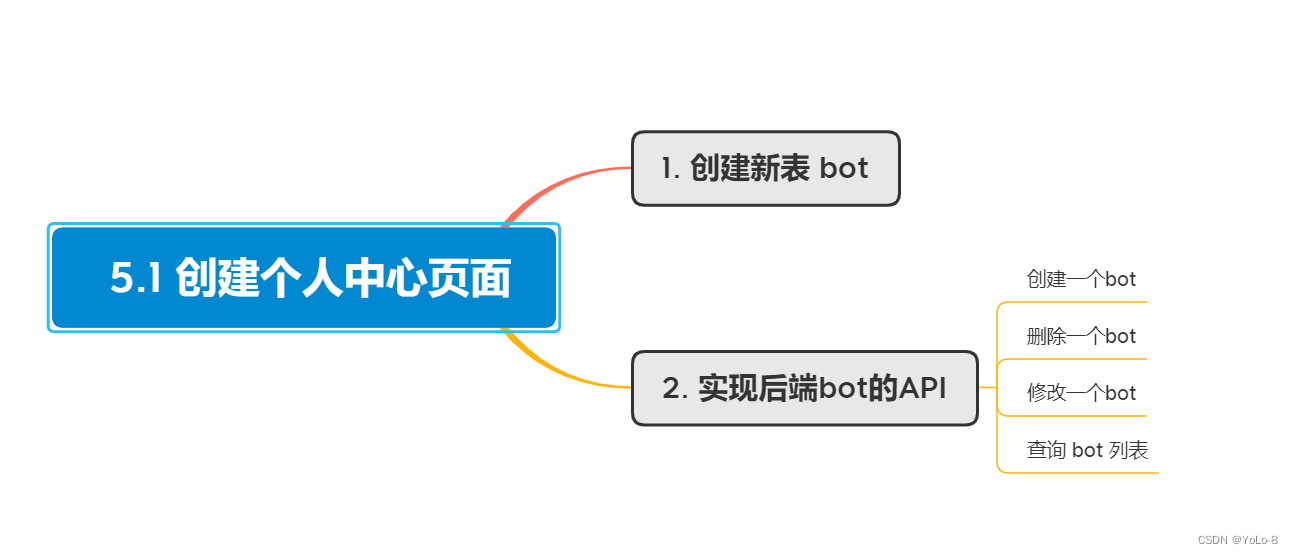
1. 整体框架
2. 新建表 bot
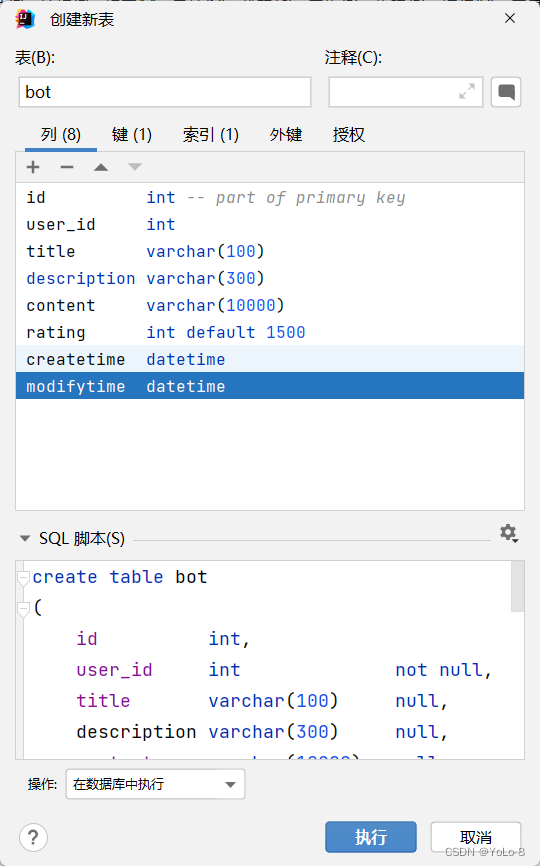
在数据库中新建表 bot
表中包含的列:
- id: int:非空、自动增加、唯一、主键
pojo 中定义主键的注解:@TableId(type = IdType.AUTO)
user_id: int:非空
注意:在 pojo 中需要定义成 userId,在 queryWrapper 中的名称仍然为 user_id
-
title: varchar(100) -
description: varchar(300) -
content:varchar(10000) -
rating: int:默认值为1500 -
createtime: datetime
pojo 中定义日期格式的注解:@JsonFormat(pattern = "yyyy-MM-dd HH:mm:ss")
modifytime: datetime
pojo 中定义日期格式的注解:@JsonFormat(pattern = "yyyy-MM-dd HH:mm:ss")

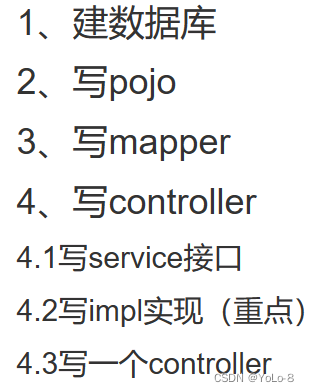
3.实现后端API
3.1 连接数据库和后端
- 在
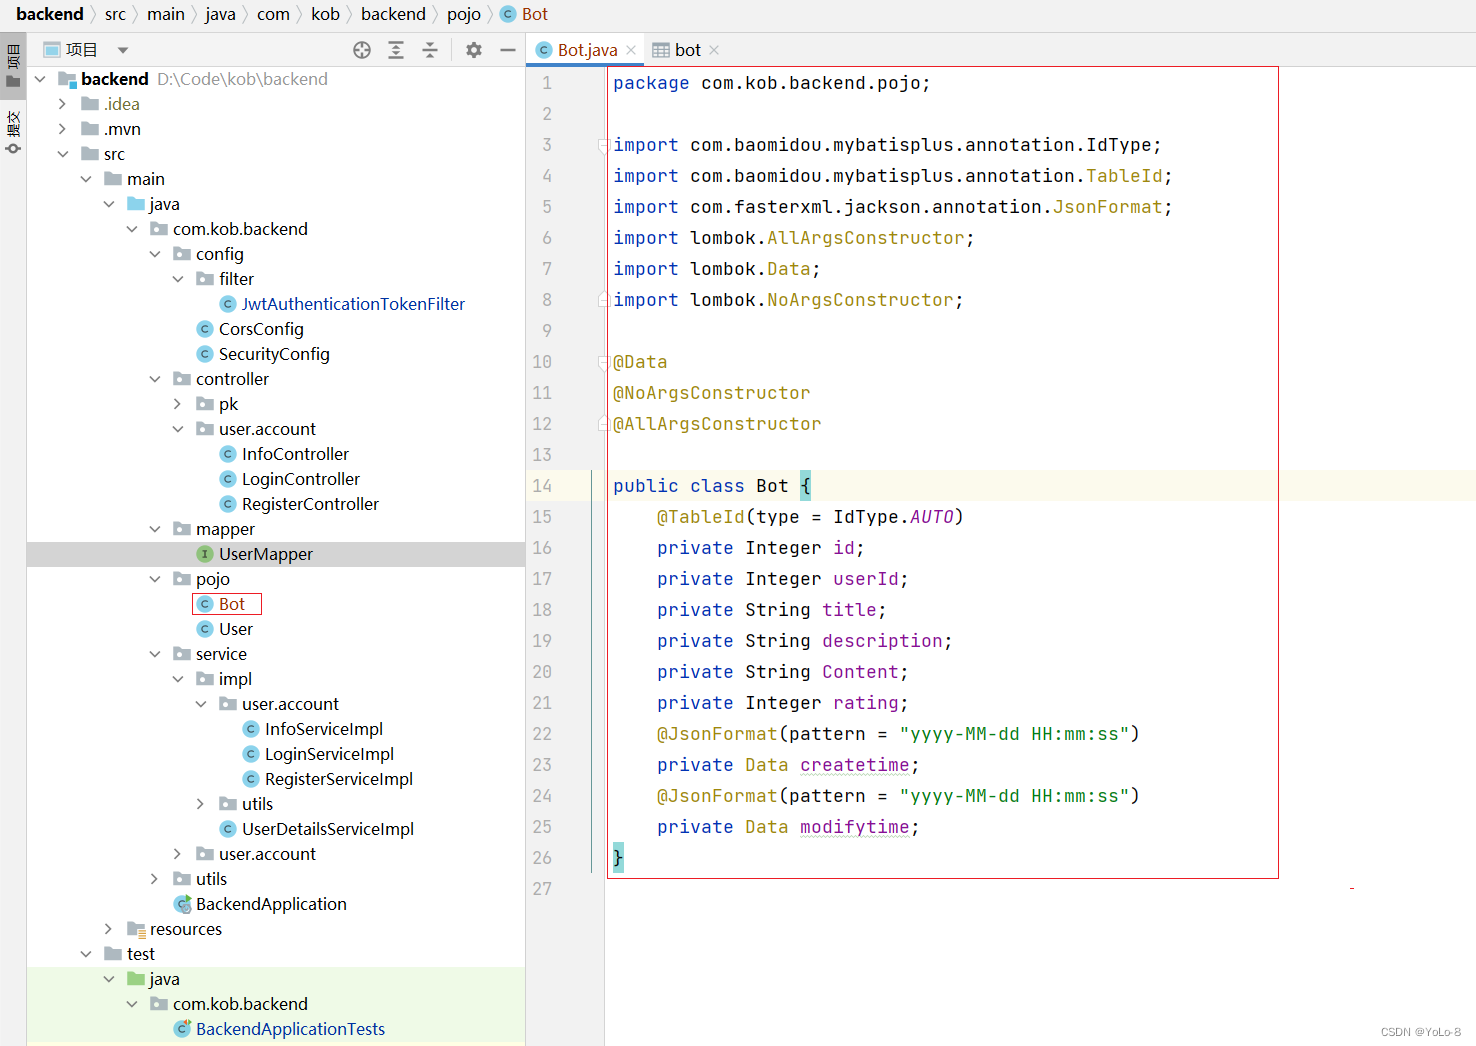
pojo目录下新建新的文件Bot.java,数据和数据库中的bot表一一对应。
package com.kob.backend.pojo;import com.baomidou.mybatisplus.annotation.IdType;
import com.baomidou.mybatisplus.annotation.TableId;
import com.fasterxml.jackson.annotation.JsonFormat;
import lombok.AllArgsConstructor;
import lombok.Data;
import lombok.NoArgsConstructor;import java.util.Date;@Data
@NoArgsConstructor
@AllArgsConstructorpublic class Bot {@TableId(type = IdType.AUTO)private Integer id; //在pojo里最好用Integer,否则会报警告private Integer userId; //pojo里要用驼峰命名法和数据库的下划线对应private String title;private String description;private String content;private Integer rating;@JsonFormat(pattern = "yyyy-MM-dd HH:mm:ss")private Date createtime;@JsonFormat(pattern = "yyyy-MM-dd HH:mm:ss")private Date modifytime;
}- 在
Mapper目录下新建BotMapper.java文件,映射SQL语句。
package com.kob.backend.mapper;import com.baomidou.mybatisplus.core.mapper.BaseMapper;
import com.kob.backend.pojo.Bot;
import org.apache.ibatis.annotations.Mapper;@Mapper
public interface BotMapper extends BaseMapper<Bot> {
}

3.2 实现 增删改查 API
Ⅰ增加一个Bot
- 在
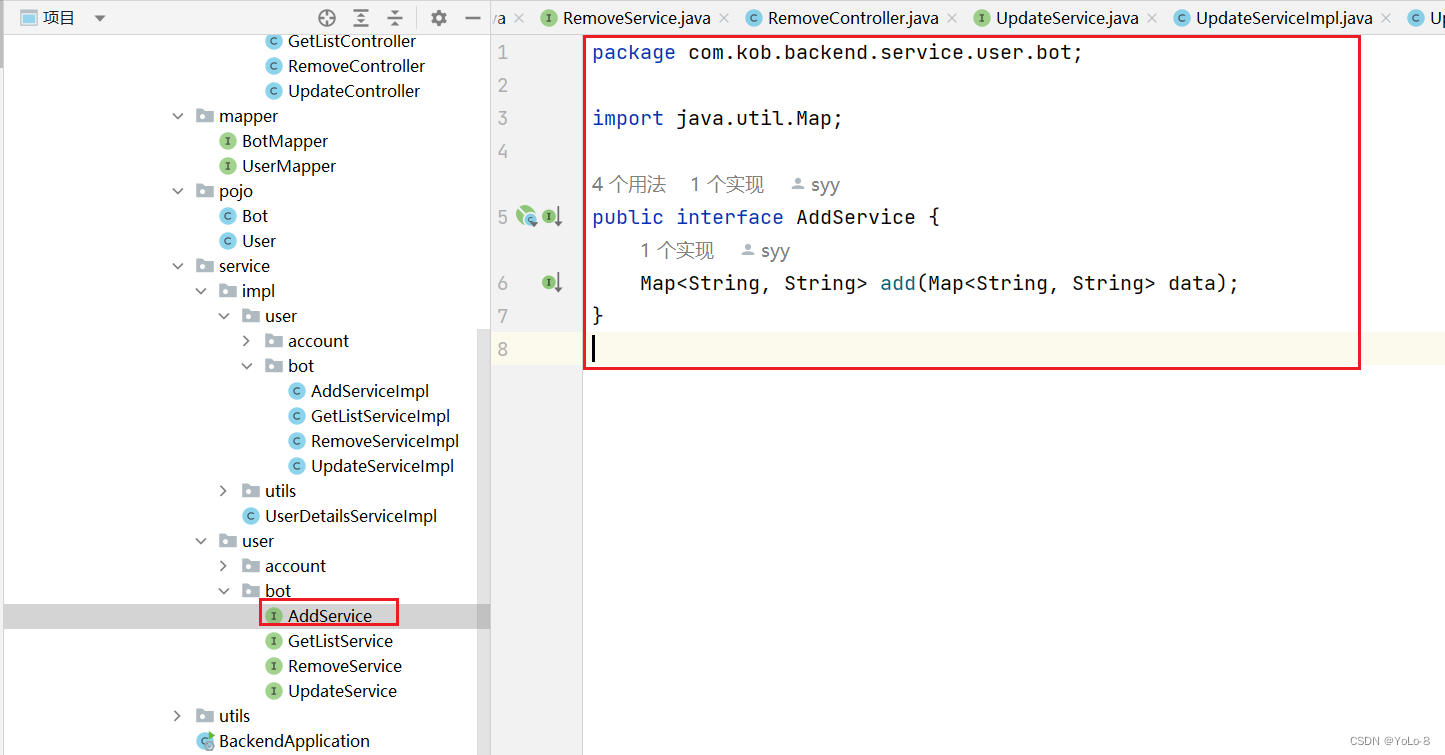
com/kob/backend/service/user新建一个新目录bot同时新建一个接口文件AddService
package com.kob.backend.service.user.bot;import java.util.Map;public interface AddService {Map<String, String> add(Map<String, String> data);
}
- 在
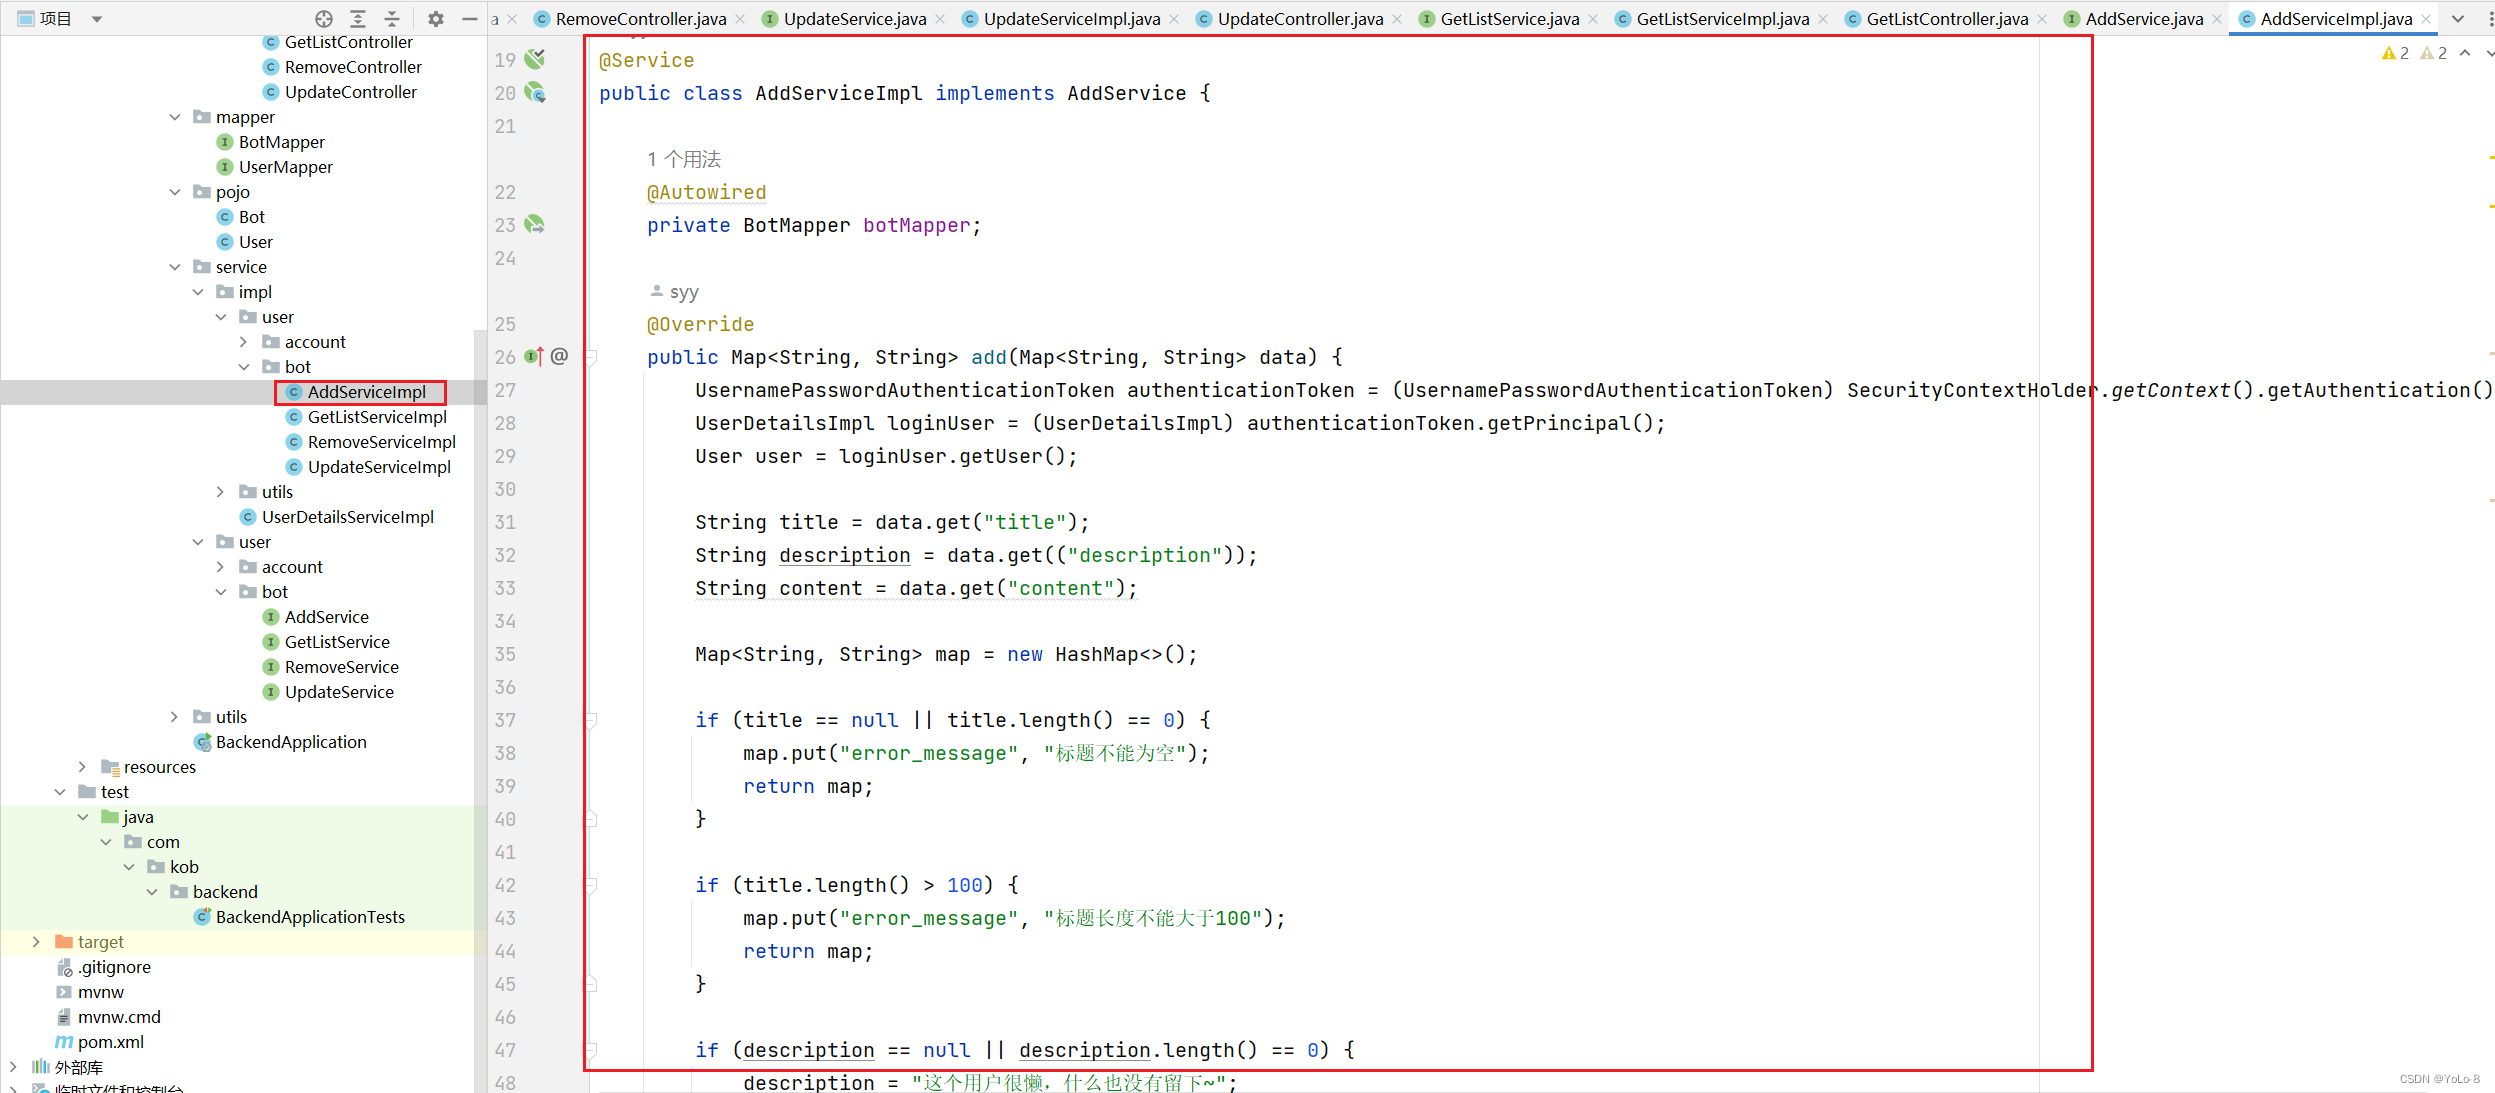
com/kob/backend/service/impl/user新建一个新目录bot同时新建一个实现类AddServiceImpl
package com.kob.backend.service.impl.user.bot;import com.kob.backend.mapper.BotMapper;
import com.kob.backend.pojo.Bot;
import com.kob.backend.pojo.User;
import com.kob.backend.service.impl.utils.UserDetailsImpl;
import com.kob.backend.service.user.bot.AddService;
import lombok.Data;
import org.springframework.beans.factory.annotation.Autowired;
import org.springframework.security.authentication.UsernamePasswordAuthenticationToken;
import org.springframework.security.core.context.SecurityContextHolder;
import org.springframework.security.core.userdetails.UserCache;
import org.springframework.stereotype.Service;import java.util.Date;
import java.util.HashMap;
import java.util.Map;@Service
public class AddServiceImpl implements AddService {@Autowiredprivate BotMapper botMapper;@Overridepublic Map<String, String> add(Map<String, String> data) {UsernamePasswordAuthenticationToken authenticationToken = (UsernamePasswordAuthenticationToken) SecurityContextHolder.getContext().getAuthentication();UserDetailsImpl loginUser = (UserDetailsImpl) authenticationToken.getPrincipal();User user = loginUser.getUser();String title = data.get("title");String description = data.get(("description"));String content = data.get("content");Map<String, String> map = new HashMap<>();if (title == null || title.length() == 0) {map.put("error_message", "标题不能为空");return map;}if (title.length() > 100) {map.put("error_message", "标题长度不能大于100");return map;}if (description == null || description.length() == 0) {description = "这个用户很懒,什么也没有留下~";}if (description.length() > 300) {map.put("error_message", "Bot描述的长度不能大于300");return map;}if (content == null || content.length() == 0) {map.put("error_message", "代码不能为空");return map;}if (content.length() > 10000) {map.put("error_message", "代码长度不能超过10000");return map;}Date now = new Date();Bot bot = new Bot(null, user.getId(), title, description, content, 1500, now, now);botMapper.insert(bot);map.put("error_message", "success");return map;}
}
- 在
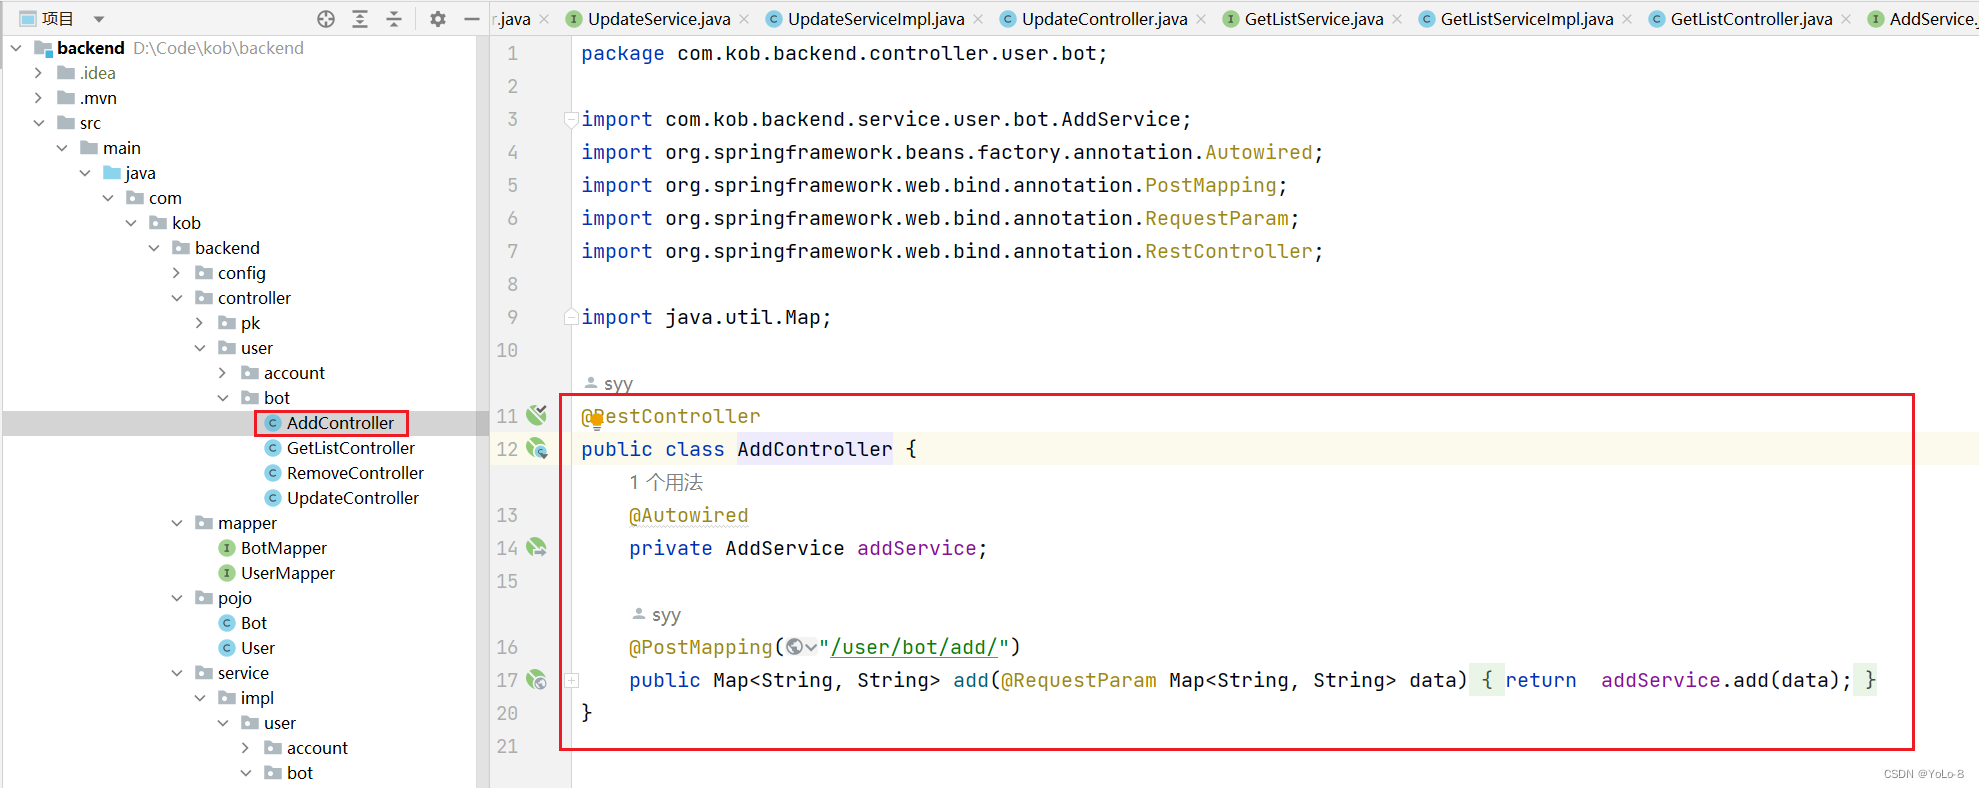
com/kob/backend/controller/user新建一个新目录bot同时新建一个Controller类AddController。
package com.kob.backend.controller.user.bot;import com.kob.backend.service.user.bot.AddService;
import org.springframework.beans.factory.annotation.Autowired;
import org.springframework.web.bind.annotation.PostMapping;
import org.springframework.web.bind.annotation.RequestParam;
import org.springframework.web.bind.annotation.RestController;import java.util.Map;@RestController
public class AddController {@Autowiredprivate AddService addService;@PostMapping("/user/bot/add/")public Map<String, String> add(@RequestParam Map<String, String> data) {return  addService.add(data);}
}
增加一个 bot 测试
- 在前端 web 项目下
kob/web/src/views/user/bot的文件UserBotIndexView.vue下编写测试。
<template><ContentField>我的Bot</ContentField>
</template><script>
import ContentField from '../../../components/ContentField'
import $ from 'jquery'
import { useStore } from 'vuex';export default {components: {ContentField},setup() {const store = useStore();// 在这里,设置的端口号为 8080,如果你已经修改了端口号,需要修改url。$.ajax({url: "http://127.0.0.1:8080/user/bot/add/",type: "post",data: {title: "Bot的标题",description : "Bot的描述",content: "Bot的代码",},headers: {Authorization: "Bearer " + store.state.user.token,},success(resp) {console.log(resp);},error(resp) {console.log(resp);}})}}
</script><style scoped>
</style>
效果如下:

Ⅱ 删除一个Bot
- 在
com/kob/backend/service/user/bot新建一个接口文件RemoveService
package com.kob.backend.service.user.bot;import java.util.Map;public interface RemoveService {Map<String, String> remove(Map<String, String> data);
}
- 在
com/kob/backend/service/impl/user/bot新建一个实现类RemoveServiceImpl
package com.kob.backend.service.impl.user.bot;import com.baomidou.mybatisplus.core.mapper.BaseMapper;
import com.kob.backend.mapper.BotMapper;
import com.kob.backend.pojo.Bot;
import com.kob.backend.pojo.User;
import com.kob.backend.service.impl.utils.UserDetailsImpl;
import com.kob.backend.service.user.bot.RemoveService;
import org.springframework.beans.factory.annotation.Autowired;
import org.springframework.security.authentication.UsernamePasswordAuthenticationToken;
import org.springframework.security.core.context.SecurityContextHolder;
import org.springframework.stereotype.Service;import java.util.HashMap;
import java.util.Map;@Service
public class RemoveServiceImpl implements RemoveService {@Autowiredprivate BotMapper botMapper;@Overridepublic Map<String, String> remove(Map<String, String> data) {UsernamePasswordAuthenticationToken authenticationToken = (UsernamePasswordAuthenticationToken) SecurityContextHolder.getContext().getAuthentication();UserDetailsImpl loginUser = (UserDetailsImpl) authenticationToken.getPrincipal();User user = loginUser.getUser();int bot_id = Integer.parseInt(data.get("bot_id"));Bot bot = botMapper.selectById(bot_id);Map<String, String> map = new HashMap<>();if (bot == null) {map.put("error_message", "Bot不存在或已被删除");return map;}if (!bot.getUserId().equals(user.getId())) {map.put("error_message", "没有权限删除该Bot");return map;}botMapper.deleteById(bot_id);map.put("error_message", "success");return map;}
}
- 在
com/kob/backend/controller/user/bot新建一个Controller类RemoveController。
package com.kob.backend.controller.user.bot;import com.kob.backend.service.user.bot.RemoveService;
import org.springframework.beans.factory.annotation.Autowired;
import org.springframework.web.bind.annotation.PostMapping;
import org.springframework.web.bind.annotation.RequestParam;
import org.springframework.web.bind.annotation.RestController;import java.util.Map;@RestController
public class RemoveController {@Autowiredprivate RemoveService removeService;@PostMapping("/user/bot/remove/")public Map<String, String> remove(@RequestParam Map<String, String> data) {return removeService.remove(data);}
}
删除一个 Bot 测试
- 在前端 web 项目下
kob/web/src/views/user/bot的文件UserBotIndexView.vue下编写测试。
<template><ContentField>我的Bot</ContentField>
</template><script>
import ContentField from '../../../components/ContentField'
import $ from 'jquery'
import { useStore } from 'vuex';export default {components: {ContentField},setup() {const store = useStore();// 在这里,设置的端口号为 8080,如果你已经修改了端口号,需要修改url。$.ajax({url: "http://127.0.0.1:8080/user/bot/remove/",type: "POST",data: {bot_id: 3, //可以修改为自己的bot_id},headers: {Authorization: "Bearer " + store.state.user.token,},success(resp) {console.log(resp);},error(resp) {console.log(resp);}})}}
</script><style scoped>
</style>
效果如下:

Ⅲ 修改一个 Bot
- 在
com/kob/backend/service/user/bot新建一个接口文件UpdateService
package com.kob.backend.service.user.bot;import java.util.Map;public interface UpdateService {Map<String, String> update(Map<String, String> data);
}
- 在
com/kob/backend/service/impl/user/bot新建一个实现类UpdateServiceImpl
package com.kob.backend.service.impl.user.bot;import com.kob.backend.mapper.BotMapper;
import com.kob.backend.pojo.Bot;
import com.kob.backend.pojo.User;
import com.kob.backend.service.impl.utils.UserDetailsImpl;
import com.kob.backend.service.user.bot.UpdateService;
import org.springframework.beans.factory.annotation.Autowired;
import org.springframework.security.authentication.UsernamePasswordAuthenticationToken;
import org.springframework.security.core.context.SecurityContextHolder;
import org.springframework.stereotype.Service;import java.util.Date;
import java.util.HashMap;
import java.util.Map;@Service
public class UpdateServiceImpl implements UpdateService {@Autowiredprivate BotMapper botMapper;@Overridepublic Map<String, String> update(Map<String, String> data) {UsernamePasswordAuthenticationToken authenticationToken = (UsernamePasswordAuthenticationToken) SecurityContextHolder.getContext().getAuthentication();UserDetailsImpl loginUser = (UserDetailsImpl) authenticationToken.getPrincipal();User user = loginUser.getUser();int bot_id = Integer.parseInt(data.get("bot_id"));String title = data.get("title");String description = data.get("description");String content = data.get("content");Map<String, String> map = new HashMap<>();if (title == null || title.length() == 0) {map.put("error_message", "标题不能为空");return map;}if (title.length() > 100) {map.put("error_message", "标题长度不能大于100");return map;}if (description == null || description.length() == 0) {description = "这个用户很懒,什么也没有留下~";}if (description.length() > 300) {map.put("error_message", "Bot描述的长度不能大于300");return map;}if (content == null || content.length() == 0) {map.put("error_message", "代码不能为空");return  map;}if (content.length() > 10000) {map.put("error_message", "代码长度不能超过10000");}Bot bot = botMapper.selectById(bot_id);if (bot == null) {map.put("error_message", "Bot不存在或已经被删除");return map;}if (!bot.getUserId().equals(user.getId())) {map.put("error_message", "没有权限修改该Bot");return map;}Bot new_bot = new Bot(bot.getId(),user.getId(),title,description,content,bot.getRating(),bot.getCreatetime(),new Date());botMapper.updateById(new_bot);map.put("error_message", "success");return map;}
}
- 在
com/kob/backend/controller/user/bot新建一个Controller类UpdateController。
package com.kob.backend.controller.user.bot;import com.kob.backend.service.user.bot.UpdateService;
import org.springframework.beans.factory.annotation.Autowired;
import org.springframework.web.bind.annotation.PostMapping;
import org.springframework.web.bind.annotation.RequestParam;
import org.springframework.web.bind.annotation.RestController;import java.util.Map;@RestController
public class UpdateController {@Autowiredprivate UpdateService updateService;@PostMapping("/user/bot/update/")public Map<String, String> update(@RequestParam Map<String, String> data) {return updateService.update(data);}
}
修改一个 Bot 测试
- 在前端 web 项目下
kob/web/src/views/user/bot的文件UserBotIndexView.vue下编写测试。
<template><ContentField>我的Bot</ContentField>
</template><script>
import ContentField from '../../../components/ContentField'
import $ from 'jquery'
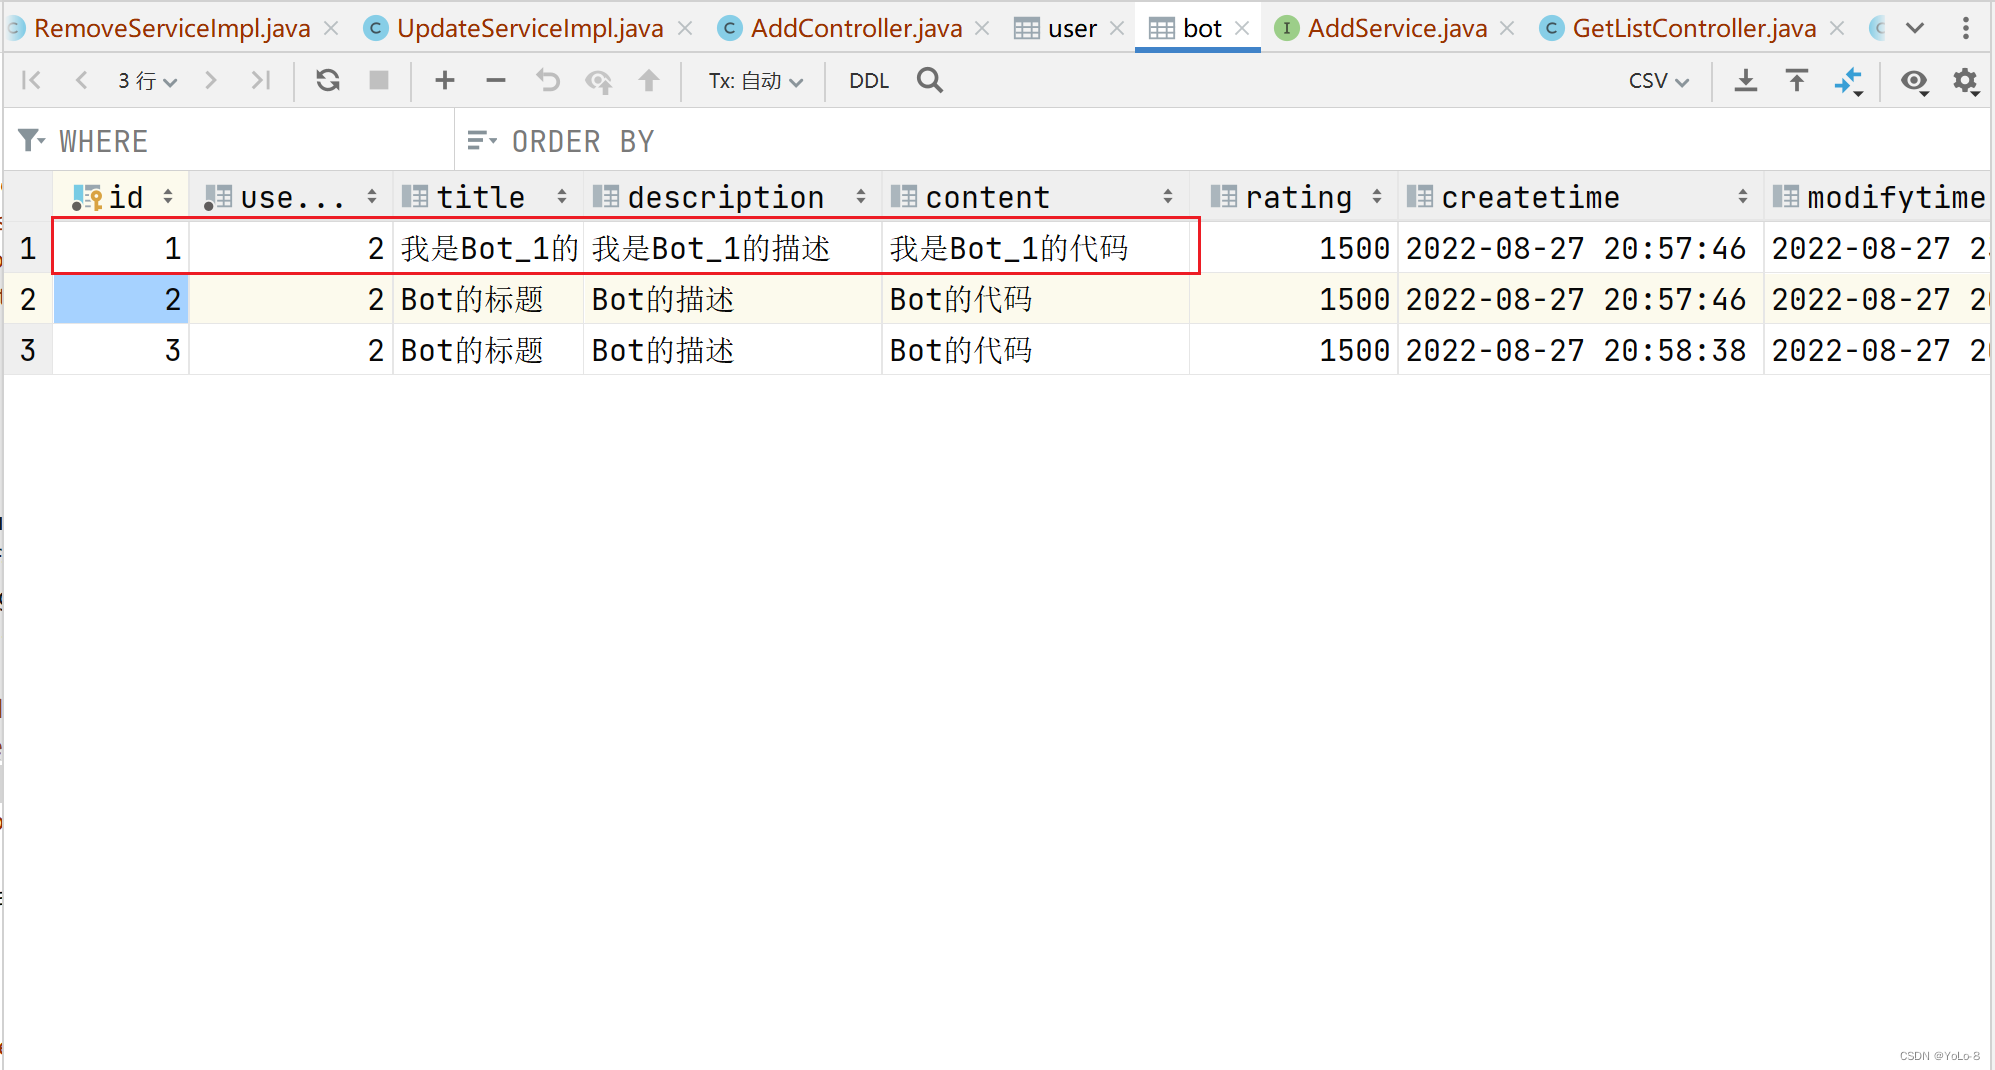
import { useStore } from 'vuex';export default {components: {ContentField},setup() {const store = useStore();// 在这里,设置的端口号为 8080,如果你已经修改了端口号,需要修改url。$.ajax({url: "http://127.0.0.1:8080/user/bot/update/",type: "POST",data: {bot_id: 1,title: "我是Bot_1的标题",description : "我是Bot_1的描述",content: "我是Bot_1的代码",},headers: {Authorization: "Bearer " + store.state.user.token,},success(resp) {console.log(resp);},error(resp) {console.log(resp);}})}}
</script><style scoped>
</style>
效果如下:

Ⅳ 查询 Bot 列表
- 在
com/kob/backend/service/user/bot新建一个接口文件GetListService
package com.kob.backend.service.user.bot;import com.kob.backend.pojo.Bot;import java.util.List;public interface GetListService {List<Bot> getList();
}
- 在
com/kob/backend/service/impl/user/bot新建一个实现类GetListServiceImpl
package com.kob.backend.service.impl.user.bot;import com.baomidou.mybatisplus.core.conditions.query.QueryWrapper;
import com.kob.backend.mapper.BotMapper;
import com.kob.backend.pojo.Bot;
import com.kob.backend.pojo.User;
import com.kob.backend.service.impl.utils.UserDetailsImpl;
import com.kob.backend.service.user.bot.GetListService;
import org.springframework.beans.factory.annotation.Autowired;
import org.springframework.security.authentication.UsernamePasswordAuthenticationToken;
import org.springframework.security.core.context.SecurityContextHolder;
import org.springframework.stereotype.Service;import java.util.List;@Service
public class GetListServiceImpl implements GetListService {@Autowiredprivate BotMapper botMapper;@Overridepublic List<Bot> getList() {UsernamePasswordAuthenticationToken authenticationToken = (UsernamePasswordAuthenticationToken) SecurityContextHolder.getContext().getAuthentication();UserDetailsImpl loginUser = (UserDetailsImpl) authenticationToken.getPrincipal();User user = loginUser.getUser();QueryWrapper<Bot> queryWrapper = new QueryWrapper<>();queryWrapper.eq("user_id", user.getId());return botMapper.selectList(queryWrapper);}
}
- 在
com/kob/backend/controller/user/bot新建一个Controller类GetListController。
package com.kob.backend.controller.user.bot;import com.kob.backend.pojo.Bot;
import com.kob.backend.service.user.bot.GetListService;
import org.springframework.beans.factory.annotation.Autowired;
import org.springframework.web.bind.annotation.GetMapping;
import org.springframework.web.bind.annotation.RestController;import java.util.List;@RestController
public class GetListController {@Autowiredprivate GetListService getListService;@GetMapping("/user/bot/getlist/")public List<Bot> getList() {return getListService.getList();}
}
查询 Bot 列表测试
- 在前端 web 项目下
kob/web/src/views/user/bot的文件UserBotIndexView.vue下编写测试。
<template><ContentField>我的Bot</ContentField>
</template><script>
import ContentField from '../../../components/ContentField'
import $ from 'jquery'
import { useStore } from 'vuex';export default {components: {ContentField},setup() {const store = useStore();// 在这里,设置的端口号为 8080,如果你已经修改了端口号,需要修改url。$.ajax({url: "http://127.0.0.1:8080/user/bot/getlist/",type: "get",headers: {Authorization: "Bearer " + store.state.user.token,},success(resp) {console.log(resp);},error(resp) {console.log(resp);}})}}
</script><style scoped>
</style>
效果如下:


