Spring:
图片出处:b站黑马 ssm学习截图
是一个大家族 ,是一套完整的开发生态圈。可以利用这个spring全家桶快速构建企业级开发环境。
Spring Freamwork 是其他框架的基础
Springbot 使用了注解开发
SpringCloud 分布式 云服务
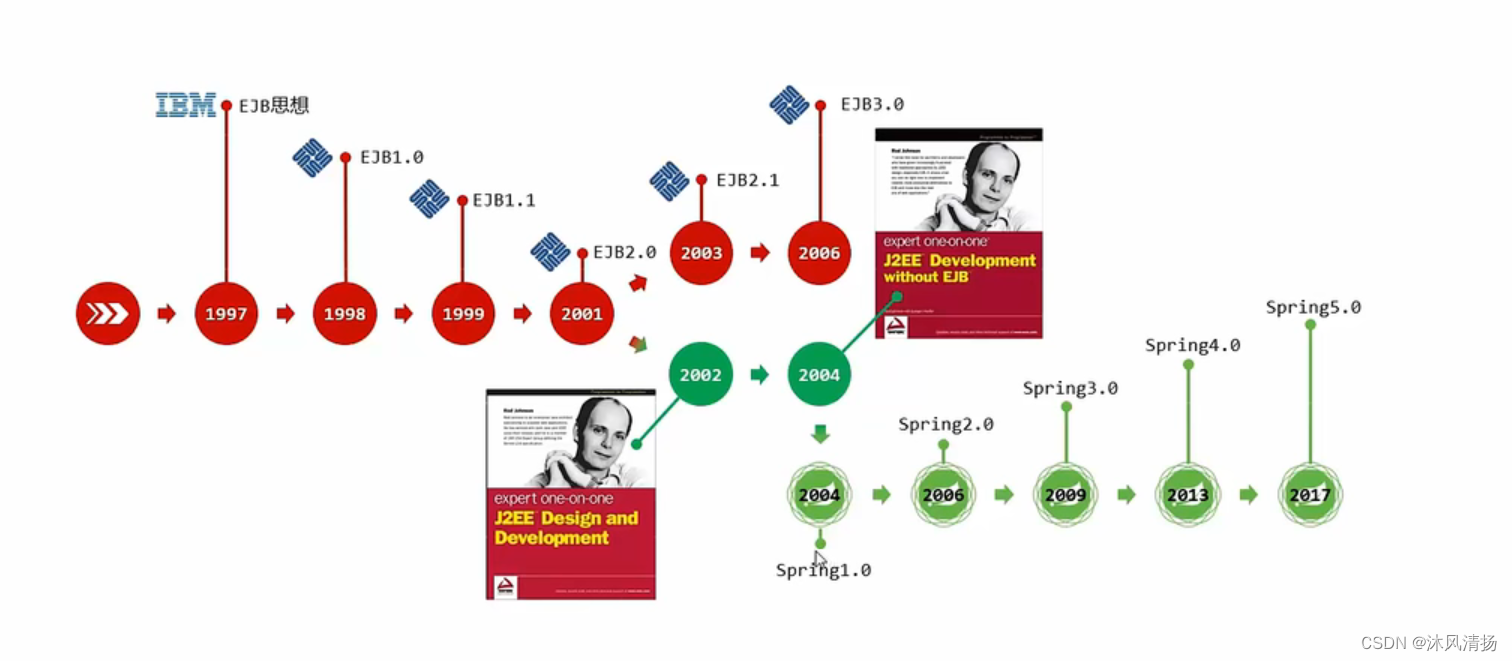
Spring 4架构图
容器:
用来管理Java对象

AOP:
面向切面编程
Aspets:
Aop的实现
Data Access :
数据访问

Spring核心概念:
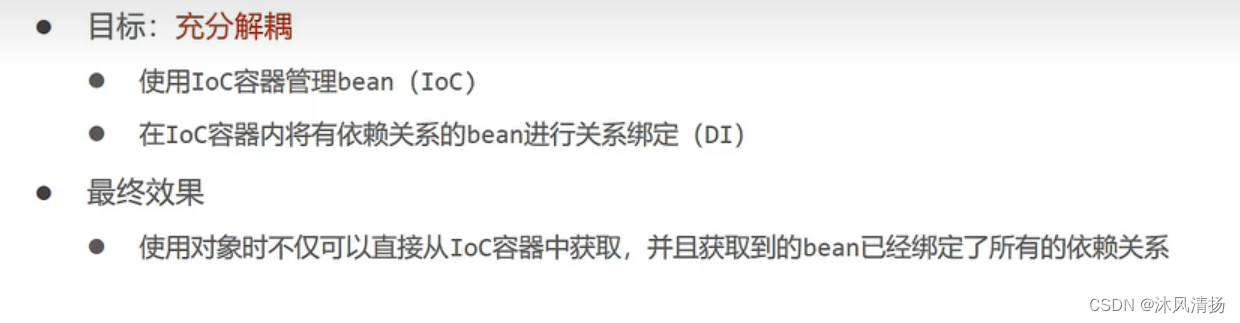
为什么出现这些框架?
以前的 开发 代码耦合度太高 ,牵一发而动全身,耗费成本太高。

控制反转:IOC
对象的创建控制权发生了转移,Spring提供了容器,实现了对象的创建,由主动创建对象 到ioc创建对象并且初始化,这里创建的对象统一称为bean。
依赖注入:Di
例如service和dao的bean就可以使用依赖注入
IOC DI入门:
我们先
导入依赖
这里导入org.sprinngframework的包 导入成功后
<?xml version="1.0" encoding="UTF-8"?>
<project xmlns="http://maven.apache.org/POM/4.0.0"xmlns:xsi="http://www.w3.org/2001/XMLSchema-instance"xsi:schemaLocation="http://maven.apache.org/POM/4.0.0 http://maven.apache.org/xsd/maven-4.0.0.xsd"><modelVersion>4.0.0</modelVersion><groupId>org.example</groupId><artifactId>springtext</artifactId><version>1.0-SNAPSHOT</version>
<dependencies><dependency><groupId>org.springframework</groupId><artifactId>spring-context</artifactId><version>6.0.1</version></dependency>
</dependencies><properties><maven.compiler.source>8</maven.compiler.source><maven.compiler.target>8</maven.compiler.target></properties></project>
建包
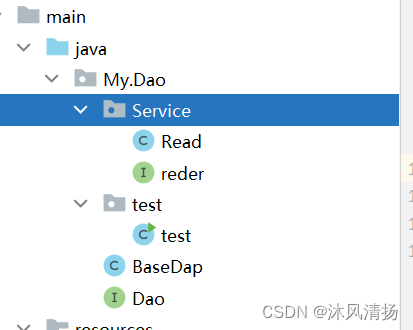
这里我只分了业务层和dao层 随便写的接口和实现类
这个具有内容自己写就行 随便写两个方法 去实现 只要能帮助你理解就行
上面提到 我们用bean容器 来管理 和创建对象 实现解耦的作用
所以导入依赖之后
先来配置bean
在resource下新建xml 导入依赖成功的话 选springconfig就行

这里我们命名为
applicationContext.xml
在文件里创建<bean>即可 class指向他所在的包,也就是你要管理的对象
这里我们新建DAO和service的
id就是它们的标识
<?xml version="1.0" encoding="UTF-8"?>
<beans xmlns="http://www.springframework.org/schema/beans"xmlns:xsi="http://www.w3.org/2001/XMLSchema-instance"xsi:schemaLocation="http://www.springframework.org/schema/beans http://www.springframework.org/schema/beans/spring-beans.xsd">
<!--
导入包后  开始配置bean--><bean class="My.Dao.Service.Read" id="Read">
<property name="Read" ref="read1"></property></bean><bean class="My.Dao.Service.Read" id="read1"></bean>
</beans>
建个测试类测试一下:
可以看到 无需用new来创建对象 而是将控制权移交给了ioc容器
package My.Dao.test;import My.Dao.Service.Read;
import org.springframework.context.ApplicationContext;
import org.springframework.context.support.ClassPathXmlApplicationContext;public class test {public static void main(String[] args) {
ApplicationContext cs=new ClassPathXmlApplicationContext("appliactionContext.xml");
//拿到bean对象Read R= (Read) cs.getBean("read");
//调用方法R.reading();}
}
完成控制权的转移之后 我们为了实现充分解耦 就需要使用
依赖注入
将 bean相关的依赖对应起来
这里对业务层 所需要的dao进行依赖注入
按照传统的方式 这里的业务层是依托于Dao层 以前都是new对象来创建dao的实例
那么这里利用依赖注入只需要封装dao层 给它设置一个set方法即可
package My.Dao.Service;import My.Dao.BaseDap;public  class Read implements reder{public void setBs(BaseDap bs) {this.bs = bs;}private BaseDap bs;@Overridepublic void reading() {System.out.println("正在阅读");}
}
在applicationContext.xml里进行如下操作
<?xml version="1.0" encoding="UTF-8"?>
<beans xmlns="http://www.springframework.org/schema/beans"xmlns:xsi="http://www.w3.org/2001/XMLSchema-instance"xsi:schemaLocation="http://www.springframework.org/schema/beans http://www.springframework.org/schema/beans/spring-beans.xsd">
<!--
导入包后  开始配置bean
--><bean class="My.Dao.Service.Read" id="Read">
<!--    //这里是业务的bean对象  class指向它所在的包-->
<property name="Read" ref="baseDap">
<!--    //利用property属性 对bean相关的进行设置-->
</property></bean>
<!--    //property 的name 是业务层的封装的dao 可以利用set方法给它传值  这里的ref 指向的就是下面这个bean--><bean class="My.Dao.BaseDap" id="baseDap">
</bean>
</beans>
注入之后就完成了解耦 这时候再去跑一下
测试代码
package My.Dao.test;import My.Dao.Service.Read;
import org.springframework.context.ApplicationContext;
import org.springframework.context.support.ClassPathXmlApplicationContext;public class test {public static void main(String[] args) {
ApplicationContext cs=new ClassPathXmlApplicationContext("appliactionContext.xml");Read R= (Read) cs.getBean("read");R.reading();}
}
这里就完成了初步的入门
Bean配置:
基础配置已经在上面给出
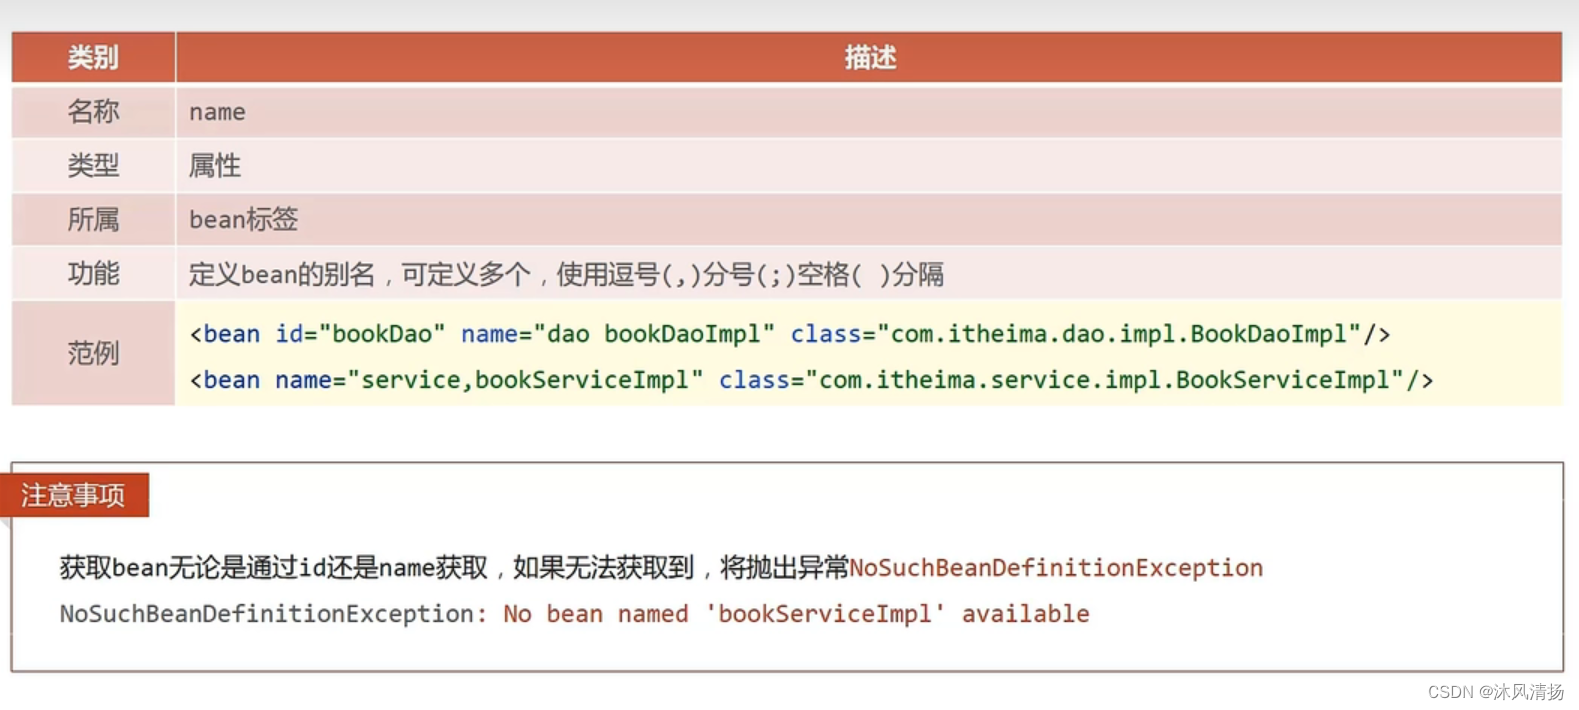
下面是别名配置:
即 在配置文中对bean 的name 设置多个参数 就可以通过别名调用
bean的作用范围
这里的作用范围默认的单例


Bean的实例化
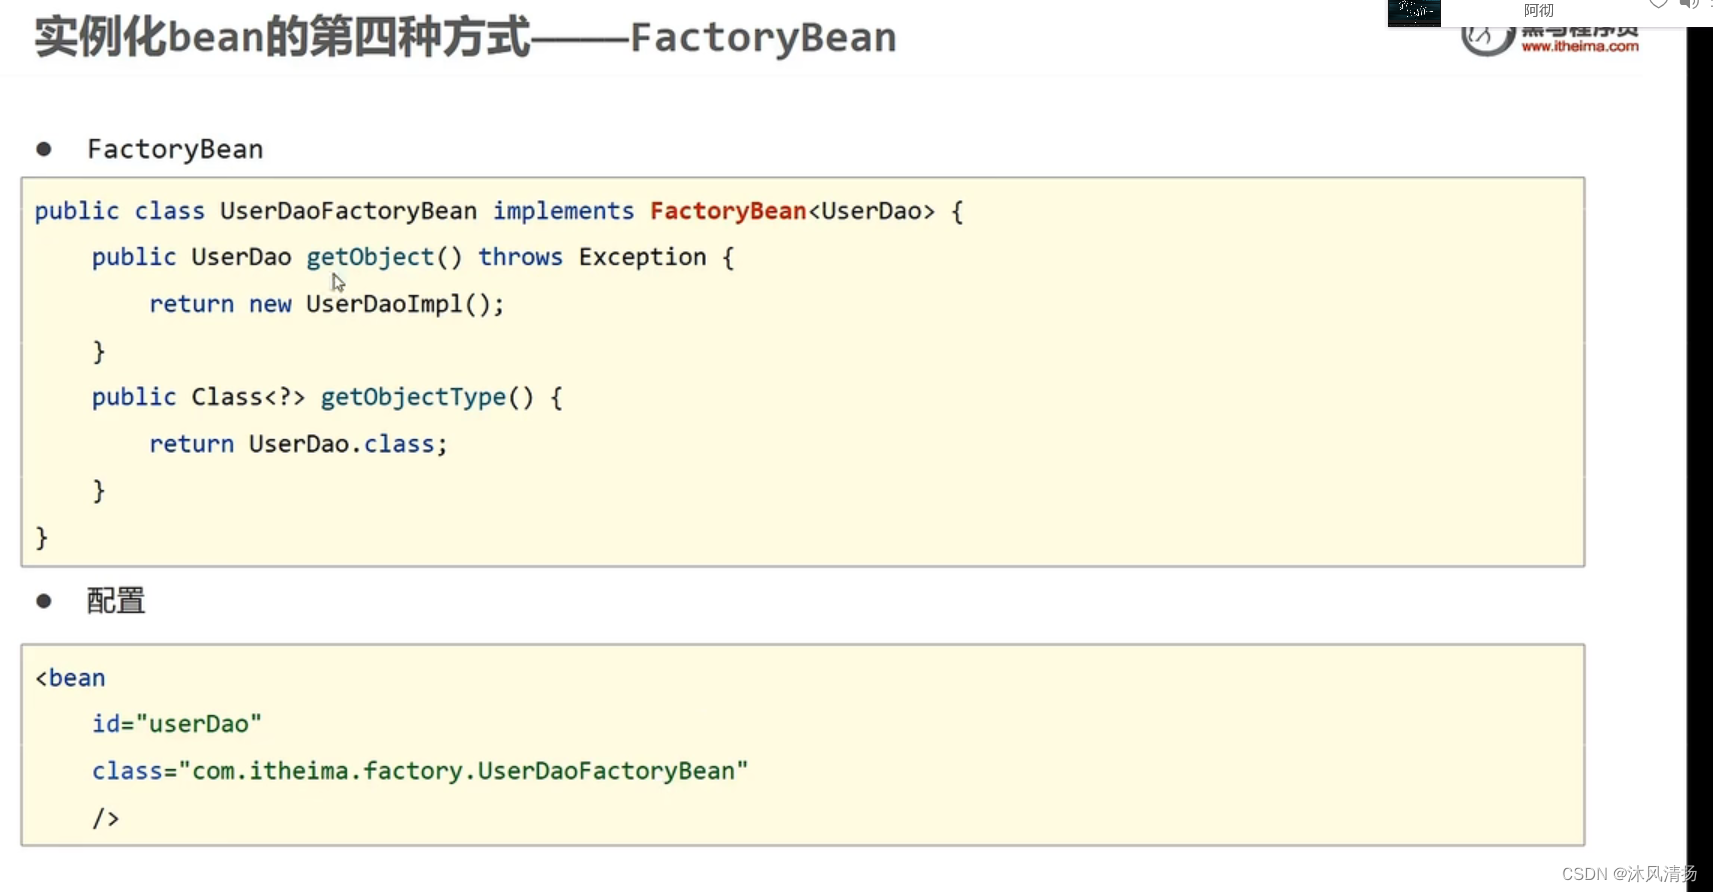
创建bean的三种方式:
构造方法

静态工厂创建bean

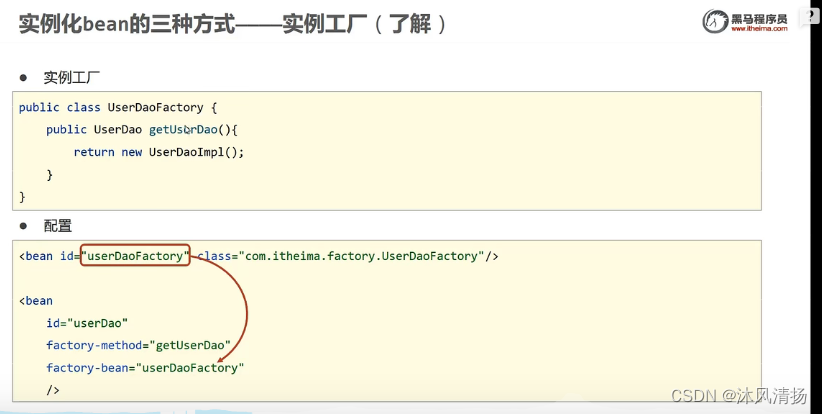
实例工厂造对象:

factoryBean构造对象