IP地址规划
| 名字 | 地址 | 主要安装软件 |
|---|---|---|
| ansible-server | 192.168.40.137 | zabbix-server、ansible、zabbix-mysql |
| zabbix-agent1 | 192.168.40.138 | zabbix-agent |
| zabbix-agent2 | 192.168.40.139 | zabbix-agent |
| zabbix-grafana | 192.168.40.140 | grafana |
ansible_10">ansible安装
服务端建立免密连接
# 生成密钥对
[root@ansible-server ~]# ssh-keygen
# 分发公钥,建立免密通道
[root@ansible-server ~]# ssh-copy-id root@192.168.40.138
[root@ansible-server ~]# ssh-copy-id root@192.168.40.139
[root@ansible-server ~]# ssh-copy-id root@192.168.40.140
分开部署
zabbixmysql_25">安装zabbix-mysql
在管理节点上(server端)安装epel源,ansible
[root@ansible-server ~]# yum install epel-release -y
[root@ansible-server ~]# yum install ansible -y
查看版本
[root@ansible-server ~]# ansible --version
ansible 2.9.27config file = /etc/ansible/ansible.cfgconfigured module search path = [u'/root/.ansible/plugins/modules', u'/usr/share/ansible/plugins/modules']ansible python module location = /usr/lib/python2.7/site-packages/ansibleexecutable location = /usr/bin/ansiblepython version = 2.7.5 (default, Oct 14 2020, 14:45:30) [GCC 4.8.5 20150623 (Red Hat 4.8.5-44)]
创建角色
[root@ansible-server roles]# ansible-galaxy init zabbix-server
- Role zabbix-server was created successfully
[root@ansible-server roles]# ansible-galaxy init zabbix-mysql
- Role zabbix-mysql was created successfully
[root@ansible-server roles]# ansible-galaxy init zabbix-agent
- Role zabbix-agent was created successfully
[root@ansible-server roles]# ansible-galaxy init zabbix-grafana
- Role zabbix-grafana was created successfully
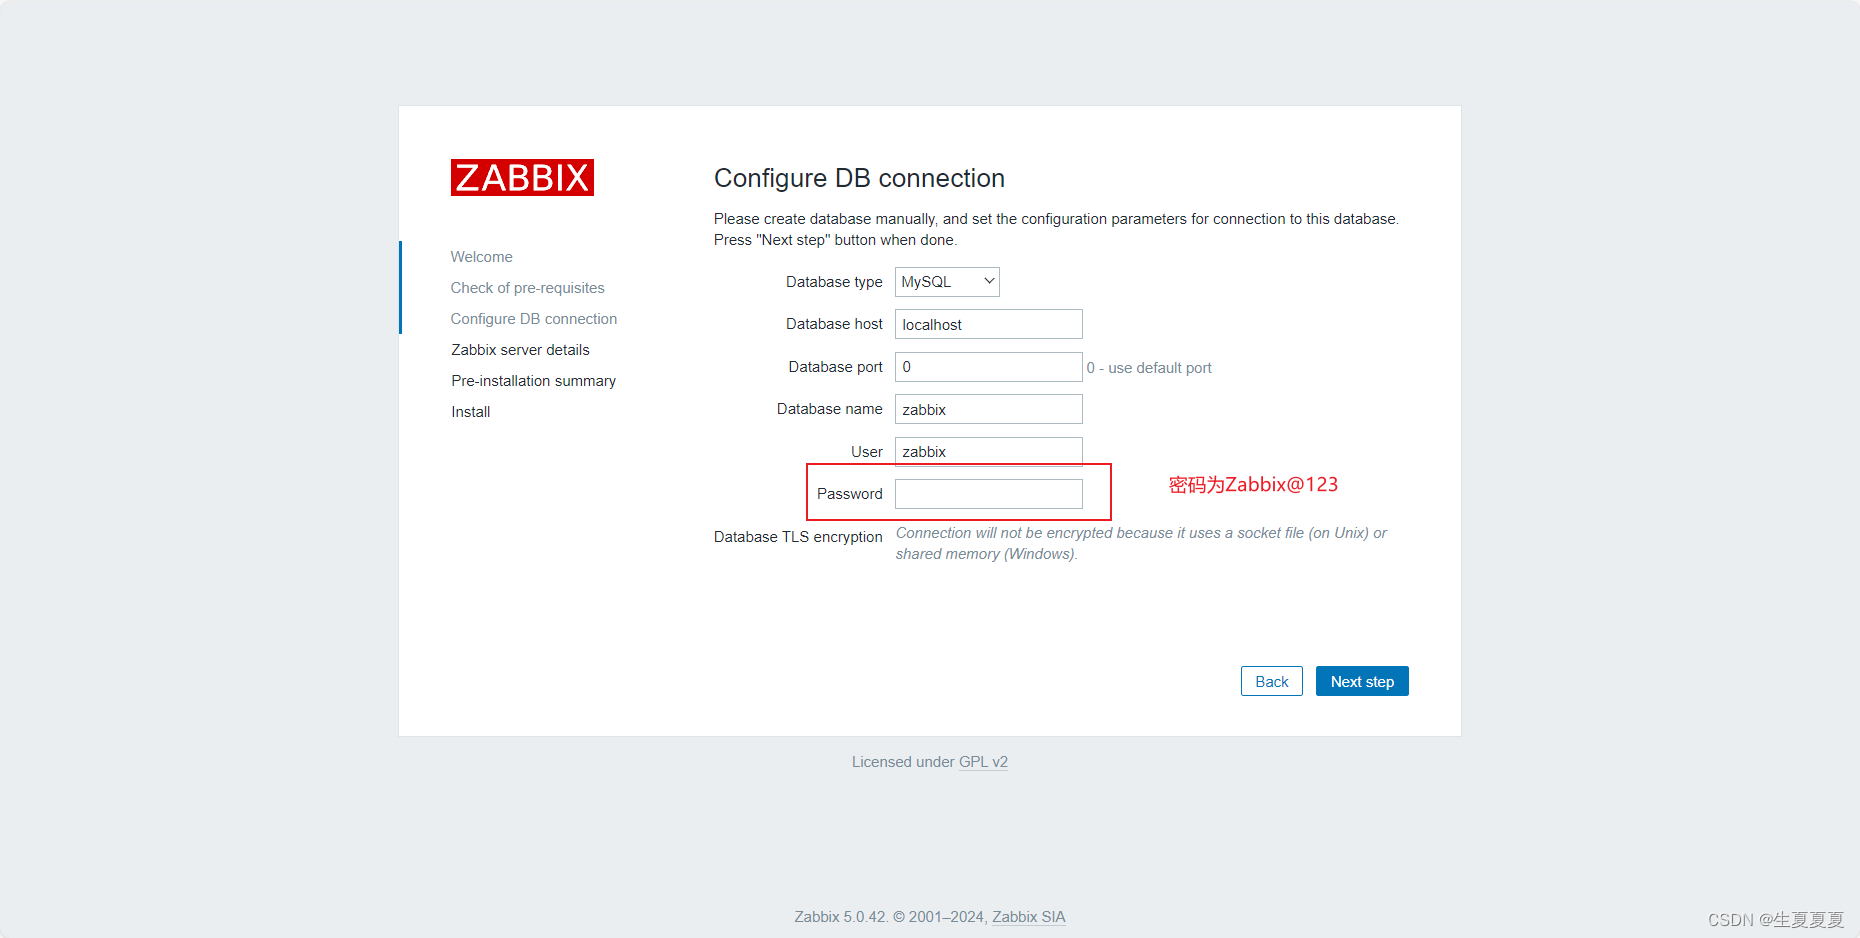
配置数据库
安装数据库软件包
[root@ansible-server files]# wget https://dev.mysql.com/get/mysql80-community-release-el7-3.noarch.rpm
安装zabbix-mysql数据库
[root@ansible-server tasks]# cat main.yml
---
# tasks file for zabbix-mysql
- name: install mysql 5.7 and config for zabbixhosts: localhosttasks:- name: copy mysql repo rpm copy:src: mysql80-community-release-el7-3.noarch.rpmdest: /root/- name: install repocommand: rpm -ivh /root/mysql80-community-release-el7-3.noarch.rpmignore_errors: yes- name: install yum-utilsyum:name: yum-utilsstate: present- name: install mysql 5.7command: yum-config-manager --enable mysql57-community- name: check repolineinfile:path: /etc/yum.repos.d/mysql-community.reporegexp: '^gpgcheck=1'line: 'gpgcheck=0'- name: install mysqlyum:name: mysql,mysql-serverstate: present- name: start mysql service:name: mysqldstate: startedenabled: yes- name: get mysql temp passwordshell: cat /var/log/mysqld.log| grep 'temporary password'|awk '{print $NF}'  # 使用register保存结果register: temp_passwordchanged_when: false- name: set old passwordmysql_user:name: roothost: localhostpassword: "{{ temp_password.stdout }}"ignore_errors: yes- name: set new passwordshell: mysql -uroot -p123456- name: create zabbix usershell: mysql -uroot -p123456 -e "alter user 'zabbix'@'localhost' identified by 'Zabbix@123';" - name: create zabbix databaseshell: mysql -uroot -p123456 -e "create database zabbix character set utf8 collate utf8_bin;"ignore_errors: yes- name: grant mysql user privilegesshell: mysql -uroot -p123456 -e "grant all privileges on zabbix.* to zabbix@localhost;"
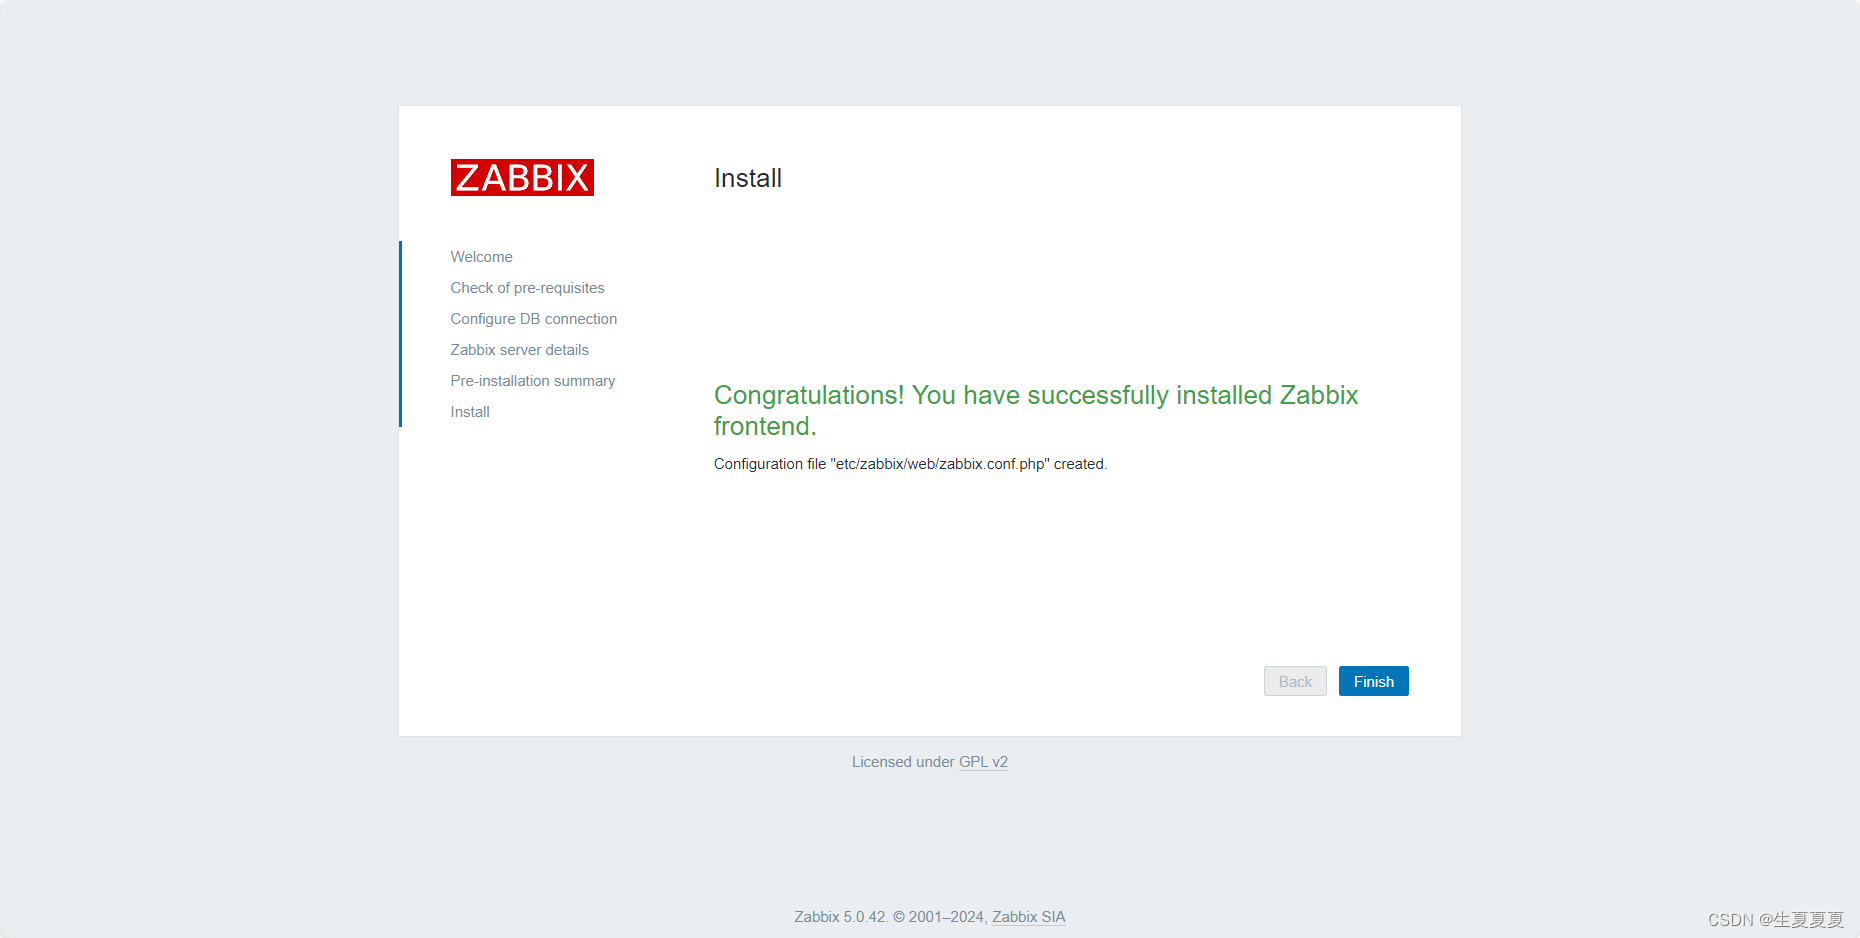
zabbixserver_125">安装zabbix-server
安装zabbix-server存储库
[root@ansible-server zabbix-server]# cd files/
[root@ansible-server files]# wget https://repo.zabbix.com/zabbix/5.0/rhel/7/x86_64/zabbix-release-5.0-1.el7.noarch.rpm
设置zabbix.repo
[zabbix]
name=zabbix
baseurl=https://repo.zabbix.com/zabbix/5.0/rhel/7/x86_64/
gpgcheck=0
enabled=1
坑 需要设置zabbix-frontend源,否则后面执行找不到前端软件包
[zabbix-frontend]
name=Zabbix Official Repository frontend - $basearch
baseurl=http://repo.zabbix.com/zabbix/5.0/rhel/7/$basearch/frontend
enabled=1
gpgcheck=0
安装zabbix-server
[root@ansible-server tasks]# ls
files  zabbix-server.yml
[root@ansible-server tasks]# cat main.yml
---
# tasks file for zabbix-server
- name: install zabbix 5.0hosts: localhosttasks:- name: copy zabbix.repo                copy:src: zabbix.repo                 dest: /etc/yum.repos.d/- name: install zabbix serviceyum:name: zabbix-server-mysql,zabbix-agent,centos-release-scl,yum-utilsstate: present- name: update zabbix-frontendshell: yum-config-manager --enable zabbix-frontend       - name: install web serviceyum:name: zabbix-web-mysql-scl,zabbix-nginx-conf-sclstate: present- name: install rpmyum:name: mysqlstate: present- name: inputdatashell: "zcat /usr/share/doc/zabbix-server-mysql*/create.sql.gz | mysql -uzabbix -pZabbix@123 zabbix" ignore_errors: yes- name: edit zabbix hostlineinfile:dest: /etc/zabbix/zabbix_server.confregexp: '# DBHost=localhost'line: 'DBHost=localhost'- name: edit zabbix passwordlineinfile:dest: /etc/zabbix/zabbix_server.confregexp: '# DBPassword='line: 'DBPassword=Zabbix@123'- name: edit nginx zabbixlineinfile:         dest: /etc/opt/rh/rh-nginx116/nginx/conf.d/zabbix.confregexp: '#        listen          80;'line: '        listen          80;'- name: edit php zabbixlineinfile:                  dest: /etc/opt/rh/rh-php72/php-fpm.d/zabbix.confregexp: 'listen.acl_users'line: 'listen.acl_users=apache,nginx'- name: edit php timezonelineinfile:         dest: /etc/opt/rh/rh-php72/php-fpm.d/zabbix.confregexp: '; php_value[date.timezone]'line: 'php_value[date.timezone]=Asia/Shanghai'- name: start serviceshell: systemctl restart zabbix-server zabbix-agent rh-php72-php-fpm rh-nginx116-nginx

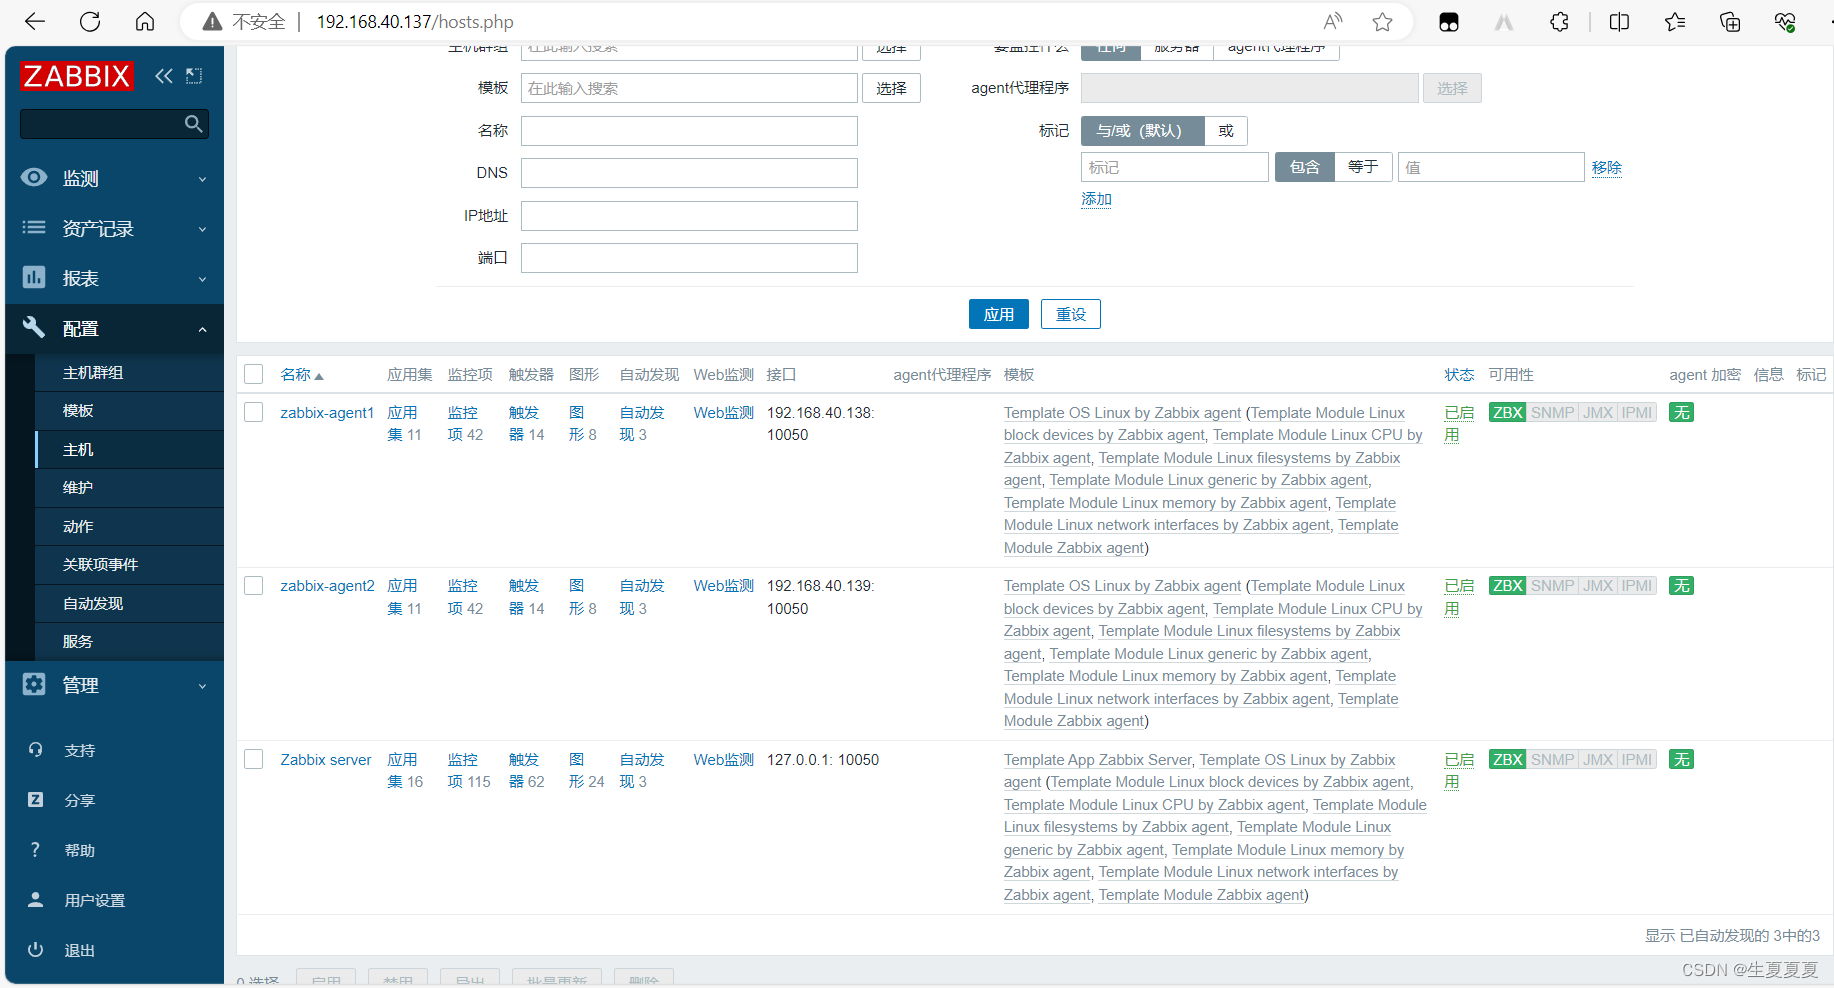
zabbixagent_222">安装zabbix-agent
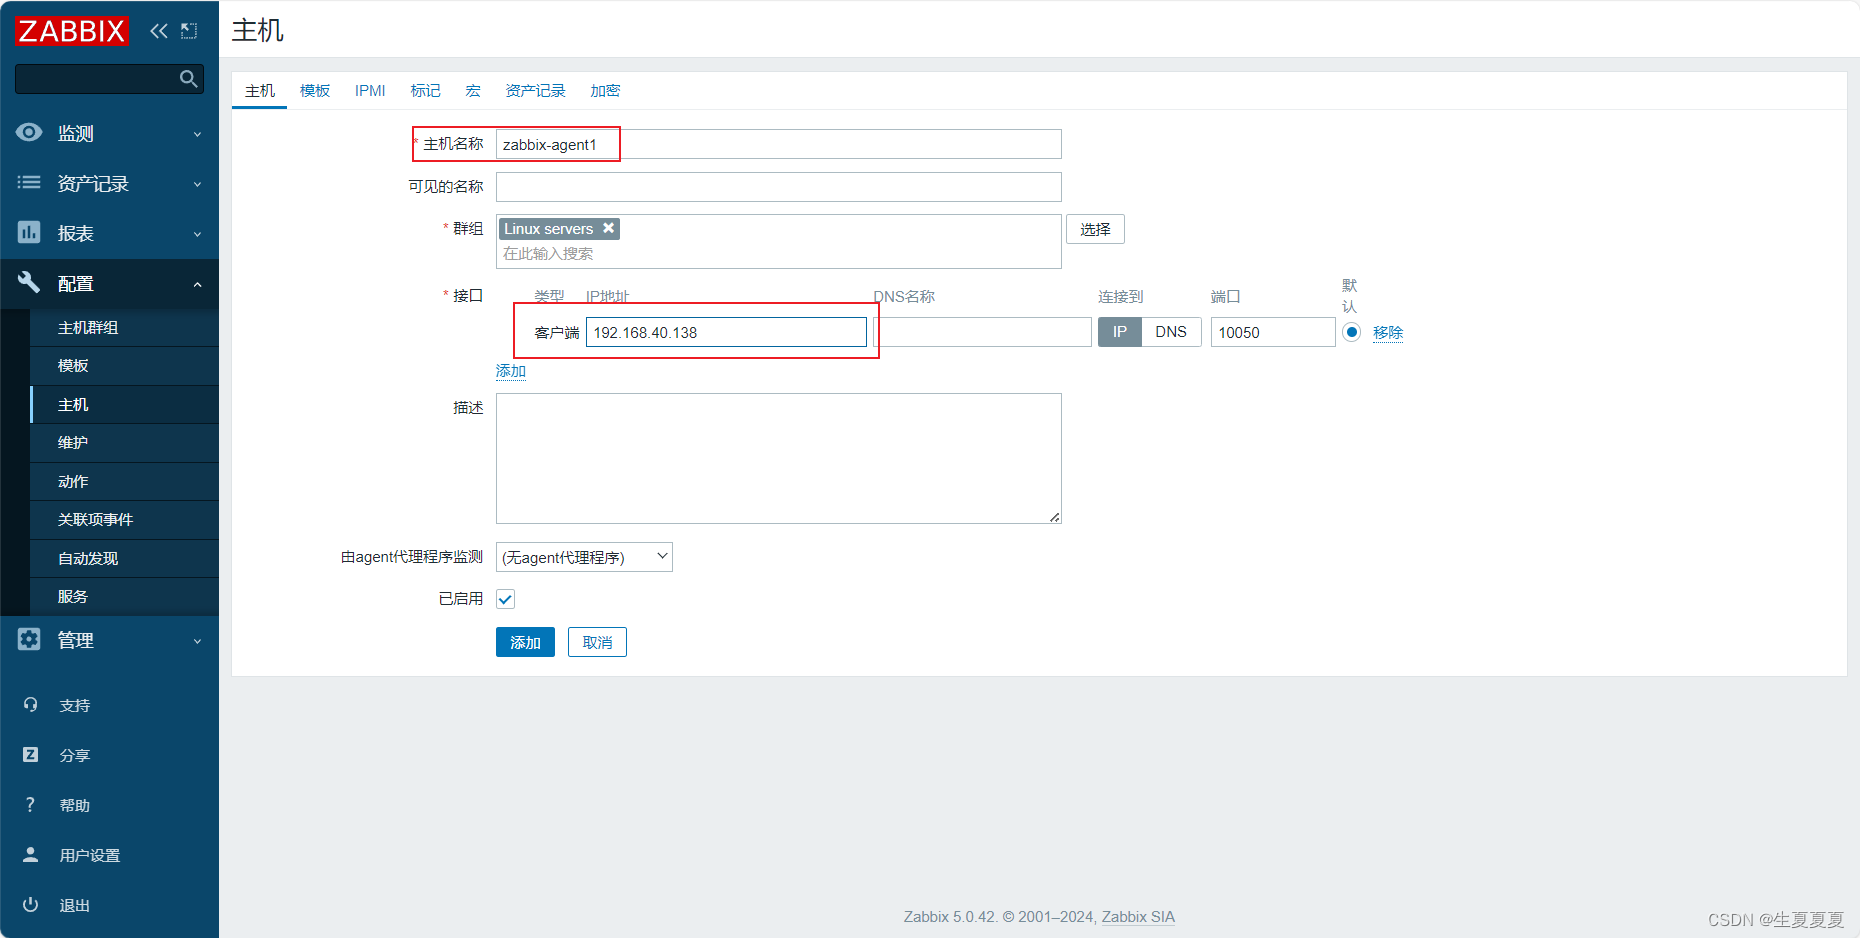
在agent主机上配置域名解析
[root@zabbix-agent1 ~]# vim /etc/hosts
192.168.40.139 zabbix-agent1
[root@zabbix-agent2 ~]# vim /etc/hosts
192.168.40.139 zabbix-agent2
[root@ansible-server tasks]# cat main.yaml
---
# tasks file for zabbix-agent
- name: install zabbix agenthosts: zabbix-agenttasks: - name: cp zabbix.repocopy:src: zabbix.repodest: /etc/yum.repos.d/- name: install agentyum:name: zabbix-agentstate: present- name: edit zabbix_agented.conflineinfile:         dest: /etc/zabbix/zabbix_agentd.confregexp: "{{ item.regexp }}"line: "{{ item.line }}"loop:- { regexp: "Server=127.0.0.1", line: "Server=192.168.40.137" }- { regexp: "ServerActive=127.0.0.1", line: "ServerActive=192.168.40.137" }- name: edit zabbix_agent.conf hostnamelineinfile:dest: /etc/zabbix/zabbix_agentd.confregexp: "^Hostname=.*"line: "Hostname={{ ansible_hostname }}" # 使用系统变量获取主机- name: start agent serviceshell: systemctl restart zabbix-agent
zabbixgrafana_271">安装zabbix-grafana
下载grafana
[root@ansible-server files]# wget https://dl.grafana.com/enterprise/release/grafana-enterprise-9.5.1-1.x86_64.rpm
下载zabbix插件
https://grafana.com/grafana/plugins/alexanderzobnin-zabbix-app/?tab=installation
[root@ansible-server tasks]# cat main.yml
---
# tasks file for zabbix-grafana
- name: install zabbix grafanahosts: zabbix-grafanatasks: - name: copy filecopy:src: /etc/ansible/roles/zabbix-grafana/files/grafana/dest: /root - name: install grafanayum:name: /root/grafana-enterprise-9.4.7-1.x86_64.rpmstate: present- name: install zabbix plugincopy:src: /etc/ansible/roles/zabbix-grafana/files/alexanderzobnin-zabbix-appdest: /var/lib/grafana/plugins/- name: start grafana-server serviceshell: systemctl restart grafana-server
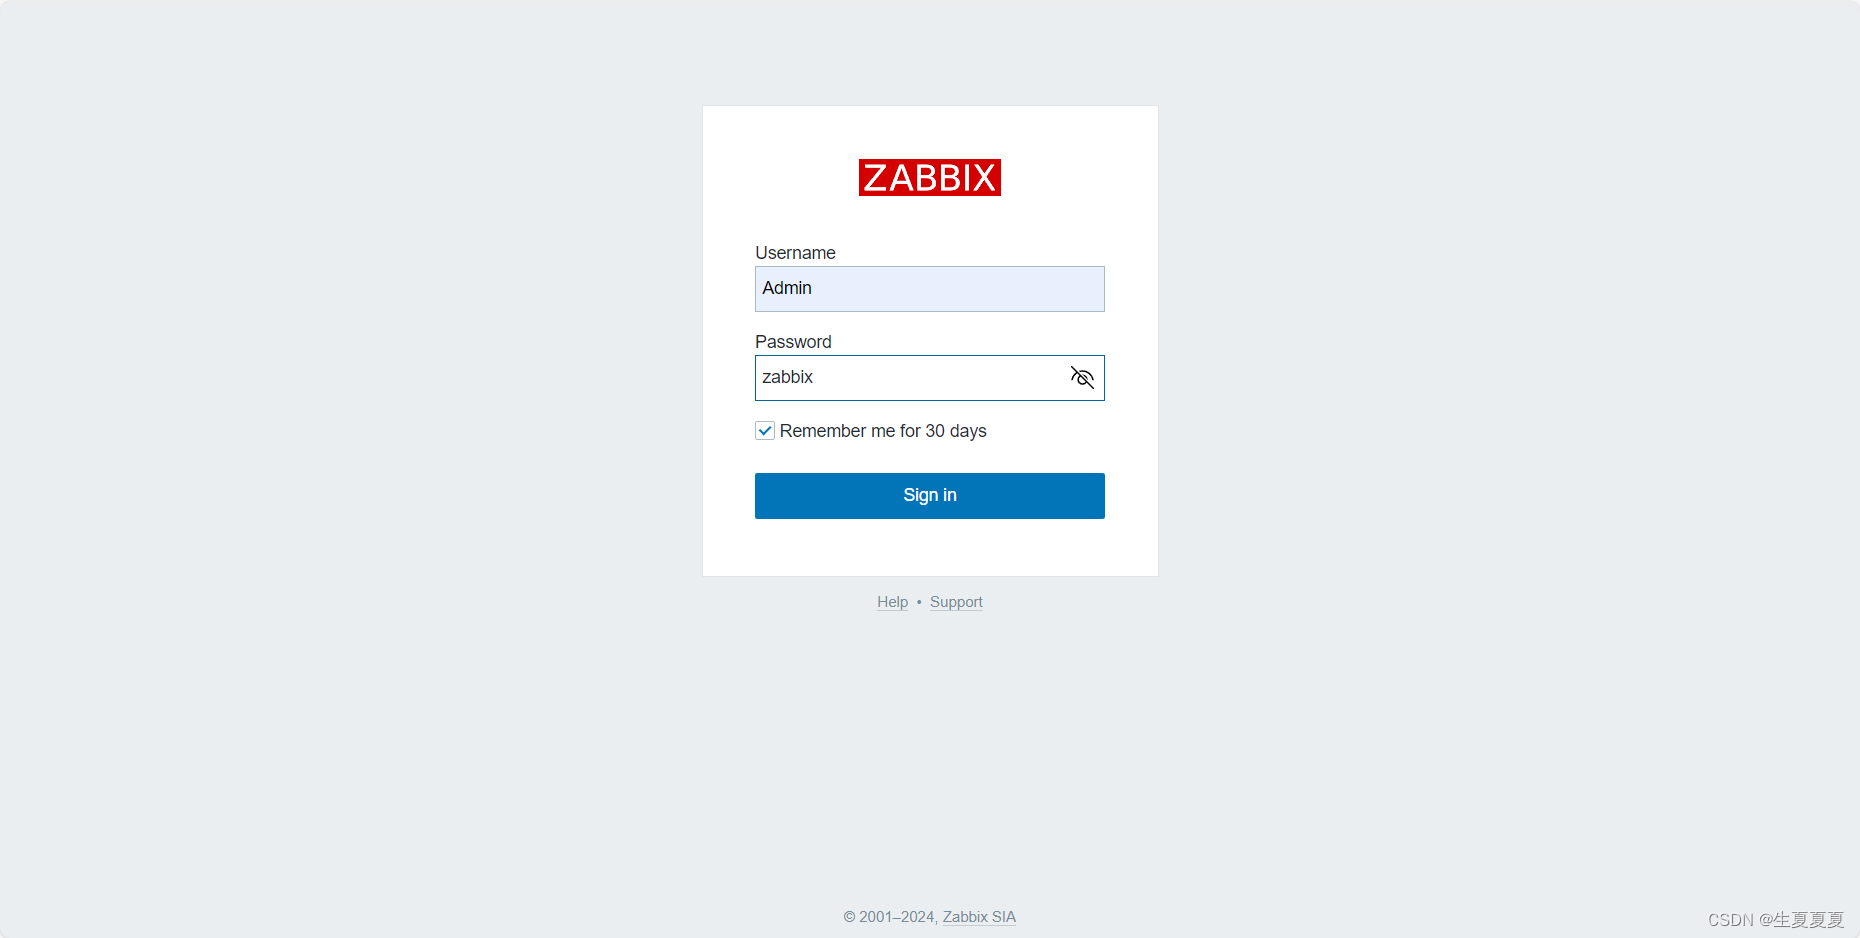
用户名和密码都是admin

出现插件不可用
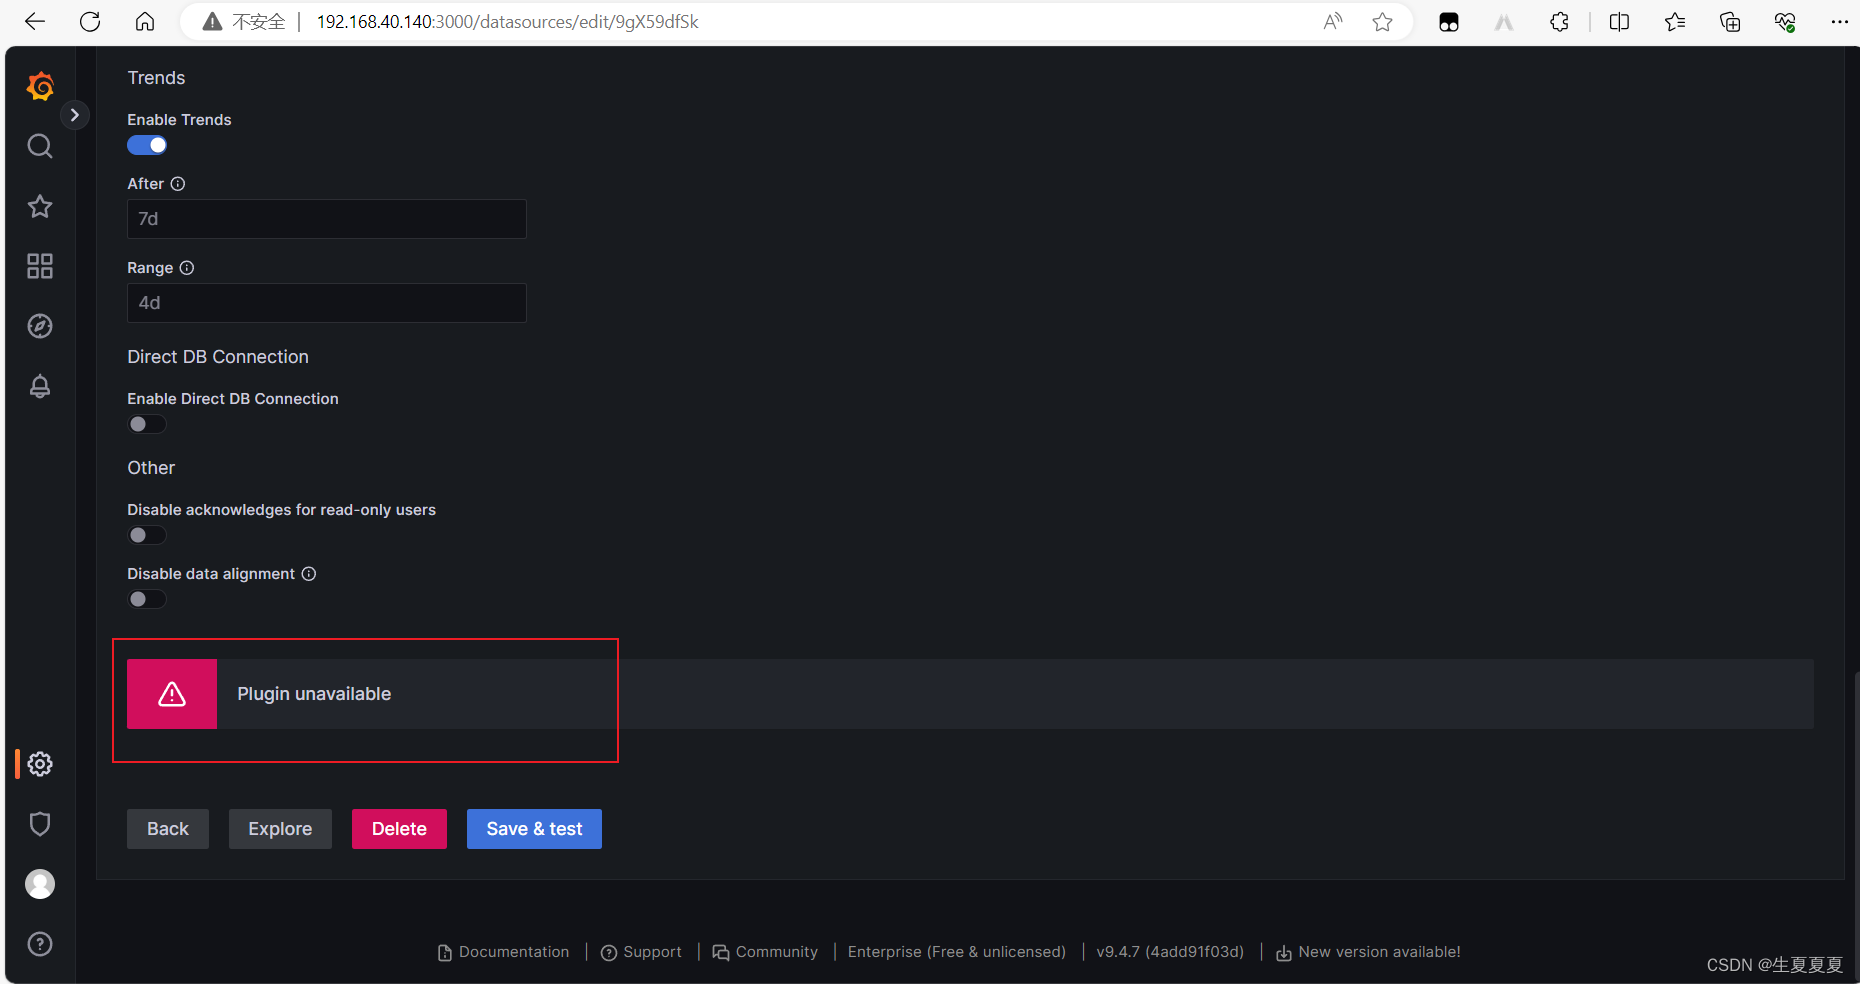
allow_loading_unsigned_plugins = alexanderzobnin-zabbix-app
设置插件权限
chmod 777 /var/lib/grafana/plugins/alexanderzobnin-zabbix-app/gpx_zabbix-plugin_linux_amd64
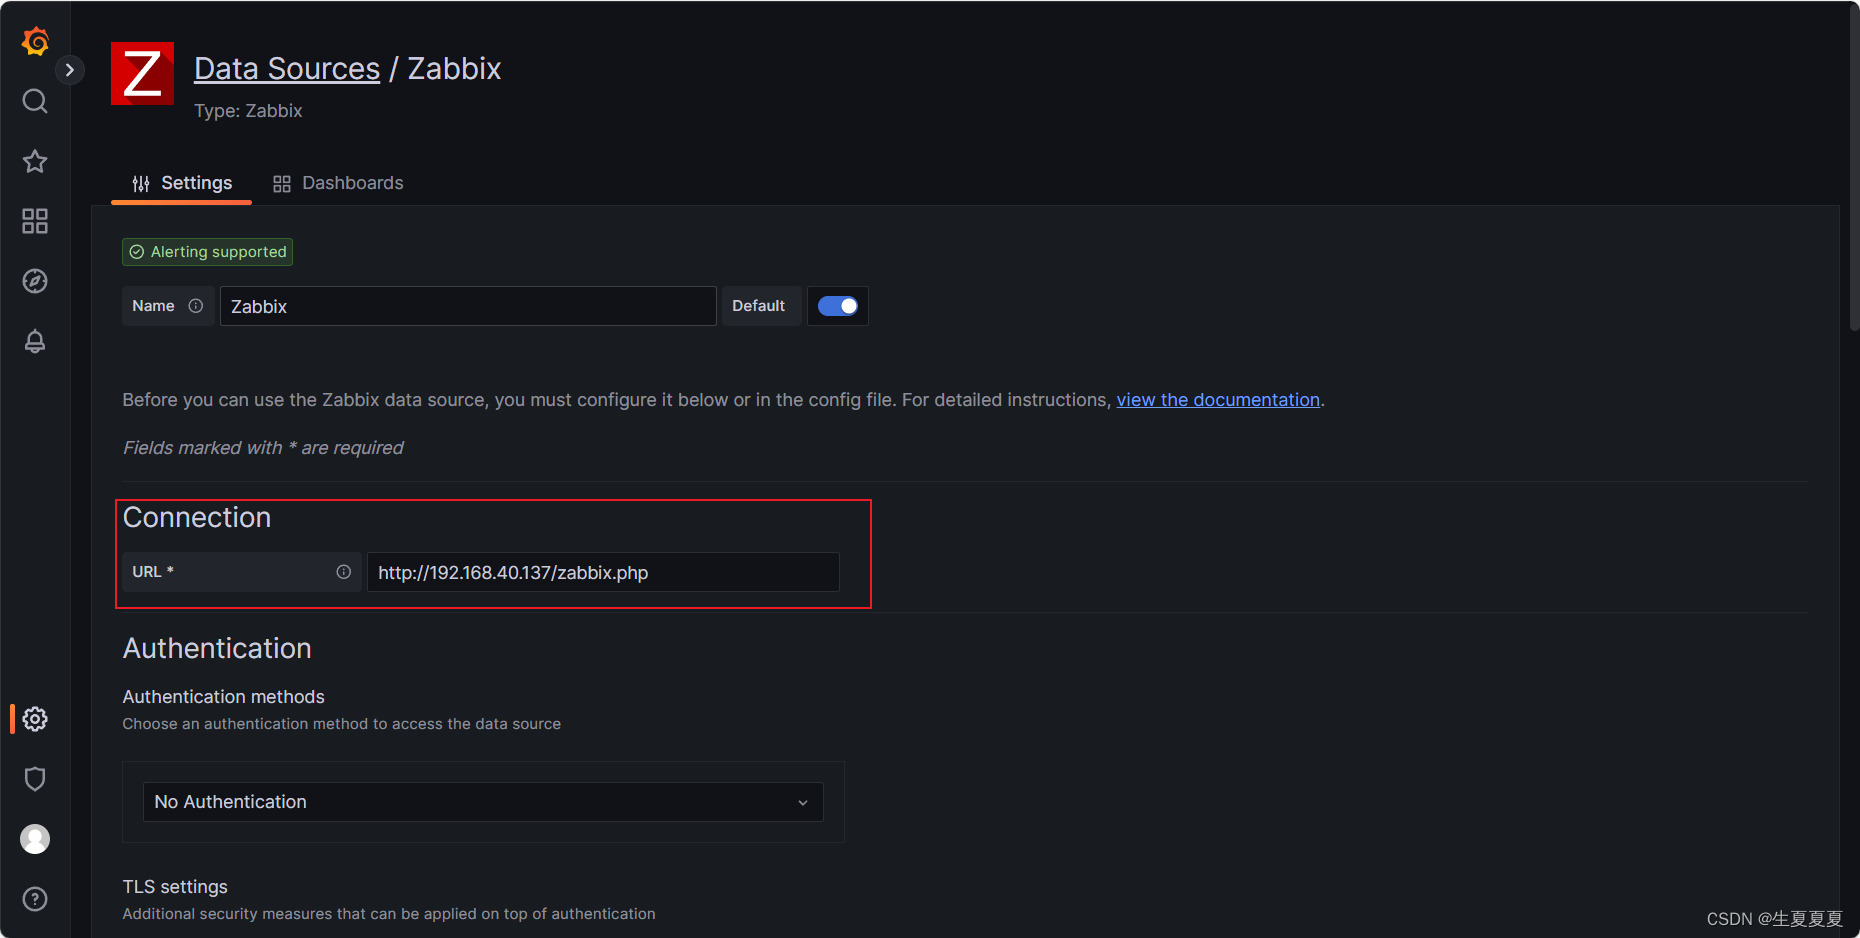
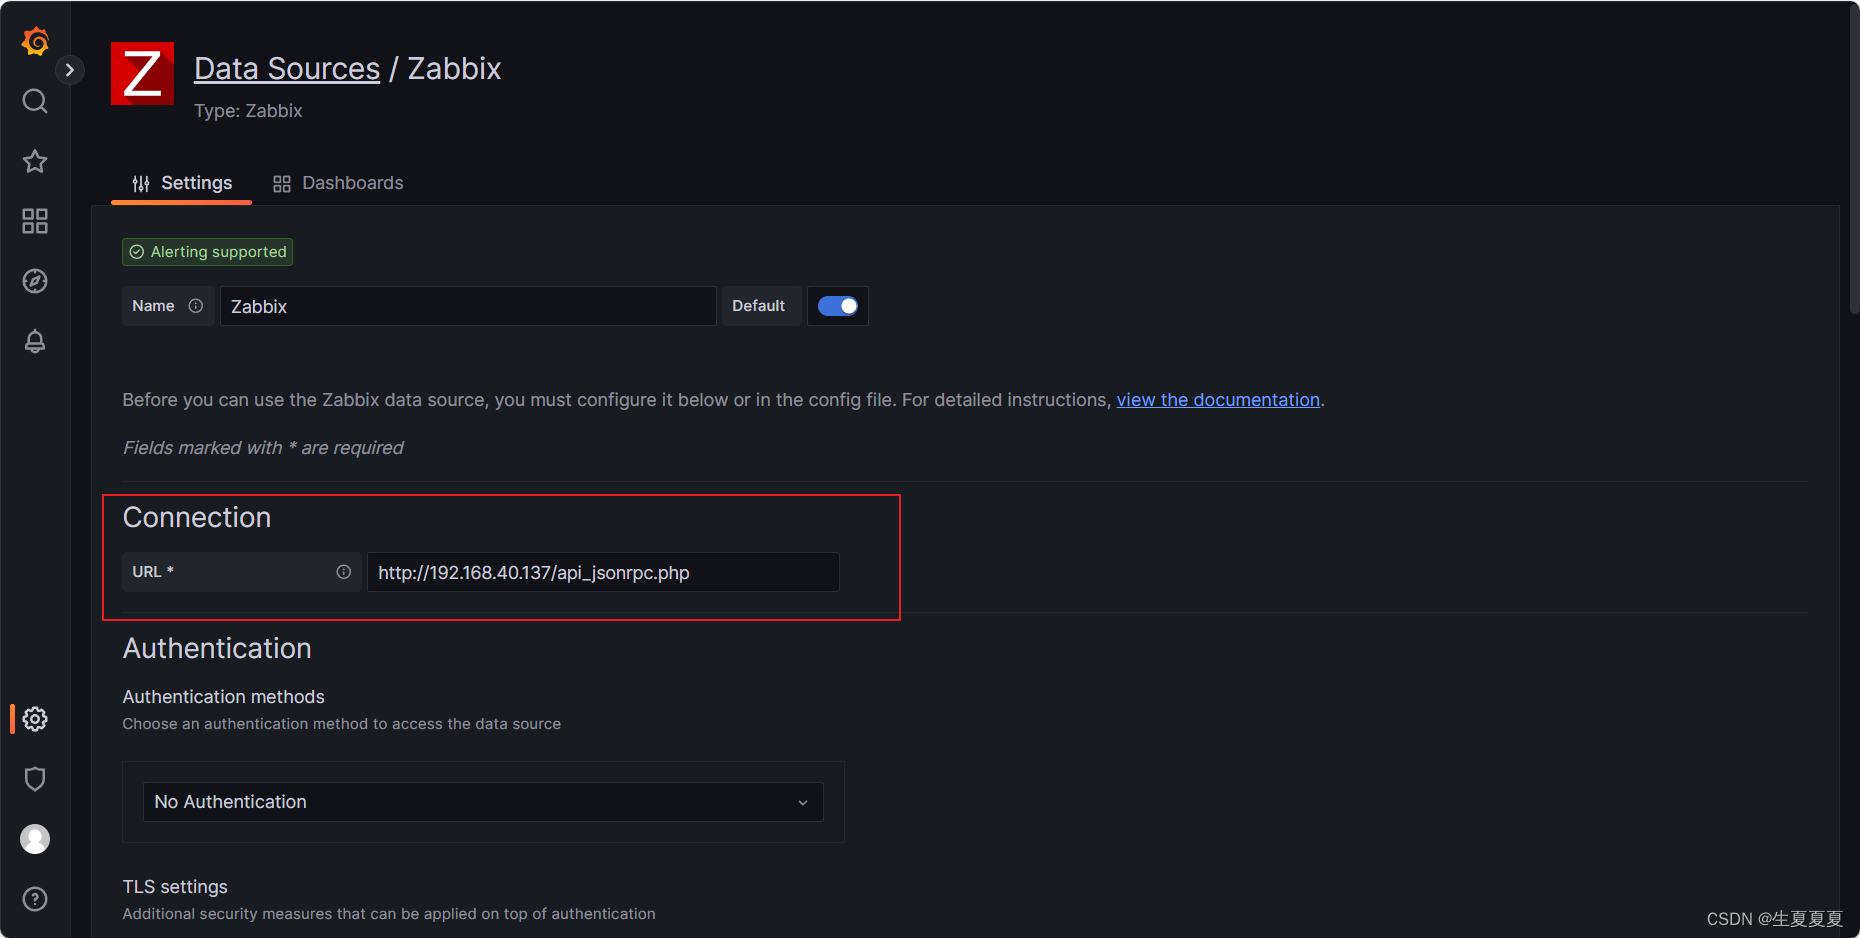
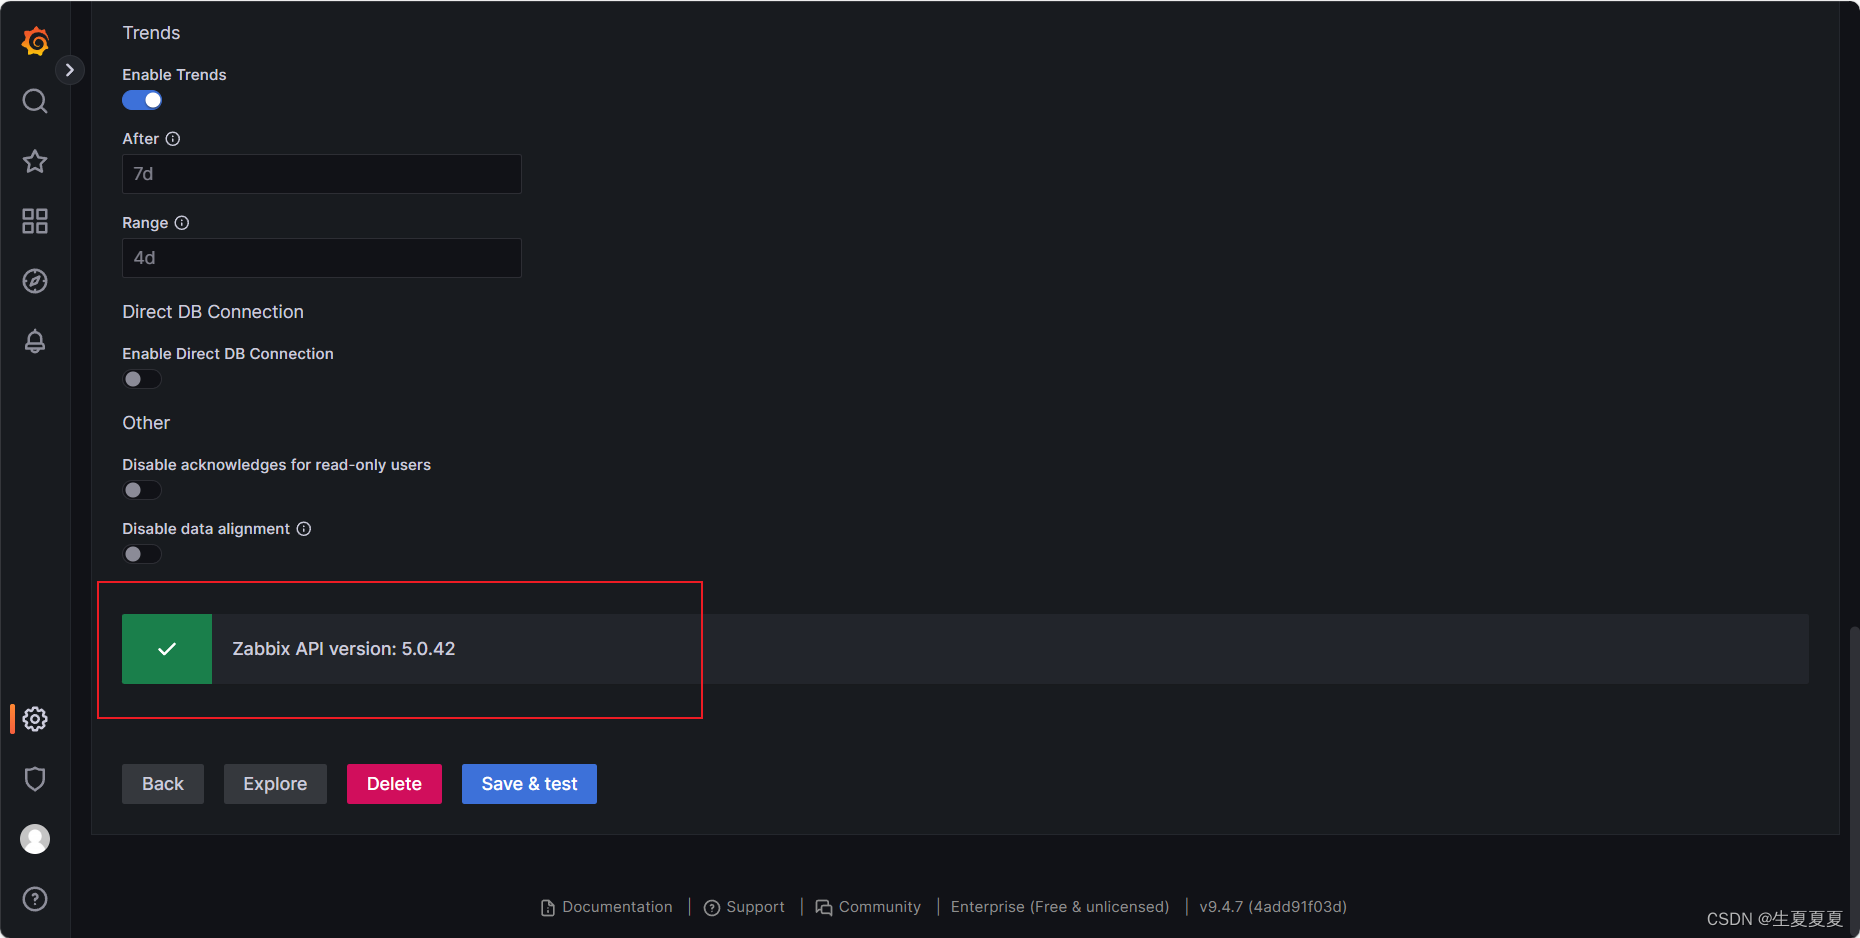
填写zabbix的用户名和密码后,数据源连接成功(用户名Admin 密码zabbix)
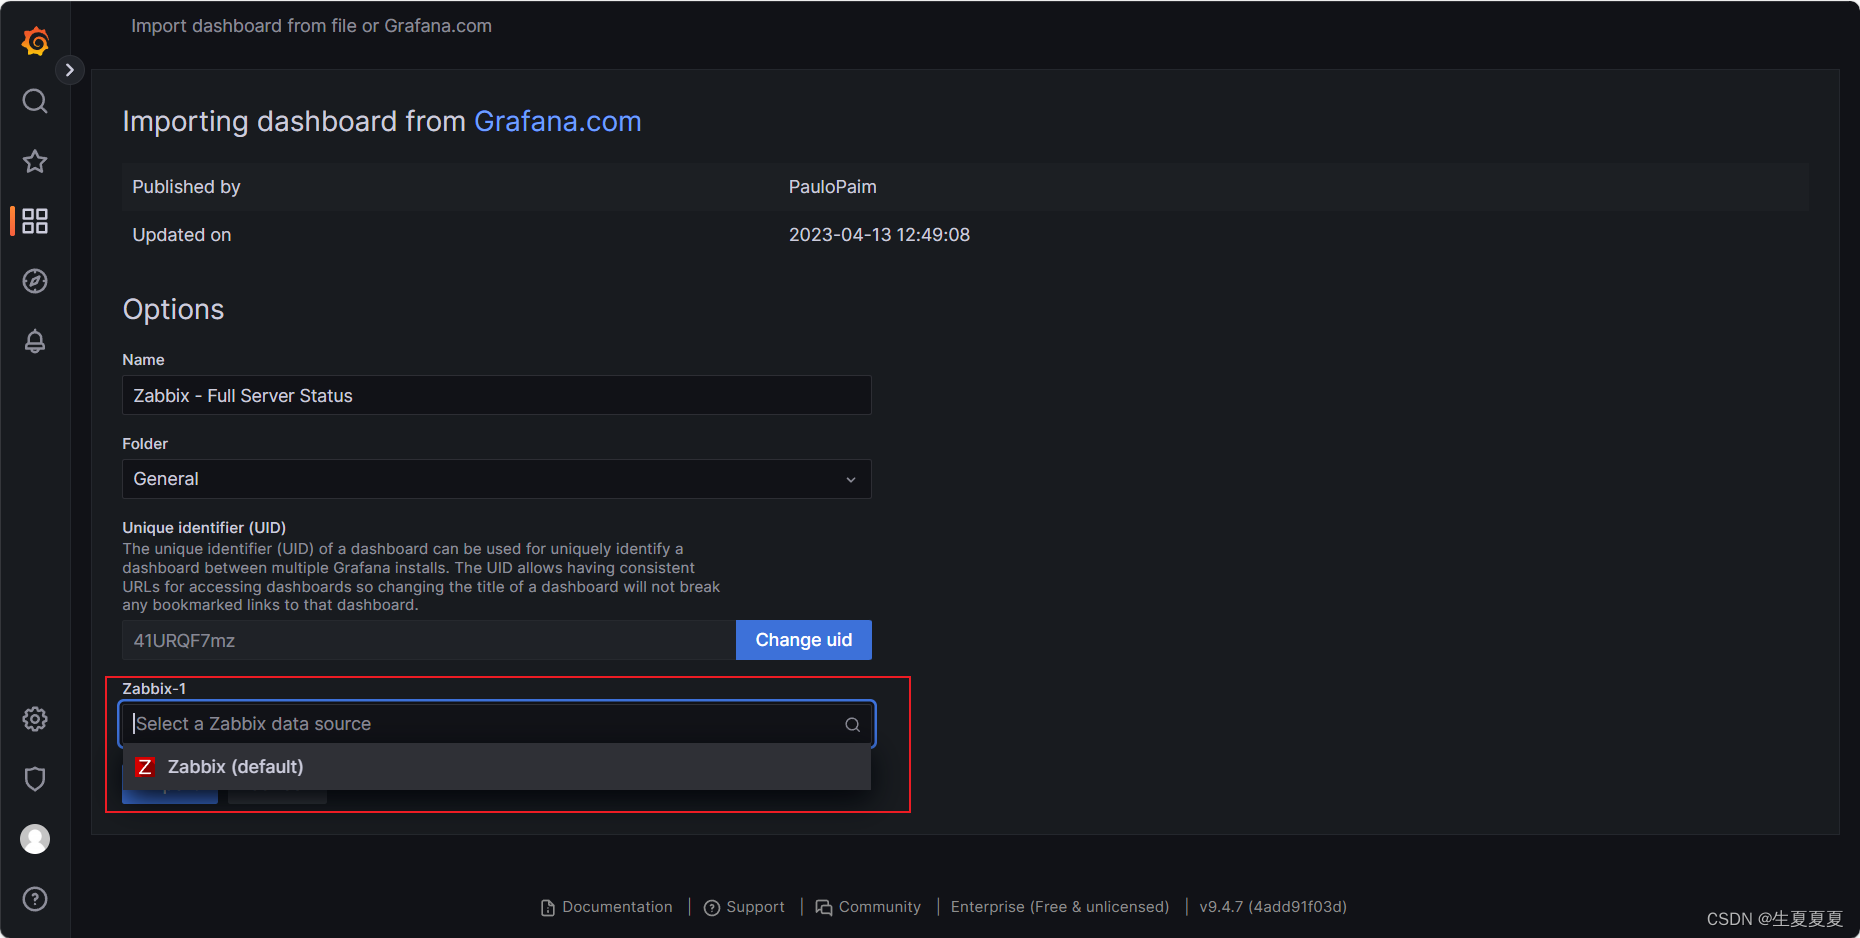
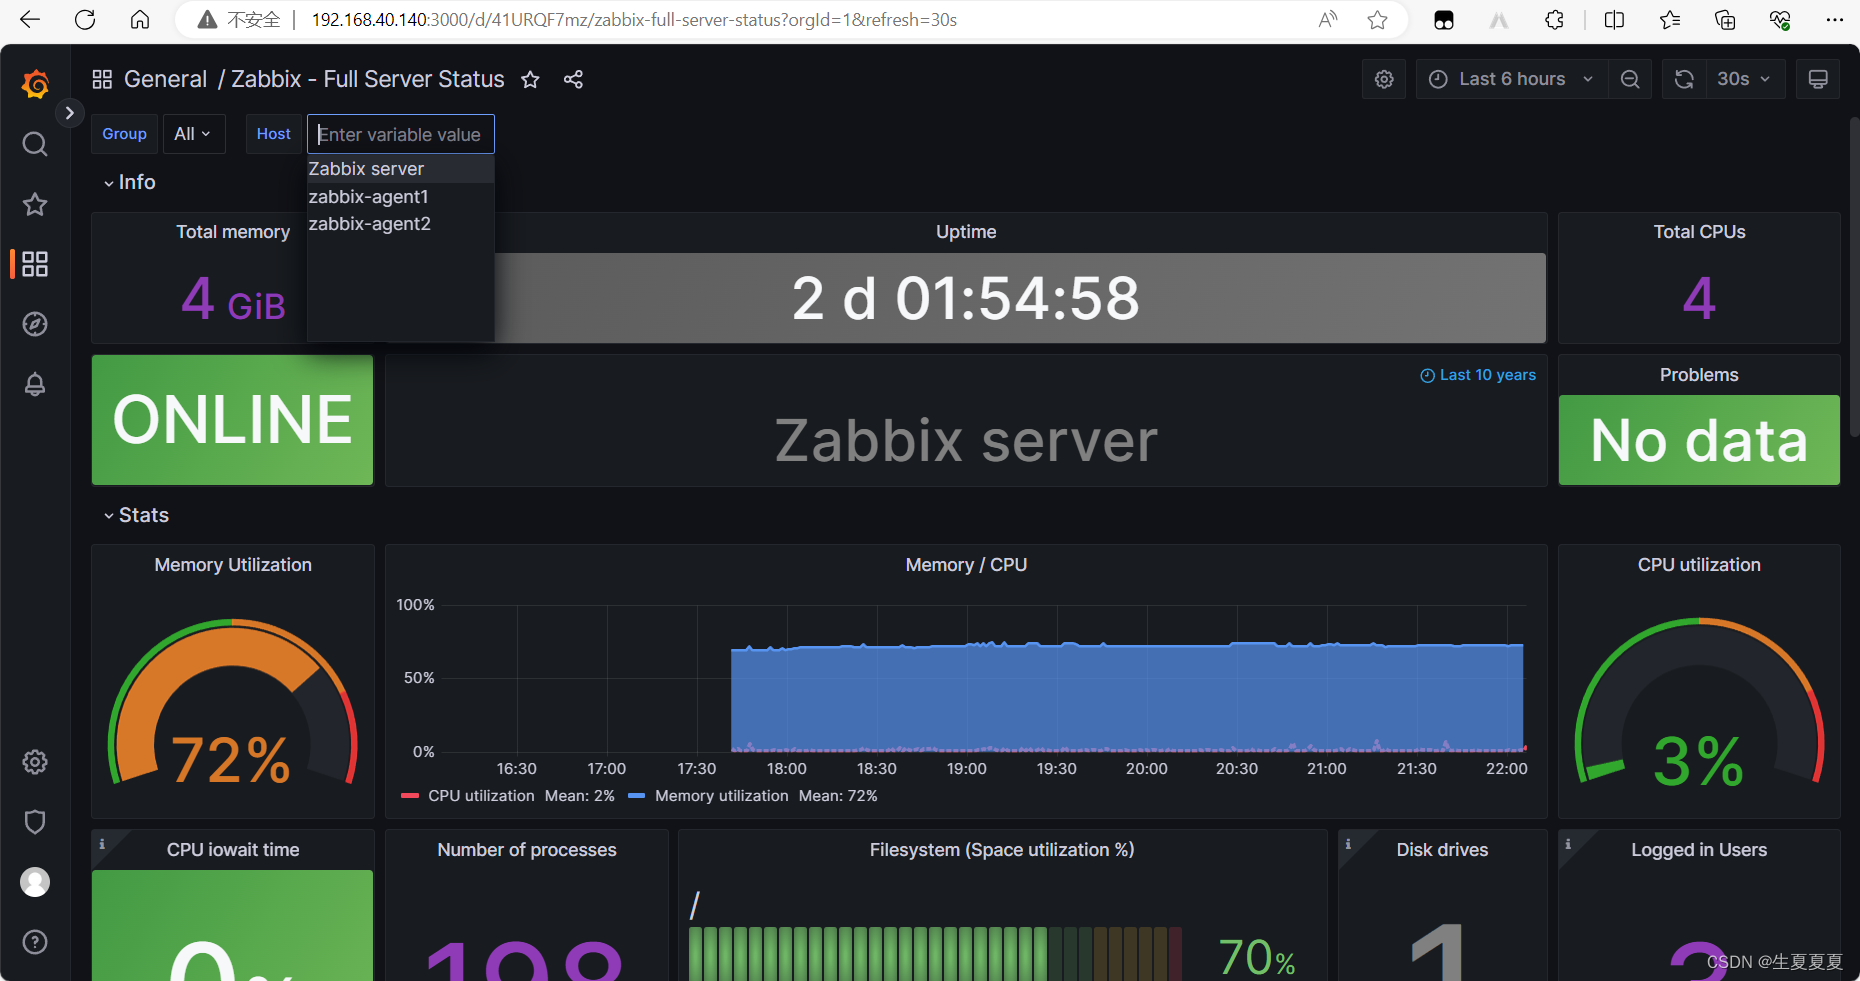
在Zabbix - Full Server Status | Grafana Labs找到id为5363的zabbix监控模板
导入数据源
一键部署
调用role,一键部署zabbix+agent+grafana(ansible的roles中task的playbook是不需要写tasks的)
zabbix-mysql
[root@ansible-server ansible]# cat /etc/ansible/roles/zabbix-mysql/tasks/main.yml
---
# tasks file for zabbix-mysql
- name: copy mysql repo rpm copy:src: mysql80-community-release-el7-3.noarch.rpmdest: /root/
- name: install repocommand: rpm -ivh /root/mysql80-community-release-el7-3.noarch.rpmignore_errors: yes
- name: install yum-utilsyum:name: yum-utilsstate: present
- name: install mysql 5.7command: yum-config-manager --enable mysql57-community
- name: check repolineinfile:path: /etc/yum.repos.d/mysql-community.reporegexp: '^gpgcheck=1'line: 'gpgcheck=0'
- name: install mysqlyum:name: mysql,mysql-serverstate: present
- name: start mysql service:name: mysqldstate: startedenabled: yes
- name: get mysql temp passwordshell: cat /var/log/mysqld.log| grep 'temporary password'|awk '{print $NF}'  # 使用register保存结果register: temp_passwordchanged_when: false
- name: set old passwordmysql_user:name: roothost: localhostpassword: "{{ temp_password.stdout }}"ignore_errors: yes
- name: set new passwordshell: mysql -uroot -p123456
- name: create zabbix usershell: mysql -uroot -p123456 -e "alter user 'zabbix'@'localhost' identified by 'Zabbix@123';"
- name: create zabbix databaseshell: mysql -uroot -p123456 -e "create database zabbix character set utf8 collate utf8_bin;"ignore_errors: yes
- name: grant mysql user privilegesshell: mysql -uroot -p123456 -e "grant all privileges on zabbix.* to zabbix@localhost;"
zabbix-server
[root@ansible-server ansible]# cat /etc/ansible/roles/zabbix-server/tasks/main.yml
---
# tasks file for zabbix-server
- name: copy zabbix.repo                copy:src: zabbix.repo                 dest: /etc/yum.repos.d/
- name: install zabbix serviceyum:name: zabbix-server-mysql,zabbix-agent,centos-release-scl,yum-utilsstate: present
- name: update zabbix-frontendshell: yum-config-manager --enable zabbix-frontend
- name: install web serviceyum:name: zabbix-web-mysql-scl,zabbix-nginx-conf-sclstate: present
- name: install rpmyum:name: mysqlstate: present
- name: inputdatashell: "zcat /usr/share/doc/zabbix-server-mysql*/create.sql.gz | mysql -uzabbix -pZabbix@123 zabbix" ignore_errors: yes
- name: edit zabbix hostlineinfile:dest: /etc/zabbix/zabbix_server.confregexp: '# DBHost=localhost'line: 'DBHost=localhost'
- name: edit zabbix passwordlineinfile:dest: /etc/zabbix/zabbix_server.confregexp: '# DBPassword='line: 'DBPassword=Zabbix@123'
- name: edit nginx zabbixlineinfile:         dest: /etc/opt/rh/rh-nginx116/nginx/conf.d/zabbix.confregexp: '#        listen          80;'line: '        listen          80;'
- name: edit php zabbixlineinfile:                  dest: /etc/opt/rh/rh-php72/php-fpm.d/zabbix.confregexp: 'listen.acl_users'line: 'listen.acl_users=apache,nginx'
- name: edit php timezonelineinfile:         dest: /etc/opt/rh/rh-php72/php-fpm.d/zabbix.confregexp: '; php_value[date.timezone]'line: 'php_value[date.timezone]=Asia/Shanghai'
- name: start serviceshell: systemctl restart zabbix-server zabbix-agent rh-php72-php-fpm rh-nginx116-nginx
[root@ansible-server ansible]# cat /etc/ansible/roles/zabbix-agent/tasks/main.yml
---
# tasks file for zabbix-agent
- name: cp zabbix.repocopy:src: zabbix.repodest: /etc/yum.repos.d/
- name: install agentyum:name: zabbix-agentstate: present
- name: edit zabbix_agented.conflineinfile:         dest: /etc/zabbix/zabbix_agentd.confregexp: "{{ item.regexp }}"line: "{{ item.line }}"loop:- { regexp: "Server=127.0.0.1", line: "Server=192.168.40.137" }- { regexp: "ServerActive=127.0.0.1", line: "ServerActive=192.168.40.137" }
- name: edit zabbix_agent.conf hostnamelineinfile:dest: /etc/zabbix/zabbix_agentd.confregexp: "^Hostname=.*"line: "Hostname={{ ansible_hostname }}" # 使用系统变量获取主机
- name: start agent serviceshell: systemctl restart zabbix-agent
[root@ansible-server ansible]# cat /etc/ansible/roles/zabbix-grafana/tasks/main.yml
---
# tasks file for zabbix-grafana
- name: copy filecopy:src: /etc/ansible/roles/zabbix-grafana/files/grafana/dest: /root
- name: install grafanayum:name: /root/grafana-enterprise-9.4.7-1.x86_64.rpmstate: present
- name: install zabbix plugincopy:src: /etc/ansible/roles/zabbix-grafana/files/alexanderzobnin-zabbix-appdest: /var/lib/grafana/plugins/
- name: start grafana-server serviceshell: systemctl restart grafana-server
主playbook,通过执行主playbook实现一键部署
[root@ansible-server ansible]# cat zabbix-auto.yml
---
- hosts: localhostremote_user: rootroles:- role: zabbix-mysql- role: zabbix-server
- hosts: zabbix-agentremote_user: rootroles:- role: zabbix-agent
- hosts: zabbix-grafanaremote_user: rootroles:- role: zabbix-grafana
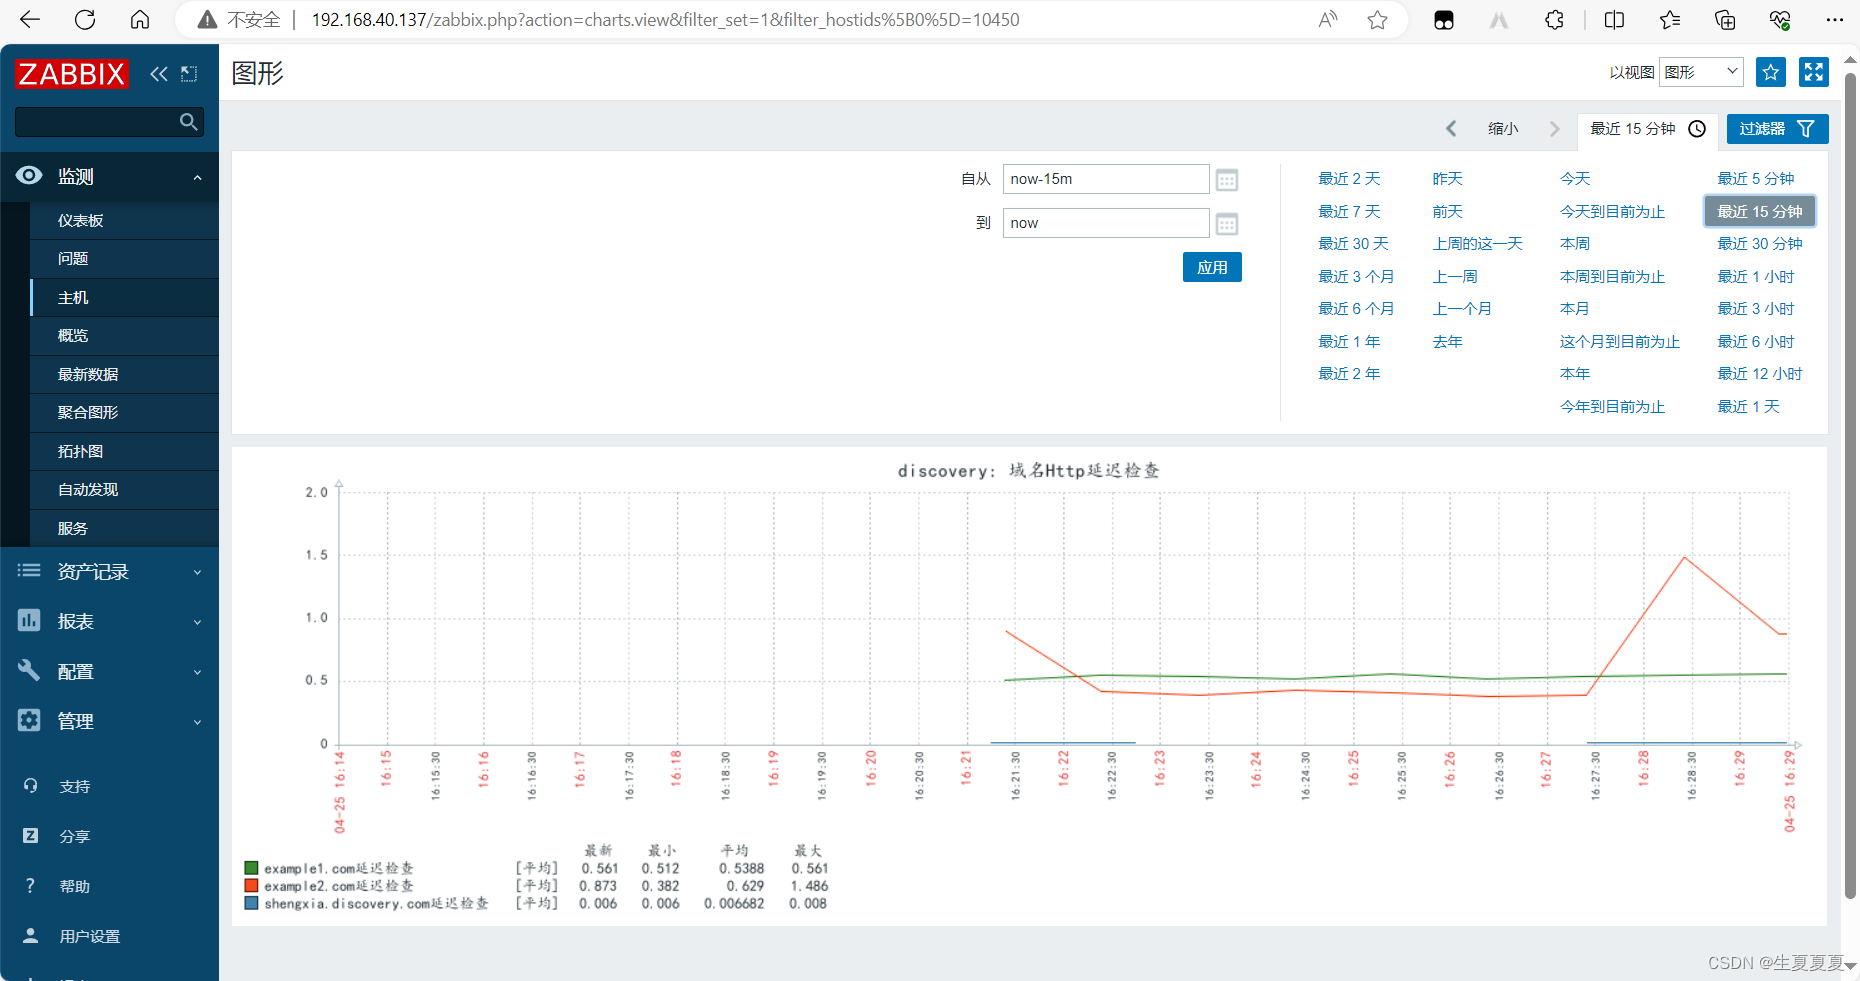
zabbix的自动发现功能,监控特定域名的http延迟,其中特定域名以一行一个格式存储在
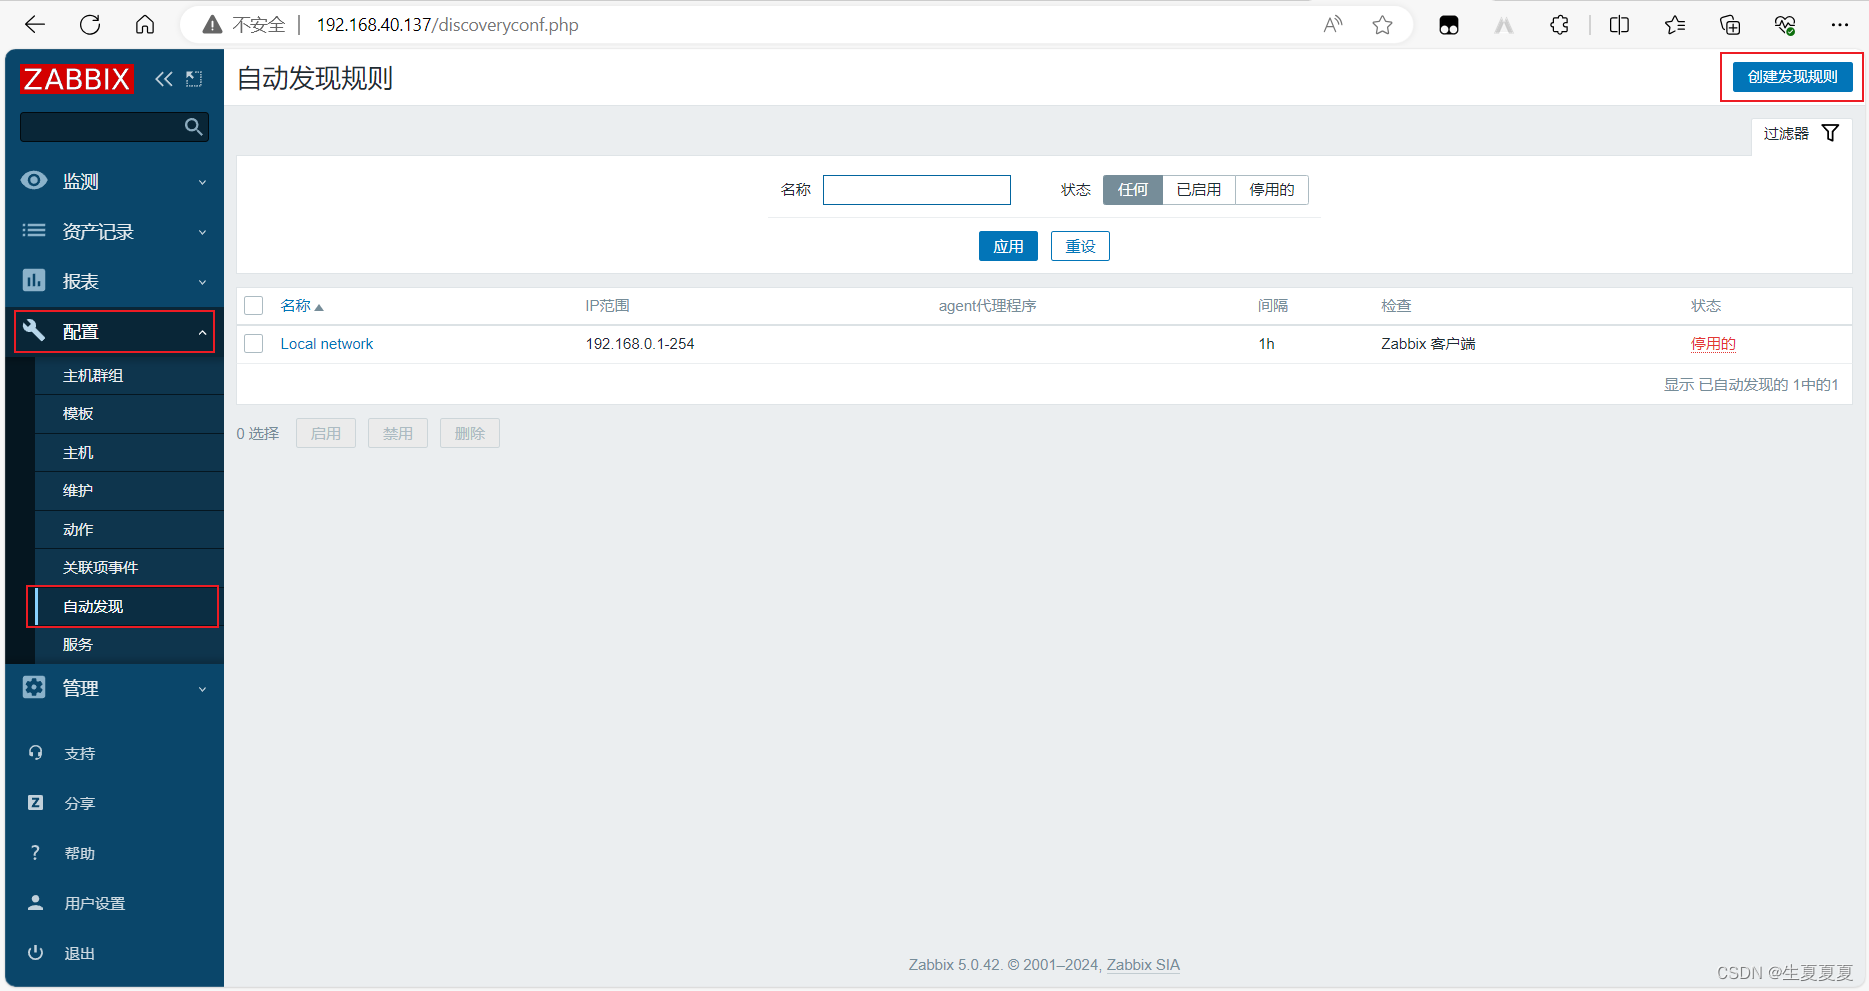
自动发现
以安装nginx为例
C:\Windows\System32\drivers\etc
修改windows的hosts文件,配置域名解析
192.168.40.145 shengxia.discovery.com
修改linux的hosts文件,配置域名解析
[root@discovery yum.repos.d]# vim /etc/hosts
192.168.40.145 shengxia.discovery.com

自动发现机器安装zabbix-agent和zabbix-sender
[root@ansible-server ~]# scp /etc/yum.repos.d/zabbix.repo root@192.168.40.145:/etc/yum.repos.d/
[root@discovery yum.repos.d]# yum install -y zabbix-agent zabbix-sender
修改配置文件
[root@discovery yum.repos.d]# vim /etc/zabbix/zabbix_agentd.conf
Server=192.168.40.137
ServerActive=192.168.40.137
Hostname=discovery
[root@discovery yum.repos.d]# service zabbix-agent restart
需要创建一个自动发现规则,然后创建一个动作,当发现新的设备时,会根据我们的配置进行响应。
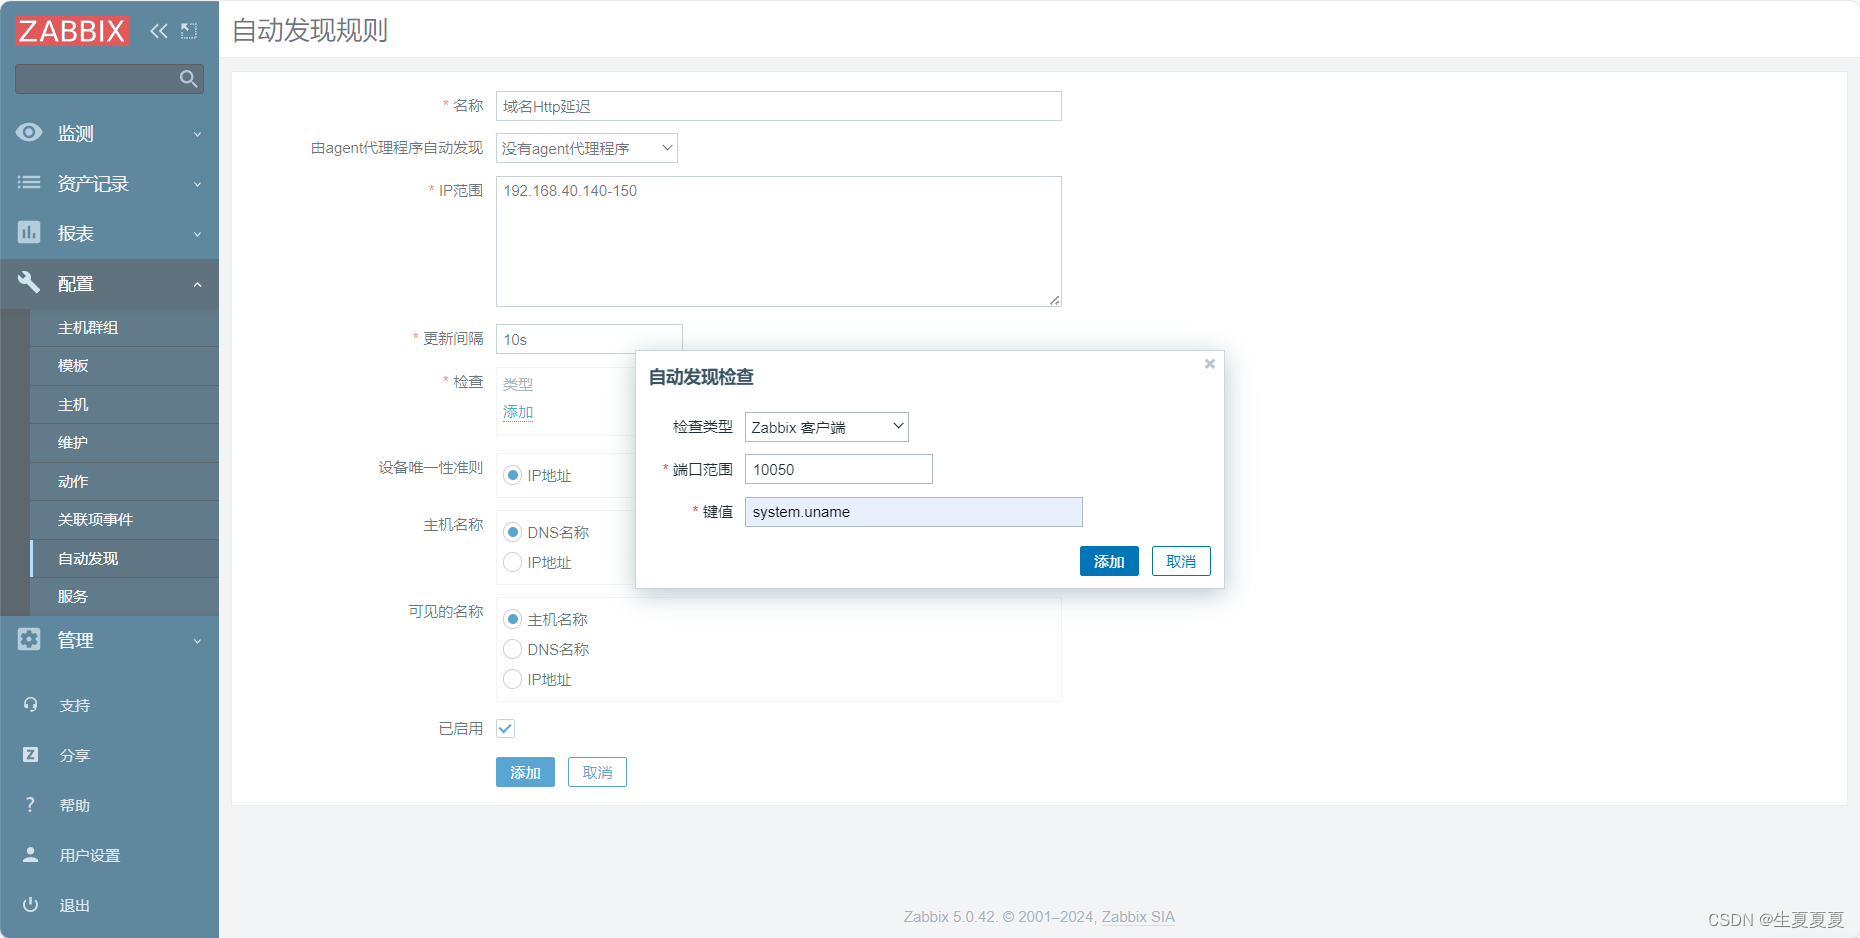
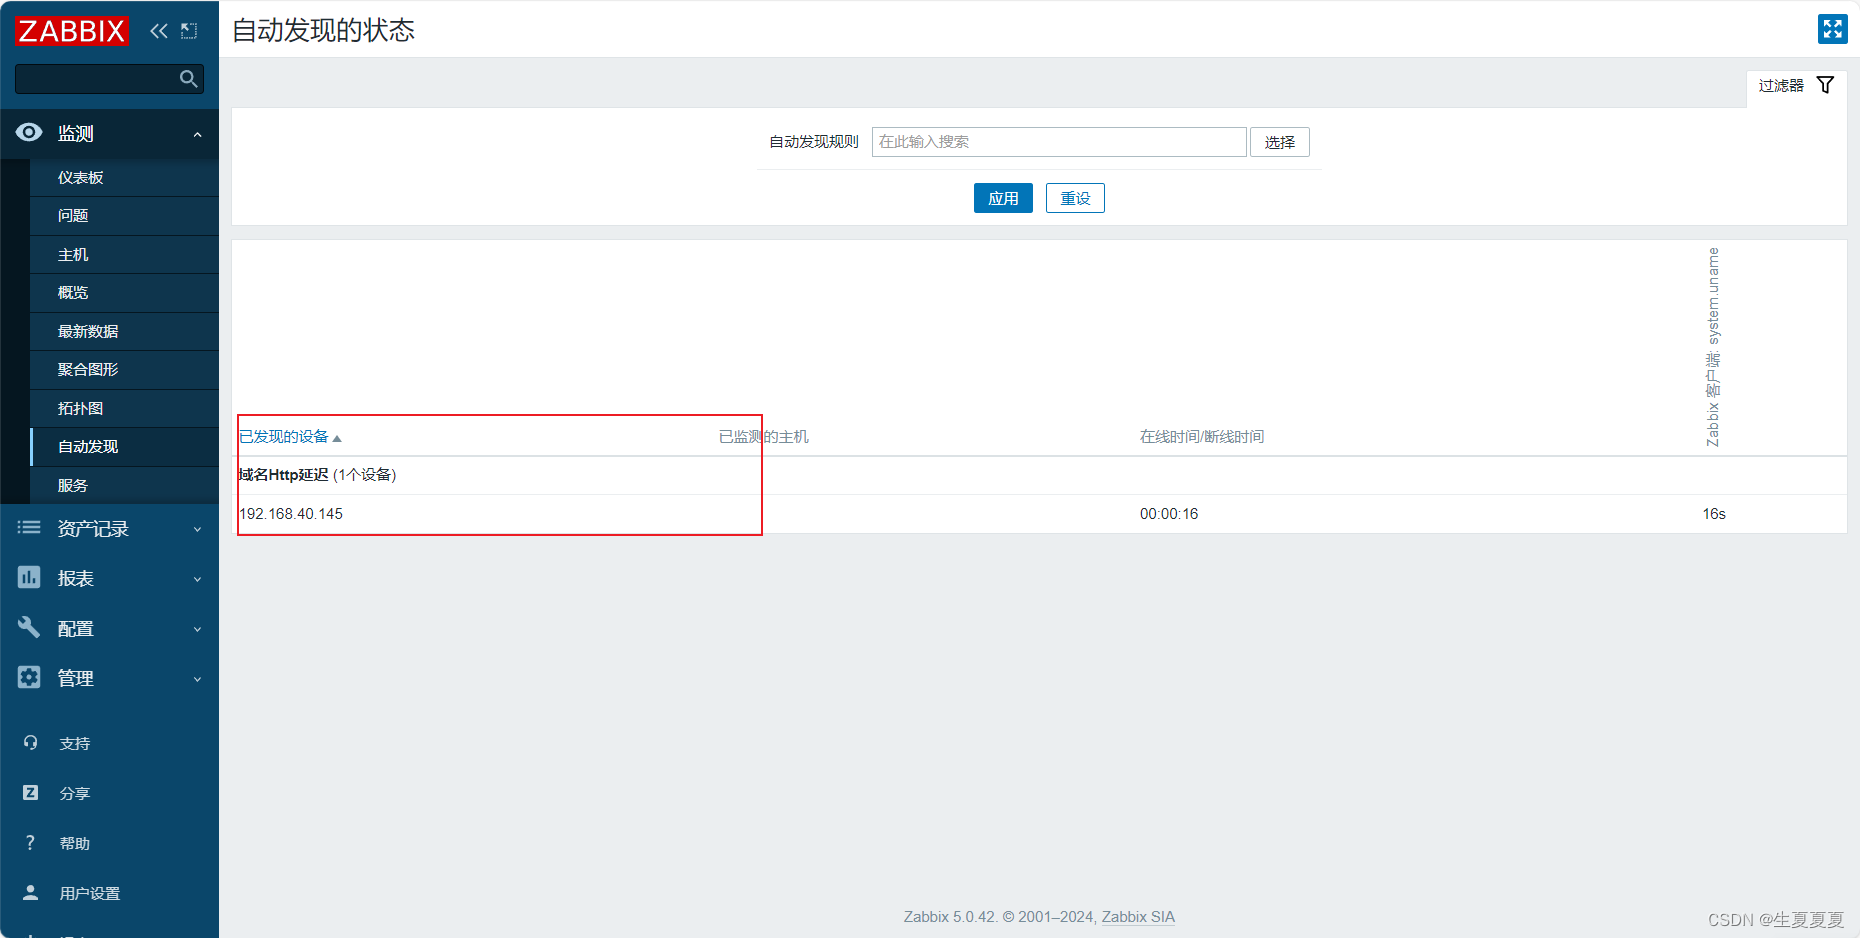
自动发现设备
创建动作
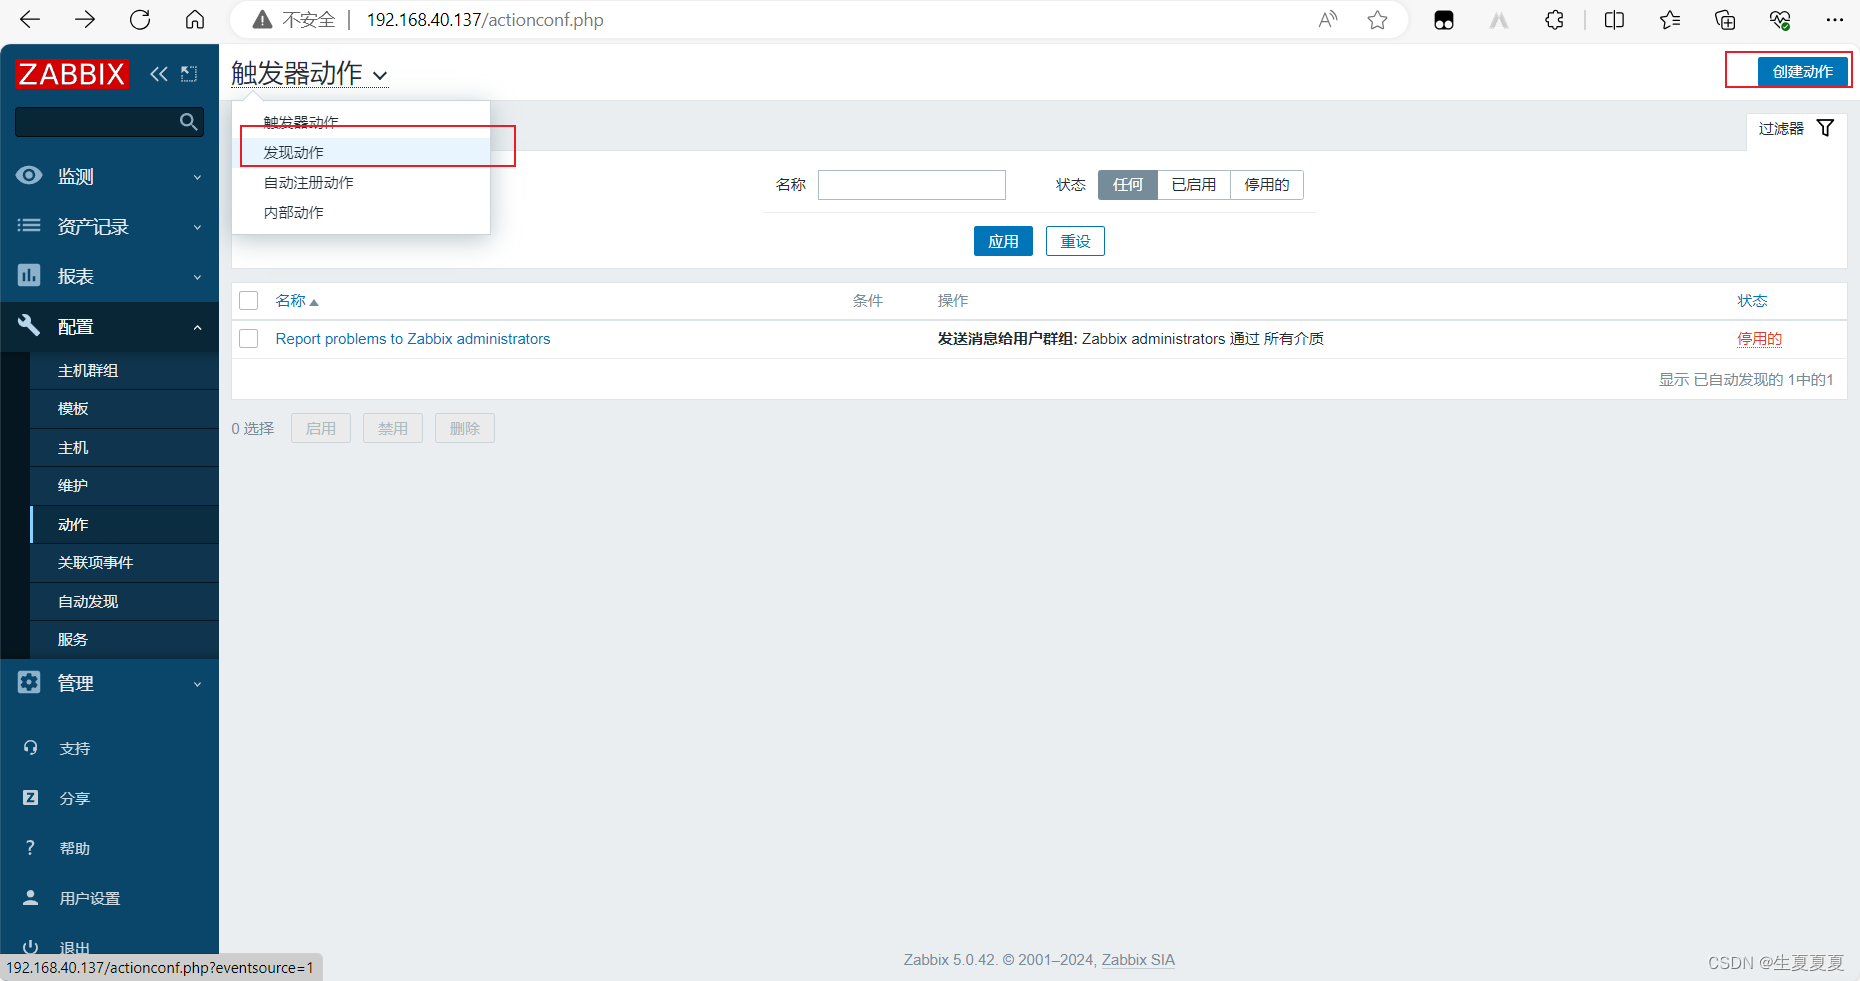
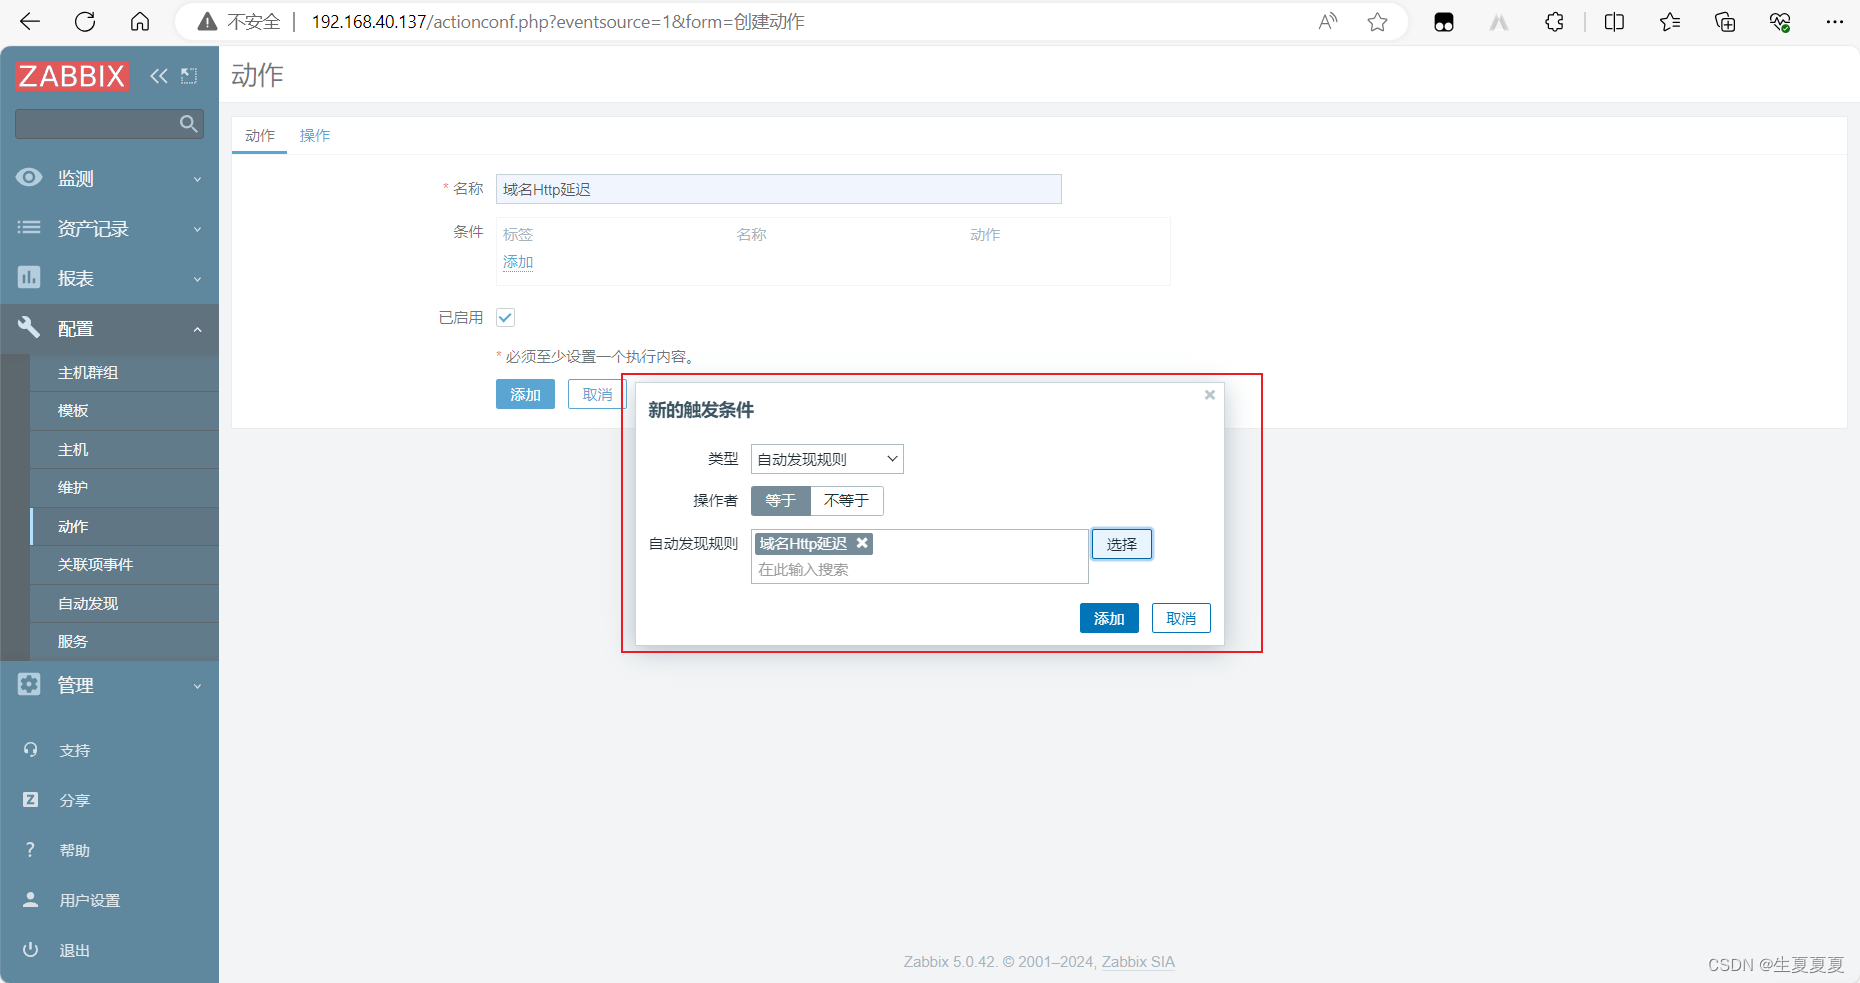
在 Zabbix 中,转到“配置” -> “动作” -> “创建动作”。
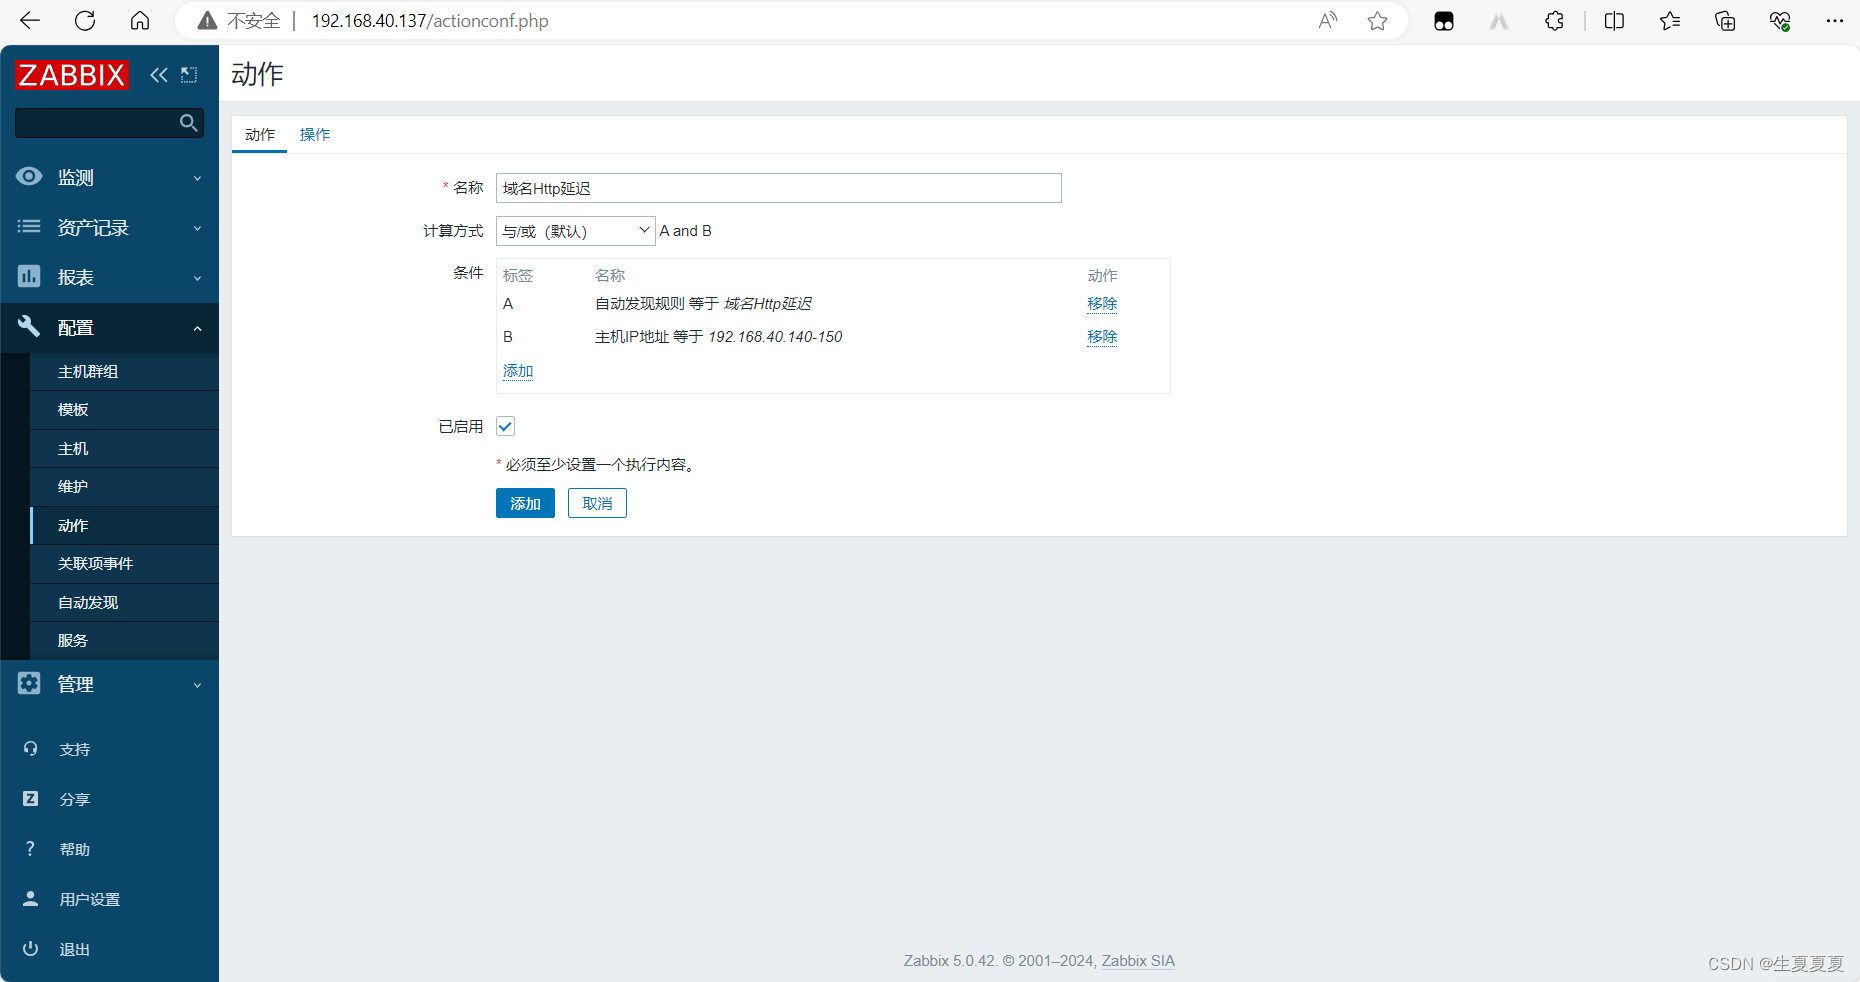
在“常规”选项卡中,填写动作名称,并选择“自动发现”作为触发条件。
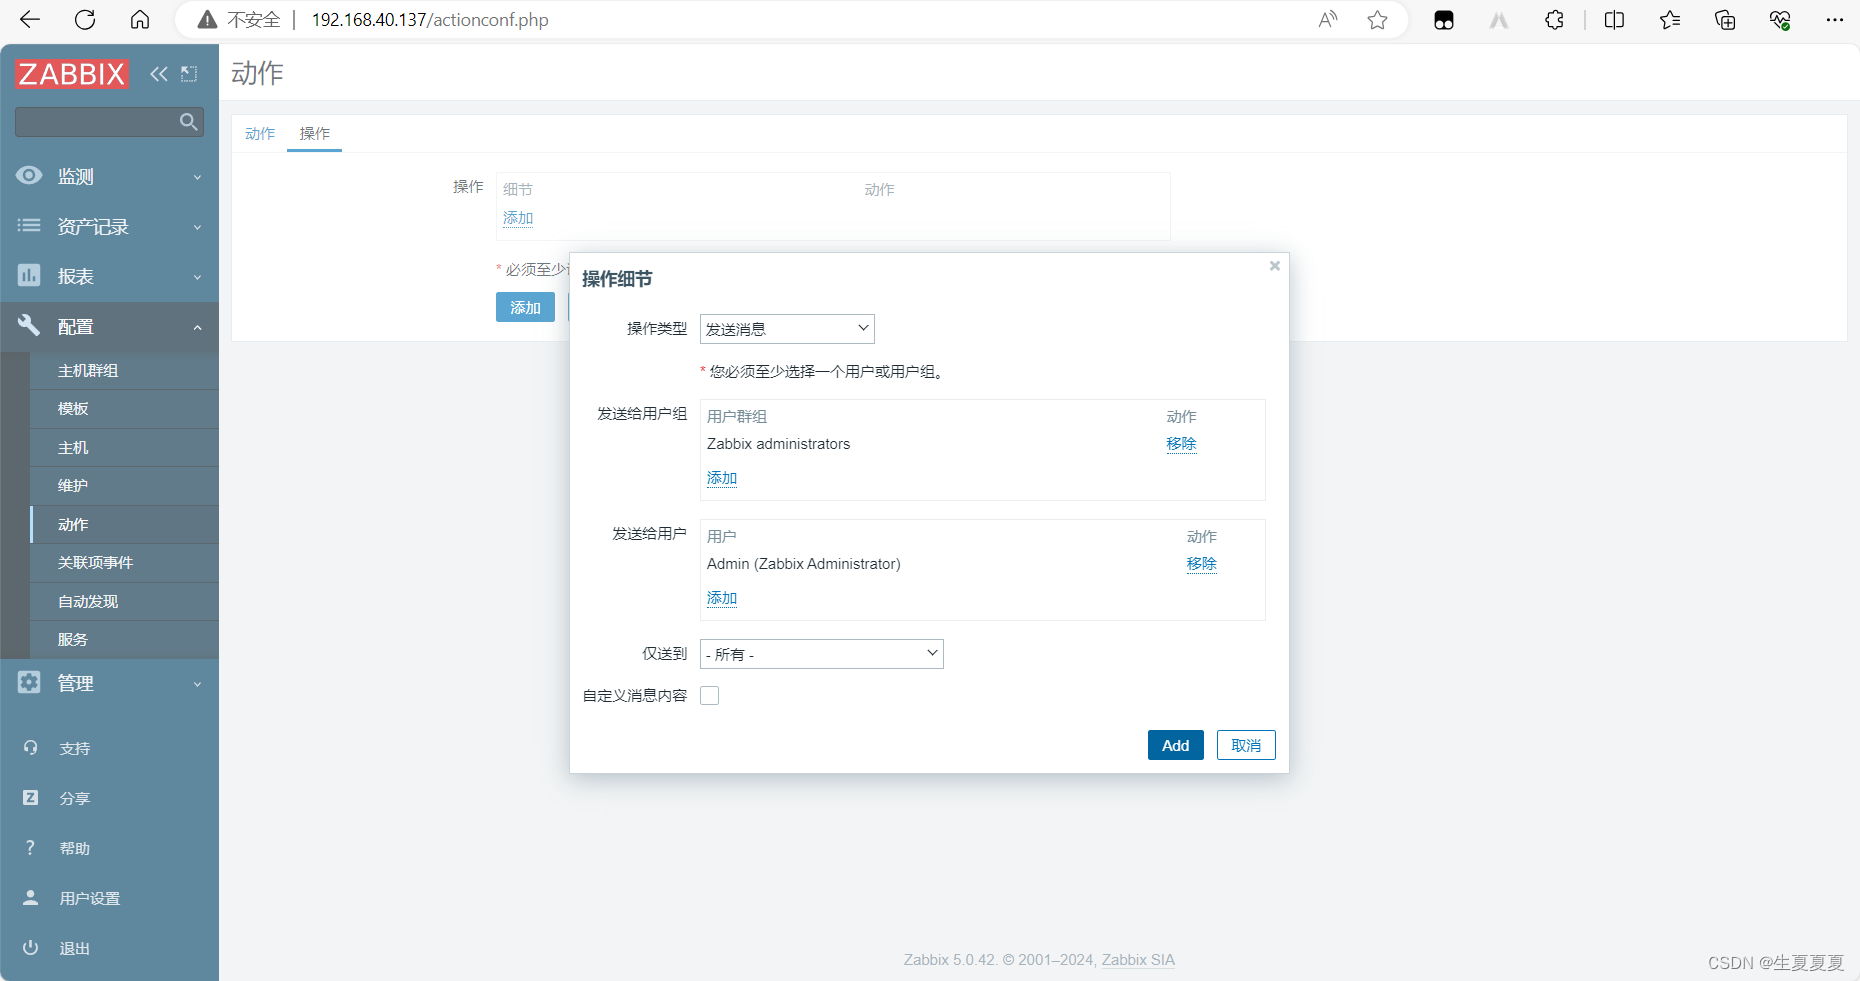
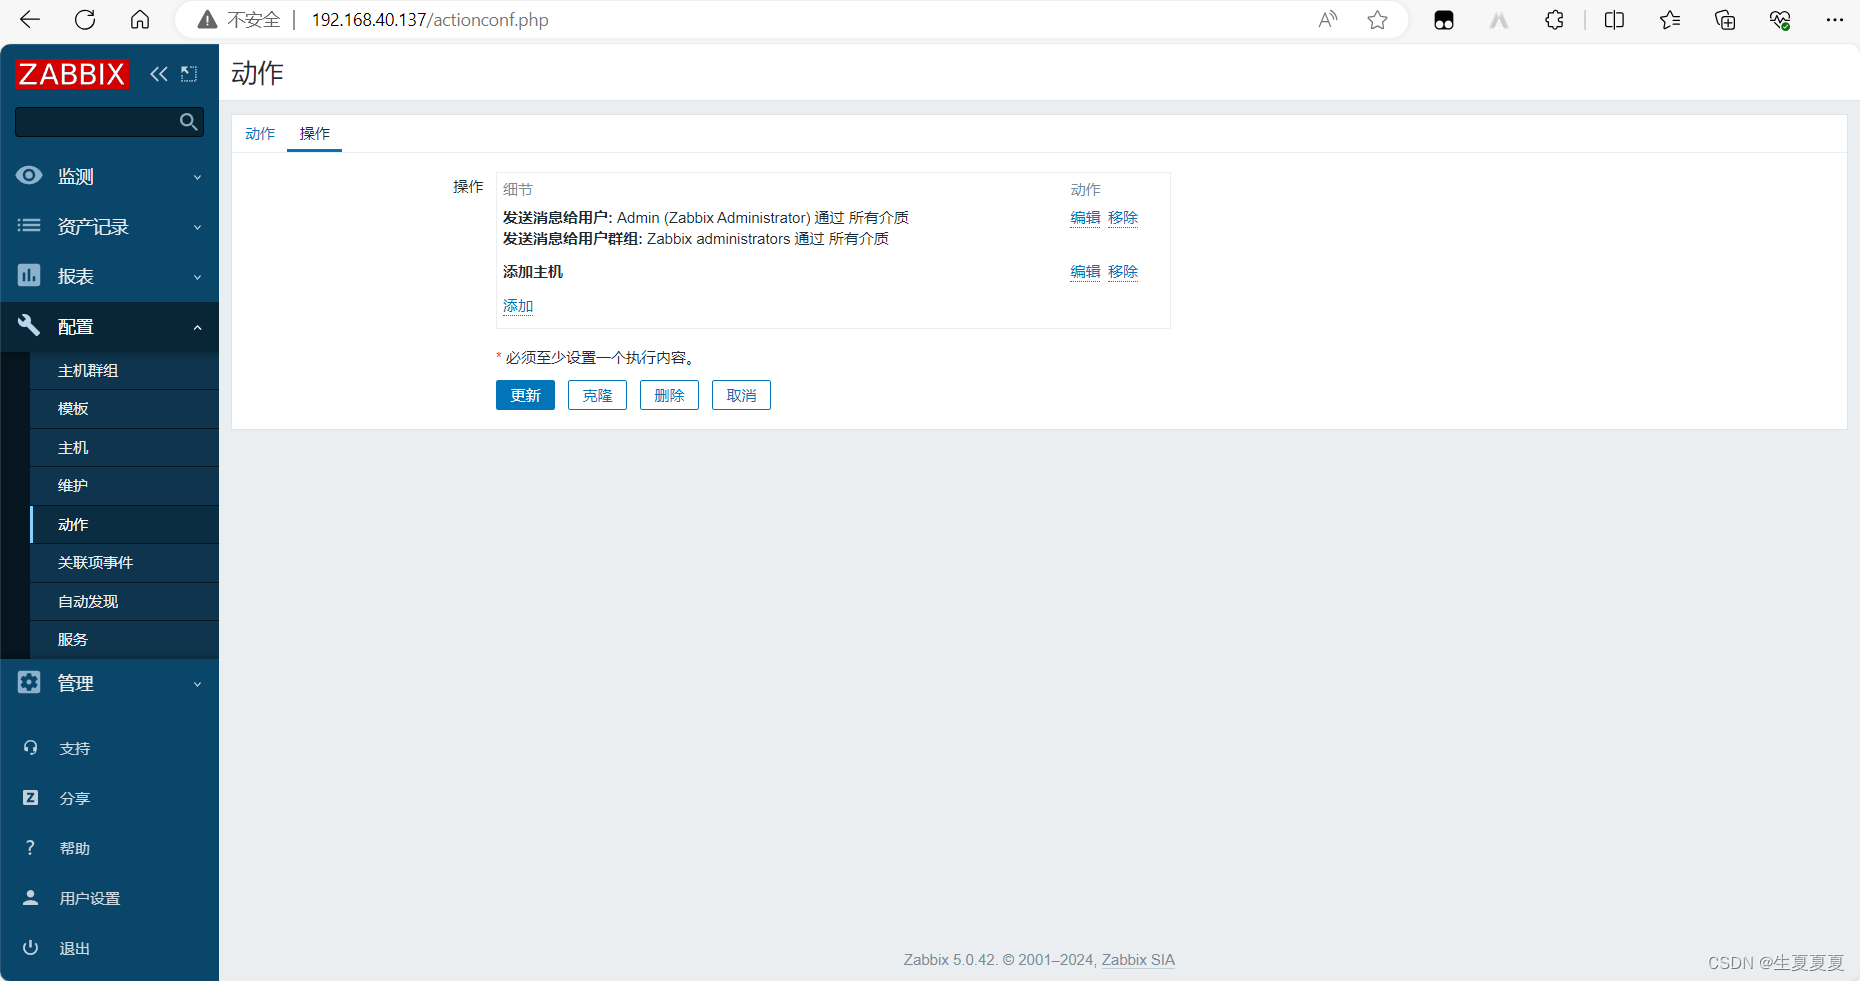
在“操作”选项卡中,添加一个“发送消息”操作,这样当发现新设备时,就会发送消息。
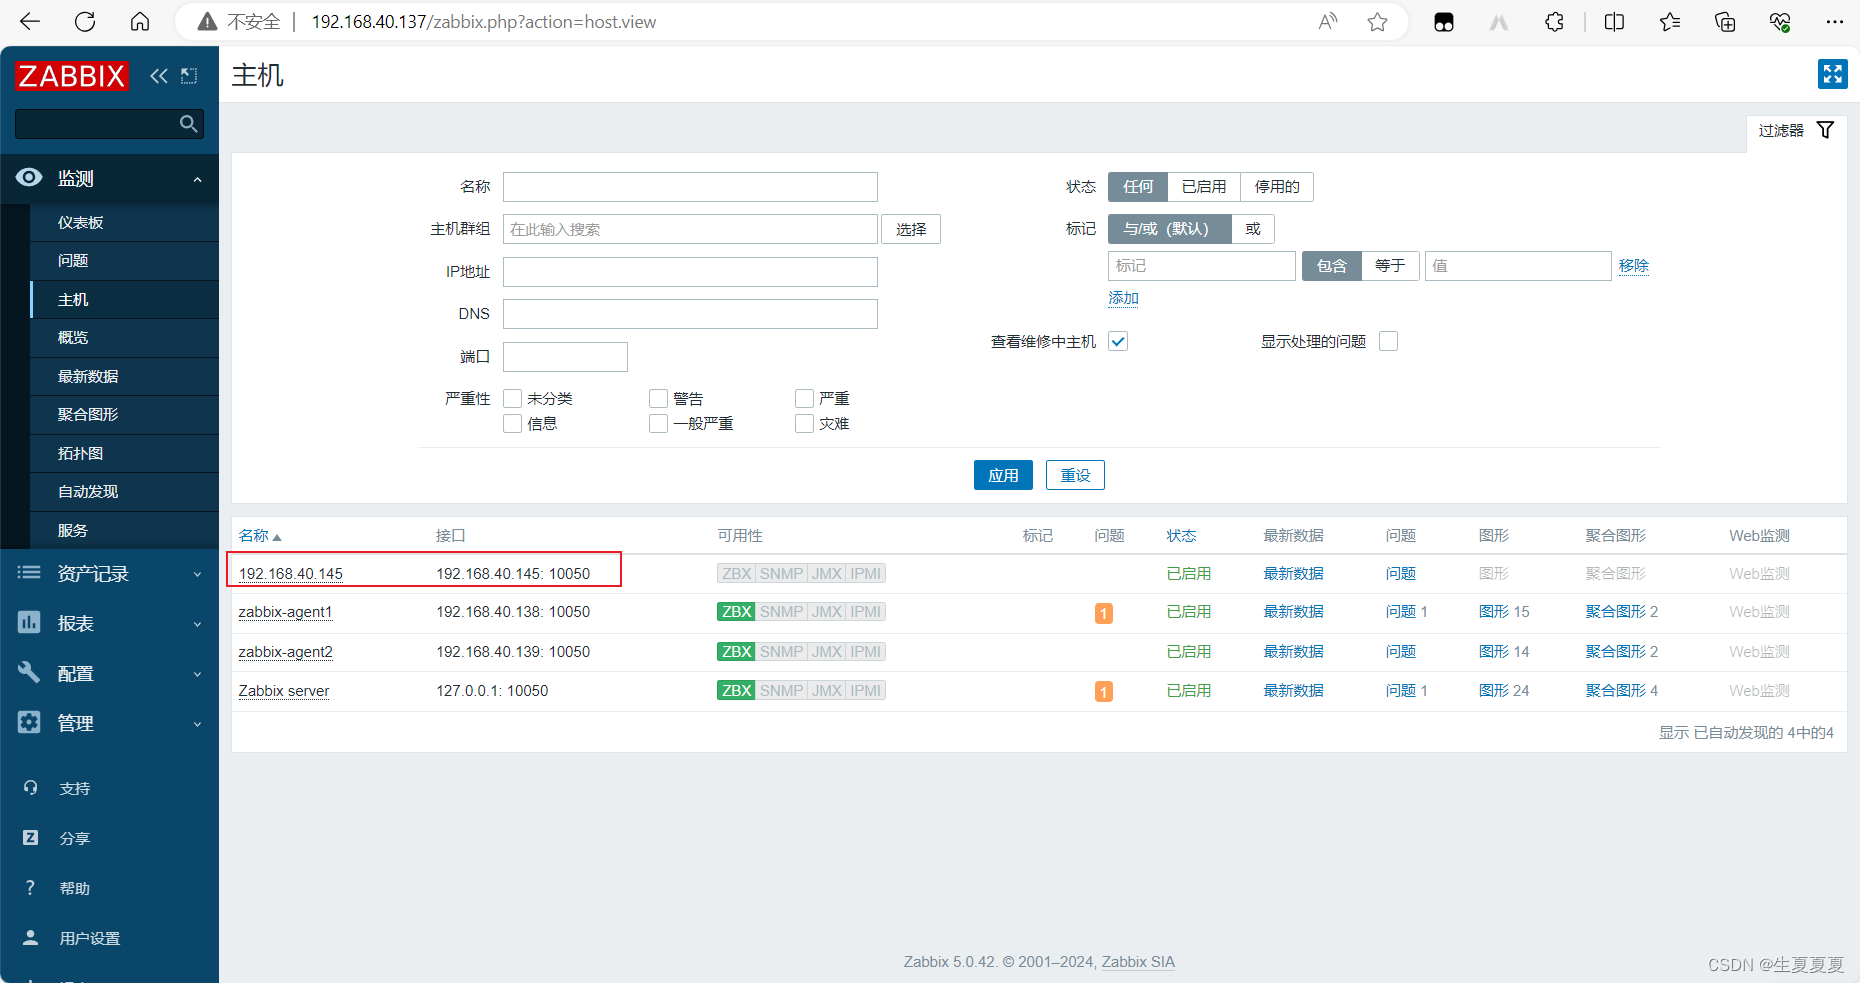
可以在zabbix-server服务器上修改hosts文件,配置域名解析
[root@ansible-server ~]# vim /etc/hosts
192.168.40.145 discovery

创建模板

先修改图形字体乱码
上传windows字体文件,在 C:\Windows\Fonts 找到字体文件,上传 到 /usr/share/zabbix/assets/fonts
[root@ansible-server ~]# mv simkai.ttf /usr/share/zabbix/assets/fonts/
[root@ansible-server ~]# cd /usr/share/zabbix/assets/fonts/
[root@ansible-server fonts]# ls
graphfont.ttf  simkai.ttf
[root@ansible-server fonts]# mv graphfont.ttf graphfont.ttf.bak
[root@ansible-server fonts]# mv simkai.ttf graphfont.ttf
UserParameter=domain.delay.shengxia,/http_delay/http_delay.sh|grep shengxia|awk '{print $2}'
UserParameter=domain.delay.example1,/http_delay/http_delay.sh|grep example1|awk '{print $2}'
UserParameter=domain.delay.example2,/http_delay/http_delay.sh|grep example2|awk '{print $2}'
脚本文件如下
[root@discovery ~]# ll /http_delay/
总用量 8
-rw-r--r-- 1 root root  49 4月  25 15:13 domain.txt
-rwxr-xr-x 1 root root 260 4月  25 15:14 http_delay.sh
[root@discovery ~]# cat domain.txt
shengxia.discovery.com
example1.com
example2.com
[root@discovery ~]# cat http_delay.sh
#!/bin/bash
# 读取域名列表
domains=$(cat /root/domain.txt)
# 遍历域名
for dm in $domains;dodelay_time=$(curl -s -o /dev/null -w "%{time_total}" $dm)if [ $? -eq 0 ];thenecho "${dm} $delay_time"elseecho "${dm} 0"fi
done
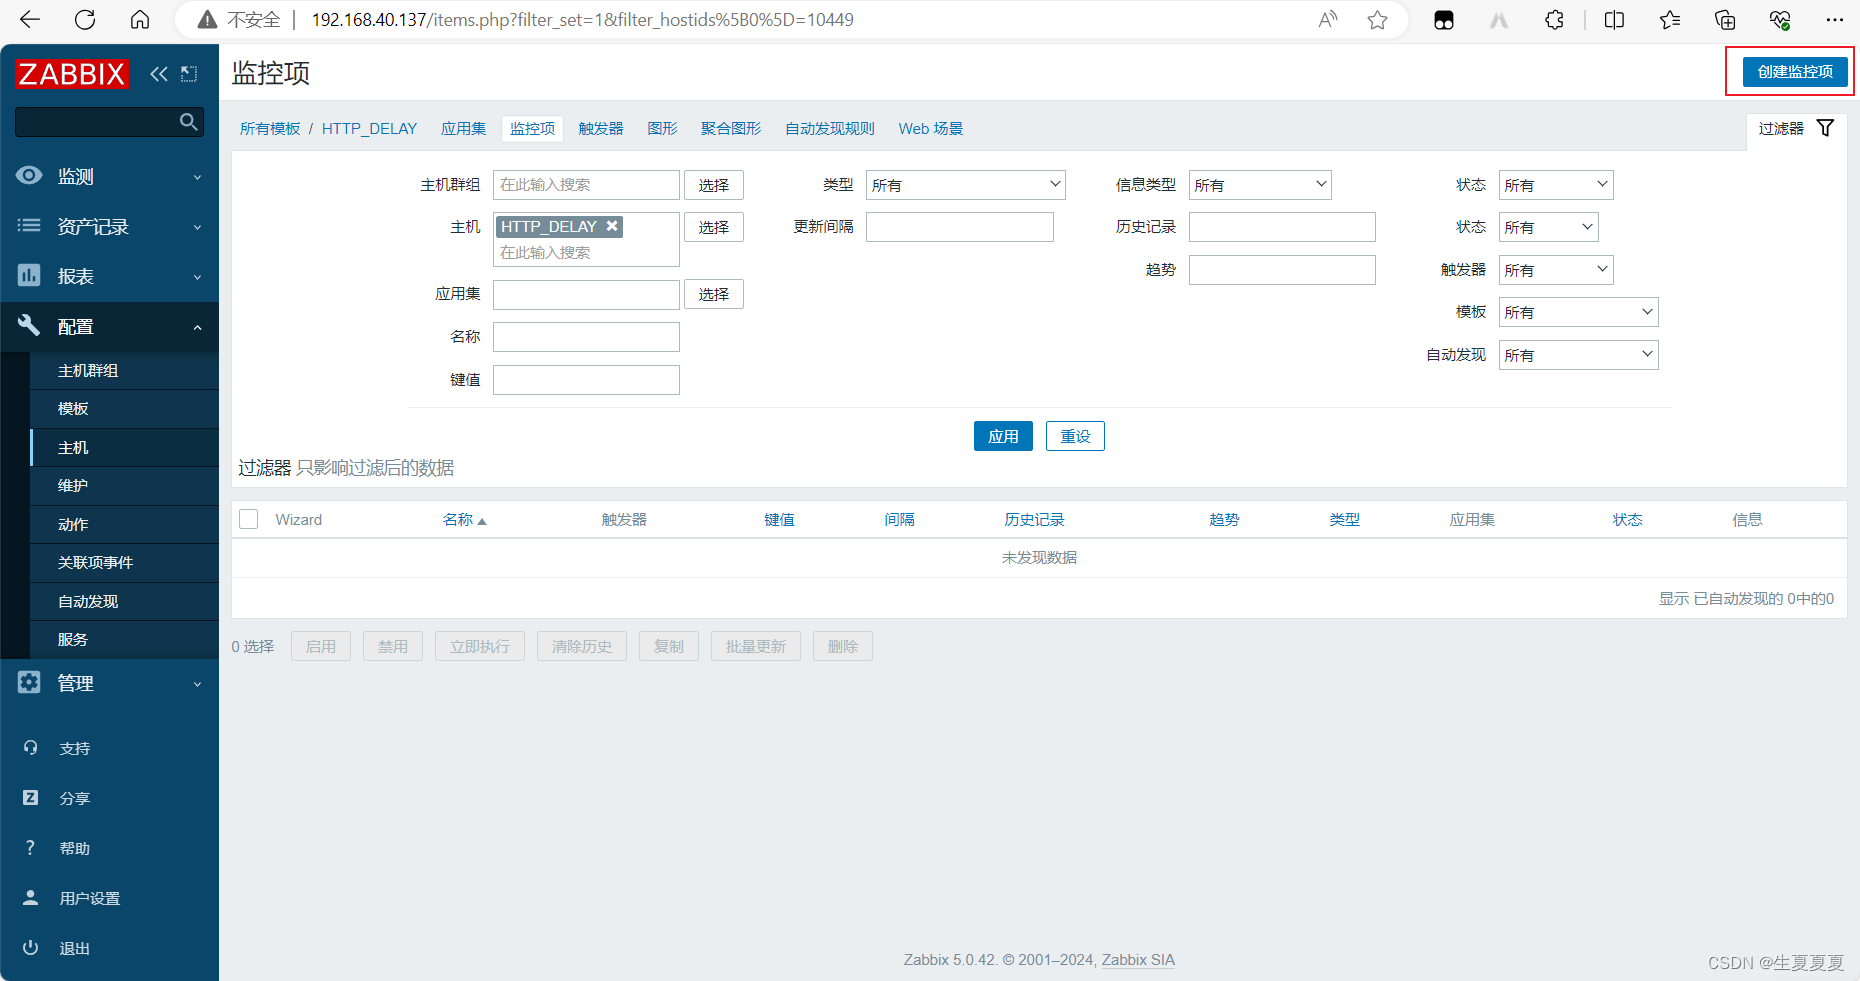
创建监控项

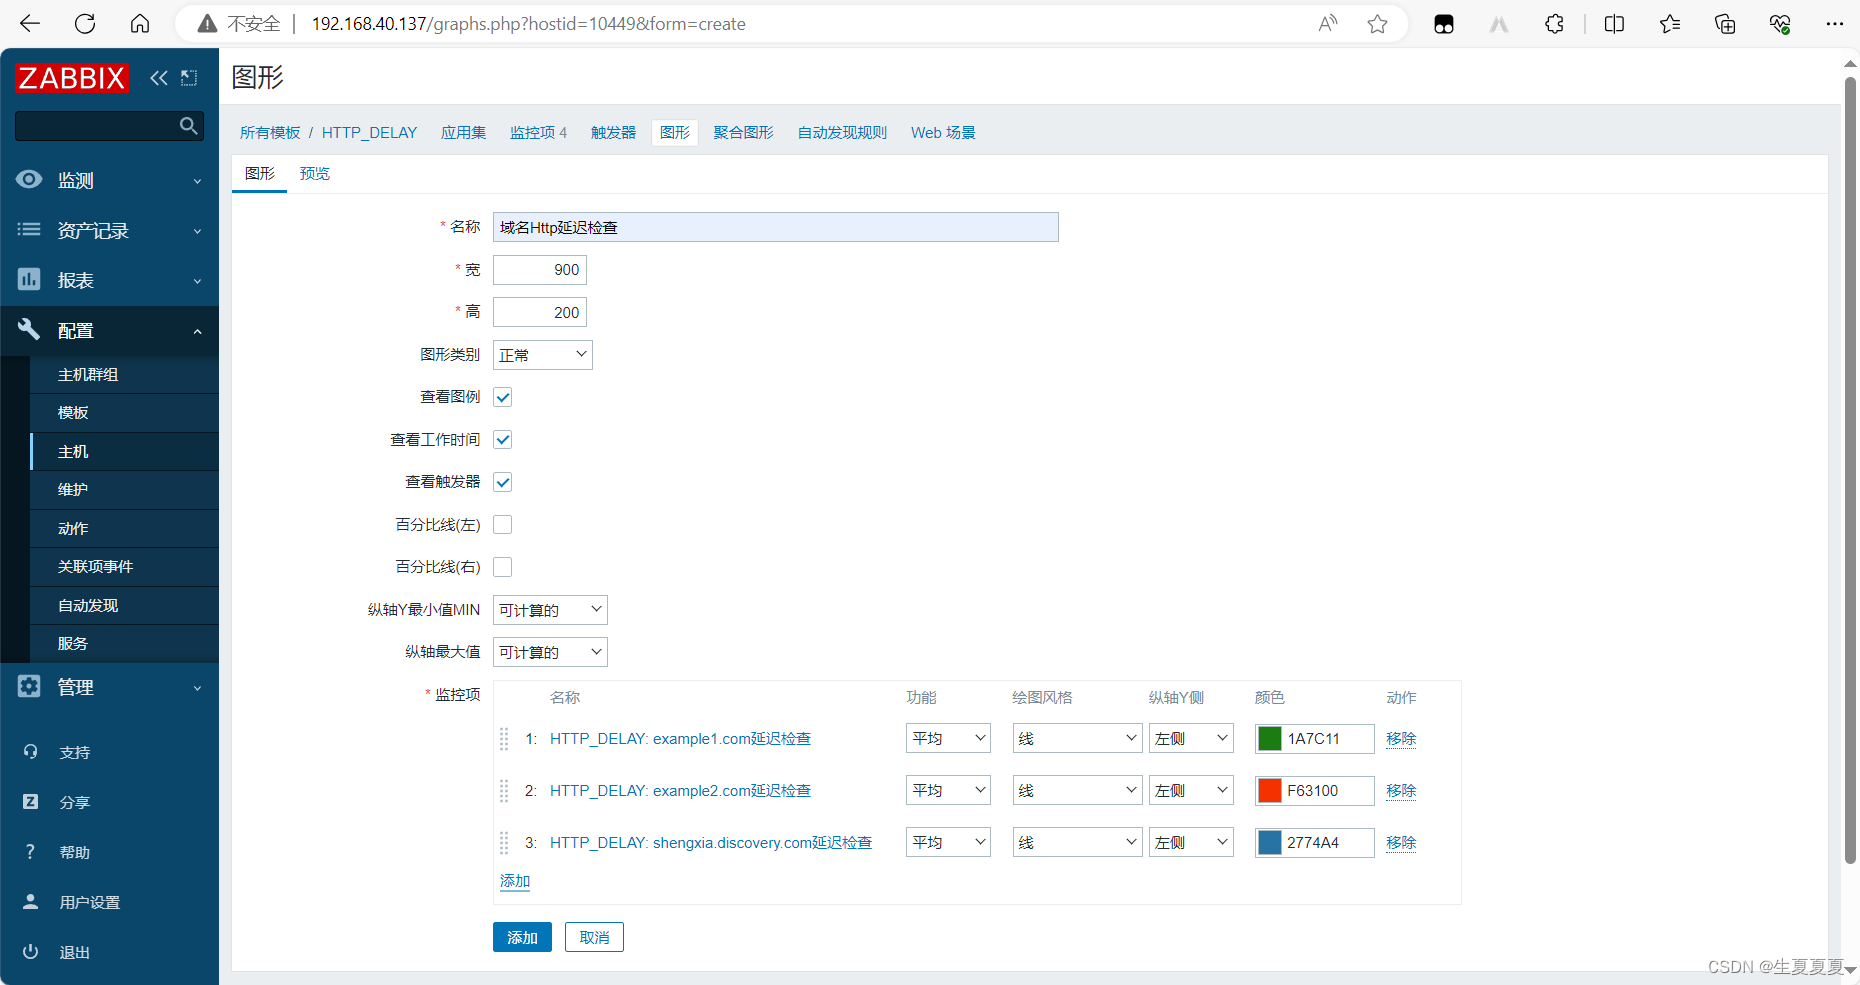
创建图形
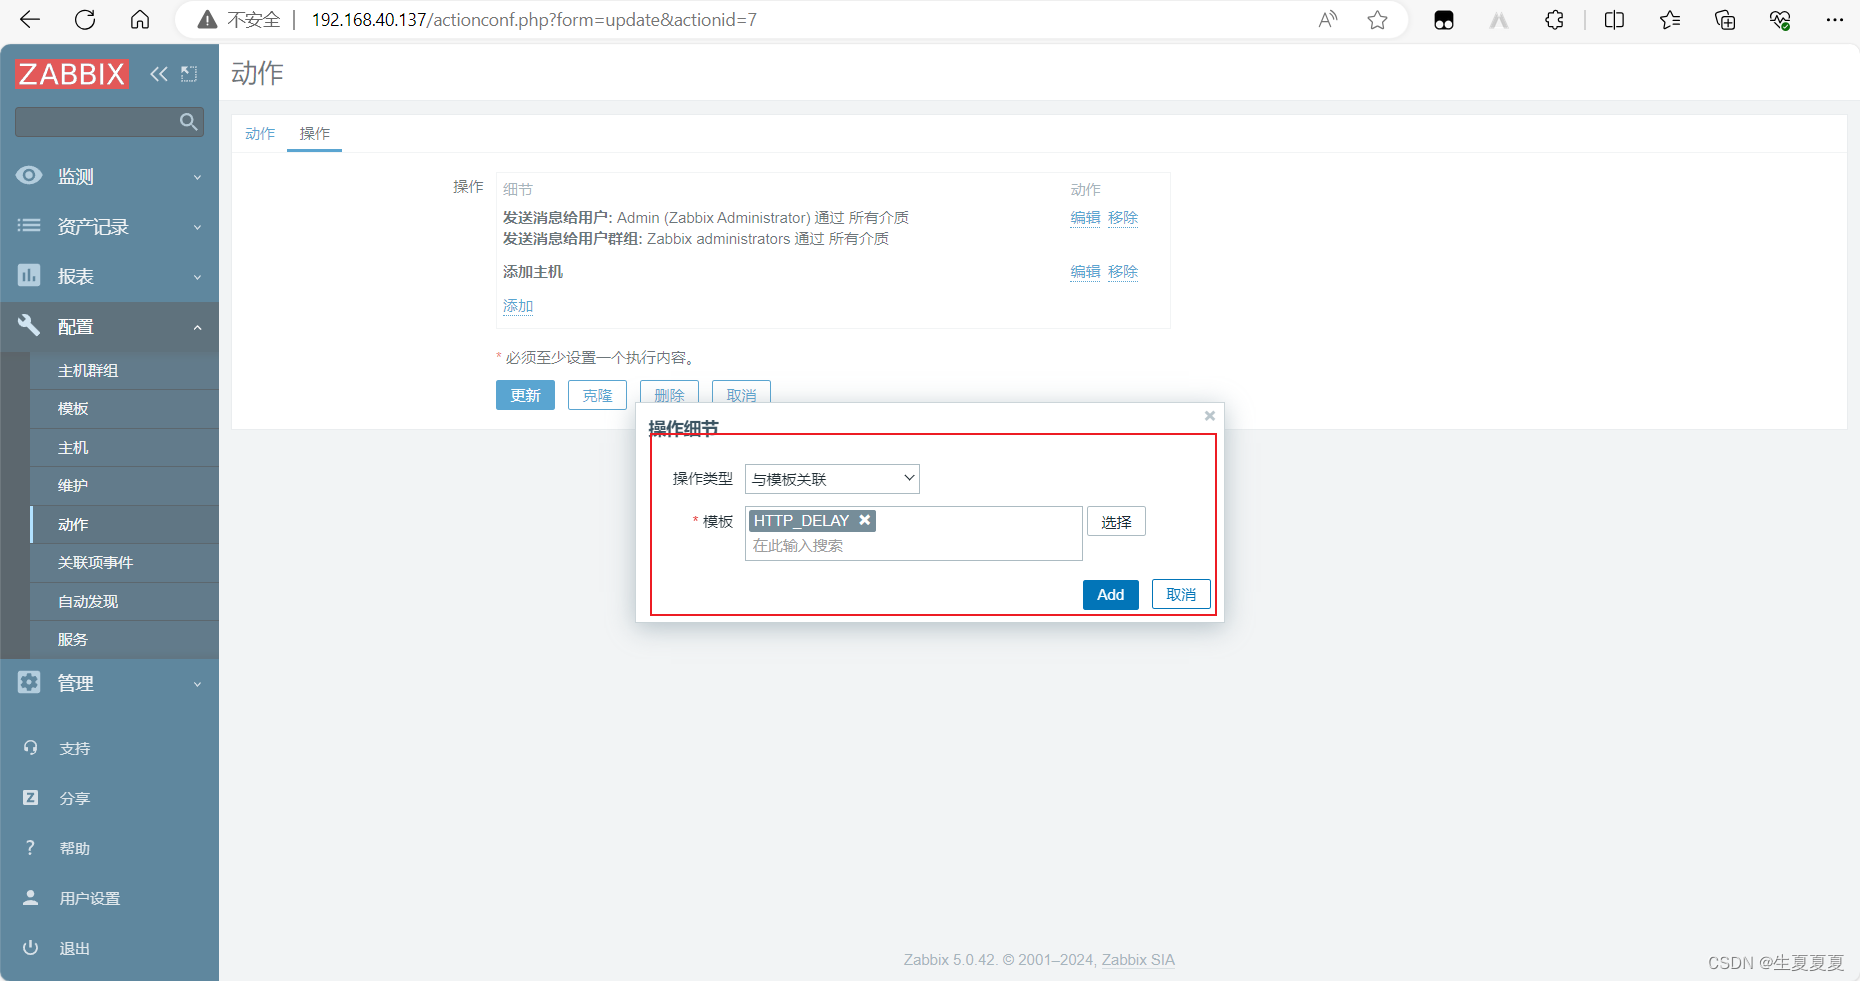
修改自动发现动作,与自定义模板关联
查看图形
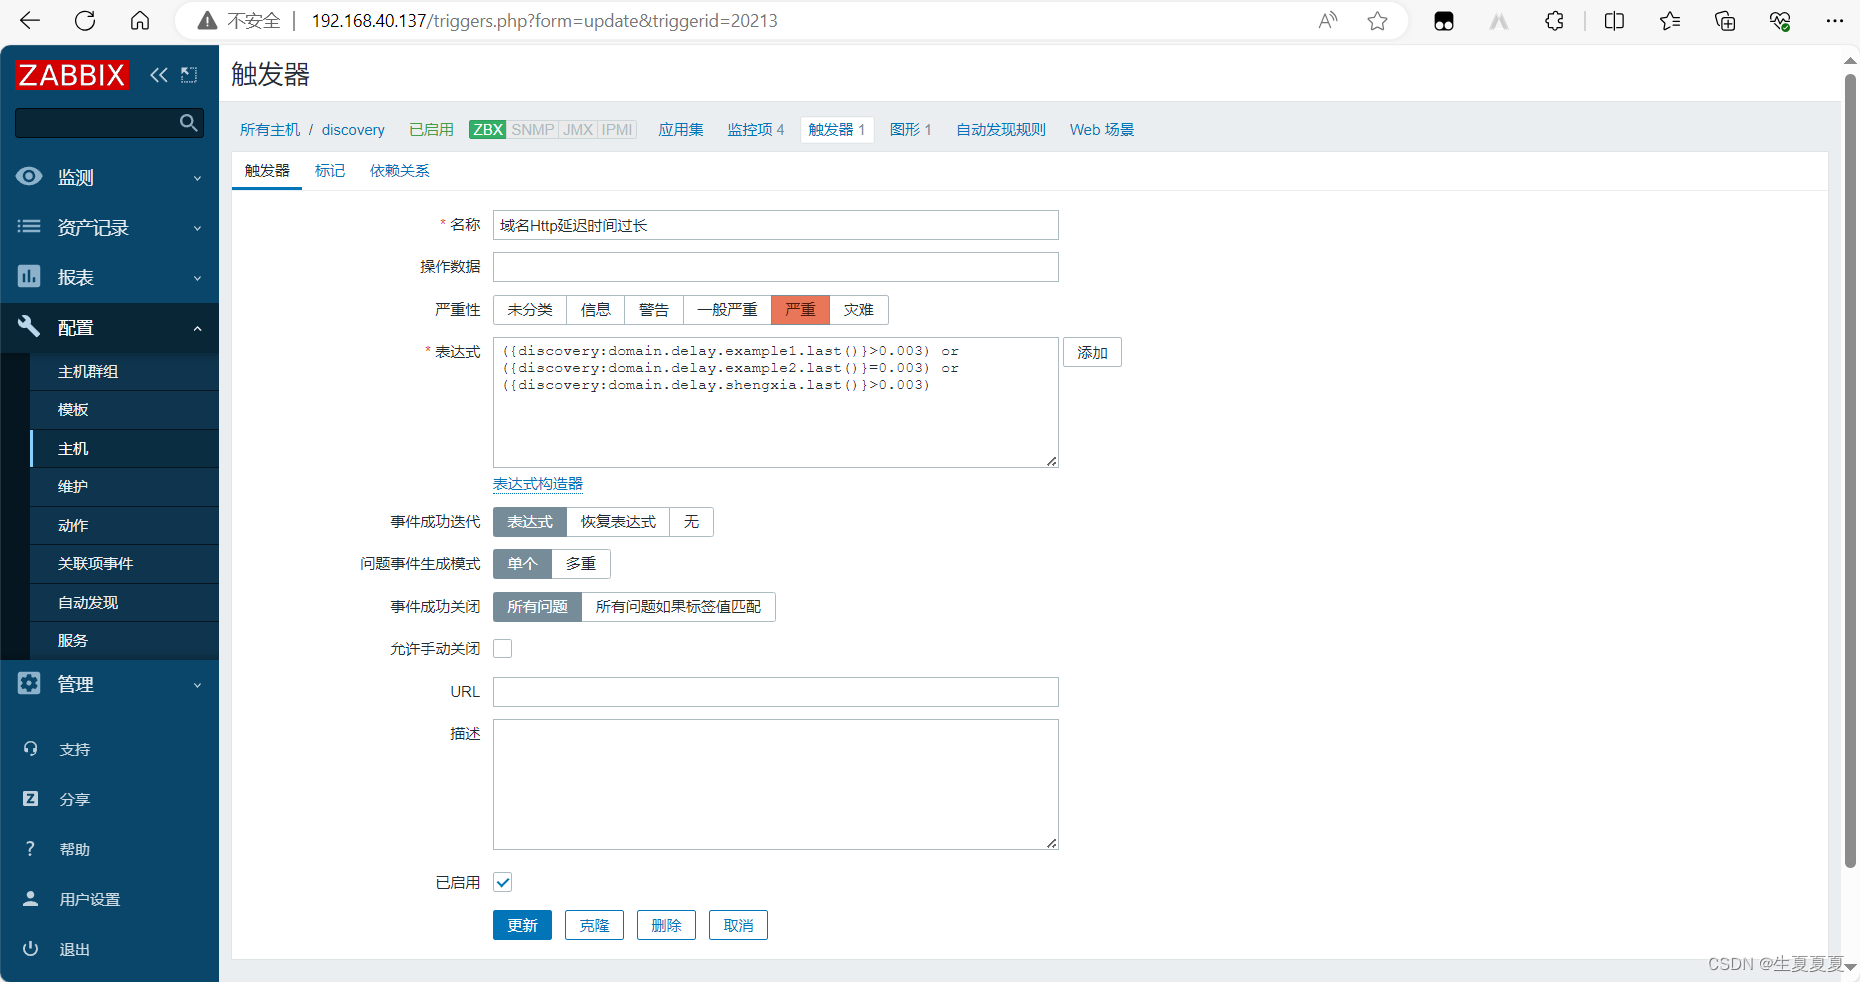
创建一个“触发器”,当延迟超过某个阈值时触发。
({discovery:domain.delay.example1.last()}>0.003) or ({discovery:domain.delay.example2.last()}=0.003) or ({discovery:domain.delay.shengxia.last()}>0.003)