1. 下载安装ollama
(1) 官网下载地址:https://github.com/ollama/ollama
这里以window版本为主,下载链接为:https://ollama.com/download/OllamaSetup.exe。
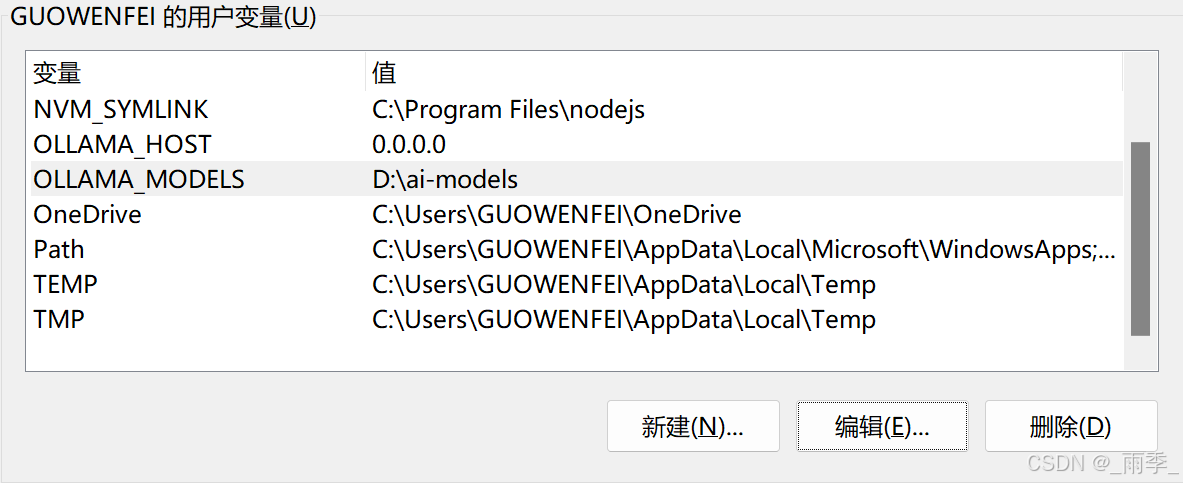
安装完毕后,桌面小图标有一个小图标,表示已安装成功,安装完毕后,首先改变环境变量,打开系统环境变量,设置如下:
OLLAMA_HOST: 0.0.0.0
OLLAMA_MODELS: D:\ai-models (这个目录需要提前创建好,目录名任意)
在这里,OLLAMA_HOST参数是为了跨域访问,方便第三方应用通过http请求访问。OLLAMA_MODELS参数为了改变模型下载地址,默认目录为C:\Users\<用户名>\.ollama\models。

接着,我们拉一个大模型,这里以阿里qwen2.5为例,更多模型可以从Ollama网站查询。打开命令行执行下面的命令:
ollama run qwen2.5
如果没有模型,首先自动尝试拉镜像,如果需要手动拉取镜像,执行ollama pull qwen2.5命令。上述命令执行完毕后,我们就可以直接使用大模型。

2. curl命令请求数据
Api详细文档: https://github.com/ollama/ollama/blob/main/docs/api.md
gitbash对curl命令支持并不好,下面的命令用win11的bash窗口或者用linux窗口执行这些命令。
(1)
curl http://localhost:11434/api/chat -d '{"model": "qwen2.5","messages": [{"role": "user","content": "天空为什么是蓝色的?"}]
}'
(2)
curl http://localhost:11434/api/chat -d '{"model": "qwen2.5","stream":false,"messages": [{"role": "user","content": "天空为什么是蓝色的?"}]
}'
(3)
curl http://localhost:11434/api/generate -d '{"model": "qwen2.5","prompt": "你是谁?"
}'
(4)
curl http://localhost:11434/api/generate -d '{"model": "qwen2.5","prompt": "你是谁?","stream": false
}'
3. Springboot集成
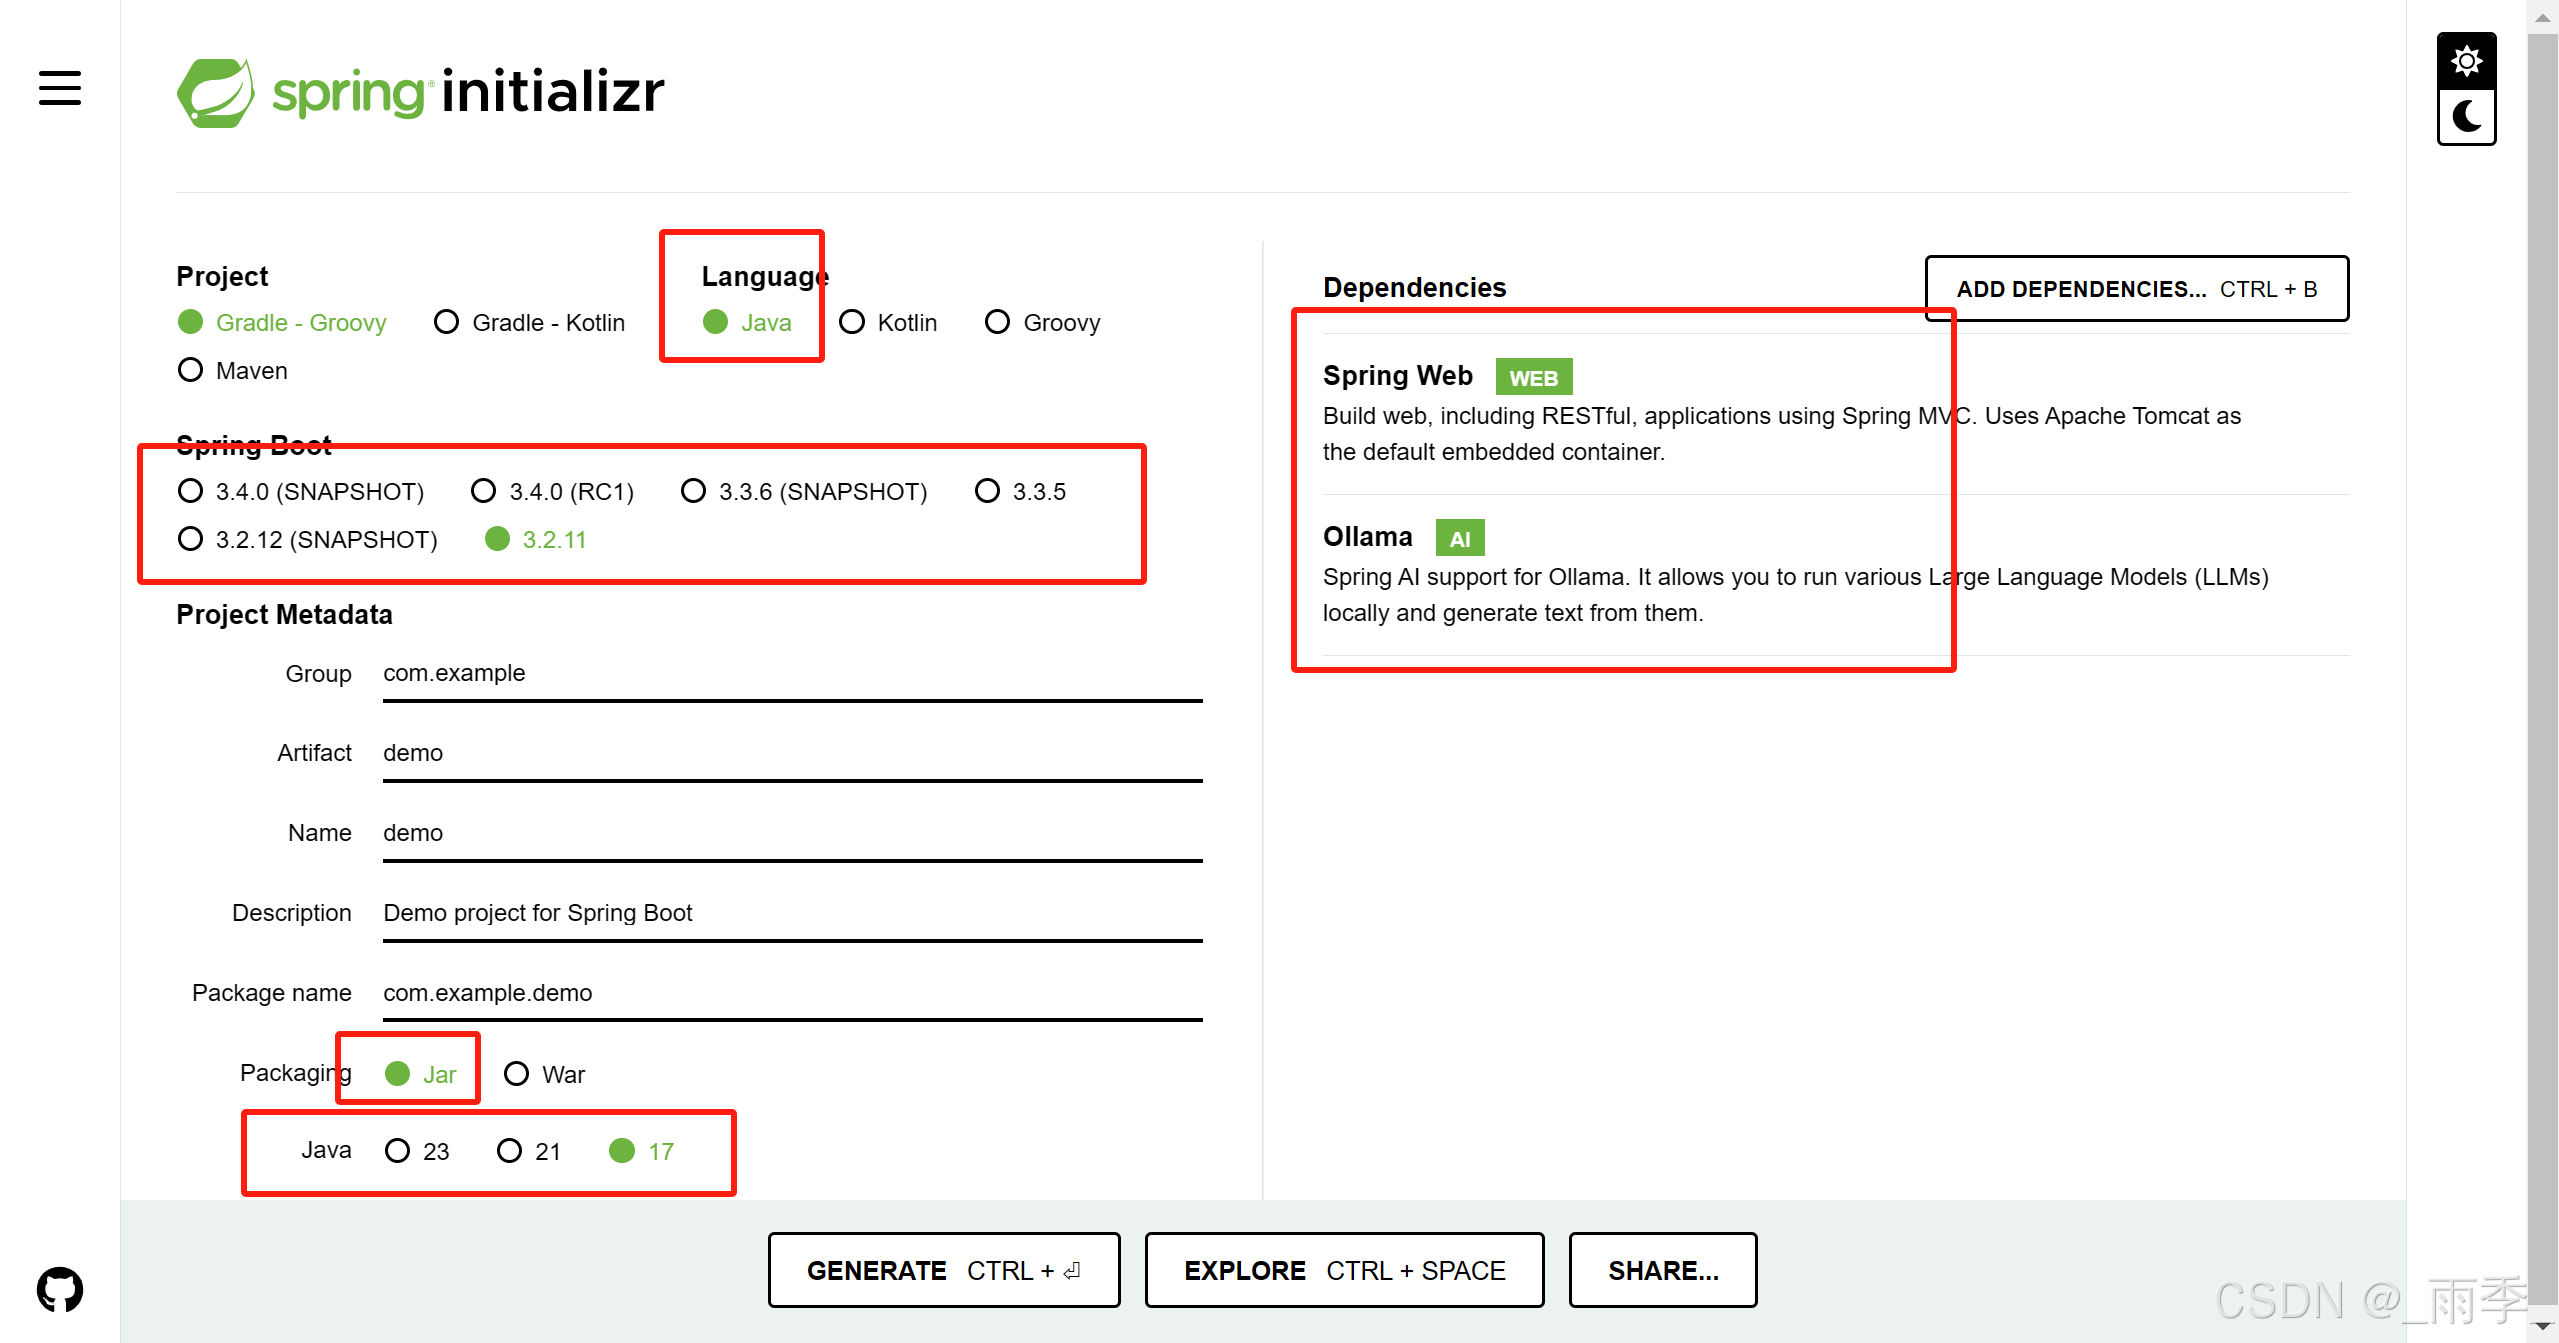
(1) 首先打开https://start.spring.io/网站,填写如下必要信息。这里要注意,不要使用springboot2.x。我们需要使用springboot3.x.

(2) 用Eclipse或者idea导入项目,首先配置application.yml,内容如下:
server:port: 9999
spring:ai:ollama:base-url: http://localhost:11434chat:options:model: qwen2.5
(3) 接下来我们需要配置跨域设置,新建一个类CorsConfig,写入如下内容:
import org.springframework.context.annotation.Bean;
import org.springframework.context.annotation.Configuration;
import org.springframework.http.HttpHeaders;
import org.springframework.web.servlet.config.annotation.CorsRegistry;
import org.springframework.web.servlet.config.annotation.WebMvcConfigurer;@Configuration
public class CorsConfig implements WebMvcConfigurer {@Beanpublic WebMvcConfigurer corsConfigurer() {return new WebMvcConfigurer() {@Overridepublic void addCorsMappings(CorsRegistry registry) {registry.addMapping("/**").allowedOriginPatterns("*").allowedMethods("*").allowedHeaders("*").allowCredentials(true).exposedHeaders(HttpHeaders.SET_COOKIE).maxAge(3600L);}};}
}
(4) 编写controller类,定义OllamaClientController类,写入如下内容:
import org.springframework.ai.ollama.OllamaChatModel;
import org.springframework.beans.factory.annotation.Autowired;
import org.springframework.web.bind.annotation.GetMapping;
import org.springframework.web.bind.annotation.RequestMapping;
import org.springframework.web.bind.annotation.RequestParam;
import org.springframework.web.bind.annotation.RestController;
import reactor.core.publisher.Flux;@RestController
@RequestMapping("/ollama")
public class OllamaClientController {@Autowiredprivate OllamaChatModel ollamaChatModel;// http://localhost:9999/ollama/chat/v1?msg=天空为什么是蓝色的?@GetMapping("/chat/v1")public String ollamaChat(@RequestParam String msg) {return ollamaChatModel.call(msg);}// http://localhost:9999/ollama/chat/v2?msg=天空为什么是蓝色的?@GetMapping("/chat/v2")public Flux<String> ollamaChat2(@RequestParam String msg) {Flux<String> stream = ollamaChatModel.stream(msg);return stream;}
}
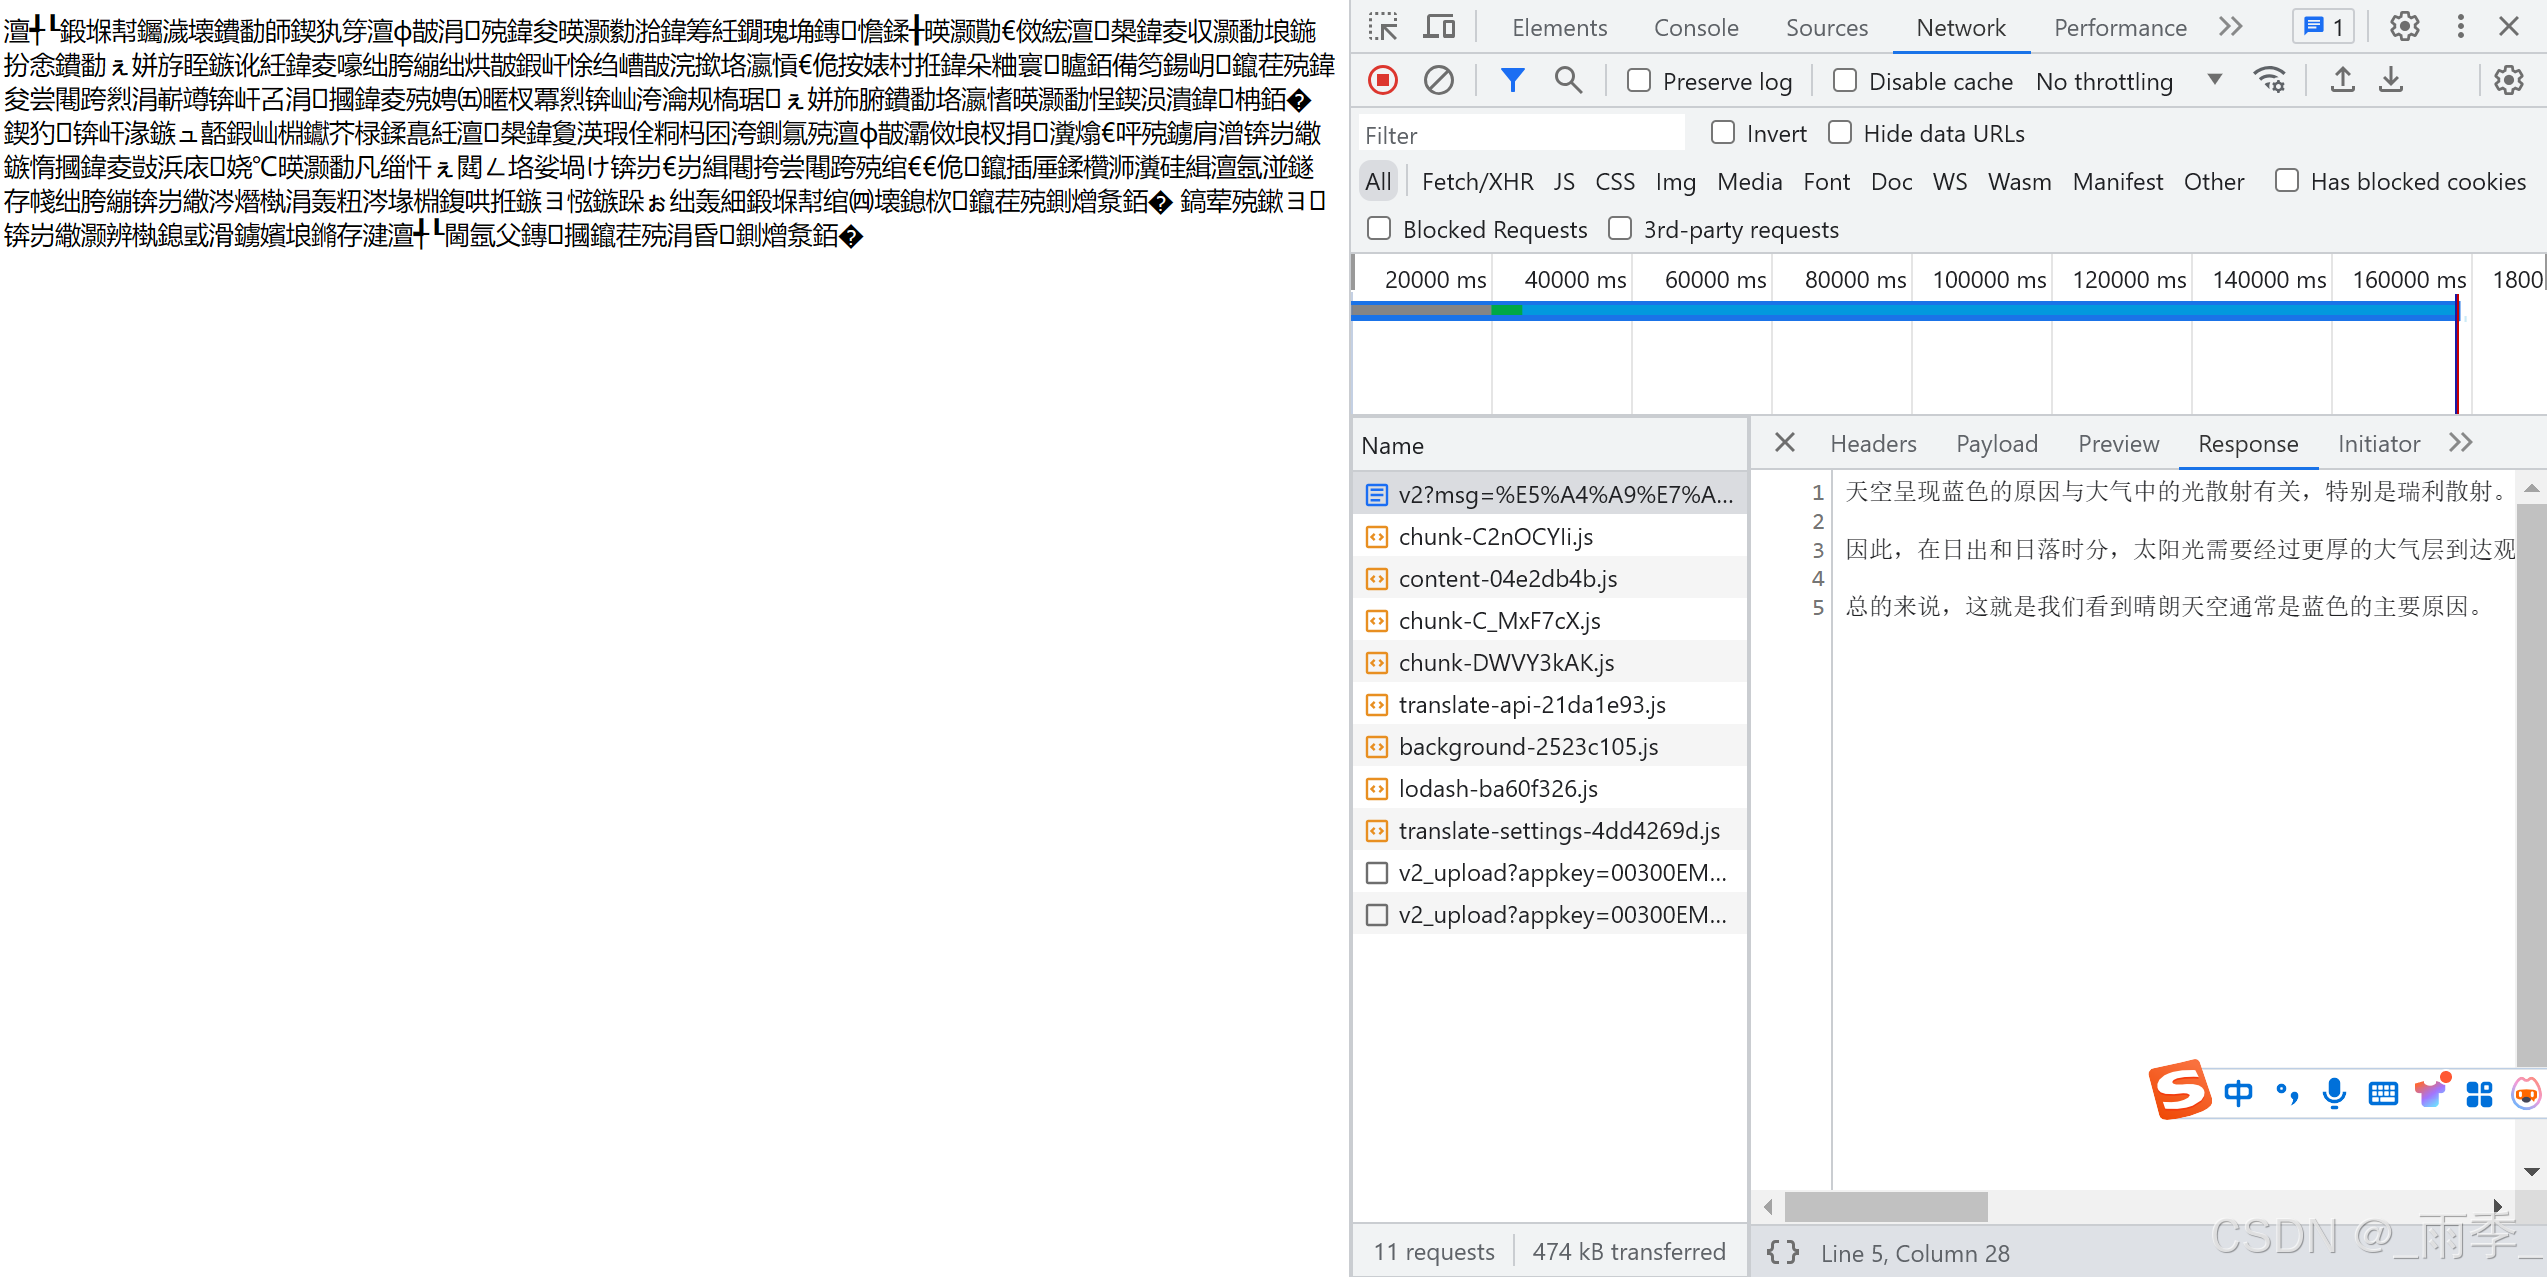
(5) 接着启动项目,打开浏览器输入: http://localhost:9999/ollama/chat/v2?msg=天空为什么是蓝色的?, 会看到如下图信息,这里中文虽然乱码,但是不影响后续前端开发。

4. 前端页面开发
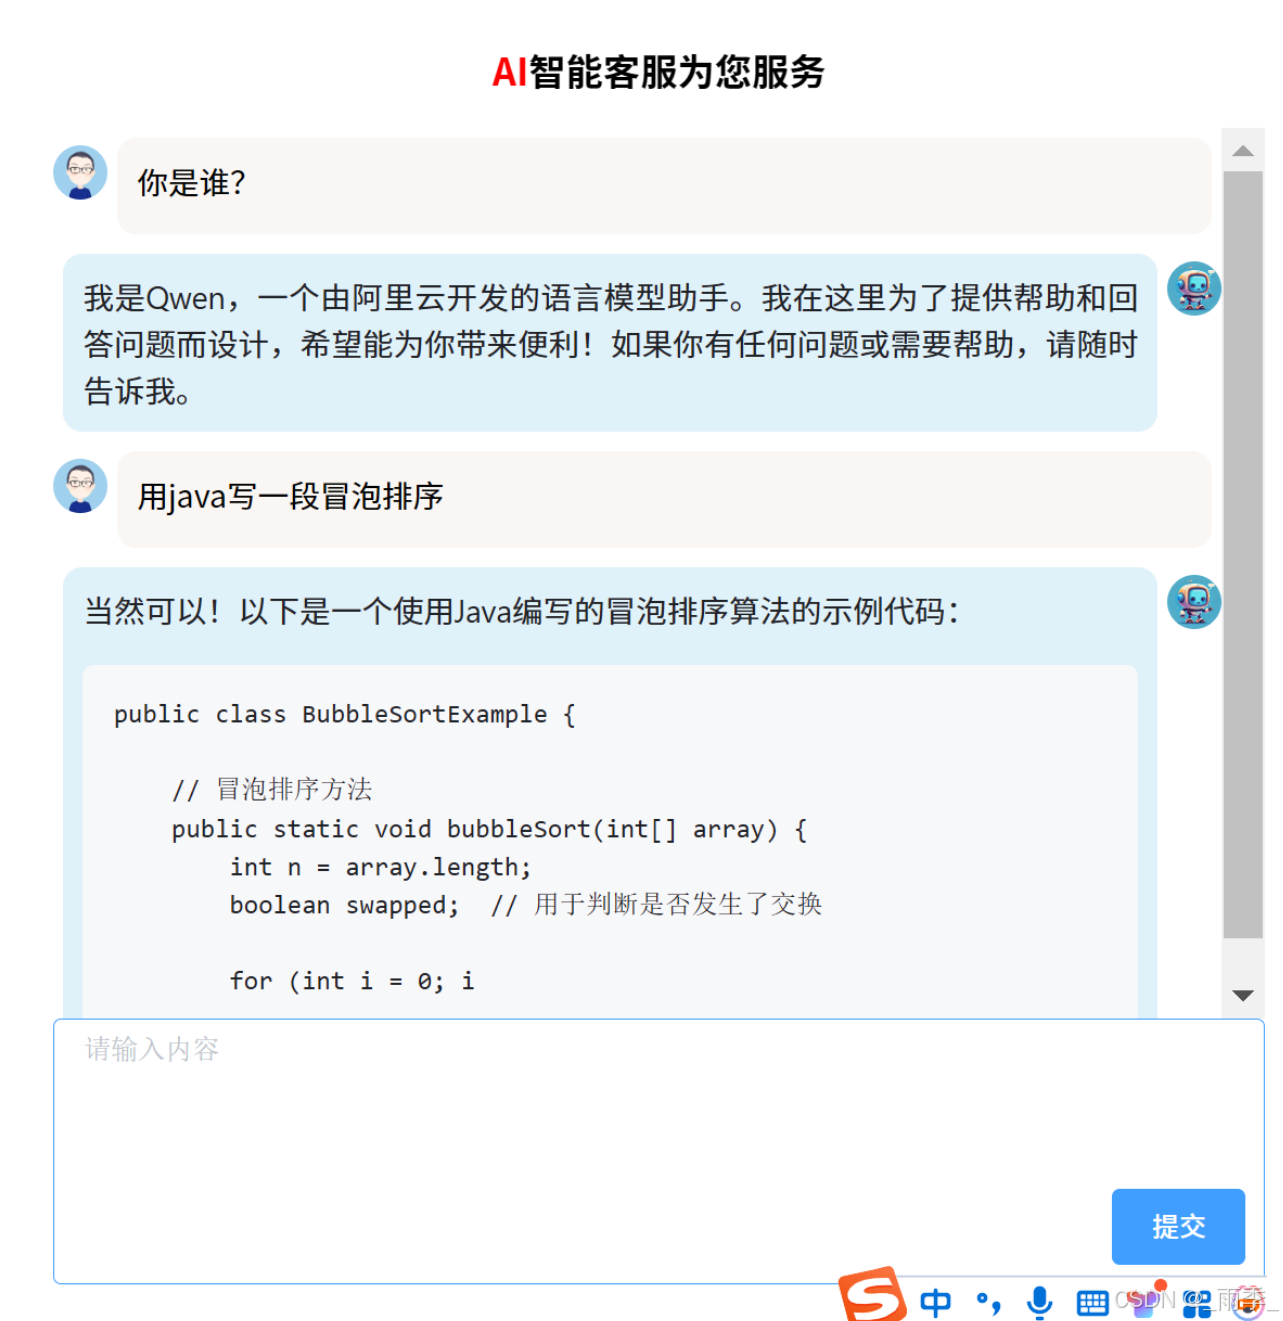
(1)这里采用Vue+ElementUI开发,首先需要创建一个vue项目。Vue项目整合ElementUI参考Element - The world's most popular Vue UI framework。将实现如下图所示的效果图:

(2) 优先采用流式数据返回,因为它响应速度较快,并且由于restful返回的结果是md格式的数据,所以,首先集成对md的支持。
首先,项目需要增加如下依赖:
npm i vue-markdown-loader
npm i vue-loader
npm i vue-template-compiler
npm i github-markdown-css
npm i highlight.js
npm i markdown-loader
npm i html-loader
npm i marked
安装完成后,还需要做一些配置,首先配置vue.config文件,增加如下内容:
const { defineConfig } = require('@vue/cli-service')
const path = require("path");
module.exports = defineConfig({transpileDependencies: true,devServer: {port: 8932, // 端口client: {overlay: false,},},configureWebpack: {module: {rules: [// 配置读取 *.md 文件的规则{test: /\.md$/,use: [{ loader: "html-loader" },{ loader: "markdown-loader", options: {} }]}]}}
})
之后,我们需要在main.js中配置参数,增加如下内容:
import 'element-ui/lib/theme-chalk/index.css';
// markdown样式
import "github-markdown-css";
// 代码高亮
import "highlight.js/styles/github.css"; //默认样式
接着启动项目,如果项目启动失败,删除package-lock.json文件和node_modules目录,执行npm install,然后启动项目。
接着增加QuestionItem.vue组件,内容如下:
<template><div class="question-warp"><div><el-avatar size="small" src="images/user-icon.jpg"></el-avatar></div><div class="question-content">{{ value }}</div></div>
</template>
<script>
export default {name: 'QuestionItem',props: {value: String,},data() {return {}},methods: {}
}
</script>
<style scoped>.question-warp {display: flex;
}.question-content {margin: 5px;line-height: 25px;text-align: justify;width: 100%;background-color: rgb(249, 246, 243);border-radius: 10px;padding: 10px;
}
</style>
接着增加一个AnswerItem.vue组件,内容如下:
<template><div class="answer-warp"><div class="answer-content"><div  v-html="value" class="markdown-body"></div></div><div><el-avatar size="small" src="images/ai-icon.jpg"></el-avatar></div></div>
</template>
<script>
export default {name: 'AnswerItem',props: {value: String,},data() {return {}},methods: {}
}
</script>
<style scoped>
.answer-warp {display: flex;
}
.markdown-body{background-color: rgb(223, 241, 249);
}
.answer-content {margin: 5px;line-height: 25px;width: 100%;text-align: justify;background-color: rgb(223, 241, 249);border-radius: 10px;padding: 10px;
}
</style>
以上两个组件分别是问题和答案的组件,所以接下来增加CustomerService.vue组件,内容如下:
<template><div><div class="title"><span style="color: red;">AI</span>智能客服为您服务</div><div class="content"><template v-for="item in data"><question-item v-if="item.question !== ''" :value="item.question" /><answer-item v-if="item.answer !== ''" :value="item.answer" /></template></div><div class="textarea-container"><el-input type="textarea" resize='none' placeholder="请输入内容" v-model="questionInputValue" :rows="6"class="custom-textarea"></el-input><el-button :disabled="submitButtonDisabled" type="primary" class="submit-button" @click="handleSubmit">提交</el-button></div></div>
</template>
<script>
import QuestionItem from "@/components/QuestionItem.vue";
import AnswerItem from "@/components/AnswerItem.vue";
import { marked } from 'marked'
export default {name: 'CustomerService',components: {'question-item': QuestionItem,'answer-item': AnswerItem},data() {return {question: '',submitButtonDisabled: false,questionInputValue: '',data: []}},methods: {async handleSubmit() {// 处理提交逻辑console.log('提交的内容:', this.questionInputValue);if (this.questionInputValue.trim() === '') {this.$message({type: "error",message: "你没有输入内容哦"})} else {this.question = this.questionInputValuethis.submitButtonDisabled = truethis.data.push({question: this.question,answer: '正在思考中...'})this.questionInputValue = ''try {// 发送请求let response = await fetch("http://localhost:9999/api/ollama/chat/v2?msg=" + this.question,{method: "get",responseType: "stream",});// ok字段判断是否成功获取到数据流if (!response.ok) {throw new Error("Network response was not ok");}// 用来获取一个可读的流的读取器(Reader)以流的方式处理响应体数据const reader = response.body.getReader();// 将流中的字节数据解码为文本字符串const textDecoder = new TextDecoder();let result = true;let answer = ''while (result) {// done表示流是否已经完成读取value包含读取到的数据块const { done, value } = await reader.read();if (done) {result = false;this.submitButtonDisabled = falsebreak;}answer += textDecoder.decode(value);this.$set(this.data, this.data.length - 1, {question: this.question,answer: marked(answer)});}} catch (err) {console.log("发生错误:", err)}}}}
}
</script>
<style scoped>
.title {text-align: center;font-size: larger;font-weight: bold;
}
.content {height: 460px;overflow-y: auto;
}
.question {border: 2px solid salmon;border-radius: 10px;
}
.textarea-container {position: relative;display: flex;flex-direction: column;
}
.custom-textarea {/* 为按钮留出空间 */box-sizing: border-box;/* 确保内边距不会增加元素的总宽度 */
}
.submit-button {position: absolute;bottom: 10px;/* 根据需要调整 */right: 10px;/* 根据需要调整 */z-index: 1;/* 确保按钮在文本域之上 */
}
</style>
之后我们在父组件调用该组件,即可,父组件示例代码如下:
…<el-drawer :visible.sync="customerService" :with-header="false" direction="rtl" size="45%"><div style="padding-left: 10px;padding-right:10px;"><customer-service /></div>
</el-drawer>
…
import CustomerService from "@/components/CustomerService.vue";
export default {name: "xxxx",components: {"customer-service": CustomerService},…
}
参考文档
1.ollama官网: Ollama
2. 报错 - 使用marked报错 marked__WEBPACK_IMPORTED_MODULE_4___default(...) is not a function_marked is not a function-CSDN博客
3.ollama readme : https://github.com/ollama/ollama?tab=readme-ov-file
4.vue中展示、读取.md 文件的方法(批量引入、自定义代码块高亮样式)_vue.js_脚本之家
5.在vue中解析md文档并显示-腾讯云开发者社区-腾讯云
6.axios设置 responseType为 “stream“流式获取后端数据_axios stream-CSDN博客


