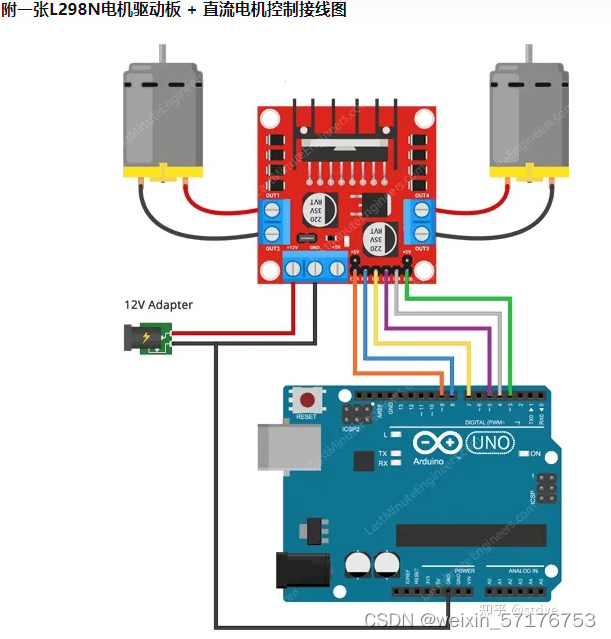
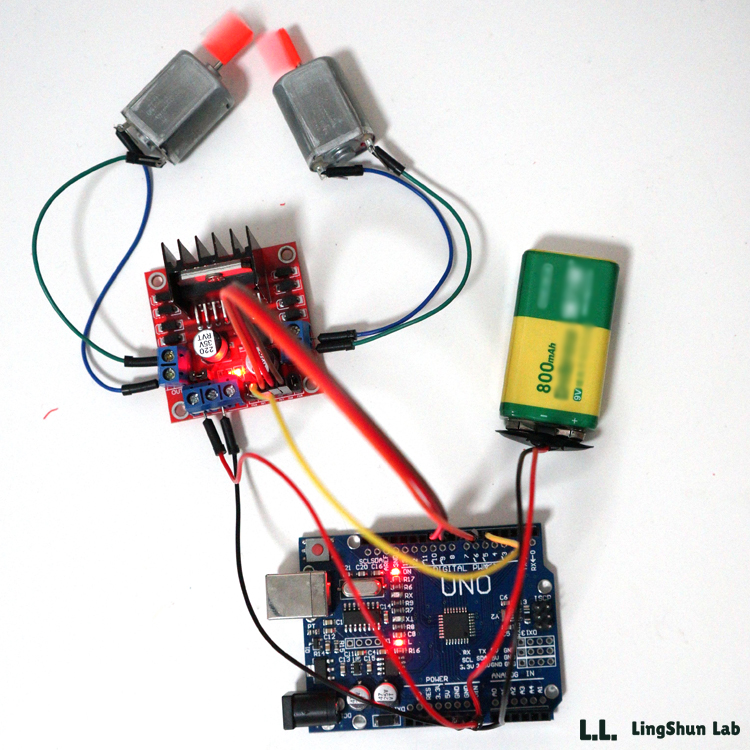
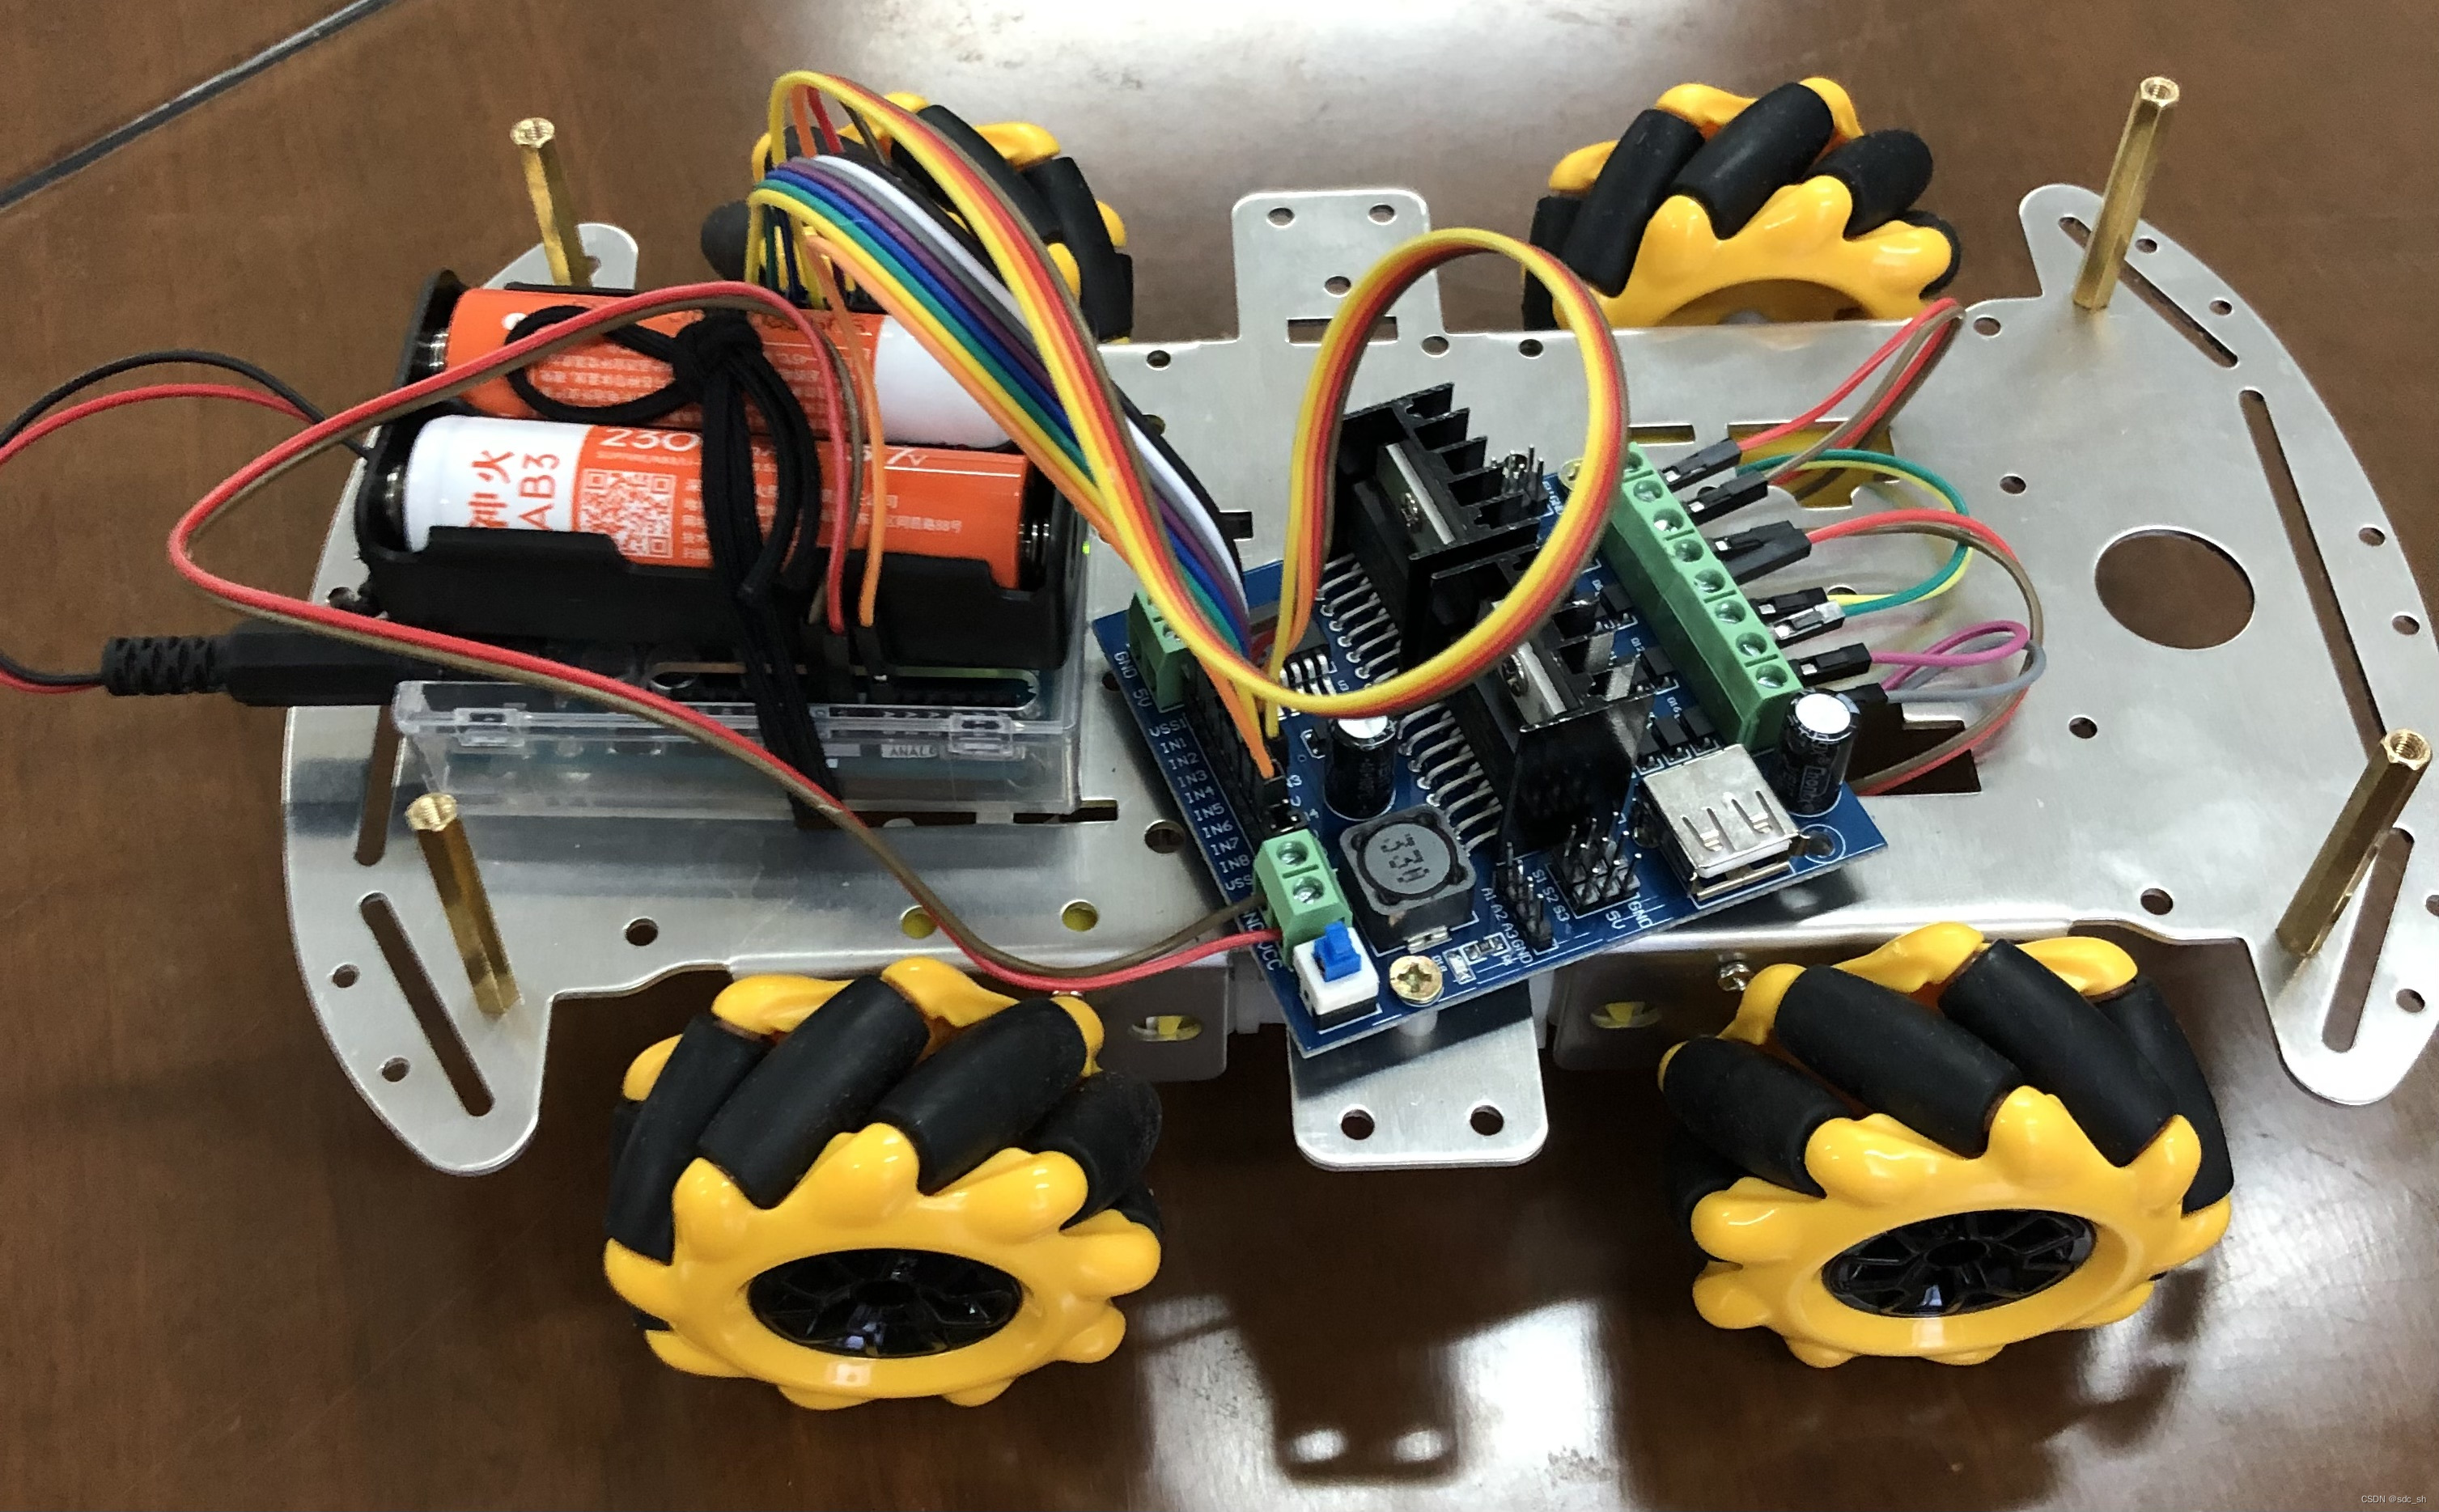
一、接线

二、使用步骤
int Left_motor_go=8;     //左电机前进(IN1)
int Left_motor_back=9;     //左电机后退(IN2)
int Right_motor_go=10;    // 右电机前进(IN3)
int Right_motor_back=11;    // 右电机后退(IN4)
char getstr;int moshi = 0;
#include <SoftwareSerial.h>
//这是软串口通讯arduino和esp8266-Mode连接的库函数
SoftwareSerial youSerial(50, 51); //RX=50,TX=51 需分配Mega 和 Mega 2560 上并非所有引脚都支持更改中断,因此只有以下引脚可用于 RX:10、11、12、13、14、15、50、51、52、53、A8 (62)、A9 (63)、A10 (64)、A11 (65)、A12 (66)、A13 (67)、A14 (68)、A15 (69)。void setup()
{//红外模块初始化//初始化电机驱动IO为输出方式pinMode(Left_motor_go,OUTPUT); // PIN 8 8脚无PWM功能pinMode(Left_motor_back,OUTPUT); // PIN 9 (PWM)pinMode(Right_motor_go,OUTPUT);// PIN 10 (PWM) pinMode(Right_motor_back,OUTPUT);// PIN 11 (PWM)Serial.begin(9600);youSerial.begin(9600);
}void run()     // 前进
{digitalWrite(Right_motor_go,HIGH);  // 右电机前进digitalWrite(Right_motor_back,LOW);     digitalWrite(Left_motor_go,HIGH);  // 左电机前进digitalWrite(Left_motor_back,LOW);analogWrite(Right_motor_go,200);//PWM比例0~255调速,左右轮差异略增减analogWrite(Right_motor_back,0); analogWrite(Left_motor_go,200);//PWM比例0~255调速,左右轮差异略增减analogWrite(Left_motor_back,0);
}
void back()     // 后退
{digitalWrite(Right_motor_go,LOW);  // 右电机后退digitalWrite(Right_motor_back,HIGH);     digitalWrite(Left_motor_go,LOW);  // 左电机后退digitalWrite(Left_motor_back,HIGH);analogWrite(Right_motor_go,0);//PWM比例0~255调速,左右轮差异略增减analogWrite(Right_motor_back,200); analogWrite(Left_motor_go,0);//PWM比例0~255调速,左右轮差异略增减analogWrite(Left_motor_back,200);
}
void left()     // 左转
{digitalWrite(Right_motor_go,HIGH);  // 右电机前进digitalWrite(Right_motor_back,LOW);     digitalWrite(Left_motor_go,LOW);  // 左电机后退digitalWrite(Left_motor_back,HIGH);analogWrite(Right_motor_go,200);//PWM比例0~255调速,左右轮差异略增减analogWrite(Right_motor_back,0); analogWrite(Left_motor_go,0);//PWM比例0~255调速,左右轮差异略增减analogWrite(Left_motor_back,100);//内圆,幅度小
}
void right()     // 右转
{digitalWrite(Right_motor_go,LOW);  // 右电机后退digitalWrite(Right_motor_back,HIGH);     digitalWrite(Left_motor_go,HIGH);  // 左电机前进digitalWrite(Left_motor_back,LOW);analogWrite(Right_motor_go,0);//PWM比例0~255调速,左右轮差异略增减analogWrite(Right_motor_back,100); analogWrite(Left_motor_go,200);//PWM比例0~255调速,左右轮差异略增减analogWrite(Left_motor_back,0);
}
void stop()     // 停止
{digitalWrite(Right_motor_go,LOW);  // 右电机停止digitalWrite(Right_motor_back,LOW);    analogWrite(Left_motor_go,0);//PWM比例0~255调速,左右轮差异略增减analogWrite(Left_motor_back,0); digitalWrite(Left_motor_go,LOW);  // 左电机停止digitalWrite(Left_motor_back,LOW);analogWrite(Left_motor_go,0);//PWM比例0~255调速,左右轮差异略增减analogWrite(Left_motor_back,0); analogWrite(Left_motor_go,0);//PWM比例0~255调速,左右轮差异略增减analogWrite(Left_motor_back,0);
}
void moshiqiehuang()
{}
void zhongzhi()
{}
void loop()
{if(youSerial.available() > 0){getstr=youSerial.read();}switch(getstr){case 'w': Serial.println("run");run();break;case 'a': Serial.println("left");left();break; case 'd': Serial.println("right");right();break;case 's': Serial.println("back");back();break;  case 't': Serial.println("stop");stop();break; case 'q':Serial.println("moshiqiehuang");
//     moshiqiehuang();break;case 'z':Serial.println("zhongzhi");zhongzhi();break;}
}
总结


