mongoose
elegant mongodb object modeling for node.js
https://mongoosejs.com/
安装 mongoose
npm i mongoose
基本示例
const mongoose = require("mongoose");// 1、连接 mongodb
let conn = mongoose.createConnection("mongodb://kaimo313:kaimo313@localhost:27017/user", {useNewUrlParser: true,useUnifiedTopology: true
});
conn.on("connected", () => {console.log("链接成功");
});// 2、Schema 骨架,根据这个骨架来创建内容,用来规范文档的
let StudentSchema = new mongoose.Schema({username: {type: String,required: true},password: String,age: Number,birthday: {type: Date,default: Date.now}},{collection: "Student" // 设置固定的名字}
);// 3、通过骨架来创建模型 -> 集合 db.student.insert()
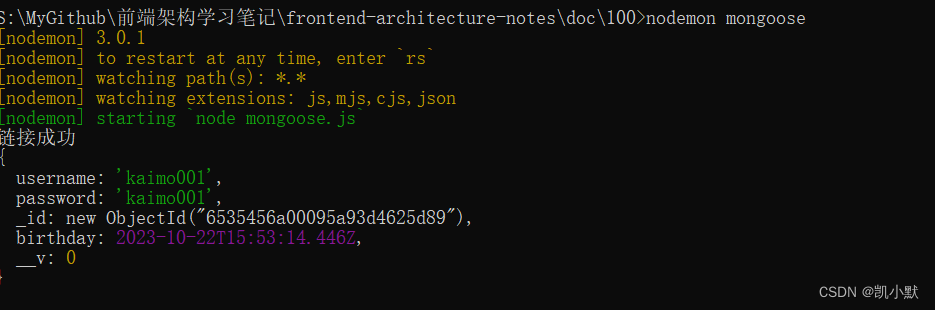
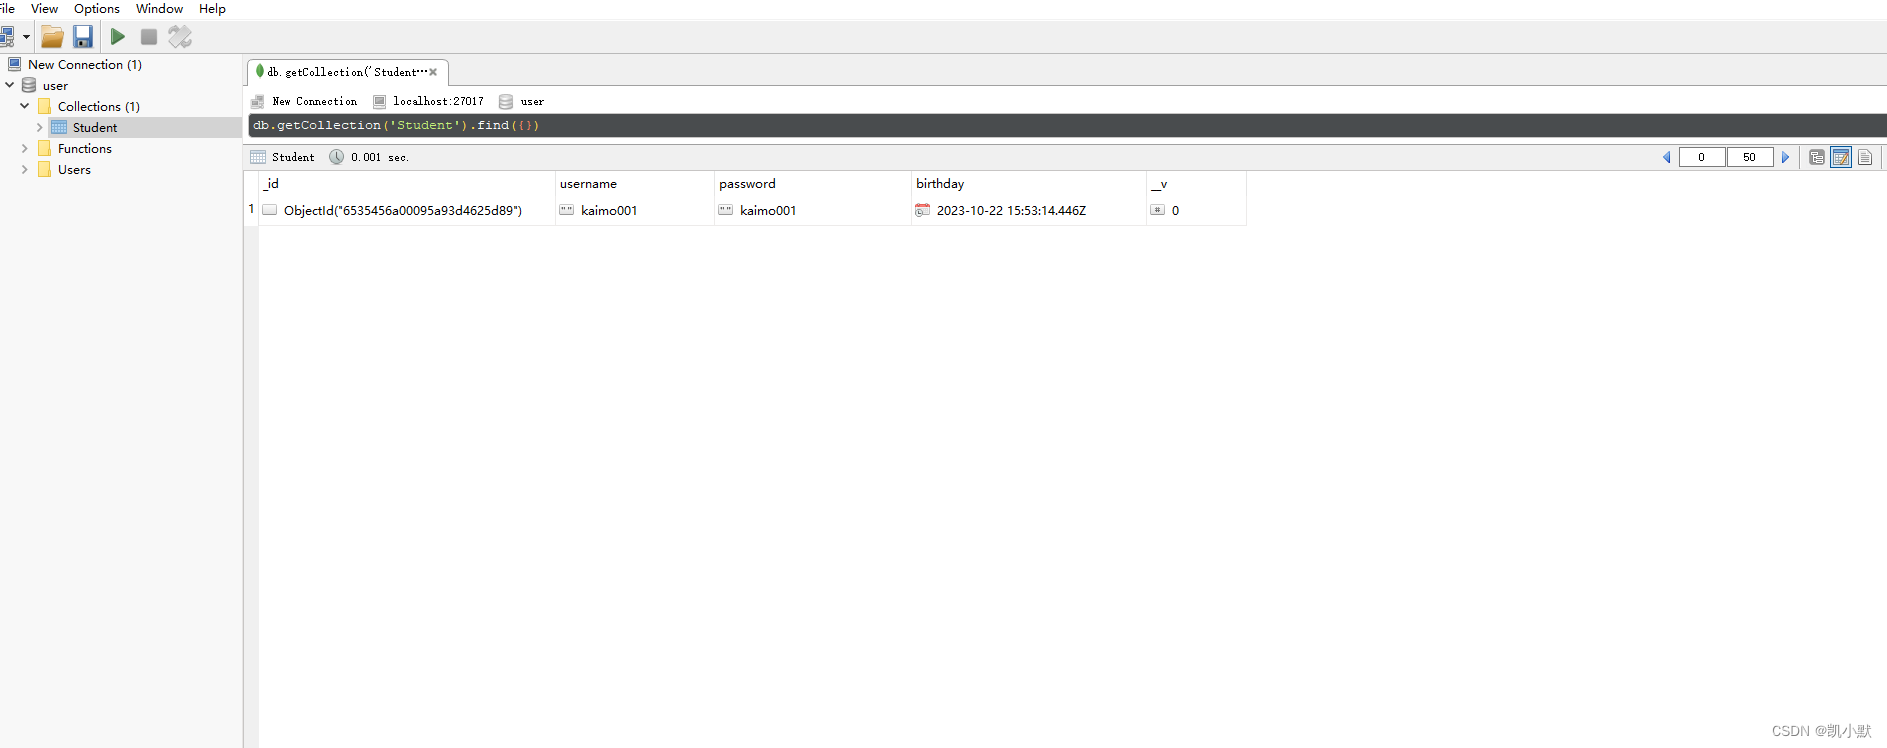
let Student = conn.model("Student", StudentSchema);// 4、模型可以操作数据
Student.create({username: "kaimo001",password: "kaimo001",test: "测试多余数据"
}).then((doc) => {console.log(doc);
});
启动
nodemon mongoose.js
新增改查,分页
const mongoose = require("mongoose");// 1、连接 mongodb
let conn = mongoose.createConnection("mongodb://kaimo313:kaimo313@localhost:27017/user", {useNewUrlParser: true,useUnifiedTopology: true
});
conn.on("connected", () => {console.log("链接成功");
});// 2、Schema 骨架,根据这个骨架来创建内容,用来规范文档的
let StudentSchema = new mongoose.Schema({username: {type: String,required: true},password: String,age: Number,birthday: {type: Date,default: Date.now},hobby: [String]},{collection: "Student" // 设置固定的名字}
);// 3、通过骨架来创建模型 -> 集合 db.student.insert()
let Student = conn.model("Student", StudentSchema);// 4、模型可以操作数据
(async () => {// 1) 批量插入:let arr = [];for (let i = 0; i < 4; i++) {arr.push({username: "kaimo" + i,password: "kaimo" + i,age: i});}let r1 = await Student.create(arr);console.log("批量插入----->", r1);// 2) 查询操作:findOne 是查询一个;find 是查询一组,查询的结果只采用某个几个字段// _id 比较特殊需要单独控制,username: 1, password: 1 表示显示该字段let r2 = await Student.findOne({ username: "kaimo1" }, { username: 1, password: 1 });// await Student.findById("652e81753e38c888970b3846");console.log("查询操作----->", r2);// 3) 修改操作 (查询条件,修改成的结果)// 修改所有年龄大于2的,年龄都加10// where 基本不用,性能差 ({$where: "age>2"})// 操作符:lt: 小于 gt:大于 lte:小于等于 lgt:大于等于 inc:递增let r3 = await Student.updateOne({ age: { $gt: 2 } }, { $inc: { age: 10 } });console.log("修改操作--r3--->", r3);// 加个字段,新增 setlet r4 = await Student.updateOne({ username: /kaimo1/ }, { $set: { password: "123456" } });console.log("修改操作--r4--->", r4);// 数组新增用 push,不重复添加用 addToSetlet r5 = await Student.updateOne({ username: /kaimo1/ }, { $push: { hobby: ["睡觉1", "睡觉2"] } });console.log("修改操作--r5--->", r5);// 多条件(or)删除(pop)数组第一个let r6 = await Student.updateOne({ $or: [{ username: /kaimo1/ }, { age: 1 }] }, { $pop: { hobby: -1 } });console.log("修改操作--r6--->", r6);// 4) 删除// Student.deleteOne(); Student.deleteMany();// 5) 分页查询let limit = 2; // 每页2条let currentPage = 2; // 当前是第2页let skip = (currentPage - 1) * limit;// find 返回的是一个游标,并不是一个结果;查询 -> 排序 -> 跳过 -> 限制let r7 = await Student.find({}).limit(limit).skip(skip).sort({ age: -1 });console.log("分页查询--r7--->", r7);
})();
连表查询
const mongoose = require("mongoose");// 1、连接 mongodb
let conn = mongoose.createConnection("mongodb://kaimo313:kaimo313@localhost:27017/user", {useNewUrlParser: true,useUnifiedTopology: true
});
conn.on("connected", () => {console.log("链接成功");
});// 学生模型
let StudentSchema = new mongoose.Schema({username: {type: String,required: true},password: String,age: Number,birthday: {type: Date,default: Date.now},hobby: [String]},{collection: "Student" // 设置固定的名字}
);let Student = conn.model("Student", StudentSchema);// 作业模型
let HomeWorkSchema = new mongoose.Schema({title: String,content: String,student: {ref: "Student",type: mongoose.SchemaTypes.ObjectId // 用户id}},{collection: "Homework" // 设置固定的名字}
);
let HomeWork = conn.model("Homework", HomeWorkSchema);(async () => {let user = await Student.create({ username: "kaimo666", password: "123456" });let home = await HomeWork.create({title: "第一篇作业",content: "第一篇作业的内容",student: user._id});console.log(home);// 连表查询let r = await HomeWork.findById("653538ed066785338ab72d81").populate("student", { username: 1 });console.log("连表查询--r-->", r);// 修改:通过模型来操作;通过文档自己操作自己r.title = "修改后的标题";await r.save();
})();