前言
本文是作为学习总结而写的一篇文章,也是方便以后有相关需求,可以直接拿来用,也算是记录吧,文中有一些文件的引入,没给出来,完整项目地址(后续代码仓库放这里)
1、layout解决方案
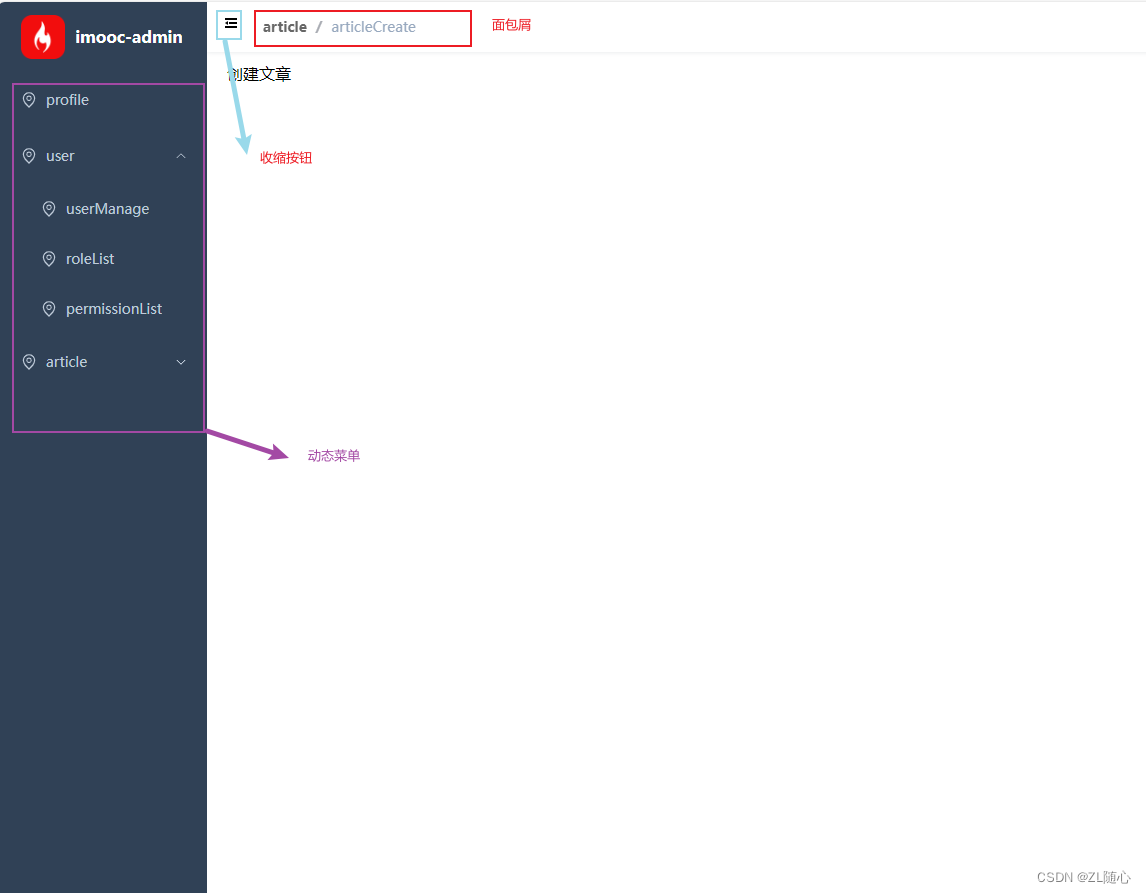
1.1、动态菜单
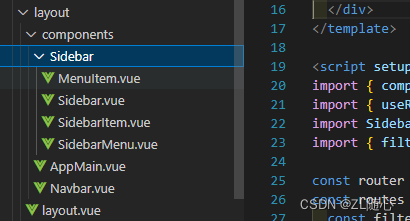
左侧整体文件 Sidebar.vue
<template><div class="a"><div class="logo-container"><el-avatar:size="logoHeight"shape="square"src="https://m.imooc.com/static/wap/static/common/img/logo-small@2x.png"/><span class="logo-title" v-if="$store.getters.sidebarOpened">imooc-admin</span></div><el-scrollbar><SidebarMenu :routes="routes" /></el-scrollbar></div>
</template><script setup>
import { computed } from 'vue'
import { useRouter } from 'vue-router'
import SidebarMenu from './SidebarMenu.vue'
import { filterRouters, generateMenus } from '@/utils/route'const router = useRouter()
const routes = computed(() => {const filterRoutes = filterRouters(router.getRoutes())return generateMenus(filterRoutes)
})const logoHeight = 44
</script><style lang="scss" scoped>
.logo-container {height: v-bind(logoHeight) + 'px';padding: 10px 0;display: flex;align-items: center;justify-content: center;.logo-title {margin-left: 10px;color: #fff;font-weight: 600;line-height: 50px;font-size: 16px;white-space: nowrap;}
}
</style>
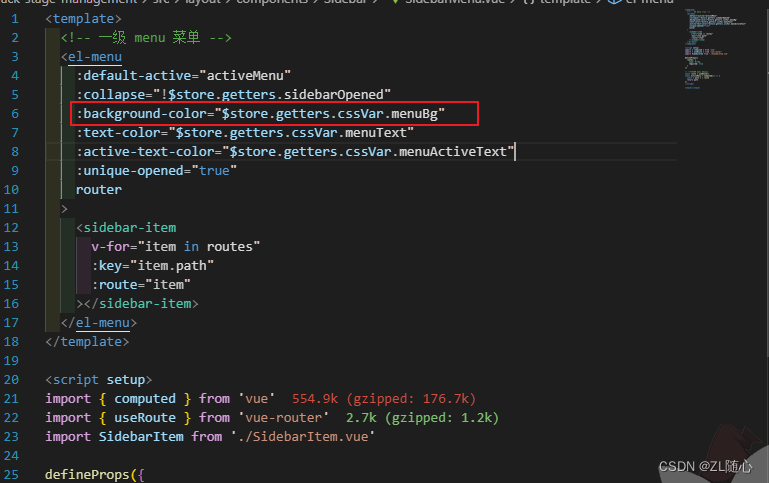
菜单文件 SidebarMenu.vue
<template><!-- 一级 menu 菜单 --><el-menu:collapse="!$store.getters.sidebarOpened":default-active="activeMenu":background-color="$store.getters.cssVar.menuBg":text-color="$store.getters.cssVar.menuText":active-text-color="$store.getters.cssVar.menuActiveText":unique-opened="true"router><sidebar-itemv-for="item in routes":key="item.path":route="item"></sidebar-item></el-menu>
</template><script setup>
import { computed } from 'vue'
import { useRoute } from 'vue-router'
import SidebarItem from './SidebarItem.vue'defineProps({routes: {type: Array,required: true}
})// 计算高亮 menu 的方法
const route = useRoute()
const activeMenu = computed(() => {const { path } = routereturn path
})
</script><style></style>
控制是子菜单还是菜单项文件 SidebarItem.vue
<template><!-- 支持渲染多级 menu 菜单 --><el-sub-menu v-if="route.children.length > 0" :index="route.path"><template #title><menu-item :title="route.meta.title" :icon="route.meta.icon"></menu-item></template><!-- 循环渲染 --><sidebar-itemv-for="item in route.children":key="item.path":route="item"></sidebar-item></el-sub-menu><!-- 渲染 item 项 --><el-menu-item v-else :index="route.path"><menu-item :title="route.meta.title" :icon="route.meta.icon"></menu-item></el-menu-item>
</template><script setup>
import MenuItem from './MenuItem.vue'
import { defineProps } from 'vue'
// 定义 props
defineProps({route: {type: Object,required: true}
})
</script>
显示菜单名字文件 MenuItem.vue
<template><el-icon><Location /></el-icon><span>{{ title }}</span>
</template><script setup>
import { Location } from '@element-plus/icons-vue'defineProps({title: {type: String,required: true},icon: {type: String,required: true}
})
</script>
1.2、动态面包屑
代码文件
<template><el-breadcrumb class="breadcrumb" separator="/"><transition-group name="breadcrumb"><el-breadcrumb-itemv-for="(item, index) in breadcrumbData":key="item.path"><!-- 不可点击项 --><span v-if="index === breadcrumbData.length - 1" class="no-redirect">{{item.meta.title}}</span><!-- 可点击项 --><a v-else class="redirect" @click.prevent="onLinkClick(item)">{{item.meta.title}}</a></el-breadcrumb-item></transition-group></el-breadcrumb>
</template><script setup>
import { ref, watch } from 'vue'
import { useRoute, useRouter } from 'vue-router'
import { useStore } from 'vuex'const route = useRoute()
// 生成数组数据
const breadcrumbData = ref([])
const getBreadcrumbData = () => {// route.matched 获取到匹配的路由// 比如 当前路由是 /article/create// 会匹配到 /article、/article/create 就可以用于面包屑点击跳转了breadcrumbData.value = route.matched.filter((item) => item.meta && item.meta.title)
}
// 监听路由变化时触发
watch(route,() => {getBreadcrumbData()},{immediate: true}
)// 处理点击事件
const router = useRouter()
const onLinkClick = (item) => {router.push(item.path)
}// 将来需要进行主题替换,所以这里获取下动态样式
const store = useStore()
const linkHoverColor = ref(store.getters.cssVar.menuBg)
</script><style lang="scss" scoped>
.breadcrumb {display: inline-block;font-size: 14px;line-height: 50px;margin-left: 8px;.redirect {color: #666;font-weight: 600;}.redirect:hover {// 将来需要进行主题替换,所以这里不去写死样式color: v-bind(linkHoverColor);}:deep(.no-redirect) {color: #97a8be;cursor: text;}
}
</style>
1.3、header部分
Navbar.vue 文件
<template><div class="navbar"><hamburger class="hamburger-container" /><Breadcrumb /><div class="right-menu"><!-- 头像 --><el-dropdown class="avatar-container" trigger="click"><div class="avatar-wrapper"><el-avatarshape="square":size="40":src="$store.getters.userInfo.avatar"></el-avatar><el-icon><Tools /></el-icon></div><template #dropdown><el-dropdown-menu class="user-dropdown"><router-link to="/"><el-dropdown-item> 首页 </el-dropdown-item></router-link><a target="_blank" href=""><el-dropdown-item>课程主页</el-dropdown-item></a><el-dropdown-item @click="logout" divided>退出登录</el-dropdown-item></el-dropdown-menu></template></el-dropdown></div></div>
</template><script setup>
import { Tools } from '@element-plus/icons-vue'
import { useStore } from 'vuex'
import Hamburger from '@/components/hamburger/hamburger.vue'
import Breadcrumb from '@/components/breadcrumb/breadcrumb.vue'const store = useStore()
const logout = () => {store.dispatch('user/logout')
}
</script><style lang="scss" scoped>
.navbar {height: 50px;overflow: hidden;position: relative;background: #fff;box-shadow: 0 1px 4px rgba(0, 21, 41, 0.08);.breadcrumb-container {float: left;}.hamburger-container {line-height: 46px;height: 100%;float: left;cursor: pointer;// hover 动画transition: background 0.5s;&:hover {background: rgba(0, 0, 0, 0.1);}}.right-menu {display: flex;align-items: center;float: right;padding-right: 16px;:deep(.avatar-container) {cursor: pointer;.avatar-wrapper {margin-top: 5px;position: relative;.el-avatar {--el-avatar-background-color: none;margin-right: 12px;}}}}
}
</style>
2、国际化、主题等通用解决方案
2.1、国际化
原理
- 通过一个变量来 控制 语言环境
- 所有语言环境下的数据源要 预先 定义好
- 通过一个方法来获取 当前语言 下 指定属性 的值
- 该值即为国际化下展示值
vue-i18n 使用流程
- 创建 messages 数据源
- 创建 locale 语言变量
- 初始化 i18n 实例
- 注册 i18n 实例
1、安装
javascript">npm install vue-i18n@next2、创建数据源 在src/i18n/index.js文件下
javascript">import { createI18n } from 'vue-i18n'const messages = {en: {msg: {test: 'hello world'}},zh: {msg: {test: '你好世界'}}
}const locale = 'en'const i18n = createI18n({// 使用 Composition API 模式,则需要将其设置为falselegacy: false,// 全局注入 $t 函数globalInjection: true,locale,messages
})export default i18n
3、在main.js中导入
javascript">import i18n from '@/i18n'4、在组件中使用
javascript">// i18n 是直接挂载到 vue的所以在html上用的话不用引入,直接用就行
{{ $t('msg.test') }}5、定义一个切换国际化的组件,主要是切换国际化,这里简单文字代替,实际使用的话就根据自己的需要搞,文件中有相关vuex代码,都会放在开头仓库里面
<template><el-dropdowntrigger="click"class="international"@command="handleSetLanguage"><div><el-tooltip :content="$t('msg.navBar.lang')" :effect="effect">{{ LANG[language] }}</el-tooltip></div><template #dropdown><el-dropdown-menu><el-dropdown-item :disabled="language === 'zh'" command="zh">中文</el-dropdown-item><el-dropdown-item :disabled="language === 'en'" command="en">English</el-dropdown-item></el-dropdown-menu></template></el-dropdown>
</template><script setup>
import { computed } from 'vue'
import { useStore } from 'vuex'
import { useI18n } from 'vue-i18n'
import { ElMessage } from 'element-plus'defineProps({effect: {type: String,default: 'dark',validator: function (value) {// 这个值必须匹配下列字符串中的一个return ['dark', 'light'].indexOf(value) !== -1}}
})const store = useStore()
const language = computed(() => store.getters.language)const LANG = {zh: '中文',en: 'English'
}
// 切换语言的方法
const i18n = useI18n()
const handleSetLanguage = (lang) => {i18n.locale.value = langstore.commit('app/setLanguage', lang)ElMessage.success('更新成功')
}
</script>
6、element-plus 国际化
关键步骤在App.vue文件这样配置即可
javascript"><template><ElConfigProvider :locale="elementLang"><router-view></router-view></ElConfigProvider>
</template><script setup>
import zhCn from 'element-plus/dist/locale/zh-cn.mjs'
import en from 'element-plus//dist/locale//en.mjs'
import { computed } from 'vue'
import { useStore } from 'vuex'
import { ElConfigProvider } from 'element-plus'const store = useStore()const elementLang = computed(() => {return store.getters.language === 'en' ? en : zhCn
})
</script><style lang="scss"></style>
plugins/element.js文件
javascript">import ElementPlus from 'element-plus'
import 'element-plus/dist/index.css'export default app => {app.use(ElementPlus)
}
在main.js 中引入使用
javascript">import installElementPlus from './plugins/element'const app = createApp(App)...
installElementPlus(app)
7、自定义语言包

index.js的内容
javascript">import { createI18n } from 'vue-i18n'
import mZhLocale from './lang/zh'
import mEnLocale from './lang/en'
import store from '@/store'const messages = {en: {msg: {...mEnLocale}},zh: {msg: {...mZhLocale}}
}/*** 返回当前 lang*/
function getLanguage() {return store?.getters?.language
}
const i18n = createI18n({// 使用 Composition API 模式,则需要将其设置为falselegacy: false,// 全局注入 $t 函数globalInjection: true,locale: 'zh',messages
})export default i18n
使用就是像下面这样,为什么都要msg.模块.字段, msg开头就是因为上面就是把国际化的内容放到msg下的

然后其他模块类似这么处理即可
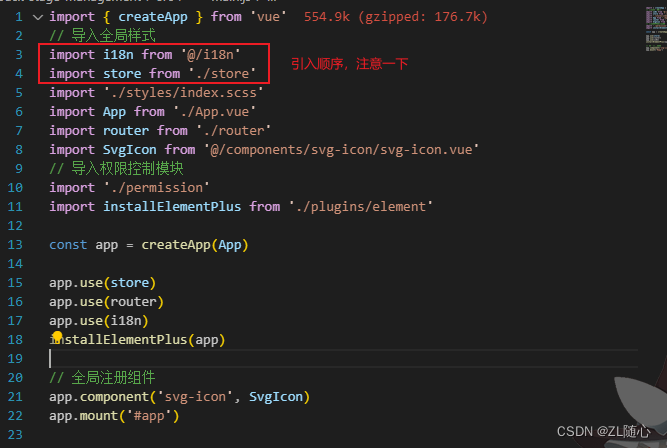
注意一下引入顺序
2.2、主题切换
原理
在 scss中,我们可以通过 $变量名:变量值 的方式定义 css 变量,然后通过该 css 变量 来去指定某一块 DOM 对应的颜色,当我改变了该 css 变量 的值,那么所对应的 DOM 颜色也会同步发生变化,当大量的 DOM 都依赖于这个 css 变量 设置颜色时,我们只需要改变这个 css 变量,那么所有 DOM 的颜色都会发生变化,所谓的 主题切换 就可以实现了,这个就是实现 主题切换 的原理。
而在我们的项目中想要实现主题切换,需要同时处理两个方面的内容:
1. element-plus 主题
2. 非 element-plus 主题
那么根据以上关键信息,我们就可以得出对应的实现方案
1. 创建一个组件 ThemeSelect 用来处理修改之后的 css 变量 的值(当然如果是只需要黑白两种主题,也可el-drapdown)
2. 根据新值修改 element-plus 主题色
3. 根据新值修改非 element-plus 主题色
其实主要就是修改样式 element-plus比较复杂
实现步骤:
1. 获取当前 element-plus 的所有样式
2. 定义我们要替换之后的样式
3. 在原样式中,利用正则替换新样式
4. 把替换后的样式写入到 style 标签中
需要用到两个库
rgb-hex:转换RGB(A)颜色为十六进制
css-color-function:在CSS中提出的颜色函数的解析器和转换器
涉及到的文件
utils/theme.js
javascript">import color from 'css-color-function'
import rgbHex from 'rgb-hex'
import formula from '@/constant/formula.json'
import axios from 'axios'import version from 'element-plus/package.json'/*** 写入新样式到 style* @param {*} elNewStyle  element-plus 的新样式* @param {*} isNewStyleTag 是否生成新的 style 标签*/
export const writeNewStyle = elNewStyle => {const style = document.createElement('style')style.innerText = elNewStyledocument.head.appendChild(style)
}/*** 根据主色值,生成最新的样式表*/
export const generateNewStyle = async primaryColor => {const colors = generateColors(primaryColor)let cssText = await getOriginalStyle()// 遍历生成的样式表,在 CSS 的原样式中进行全局替换Object.keys(colors).forEach(key => {cssText = cssText.replace(new RegExp('(:|\\s+)' + key, 'g'),'$1' + colors[key])})return cssText
}/*** 根据主色生成色值表*/
export const generateColors = primary => {if (!primary) returnconst colors = {primary}Object.keys(formula).forEach(key => {const value = formula[key].replace(/primary/g, primary)colors[key] = '#' + rgbHex(color.convert(value))})return colors
}/*** 获取当前 element-plus 的默认样式表*/
const getOriginalStyle = async () => {const url = `https://unpkg.com/element-plus@${version.version}/dist/index.css`const { data } = await axios(url)// 把获取到的数据筛选为原样式模板return getStyleTemplate(data)
}/*** 返回 style 的 template*/
const getStyleTemplate = data => {// element-plus 默认色值const colorMap = {'#3a8ee6': 'shade-1','#409eff': 'primary','#53a8ff': 'light-1','#66b1ff': 'light-2','#79bbff': 'light-3','#8cc5ff': 'light-4','#a0cfff': 'light-5','#b3d8ff': 'light-6','#c6e2ff': 'light-7','#d9ecff': 'light-8','#ecf5ff': 'light-9'}// 根据默认色值为要替换的色值打上标记Object.keys(colorMap).forEach(key => {const value = colorMap[key]data = data.replace(new RegExp(key, 'ig'), value)})return data
}
store/modules/theme.js
javascript">import { getItem, setItem } from '@/utils/storage'
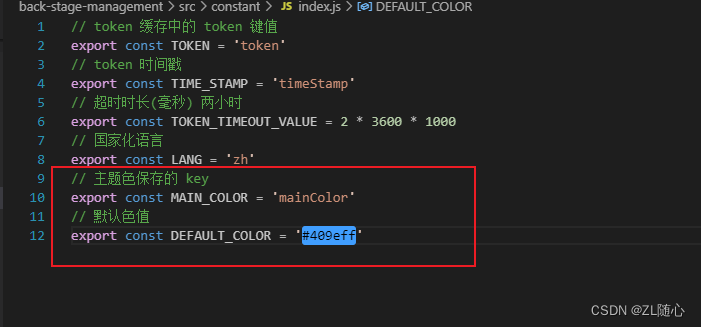
import { MAIN_COLOR, DEFAULT_COLOR } from '@/constant'
import variables from '@/styles/variables.module.scss'export default {namespaced: true,state: () => ({mainColor: getItem(MAIN_COLOR) || DEFAULT_COLOR,variables}),mutations: {/*** 设置主题色*/setMainColor(state, newColor) {state.variables.menuBg = newColorstate.mainColor = newColorsetItem(MAIN_COLOR, newColor)}}
}store/getters/index.js

constant/formula.json
javascript">{"shade-1": "color(primary shade(10%))","light-1": "color(primary tint(10%))","light-2": "color(primary tint(20%))","light-3": "color(primary tint(30%))","light-4": "color(primary tint(40%))","light-5": "color(primary tint(50%))","light-6": "color(primary tint(60%))","light-7": "color(primary tint(70%))","light-8": "color(primary tint(80%))","light-9": "color(primary tint(90%))","subMenuHover": "color(primary tint(70%))","subMenuBg": "color(primary tint(80%))","menuHover": "color(primary tint(90%))","menuBg": "color(primary)"
}
index.js 文件
layout.vue文件

SidebarMenu.vue
小总结
对于 element-plus:因为 element-plus 是第三方的包,所以它 不是完全可控 的,那么对于这种最简单直白的方案,就是直接拿到它编译后的 css 进行色值替换,利用 style 内部样式表优先级高于 外部样式表 的特性,来进行主题替换
对于自定义主题:因为自定义主题是 完全可控 的,所以我们实现起来就轻松很多,只需要修改对应的 scss 变量即可
2.3、全屏
使用screenfull 库
安装
javascript">npm i screenfull封装一个处理全屏的组件,这里图标临时的,具体的需要根据自己项目实际需求来
javascript"><template><div><el-icon @click="onToggle"><component :is="isFullscreen ? Aim : FullScreen" /></el-icon></div>
</template><script setup>
import { FullScreen, Aim } from '@element-plus/icons-vue'
import { ref, onMounted, onUnmounted } from 'vue'
import screenfull from 'screenfull'// 是否全屏
const isFullscreen = ref(false)// 监听变化
const change = () => {isFullscreen.value = screenfull.isFullscreen
}// 切换事件
const onToggle = () => {screenfull.toggle()
}// 设置侦听器
onMounted(() => {screenfull.on('change', change)
})// 删除侦听器
onUnmounted(() => {screenfull.off('change', change)
})
</script><style lang="scss" scoped></style>
2.4、头部搜索
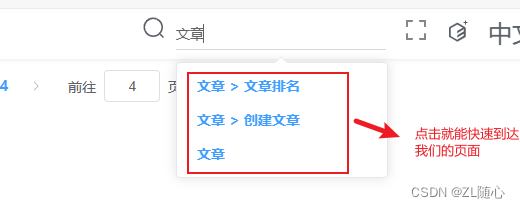
整个 headerSearch 其实可以分为三个核心的功能点:
- 根据指定内容对所有页面进行检索
- 以 select 形式展示检索出的页面
- 通过检索页面可快速进入对应页面
方案:对照着三个核心功能点和原理,想要指定对应的实现方案是非常简单的一件事情了
- 创建 headerSearch 组件,用作样式展示和用户输入内容获取
- 获取所有的页面数据,用作被检索的数据源
- 根据用户输入内容在数据源中进行 [模糊搜索](https://fusejs.io/)
- 把搜索到的内容以 select 进行展示
- 监听 select 的 change 事件,完成对应跳转
其主要作用就是快速搜索我们的页面,然后进入页面,效果类似这样
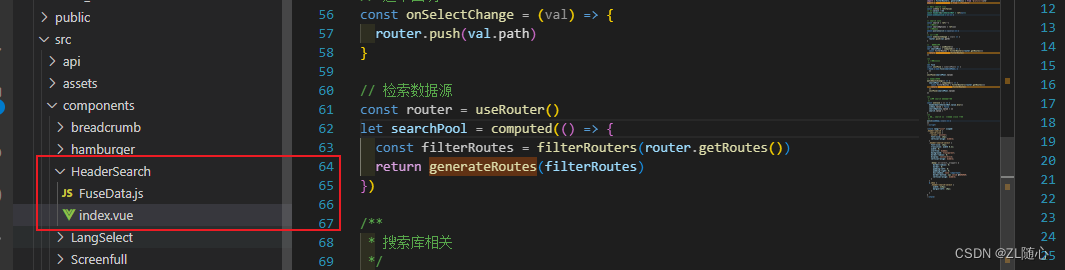
index.vue文件
javascript"><template><div :class="{ show: isShow }" class="header-search"><el-icon @click.stop="onShowClick"><Search /></el-icon><el-selectref="headerSearchSelectRef"class="header-search-select"v-model="search"filterabledefault-first-optionremoteplaceholder="Search":remote-method="querySearch"@change="onSelectChange"><el-optionv-for="option in searchOptions":key="option.item.path":label="option.item.title.join(' > ')":value="option.item"></el-option></el-select></div>
</template><script setup>
import { ref, computed, watch } from 'vue'
import { useRouter } from 'vue-router'
import { Search } from '@element-plus/icons-vue'
import Fuse from 'fuse.js'
import { watchSwitchLang } from '@/utils/i18n'
import { filterRouters, generateMenus } from '@/utils/route'
import { generateRoutes } from './FuseData'// 控制 search 显示
const isShow = ref(false)
// el-select 实例
const headerSearchSelectRef = ref(null)
const onShowClick = () => {isShow.value = !isShow.valueheaderSearchSelectRef.value.focus()
}// search 相关
const search = ref('')
// 搜索结果
const searchOptions = ref([])
// 搜索方法
const querySearch = (query) => {if (query !== '') {searchOptions.value = fuse.search(query)} else {searchOptions.value = []}
}
// 选中回调
const onSelectChange = (val) => {router.push(val.path)
}// 检索数据源
const router = useRouter()
let searchPool = computed(() => {const filterRoutes = filterRouters(router.getRoutes())return generateRoutes(filterRoutes)
})/*** 搜索库相关*/
let fuse
const initFuse = (searchPool) => {fuse = new Fuse(searchPool, {// 是否按优先级进行排序shouldSort: true,// 匹配长度超过这个值的才会被认为是匹配的minMatchCharLength: 1,// 将被搜索的键列表。 这支持嵌套路径、加权搜索、在字符串和对象数组中搜索。// name:搜索的键// weight:对应的权重keys: [{name: 'title',weight: 0.7},{name: 'path',weight: 0.3}]})
}
initFuse(searchPool.value)// 处理国际化
watchSwitchLang(() => {searchPool = computed(() => {const filterRoutes = filterRouters(router.getRoutes())return generateRoutes(filterRoutes)})initFuse(searchPool.value)
})/*** 关闭 search 的处理事件*/
const onClose = () => {headerSearchSelectRef.value.blur()isShow.value = falsesearchOptions.value = []search.value = ''
}
/*** 监听 search 打开,处理 close 事件*/
watch(isShow, (val) => {if (val) {document.body.addEventListener('click', onClose)} else {document.body.removeEventListener('click', onClose)}
})
</script><style lang="scss" scoped>
.header-search {.search-icon {cursor: pointer;font-size: 18px;vertical-align: middle;}.header-search-select {font-size: 18px;transition: width 0.2s;width: 0;overflow: hidden;background: transparent;border-radius: 0;display: inline-block;vertical-align: middle;:deep(.el-select__wrapper) {border-radius: 0;border: 0;padding-left: 0;padding-right: 0;box-shadow: none !important;border-bottom: 1px solid #d9d9d9;vertical-align: middle;}}&.show {.header-search-select {width: 210px;margin-left: 10px;}}
}
</style>
FuseData.js文件
javascript">import path from 'path'
import i18n from '@/i18n'
import { resolve } from "@/utils/route.js"
/*** 筛选出可供搜索的路由对象* @param routes 路由表* @param basePath 基础路径,默认为 /* @param prefixTitle*/
export const generateRoutes = (routes, basePath = '/', prefixTitle = []) => {// 创建 result 数据let res = []// 循环 routes 路由for (const route of routes) {// 创建包含 path 和 title 的 itemconst data = {path: resolve(basePath, route.path),title: [...prefixTitle]}// 当前存在 meta 时,使用 i18n 解析国际化数据,组合成新的 title 内容// 动态路由不允许被搜索// 匹配动态路由的正则const re = /.*\/:.*/if (route.meta && route.meta.title && !re.exec(route.path)) {const i18ntitle = i18n.global.t(`msg.route.${route.meta.title}`)data.title = [...data.title, i18ntitle]res.push(data)}// 存在 children 时,迭代调用if (route.children) {const tempRoutes = generateRoutes(route.children, data.path, data.title)if (tempRoutes.length >= 1) {res = [...res, ...tempRoutes]}}}return res
}
utils/i18n.js 增加下面的内容
javascript">import { watch } from 'vue'
import store from '@/store'/**** @param  {...any} cbs 所有的回调*/
export function watchSwitchLang(...cbs) {watch(() => store.getters.language,() => {cbs?.forEach(cb => cb(store.getters.language))})
}
2.5、tabViews
实现方案
- 创建 tagsView 组件:用来处理 tags 的展示
- 处理基于路由的动态过渡,在 AppMain 中进行:用于处理 view 的部分
整个的方案就是这么两大部,但是其中我们还需要处理一些细节相关的,**完整的方案为**:
1. 监听路由变化,组成用于渲染 tags 的数据源
2. 创建 tags 组件,根据数据源渲染 tag,渲染出来的 tags 需要同时具备
1. 国际化 title
2. 路由跳转
3. 处理鼠标右键效果,根据右键处理对应数据源
4. 处理基于路由的动态过渡
创建数据源
在contant/index.js 文件下创建
javascript">// tags
export const TAGS_VIEW = 'tagsView'
在 store/app 中创建 tagsViewList
javascript">import { LANG, TAGS_VIEW } from '@/constant'
import { getItem, setItem } from '@/utils/storage'
export default {namespaced: true,state: () => ({...tagsViewList: getItem(TAGS_VIEW) || []}),mutations: {.../*** 添加 tags*/addTagsViewList(state, tag) {const isFind = state.tagsViewList.find(item => {return item.path === tag.path})// 处理重复if (!isFind) {state.tagsViewList.push(tag)setItem(TAGS_VIEW, state.tagsViewList)}}},actions: {}
}
创建 utils/tags.js
在 appmain 中监听路由的变化
javascript"><script setup>
import { watch } from 'vue'
import { isTags } from '@/utils/tags.js'
import { generateTitle } from '@/utils/i18n'
import { useRoute } from 'vue-router'
import { useStore } from 'vuex'const route = useRoute()/*** 生成 title*/
const getTitle = route => {let title = ''if (!route.meta) {// 处理无 meta 的路由const pathArr = route.path.split('/')title = pathArr[pathArr.length - 1]} else {title = generateTitle(route.meta.title)}return title
}/*** 监听路由变化*/
const store = useStore()
watch(route,(to, from) => {if (!isTags(to.path)) returnconst { fullPath, meta, name, params, path, query } = tostore.commit('app/addTagsViewList', {fullPath,meta,name,params,path,query,title: getTitle(to)})},{immediate: true}
)
</script>
在 store/ getters/index.js 添加
javascript"> tagsViewList: state => state.app.tagsViewList在conponents/tagsView 创建 index.vue组件
javascript"><template><div class="tags-view-container"><el-scrollbar class="tags-view-wrapper"><router-linkclass="tags-view-item":class="isActive(tag) ? 'active' : ''":style="{backgroundColor: isActive(tag) ? $store.getters.cssVar.menuBg : '',borderColor: isActive(tag) ? $store.getters.cssVar.menuBg : ''}"v-for="(tag, index) in $store.getters.tagsViewList":key="tag.fullPath":to="{ path: tag.fullPath }"@contextmenu.prevent="openMenu($event, index)">{{ tag.title }}<el-iconv-show="!isActive(tag)"@click.prevent.stop="onCloseClick(index)"><Close /></el-icon></router-link></el-scrollbar><context-menuv-show="visible":style="menuStyle":index="selectIndex"></context-menu></div>
</template><script setup>
import { ref, reactive, watch } from 'vue'
import { useRoute } from 'vue-router'
import { Close } from '@element-plus/icons-vue'
import ContextMenu from './ContextMenu.vue'
import { useStore } from 'vuex'const route = useRoute()/*** 是否被选中*/
const isActive = (tag) => {console.log('tag.path === route.path', tag.path === route.path)return tag.path === route.path
}// contextMenu 相关
const selectIndex = ref(0)
const visible = ref(false)
const menuStyle = reactive({left: 0,top: 0
})
/*** 展示 menu*/
const openMenu = (e, index) => {const { x, y } = emenuStyle.left = x + 'px'menuStyle.top = y + 'px'selectIndex.value = indexvisible.value = true
}
/*** 关闭 menu*/
const closeMenu = () => {visible.value = false
}/*** 监听变化*/
watch(visible, (val) => {if (val) {document.body.addEventListener('click', closeMenu)} else {document.body.removeEventListener('click', closeMenu)}
})
/*** 关闭 tag 的点击事件*/
const store = useStore()
const onCloseClick = (index) => {store.commit('app/removeTagsView', {type: 'index',index: index})
}
</script><style lang="scss" scoped>
.tags-view-container {height: 34px;width: 100%;background: #fff;border-bottom: 1px solid #d8dce5;box-shadow:0 1px 3px 0 rgba(0, 0, 0, 0.12),0 0 3px 0 rgba(0, 0, 0, 0.04);.tags-view-item {display: inline-block;position: relative;cursor: pointer;height: 26px;line-height: 26px;border: 1px solid #d8dce5;color: #495060;background: #fff;padding: 0 8px;font-size: 12px;margin-left: 5px;margin-top: 4px;&:first-of-type {margin-left: 15px;}&:last-of-type {margin-right: 15px;}&.active {color: #fff;&::before {content: '';background: #fff;display: inline-block;width: 8px;height: 8px;border-radius: 50%;position: relative;margin-right: 4px;}}// close 按钮.el-icon-close {width: 16px;height: 16px;line-height: 10px;vertical-align: 2px;border-radius: 50%;text-align: center;transition: all 0.3s cubic-bezier(0.645, 0.045, 0.355, 1);transform-origin: 100% 50%;&:before {transform: scale(0.6);display: inline-block;vertical-align: -3px;}&:hover {background-color: #b4bccc;color: #fff;}}}
}
</style>
在layout/layout.vue 中引入
javascript"><div class="fixed-header"><!-- 顶部的 navbar --><navbar /><!-- tags --><tags-view></tags-view>
</div>import TagsView from '@/components/TagsView.index.vue'
tagsView 的国际化处理可以理解为修改现有 tags 的 title
1. 监听到语言变化
2. 国际化对应的 title 即可
在 store/app 中,创建修改 ttile 的 mutations
javascript">/**
* 为指定的 tag 修改 title
*/
changeTagsView(state, { index, tag }) {state.tagsViewList[index] = tagsetItem(TAGS_VIEW, state.tagsViewList)
}
在 AppMain.vue
javascript"><template><div class="app-main"><div class="app-main"><router-view v-slot="{ Component, route }"><transition name="fade-transform" mode="out-in"><keep-alive><component :is="Component" :key="route.path" /></keep-alive></transition></router-view></div></div>
</template><script setup>
import { watch } from 'vue'
import { useRoute } from 'vue-router'
import { useStore } from 'vuex'
import { isTags } from '@/utils/tags.js'
import { generateTitle, watchSwitchLang } from '@/utils/i18n'const route = useRoute()/*** 生成 title*/
const getTitle = (route) => {let title = ''if (!route.meta) {// 处理无 meta 的路由const pathArr = route.path.split('/')title = pathArr[pathArr.length - 1]} else {title = generateTitle(route.meta.title)}return title
}/*** 监听路由变化*/
const store = useStore()
watch(route,(to, from) => {if (!isTags(to.path)) returnconst { fullPath, meta, name, params, path, query } = tostore.commit('app/addTagsViewList', {fullPath,meta,name,params,path,query,title: getTitle(to)})},{immediate: true}
)/*** 国际化 tags*/
watchSwitchLang(() => {store.getters.tagsViewList.forEach((route, index) => {store.commit('app/changeTagsView', {index,tag: {...route,title: getTitle(route)}})})
})
</script><style lang="scss" scoped>
.app-main {min-height: calc(100vh - 50px - 43px);width: 100%;padding: 104px 20px 20px 20px;position: relative;overflow: hidden;padding: 61px 20px 20px 20px;box-sizing: border-box;
}
</style>
contextMenu 为 鼠标右键事件
- contextMenu 的展示
- 右键项对应逻辑处理
创建 components/TagsView/ContextMenu.vue组件 组件,作为右键展示部分
javascript"><template><ul class="context-menu-container"><li @click="onRefreshClick">{{ $t('msg.tagsView.refresh') }}</li><li @click="onCloseRightClick">{{ $t('msg.tagsView.closeRight') }}</li><li @click="onCloseOtherClick">{{ $t('msg.tagsView.closeOther') }}</li></ul>
</template><script setup>
import { defineProps } from 'vue'
import { useRouter } from 'vue-router'
import { useStore } from 'vuex'const props = defineProps({index: {type: Number,required: true}
})const router = useRouter()
const onRefreshClick = () => {router.go(0)
}const store = useStore()
const onCloseRightClick = () => {store.commit('app/removeTagsView', {type: 'right',index: props.index})
}const onCloseOtherClick = () => {store.commit('app/removeTagsView', {type: 'other',index: props.index})
}
</script><style lang="scss" scoped>
.context-menu-container {position: fixed;background: #fff;z-index: 3000;list-style-type: none;padding: 5px 0;border-radius: 4px;font-size: 12px;font-weight: 400;color: #333;box-shadow: 2px 2px 3px 0 rgba(0, 0, 0, 0.3);li {margin: 0;padding: 7px 16px;cursor: pointer;&:hover {background: #eee;}}
}
</style>
在styles/transition.scss 增加下面样式
/* fade-transform */
.fade-transform-leave-active,
.fade-transform-enter-active {transition: all 0.5s;
}.fade-transform-enter-from {opacity: 0;transform: translateX(-30px);
}.fade-transform-leave-to {opacity: 0;transform: translateX(30px);
}
2.6、Guide 引导
guide 指的就是 引导页
流程
- 高亮某一块指定的样式
- 在高亮的样式处通过文本展示内容
- 用户可以进行下一次高亮或者关闭事件
安装 driver.js
javascript">npm i driver.jscomponents/Guide.vue 组件
javascript"><template><div><el-tooltip :content="$t('msg.navBar.guide')"><el-icon id="guide-start"><Guide /></el-icon></el-tooltip></div>
</template><script setup>
import { onMounted } from 'vue'
import { useI18n } from 'vue-i18n'
import { driver } from 'driver.js'
import 'driver.js/dist/driver.css'
import { Guide } from '@element-plus/icons-vue'
import steps from './steps'const i18n = useI18n()onMounted(() => {const driverObj = driver({showProgress: true,steps: steps(i18n)})driverObj.drive()
})
</script><style scoped></style>
在navbar 中导入该组件
javascript"><guide class="right-menu-item hover-effect" />import Guide from '@/components/Guide/index.vue'steps.js 文件里面
javascript">const steps = i18n => {return [{element: '#guide-start',popover: {title: i18n.t('msg.guide.guideTitle'),description: i18n.t('msg.guide.guideDesc'),position: 'bottom-right'}},{element: '#guide-hamburger',popover: {title: i18n.t('msg.guide.hamburgerTitle'),description: i18n.t('msg.guide.hamburgerDesc')}},{element: '#guide-breadcrumb',popover: {title: i18n.t('msg.guide.breadcrumbTitle'),description: i18n.t('msg.guide.breadcrumbDesc')}},{element: '#guide-search',popover: {title: i18n.t('msg.guide.searchTitle'),description: i18n.t('msg.guide.searchDesc'),position: 'bottom-right'}},{element: '#guide-full',popover: {title: i18n.t('msg.guide.fullTitle'),description: i18n.t('msg.guide.fullDesc'),position: 'bottom-right'}},{element: '#guide-theme',popover: {title: i18n.t('msg.guide.themeTitle'),description: i18n.t('msg.guide.themeDesc'),position: 'bottom-right'}},{element: '#guide-lang',popover: {title: i18n.t('msg.guide.langTitle'),description: i18n.t('msg.guide.langDesc'),position: 'bottom-right'}},{element: '#guide-tags',popover: {title: i18n.t('msg.guide.tagTitle'),description: i18n.t('msg.guide.tagDesc')}},{element: '#guide-sidebar',popover: {title: i18n.t('msg.guide.sidebarTitle'),description: i18n.t('msg.guide.sidebarDesc'),position: 'right-center'}}]
}
export default steps
最后一步就是找到你需要在那个元素展示这些指引了,就将上面element 对应的id绑定到对应的元素,例如

其他元素也是如此即可
3、个人中心模块
根据功能划分,整个项目应该包含 4 个组件,分别对应着 4 个功能。
所以,我们想要完成 个人中心模块基本布局 那么就需要先创建出这四个组件
1. 在 views/profile/components 下创建 项目介绍 组件 ProjectCard
2. 在 views/profile/components 下创建 功能 组件 feature
3. 在 views/profile/components 下创建 章节 组件 chapter
4. 在 views/profile/components 下创建 作者 组件 author
5. 进入到 views/profile/index.vue 页面,绘制基本布局结构
效果
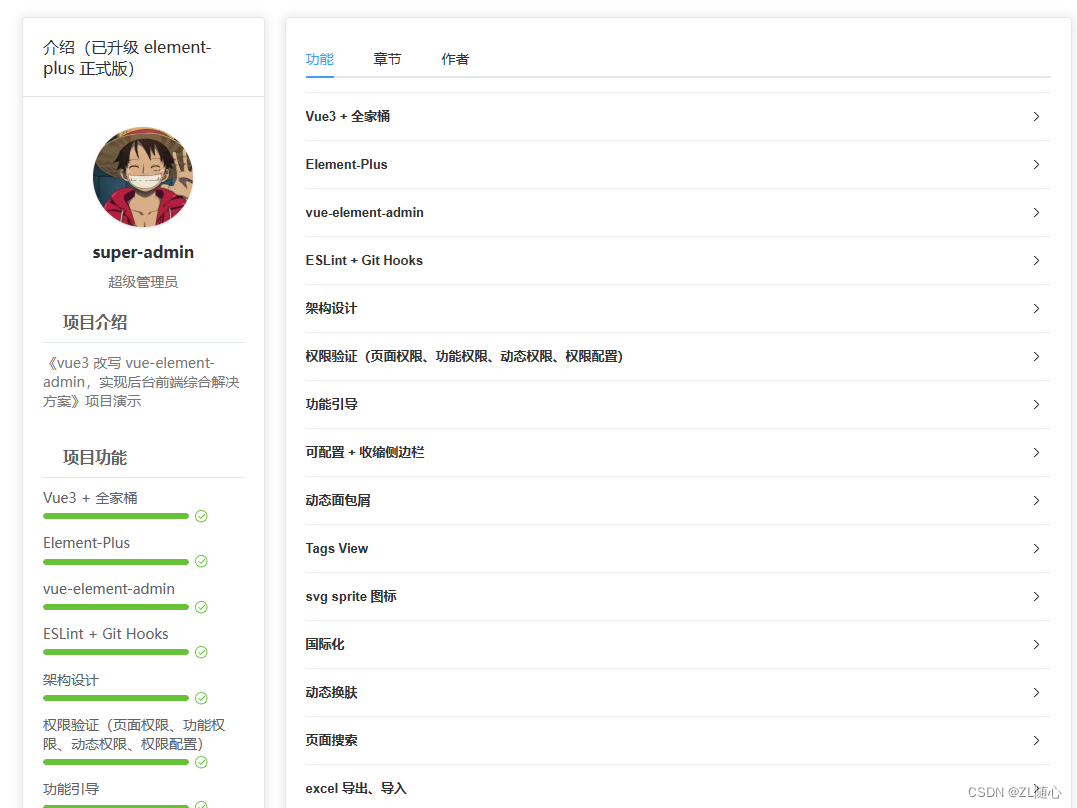
3.1、入口组件、即index.vue组件
javascript"><template><div class="my-container"><el-row><el-col :span="6"><project-card class="user-card" :features="featureData"></project-card></el-col><el-col :span="18"><el-card><el-tabs v-model="activeName"><el-tab-pane :label="$t('msg.profile.feature')" name="feature"><feature :features="featureData" /></el-tab-pane><el-tab-pane :label="$t('msg.profile.chapter')" name="chapter"><chapter /></el-tab-pane><el-tab-pane :label="$t('msg.profile.author')" name="author"><author /></el-tab-pane></el-tabs></el-card></el-col></el-row></div>
</template><script setup>
import ProjectCard from './components/ProjectCard.vue'
import Chapter from './components/Chapter.vue'
// eslint-disable-next-line
import Feature from './components/Feature.vue'
import Author from './components/Author.vue'
import { ref } from 'vue'
import { feature } from '@/api/user'
import { watchSwitchLang } from '@/utils/i18n'const activeName = ref('feature')const featureData = ref([])
const getFeatureData = async () => {featureData.value = await feature()
}
getFeatureData()
// 监听语言切换
watchSwitchLang(getFeatureData)
</script><style lang="scss" scoped>
.my-container {.user-card {margin-right: 20px;}
}
</style>
3.2、ProjectCard 组件
javascript"><template><el-card class="user-container"><template #header><div class="header"><span>{{ $t('msg.profile.introduce') }}</span></div></template><div class="user-profile"><!-- 头像 --><div class="box-center"><pan-thumb:image="$store.getters.userInfo.avatar":height="'100px'":width="'100px'":hoverable="false"><div>Hello</div>{{ $store.getters.userInfo.title }}</pan-thumb></div><!-- 姓名 && 角色 --><div class="box-center"><div class="user-name text-center">{{ $store.getters.userInfo.username }}</div><div class="user-role text-center text-muted">{{ $store.getters.userInfo.title }}</div></div></div><!-- 简介 --><div class="project-bio"><div class="project-bio-section"><div class="project-bio-section-header"><el-icon><Document /></el-icon><span>{{ $t('msg.profile.projectIntroduction') }}</span></div><div class="project-bio-section-body"><div class="text-muted">{{ $t('msg.profile.muted') }}</div></div></div><div class="project-bio-section"><div class="project-bio-section-header"><el-icon><Calendar /></el-icon><span>{{ $t('msg.profile.projectFunction') }} </span></div><div class="project-bio-section-body"><div class="progress-item" v-for="item in features" :key="item.id"><div>{{ item.title }}</div><el-progress :percentage="item.percentage" status="success" /></div></div></div></div></el-card>
</template><script setup>
import { Document, Calendar } from '@element-plus/icons-vue'
import PanThumb from './PanThumb.vue'defineProps({features: {type: Array,required: true}
})
</script><style lang="scss" scoped>
.user-container {.text-muted {font-size: 14px;color: #777;}.user-profile {text-align: center;.user-name {font-weight: bold;}.box-center {padding-top: 10px;}.user-role {padding-top: 10px;font-weight: 400;}}.project-bio {margin-top: 20px;color: #606266;span {padding-left: 4px;}.project-bio-section {margin-bottom: 36px;.project-bio-section-header {border-bottom: 1px solid #dfe6ec;padding-bottom: 10px;margin-bottom: 10px;font-weight: bold;}.project-bio-section-body {.progress-item {margin-top: 10px;div {font-size: 14px;margin-bottom: 2px;}}}}}
}
</style>
3.3、feature 组件
javascript"><template><el-collapse v-model="activeName" accordion><el-collapse-itemv-for="item in features":key="item.id":title="item.title":name="item.id"><div v-html="item.content"></div></el-collapse-item></el-collapse>
</template><script setup>
import { ref } from 'vue'
const activeName = ref(0)
defineProps({features: {type: Array,required: true}
})
</script><style lang="scss" scoped>
::v-deep .el-collapse-item__header {font-weight: bold;
}.el-collapse-item {:deep(a) {color: #2d62f7;margin: 0 4px;}
}
</style>
3.4、chapter组件
javascript"><template><el-timeline><el-timeline-itemv-for="item in chapterData":key="item.id":timestamp="item.timestamp"placement="top"><el-card><h4>{{ item.content }}</h4></el-card></el-timeline-item></el-timeline>
</template><script setup>
import { watchSwitchLang } from '@/utils/i18n'
import { chapter } from '@/api/user'
import { ref } from 'vue'
const chapterData = ref([])const getChapterData = async () => {chapterData.value = await chapter()
}
getChapterData()// 监听语言切换
watchSwitchLang(getChapterData)
</script><style lang="scss" scoped></style>
3.5、author 组件
javascript"><template><div class="author-container"><div class="header"><pan-thumbimage="https://img4.sycdn.imooc.com/61110c2b0001152907400741-140-140.jpg"height="60px"width="60px":hoverable="false">{{ $t('msg.profile.name') }}</pan-thumb><div class="header-desc"><h3>{{ $t('msg.profile.name') }}</h3><span>{{ $t('msg.profile.job') }}</span></div></div><div class="info">{{ $t('msg.profile.Introduction') }}</div></div>
</template><script setup>
import PanThumb from './PanThumb.vue'
</script><style lang="scss" scoped>
.author-container {.header {display: flex;.header-desc {margin-left: 12px;display: flex;flex-direction: column;justify-content: space-around;span {font-size: 14px;}}}.info {margin-top: 16px;line-height: 22px;font-size: 14px;text-indent: 26px;}
}
</style>
3.6、PanThumb 组件
javascript"><template><div:style="{ zIndex: zIndex, height: height, width: width }"class="pan-item"><div class="pan-info"><div class="pan-info-roles-container"><slot /></div></div><div :style="{ backgroundImage: `url(${image})` }" class="pan-thumb"></div></div>
</template><script setup>
defineProps({image: {type: String},zIndex: {type: Number,default: 1},width: {type: String,default: '150px'},height: {type: String,default: '150px'}
})
</script><style scoped>
.pan-item {width: 200px;height: 200px;border-radius: 50%;display: inline-block;position: relative;cursor: pointer;box-shadow: 0 1px 3px rgba(0, 0, 0, 0.2);.pan-info {position: absolute;width: inherit;height: inherit;border-radius: 50%;overflow: hidden;box-shadow: inset 0 0 0 5px rgba(0, 0, 0, 0.05);h3 {color: #fff;text-transform: uppercase;position: relative;letter-spacing: 2px;font-size: 14px;margin: 0 60px;padding: 22px 0 0 0;height: 85px;font-family: 'Open Sans', Arial, sans-serif;text-shadow:0 0 1px #fff,0 1px 2px rgba(0, 0, 0, 0.3);}p {color: #fff;padding: 10px 5px;font-style: italic;margin: 0 30px;font-size: 12px;border-top: 1px solid rgba(255, 255, 255, 0.5);a {display: block;color: #333;width: 80px;height: 80px;background: rgba(255, 255, 255, 0.3);border-radius: 50%;color: #fff;font-style: normal;font-weight: 700;text-transform: uppercase;font-size: 9px;letter-spacing: 1px;padding-top: 24px;margin: 7px auto 0;font-family: 'Open Sans', Arial, sans-serif;opacity: 0;transition:transform 0.3s ease-in-out 0.2s,opacity 0.3s ease-in-out 0.2s,background 0.2s linear 0s;transform: translateX(60px) rotate(90deg);}a:hover {background: rgba(255, 255, 255, 0.5);}}.pan-info-roles-container {padding: 20px;text-align: center;}}.pan-thumb {width: 100%;height: 100%;background-position: center center;background-size: cover;border-radius: 50%;overflow: hidden;position: absolute;transform-origin: 95% 40%;transition: all 0.3s ease-in-out;}.pan-item:hover .pan-thumb {transform: rotate(-110deg);}.pan-item:hover .pan-info p a {opacity: 1;transform: translateX(0px) rotate(0deg);}
}
</style>
api/user.js文件
javascript">import request from '@/utils/request'export const feature = () => {return request({url: '/user/feature'})
}export const chapter = () => {return request({url: '/user/chapter'})
}
4、用户模块
4.1、用户列表
在src下创建 filters/index.js
javascript">import dayjs from 'dayjs'const dateFilter = (val, format = 'YYYY-MM-DD') => {if (!isNaN(val)) {val = parseInt(val)}return dayjs(val).format(format)
}export default app => {app.config.globalProperties.$filters = {dateFilter}
}
安装 dayjs
javascript">npm i dayjs在main.js 中引入
javascript">// filter
import installFilter from '@/filters'installFilter(app)
这样子就可以,格式化时间列了
javascript"><el-table-column :label="$t('msg.excel.openTime')"><template #default="{ row }">{{ $filters.dateFilter(row.openTime) }}</template>
</el-table-column>
4.2、excel导入解决方案
其实对于这种导入的情况,我们一般是,导入文件,让后端去解释,然后导入成功之后,再请求一个接口,将导入的数据请求回来,并展示的,当然,也可以像这里这样导入后前端解释,再将数据存到后端,就相当于是批新建了。
方案:
搭建一个上传文件的组件,这里命名为 UploadExcel.vue
javascript"><template><div class="upload-excel"><div class="btn-upload"><el-button :loading="loading" type="primary" @click="handleUpload">{{ $t('msg.uploadExcel.upload') }}</el-button></div><inputref="excelUploadInput"class="excel-upload-input"type="file"accept=".xlsx, .xls"@change="handleChange"/><!-- https://developer.mozilla.org/zh-CN/docs/Web/API/HTML_Drag_and_Drop_API --><divclass="drop"@drop.stop.prevent="handleDrop"@dragover.stop.prevent="handleDragover"@dragenter.stop.prevent="handleDragover"><el-icon><UploadFilled /></el-icon><span>{{ $t('msg.uploadExcel.drop') }}</span></div></div>
</template><script setup>
import { ElMessage } from 'element-plus'
import { UploadFilled } from '@element-plus/icons-vue'
import * as XLSX from 'xlsx'
import { ref } from 'vue'
import { getHeaderRow, isExcel } from './utils'const props = defineProps({// 上传前回调beforeUpload: Function,// 成功回调onSuccess: Function
})/*** 点击上传触发*/
const loading = ref(false)
const excelUploadInput = ref(null)
const handleUpload = () => {excelUploadInput.value.click()
}
const handleChange = (e) => {const files = e.target.filesconst rawFile = files[0] // only use files[0]if (!rawFile) returnupload(rawFile)
}/*** 触发上传事件*/
const upload = (rawFile) => {excelUploadInput.value.value = null// 如果没有指定上传前回调的话if (!props.beforeUpload) {readerData(rawFile)return}// 如果指定了上传前回调,那么只有返回 true 才会执行后续操作const before = props.beforeUpload(rawFile)if (before) {readerData(rawFile)}
}/*** 读取数据(异步)*/
const readerData = (rawFile) => {loading.value = truereturn new Promise((resolve, reject) => {// https://developer.mozilla.org/zh-CN/docs/Web/API/FileReaderconst reader = new FileReader()// 该事件在读取操作完成时触发// https://developer.mozilla.org/zh-CN/docs/Web/API/FileReader/onloadreader.onload = (e) => {// 1. 获取解析到的数据const data = e.target.result// 2. 利用 XLSX 对数据进行解析const workbook = XLSX.read(data, { type: 'array' })// 3. 获取第一张表格(工作簿)名称const firstSheetName = workbook.SheetNames[0]// 4. 只读取 Sheet1(第一张表格)的数据const worksheet = workbook.Sheets[firstSheetName]// 5. 解析数据表头const header = getHeaderRow(worksheet)// 6. 解析数据体const results = XLSX.utils.sheet_to_json(worksheet)// 7. 传入解析之后的数据generateData({ header, results })// 8. loading 处理loading.value = false// 9. 异步完成resolve()}// 启动读取指定的 Blob 或 File 内容reader.readAsArrayBuffer(rawFile)})
}/*** 根据导入内容,生成数据*/
const generateData = (excelData) => {props.onSuccess && props.onSuccess(excelData)
}/*** 拖拽文本释放时触发*/
const handleDrop = (e) => {// 上传中跳过if (loading.value) returnconst files = e.dataTransfer.filesif (files.length !== 1) {ElMessage.error('必须要有一个文件')return}const rawFile = files[0]if (!isExcel(rawFile)) {ElMessage.error('文件必须是 .xlsx, .xls, .csv 格式')return false}// 触发上传事件upload(rawFile)
}/*** 拖拽悬停时触发*/
const handleDragover = (e) => {// https://developer.mozilla.org/zh-CN/docs/Web/API/DataTransfer/dropEffect// 在新位置生成源项的副本e.dataTransfer.dropEffect = 'copy'
}
</script><style lang="scss" scoped>
.upload-excel {display: flex;justify-content: center;margin-top: 100px;.excel-upload-input {display: none;z-index: -9999;}.btn-upload,.drop {border: 1px dashed #bbb;width: 350px;height: 160px;text-align: center;line-height: 160px;}.drop {line-height: 60px;display: flex;flex-direction: column;justify-content: center;color: #bbb;display: flex;flex-direction: column;justify-content: center;align-items: center;cursor: pointer;i {font-size: 60px;display: block;}}
}
</style>
utils.js 文件
javascript">import * as XLSX from 'xlsx'
/*** 获取表头(通用方式)*/
export const getHeaderRow = sheet => {const headers = []const range = XLSX.utils.decode_range(sheet['!ref'])let Cconst R = range.s.r/* start in the first row */for (C = range.s.c; C <= range.e.c; ++C) {/* walk every column in the range */const cell = sheet[XLSX.utils.encode_cell({ c: C, r: R })]/* find the cell in the first row */let hdr = 'UNKNOWN ' + C // <-- replace with your desired defaultif (cell && cell.t) hdr = XLSX.utils.format_cell(cell)headers.push(hdr)}return headers
}export const isExcel = file => {return /\.(xlsx|xls|csv)$/.test(file.name)
}
这里有个小知识点,就使用 Keep-Alive 缓存的组件涉及到两个钩子 onActivated:组件激活时的钩子、onDeactivated:组件不激活时的钩子
4.3、Excel导出方案
需要安装两个库
npm i xlsx
npm i file-saver
主要就是两块
1、主逻辑
javascript">const onConfirm = async () => {loading.value = trueconst allUser = (await getUserManageAllList()).list// 将一个对象转成数组 例如 {a:"xxx", b:"yyyy"} => ["xxx","yyyy"]const data = formatJson(USER_RELATIONS, allUser)// 导入工具包(这里面就是处理json数据向excel文件转换的主要方法)const excel = await import('@/utils/Export2Excel.js')excel.export_json_to_excel({// excel 表头header: Object.keys(USER_RELATIONS),// excel 数据(二维数组结构)data,// 文件名称filename: excelName.value || exportDefaultName,// 是否自动列宽autoWidth: true,// 文件类型bookType: 'xlsx'})closed()
}
2、将列表数据转成excel 类型数据
javascript">// 该方法负责将数组转化成二维数组
const formatJson = (headers, rows) => {// 首先遍历数组// [{ username: '张三'},{},{}]  => [[’张三'],[],[]]return rows.map((item) => {return Object.keys(headers).map((key) => {// 角色特殊处理if (headers[key] === 'role') {const roles = item[headers[key]]return JSON.stringify(roles.map((role) => role.title))}return item[headers[key]]})})
}
2、调用网上成熟的处理 excel 的解决方案 (Export2Excel.js文件)
javascript">/* eslint-disable */
import { saveAs } from 'file-saver'
import * as XLSX from 'xlsx'function datenum(v, date1904) {if (date1904) v += 1462var epoch = Date.parse(v)return (epoch - new Date(Date.UTC(1899, 11, 30))) / (24 * 60 * 60 * 1000)
}function sheet_from_array_of_arrays(data, opts) {var ws = {}var range = {s: {c: 10000000,r: 10000000},e: {c: 0,r: 0}}for (var R = 0; R != data.length; ++R) {for (var C = 0; C != data[R].length; ++C) {if (range.s.r > R) range.s.r = Rif (range.s.c > C) range.s.c = Cif (range.e.r < R) range.e.r = Rif (range.e.c < C) range.e.c = Cvar cell = {v: data[R][C]}if (cell.v == null) continuevar cell_ref = XLSX.utils.encode_cell({c: C,r: R})if (typeof cell.v === 'number') cell.t = 'n'else if (typeof cell.v === 'boolean') cell.t = 'b'else if (cell.v instanceof Date) {cell.t = 'n'cell.z = XLSX.SSF._table[14]cell.v = datenum(cell.v)} else cell.t = 's'ws[cell_ref] = cell}}if (range.s.c < 10000000) ws['!ref'] = XLSX.utils.encode_range(range)return ws
}function Workbook() {if (!(this instanceof Workbook)) return new Workbook()this.SheetNames = []this.Sheets = {}
}function s2ab(s) {var buf = new ArrayBuffer(s.length)var view = new Uint8Array(buf)for (var i = 0; i != s.length; ++i) view[i] = s.charCodeAt(i) & 0xffreturn buf
}export const export_json_to_excel = ({multiHeader = [],header,data,filename,merges = [],autoWidth = true,bookType = 'xlsx'
} = {}) => {// 1. 设置文件名称filename = filename || 'excel-list'// 2. 把数据解析为数组,并把表头添加到数组的头部data = [...data]data.unshift(header)// 3. 解析多表头,把多表头的数据添加到数组头部(二维数组)for (let i = multiHeader.length - 1; i > -1; i--) {data.unshift(multiHeader[i])}// 4. 设置 Excel 表工作簿(第一张表格)名称var ws_name = 'SheetJS'// 5. 生成工作簿对象var wb = new Workbook()// 6. 将 data 数组(json格式)转化为 Excel 数据格式var ws = sheet_from_array_of_arrays(data)// 7. 合并单元格相关(['A1:A2', 'B1:D1', 'E1:E2'])if (merges.length > 0) {if (!ws['!merges']) ws['!merges'] = []merges.forEach((item) => {ws['!merges'].push(XLSX.utils.decode_range(item))})}// 8. 单元格宽度相关if (autoWidth) {/*设置 worksheet 每列的最大宽度*/const colWidth = data.map((row) =>row.map((val) => {/*先判断是否为null/undefined*/if (val == null) {return {wch: 10}} else if (val.toString().charCodeAt(0) > 255) {/*再判断是否为中文*/return {wch: val.toString().length * 2}} else {return {wch: val.toString().length}}}))/*以第一行为初始值*/let result = colWidth[0]for (let i = 1; i < colWidth.length; i++) {for (let j = 0; j < colWidth[i].length; j++) {if (result[j]['wch'] < colWidth[i][j]['wch']) {result[j]['wch'] = colWidth[i][j]['wch']}}}ws['!cols'] = result}// 9. 添加工作表(解析后的 excel 数据)到工作簿wb.SheetNames.push(ws_name)wb.Sheets[ws_name] = ws// 10. 写入数据var wbout = XLSX.write(wb, {bookType: bookType,bookSST: false,type: 'binary'})// 11. 下载数据saveAs(new Blob([s2ab(wbout)], {type: 'application/octet-stream'}),`${filename}.${bookType}`)
}
4.4、打印
安装
javascript">npm i vue3-print-nb新建 directives/index.js
javascript">import print from 'vue3-print-nb'export default app => {app.use(print)
}
在main.js中引入使用
javascript">import installDirective from '@/directives'
installDirective(app)
在使用的地方就直接使用指令的方式使用了
javascript">// 打印按钮
<el-button type="primary" v-print="printObj" :loading="printLoading">
{{ $t('msg.userInfo.print') }}
</el-button>
// 一个配置对象
const printObj = {// 打印区域,打印这个元素下里面的内容id: 'userInfoBox',// 打印标题popTitle: 'test-vue-element-admin',// 打印前beforeOpenCallback(vue) {printLoading.value = true},// 执行打印openCallback(vue) {printLoading.value = false}
}
小知识点
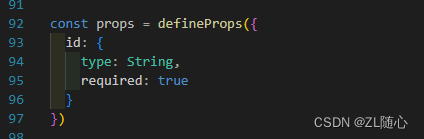
路由配置像下面这样配置
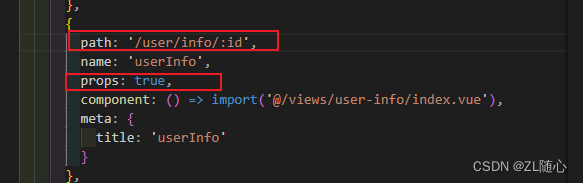
则在user-info组件内就可以像组件传参一样接受参数了
5、权限控制解决方案与角色、权限
5.1、页面权限 ,也就是动态路由的处理
1、页面权限实现的核心在于 路由表配置
请求用户信息的时候,有这样的信息

那我们配置路由表可以像下面这样配置
分别创建对应页面模块,例如 UserManage.js
javascript">import layout from '@/layout/layout.vue'export default {path: '/user',component: layout,redirect: '/user/manage',// 这个name 要与 权限信息对应上name: 'userManage',meta: {title: 'user',icon: 'personnel'},children: [{path: '/user/manage',component: () => import('@/views/user-manage/index.vue'),meta: {title: 'userManage',icon: 'personnel-manage'}},{path: '/user/info/:id',name: 'userInfo',component: () => import('@/views/user-info/index.vue'),props: true,meta: {title: 'userInfo'}},{path: '/user/import',name: 'import',component: () => import('@/views/import/index.vue'),meta: {title: 'excelImport'}}]
}
RoleList.js
javascript">import layout from '@/layout/layout.vue'export default {path: '/user',component: layout,redirect: '/user/manage',name: 'roleList',meta: {title: 'user',icon: 'personnel'},children: [{path: '/user/role',component: () => import('@/views/role-list/index.vue'),meta: {title: 'roleList',icon: 'role'}}]
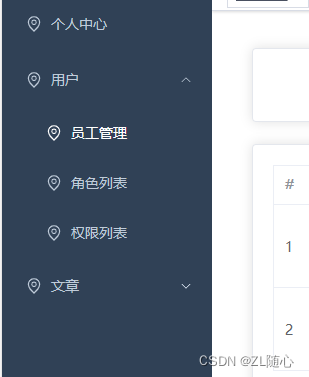
}不一一列举,他们对应的页面展示是这样的,layout.vue就是最外层布局组件了
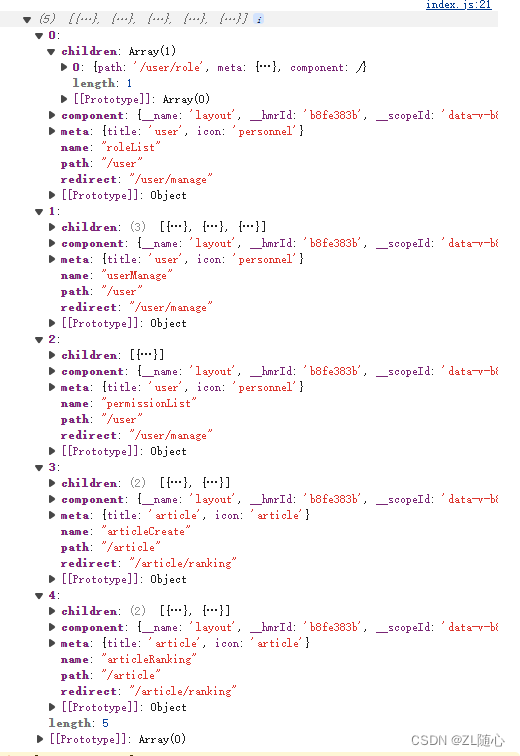
对应的私有路由表

2、路由表配置的核心在于根据获取到的用户权限从私有路由表 privateRoutes 过滤出当前用户拥有的页面路由
privateRoutes 数据是这样的,这样就可以和我们上面权限信息,menus匹配上了
然后就可以通过下面这方法过滤出,用户所拥有的权限了
javascript">/*** 根据权限筛选路由* menus 请求接口返回的 拥有的权限信息(与我们的路由名字匹配)* 例如是 ['userManage', 'import'...]*/filterRoutes(context, menus) {const routes = []// 路由权限匹配menus.forEach(key => {// 权限名 与 路由的 name 匹配routes.push(...privateRoutes.filter(item => item.name === key))})// 最后添加 不匹配路由进入 404routes.push({path: '/:catchAll(.*)',redirect: '/404'})context.commit('setRoutes', routes)return routes}3、然后根据过滤出来的路由,遍历调用 addRoute 方法将路由添加进路由表中
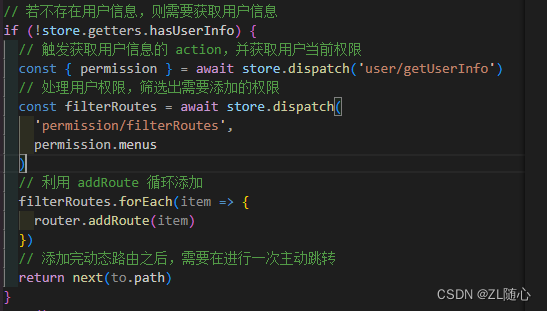
4、添加完路由后需要手动跳转一次路由,也就是上面 return next(to.path)
5.2、功能权限、一般是控制按钮显示与否
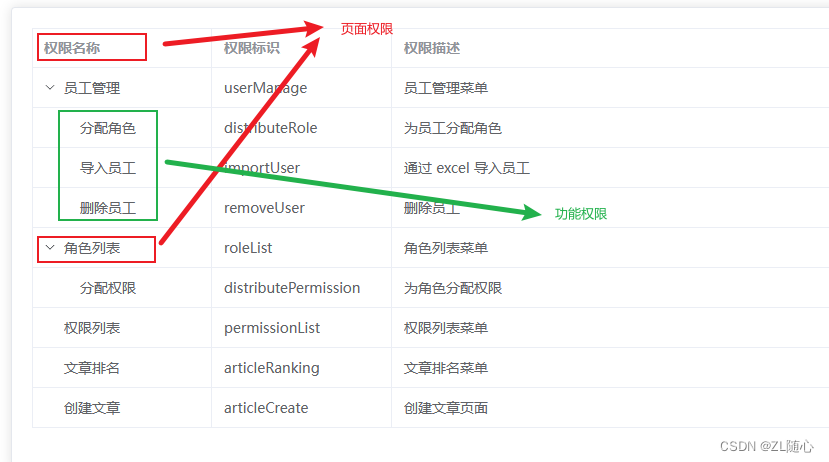
需要定义一个指令即可
javascript">import store from '@/store'function checkPermission(el, binding) {// 获取绑定的值,此处为权限const { value } = binding// 获取所有的功能指令const points = store.getters.userInfo.permission.points// 当传入的指令集为数组时if (value && value instanceof Array) {// 匹配对应的指令const hasPermission = points.some(point => {return value.includes(point)})// 如果无法匹配,则表示当前用户无该指令,那么删除对应的功能按钮if (!hasPermission) {el.parentNode && el.parentNode.removeChild(el)}} else {// eslint-disabled-next-linethrow new Error('v-permission value must be  ["admin","editor"]')}
}export default {// 在绑定元素的父组件被挂载后调用mounted(el, binding) {checkPermission(el, binding)},// 在包含组件的 VNode 及其子组件的 VNode 更新后调用update(el, binding) {checkPermission(el, binding)}
}
然后全局注册一下指令即可,然后在用的地方
javascript">
import permission from './permission'
app.directive('permission', permission)
然后在使用的地方像下面这样使用即可
<el-buttonv-permission="['edit']"
>
5.3、1element-plus table 动态列 与 拖拽行
3.1、动态列
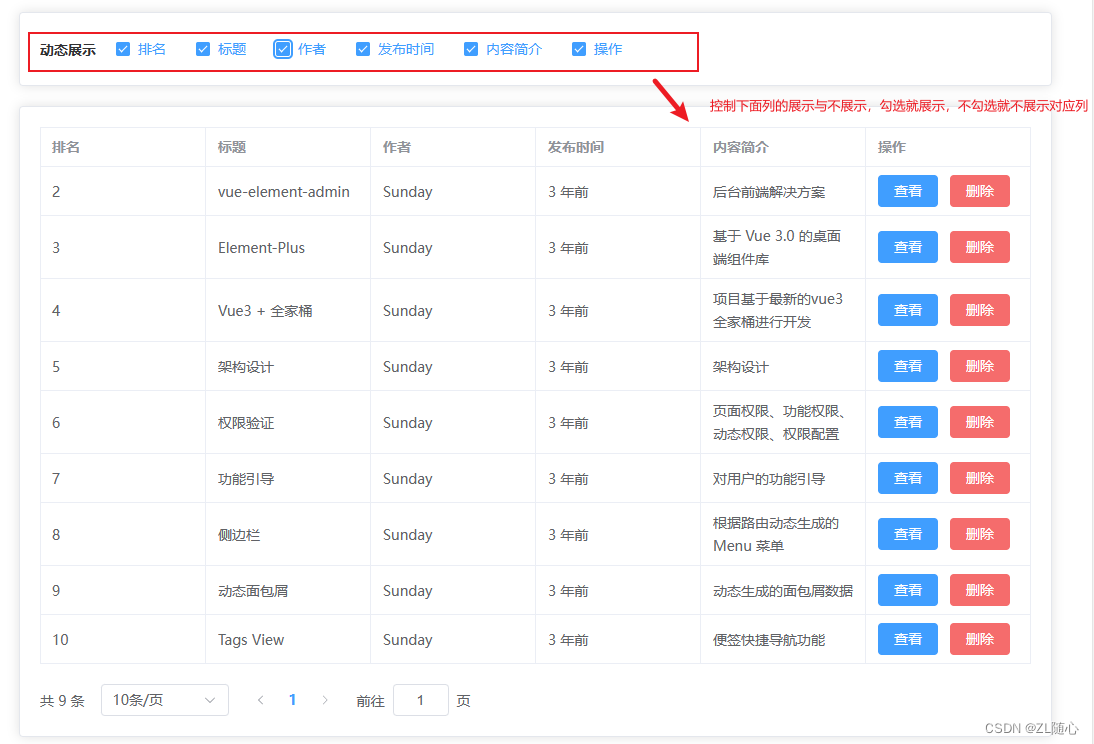
其实主要就是涉及三块数据源
1、动态展示哪里用于展示的数据 这里称为 dynamicData
2、选中的数据 这里称为 selectDynamicLabel
3、根据 selectDynamicLabel 在 dynamicData过滤 出来的数据这里称为 tableColumns (也就是用于表格列展示的)
页面代码
javascript"><template><div class="article-ranking-container"><el-card class="header"><div class="dynamic-box"><span class="title">{{ $t('msg.article.dynamicTitle') }}</span><el-checkbox-group v-model="selectDynamicLabel"><el-checkboxv-for="(item, index) in dynamicData":label="item.label":key="index">{{ item.label }}</el-checkbox></el-checkbox-group></div></el-card><el-card><el-table ref="tableRef" :data="tableData" border><el-table-columnv-for="(item, index) in tableColumns":key="index":prop="item.prop":label="item.label"><template #default="{ row }" v-if="item.prop === 'publicDate'">{{ $filters.relativeTime(row.publicDate) }}</template><template #default="{ row }" v-else-if="item.prop === 'action'"><el-button type="primary" size="mini" @click="onShowClick(row)">{{$t('msg.article.show')}}</el-button><el-button type="danger" size="mini" @click="onRemoveClick(row)">{{$t('msg.article.remove')}}</el-button></template></el-table-column></el-table><el-paginationclass="pagination"@size-change="handleSizeChange"@current-change="handleCurrentChange":current-page="page":page-sizes="[5, 10, 50, 100, 200]":page-size="size"layout="total, sizes, prev, pager, next, jumper":total="total"></el-pagination></el-card></div>
</template><script setup>
import { ref, onActivated } from 'vue'
import { getArticleList } from '@/api/article'
import { watchSwitchLang } from '@/utils/i18n'
import { dynamicData, selectDynamicLabel, tableColumns } from './dynamic'
import { tableRef, initSortable } from './sortable'// 数据相关
const tableData = ref([])
const total = ref(0)
const page = ref(1)
const size = ref(10)// 获取数据的方法
const getListData = async () => {const result = await getArticleList({page: page.value,size: size.value})tableData.value = result.listtotal.value = result.total
}
getListData()
// 监听语言切换
watchSwitchLang(getListData)
// 处理数据不重新加载的问题
onActivated(getListData)/*** size 改变触发*/
const handleSizeChange = (currentSize) => {size.value = currentSizegetListData()
}/*** 页码改变触发*/
const handleCurrentChange = (currentPage) => {page.value = currentPagegetListData()
}// 表格拖拽相关
onMounted(() => {initSortable(tableData, getListData)
})
</script><style lang="scss" scoped>
.article-ranking-container {.header {margin-bottom: 20px;.dynamic-box {display: flex;align-items: center;.title {margin-right: 20px;font-size: 14px;font-weight: bold;}}}:deep(.el-table__row) {cursor: pointer;}.pagination {margin-top: 20px;text-align: center;}
}:deep(.sortable-ghost) {opacity: 0.6;color: #fff !important;background: #304156 !important;
}
</style>
处理动态列逻辑的代码
javascript">import getDynamicData from './DynamicData'
import { watchSwitchLang } from '@/utils/i18n'
import { watch, ref } from 'vue'// 暴露出动态列数据
export const dynamicData = ref(getDynamicData())// 监听 语言变化
watchSwitchLang(() => {// 重新获取国际化的值dynamicData.value = getDynamicData()// 重新处理被勾选的列数据initSelectDynamicLabel()
})// 创建被勾选的动态列数据
export const selectDynamicLabel = ref([])
// 默认全部勾选
const initSelectDynamicLabel = () => {selectDynamicLabel.value = dynamicData.value.map(item => item.label)
}
initSelectDynamicLabel()// 声明 table 的列数据
export const tableColumns = ref([])
// 监听选中项的变化,根据选中项动态改变 table 列数据的值
watch(selectDynamicLabel,val => {tableColumns.value = []// 遍历选中项const selectData = dynamicData.value.filter(item => {return val.includes(item.label)})tableColumns.value.push(...selectData)},{immediate: true}
)
列的数据源的代码
javascript">import i18n from '@/i18n'const t = i18n.global.t// 这样,当国际化改变的时候,才能跟随改变
export default () => [{label: t('msg.article.ranking'),prop: 'ranking'},{label: t('msg.article.title'),prop: 'title'},{label: t('msg.article.author'),prop: 'author'},{label: t('msg.article.publicDate'),prop: 'publicDate'},{label: t('msg.article.desc'),prop: 'desc'},{label: t('msg.article.action'),prop: 'action'}
]
3.2、拖拽行
安装sorttablejs
javascript">npm i sortablejs排序逻辑处理
javascript">import { ref } from 'vue'
import Sortable from 'sortablejs'
import { articleSort } from '@/api/article'
import i18n from '@/i18n'
// 排序相关
export const tableRef = ref(null)/*** 初始化排序* tableData: 表格数据* cb:重新获取列表数据*/
export const initSortable = (tableData, cb) => {// 设置拖拽效果const el = tableRef.value.$el.querySelectorAll('.el-table__body tbody')[0]// 1. 要拖拽的元素// 2. 配置对象Sortable.create(el, {// 拖拽时类名,就是控制拖拽行的颜色ghostClass: 'sortable-ghost',// 拖拽结束的回调方法async onEnd(event) {const { newIndex, oldIndex } = event// 修改数据await articleSort({// 获取对应数据的排名initRanking: tableData.value[oldIndex].ranking,finalRanking: tableData.value[newIndex].ranking})ElMessage.success({message: i18n.global.t('msg.article.sortSuccess'),type: 'success'})// 直接重新获取数据无法刷新 table!!tableData.value = []// 重新获取数据cb && cb()}})
}
使用的地方
javascript">// 表格拖拽相关
onMounted(() => {initSortable(tableData, getListData)
})
6、markdown与富文本
这里会使用到两个库,这稍微讲一下怎么选择我们的库
- 开源协议最好是BSM、MIT的
- start最好是10k以上的(5k也行)
- 关注上一个版本发布时间不能间隔太久
- 关注issue是否有及时回应
- 文档是否详尽,最好有中文文档了
markdown 编辑器:tui.editor
富文本编辑器:wangEditor
6.1、markdown

安装
javascript">npm i @toast-ui/editor@3.0.2基本使用
javascript">// 绑定一个html
<div id="markdown-box"></div>// 逻辑处理
import MkEditor from '@toast-ui/editor'
import '@toast-ui/editor/dist/toastui-editor.css'
import '@toast-ui/editor/dist/i18n/zh-cn'let mkEditor
let el
onMounted(() => {el = document.querySelector('#markdown-box')initMkEditor()
})const initMkEditor = () => {mkEditor = new MkEditor({el, height: '500px',previewStyle: 'vertical',language: store.getters.language === 'zh' ? 'zh-CN' : 'en'})mkEditor.getMarkdown()
}// 涉及markdown 销毁相关的
const htmlStr = mkEditor.getHTML()mkEditor.destroy()initMkEditor()mkEditor.setHTML(htmlStr)
6.2、富文本
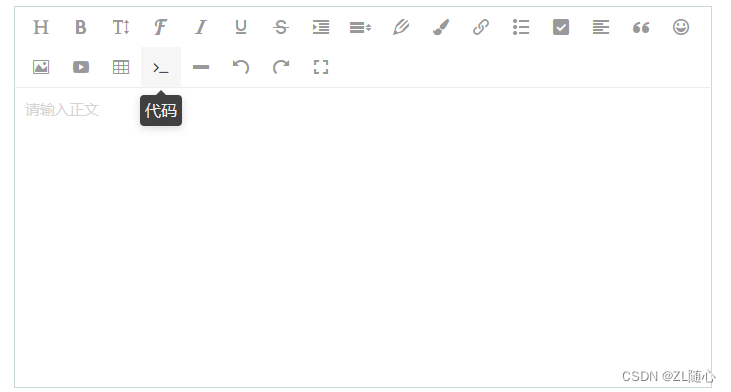
安装
javascript">npm i wangeditor@4.7.6基本逻辑使用
javascript">// html<div id="editor-box"></div>// 引入库
import E from 'wangeditor'// 基本逻辑处理
// Editor实例
let editor
// 处理离开页面切换语言导致 dom 无法被获取
let el
onMounted(() => {el = document.querySelector('#editor-box')initEditor()
})const initEditor = () => {editor = new E(el)editor.config.zIndex = 1// // 菜单栏提示editor.config.showMenuTooltips = trueeditor.config.menuTooltipPosition = 'down'editor.create()
}// 内容通过html展示editor.txt.html(val.content)
7、数据可视化
7.1、可视化解读
可视化其实分为,大可视化与数据可视化,大屏可视化通常是自己自成一个项目,而数据可视化则是一般集成在我们的后台管理系统里面,他们都是为了让我们数据可以通过图标的方式比较直观的查看,而可视化的解决方案主要有两种,AntV与Echarts
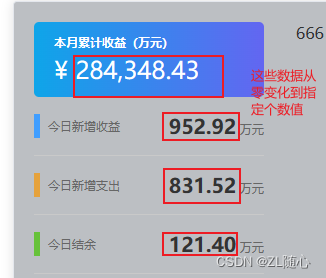
7.2、countUp的使用
countUp主要是用于数据变化的时候时期具有动画效果
7.3、文字云图
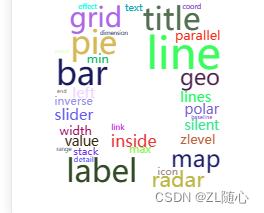
通过echarts 和 echarts-wordcloud实现
8、项目部署
1、为什么需要打包?
答: 为了让浏览器识别
2、浏览器可以直接通过url访问打包后的项目嘛?
答:不行,通过打包后的index.html 直接打包,会报文件找不到模块的错误
3、为啥需要服务器?
答:为了避免出现找不到模块的错误,所以需要一个服务器,把模块都放到服务器上
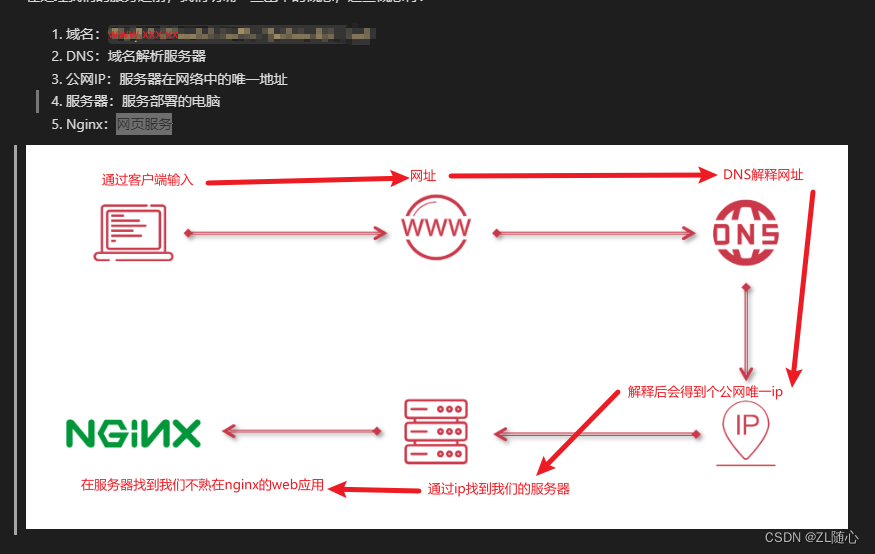
8.1、电脑访问网页图解
8.2、服务器购买
云服务器 ECS 自定义购买
常见的链接服务器的方式
- 阿里云控制台中进行远程链接
- 通过
SSH工具(XShell) SSH指令远程登录
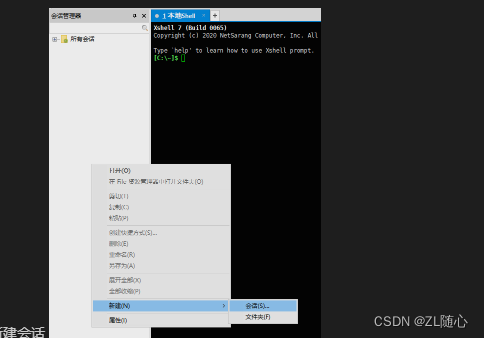
8.3、Xshell连接服务器可以使用
1、新建会话
2、确定会话信息,协议为 SSH、主机为服务器 IP(也就是我们购买的服务器)、端口号为 22
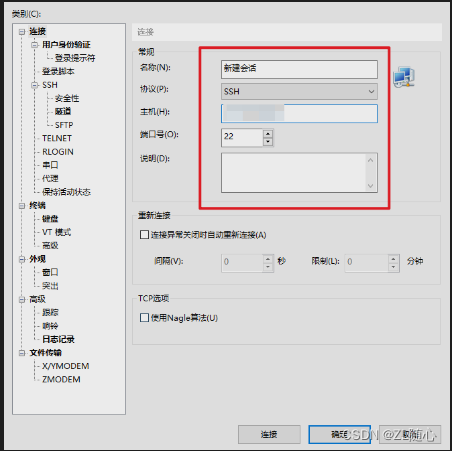
3、确定之后就会看到我们的会话列表
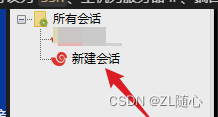
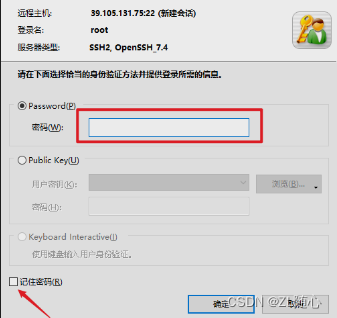
4、双击我们的会话列表中的会话,然后输入用户名(默认用户名是root)

5、输入你的密码
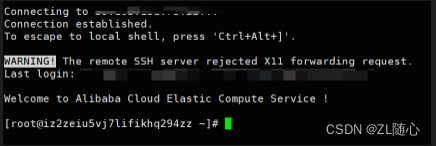
6、出现下面信息表示连接成功
8.4、配置nginx
1、nginx 编译时依赖 gcc 环境
javascript">yum -y install gcc gcc-c++2、安装 prce,让 nginx 支持重写功能
javascript">yum -y install pcre*3、安装 zlib,nginx 使用 zlib 对 http 包内容进行 gzip 压缩
javascript">yum -y install zlib zlib-devel 4、安装 openssl,用于通讯加密
javascript">yum -y install openssl openssl-devel5、下载 nginx 压缩包
javascript">wget https://nginx.org/download/nginx-1.11.5.tar.gz6、解压 nginx
javascript">tar -zxvf nginx-1.11.5.tar.gz7、进入 nginx-1.11.5 目录
javascript">cd nginx-1.11.58、检查平台安装环境
javascript">./configure --prefix=/usr/local/nginx9、进行源码编译
javascript">make 10、安装 nginx
javascript">make install11、查看 nginx 配置
javascript">/usr/local/nginx/sbin/nginx -t12、制作nginx 软连接,进入 usr/bin 目录
javascript">cd /usr/bin13、制作软连接
javascript">ln -s /usr/local/nginx/sbin/nginx nginx14、首先打开 nginx 的默认配置文件中
javascript">vim /usr/local/nginx/conf/nginx.conf15、在最底部增加配置项(按下 i 进入 输入模式)
javascript">include /nginx/*.conf;16、按下 esc 键,通过 :wq! 保存并退出
17、创建新的配置文件
javascript">touch /nginx/nginx.conf18、打开 /root/nginx/nginx.conf 文件
javascript">vim /nginx/nginx.conf19、写入如下配置
javascript"># nginx config
server {# 端口 根据实际情况来listen       8081;# 域名 申请的时候是啥就些啥就可以了 比如 http://www.xx.xx.yyserver_name  localhost;# 资源地址root   /nginx/dist/;# 目录浏览autoindex on;# 缓存处理add_header Cache-Control "no-cache, must-revalidate";# 请求配置location / {# 跨域add_header Access-Control-Allow-Origin *;# 返回 index.htmltry_files $uri $uri/ /index.html;}
}
20、通过 :wq! 保存退出
21、在 root/nginx 中创建 dist 文件夹
javascript">mkdir /nginx/dist22、在 nginx/dist 中写入 index.html 进行测试,也就是创建一个index.html文件,然后随便写入一些东西,然后保存

23、通过 nginx -s reload 重启服务
24、在 浏览器中通过,IP 测试访问,看能不能访问到我们的index.html中的内容
25、将我们 npm run build 打包后的dist下的所有文件传入到我们上面的dist目录下
可以通过 XFTP 进行传输
26、之后我们就可以通过我们申请的域名进行访问我们的项目了