当年刚接触 ASP.NET Core 2.2 时,留下的学习笔记。现在把它挪到 CSDN,也是对过去学习 ASP.NET Core 痕迹进行记录。
VS 2019 + ASP.NET Core 2.2 + sqlSugarCore (ORM)
1. 仓储模式 + 服务 + 抽象接口
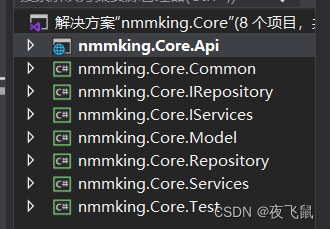
1.1 新建.net>asp.net core 2.2 WebApi项目
nmmking.Core.Api
nmmking.Core.Common
nmmking.Core.IRepository
nmmking.Core.IServices
nmmking.Core.Model
nmmking.Core.Repository
nmmking.Core.Services
nmmking.Core.Test
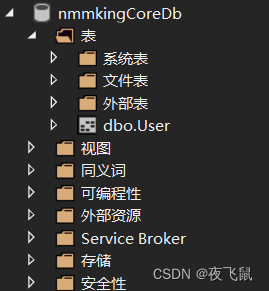
2.nmmking.Core.Model 使用 Sqlsuger Code first
2.1用 nuget 安装 sqlSugarCore ,新建 model 类
namespace nmmking.Core.Model.Models
{public class User{[SugarColumn(IsNullable =false,IsPrimaryKey =true,IsIdentity =true)]public int Id { get; set; }[SugarColumn(Length =50)]public string Name { get; set; }[SugarColumn(Length =50,IsNullable =true)]public string Password { get; set; }}
}
2.2 新建IDbContext接口
namespace nmmking.Core.Model
{public interface IDbContext{/// <summary>/// 操作数据库对象/// </summary>SqlSugarClient db { get; }/// <summary>/// 创建数据表/// </summary>/// <param name="Backup">是否备份</param>/// <param name="StringDefaultLength">string类型映射的长度</param>/// <param name="types">要创建的数据表</param>void CreateTable(bool Backup = false, int StringDefaultLength = 50, params Type[] types);/// <summary>/// 创建表/// </summary>/// <param name="Backup">是否备份</param>/// <param name="StringDefaultLength">string类型映射的长度</param>//public void CreateAllTable(bool Backup = false, int StringDefaultLength = 50);}
}
2.3 新建MyContext类
public class MyContext: IDbContext{public SqlSugarClient db{get{return new SqlSugarClient(new ConnectionConfig(){ConnectionString = "server=.;database=nmmkingCoreDb;uid=sa;pwd=123456;",DbType = DbType.SqlServer,//数据库类型IsAutoCloseConnection = true,//自动释放数据务,如果存在事务,在事务结束后释放InitKeyType = InitKeyType.Attribute,//从实体特性中读取主键自增列信息});}}//public static SqlSugarClient GetInstance()//{// db = new SqlSugarClient(new ConnectionConfig()// {// ConnectionString = "server=.;database=StudentDb;uid=sa;pwd=123456;",// DbType = DbType.SqlServer,//设置数据库类型// IsAutoCloseConnection = true,//自动释放数据库,如果存在事务,在事务结束之后释放。// InitKeyType = InitKeyType.Attribute//从实体特性中读取主键自增列信息 // });// //db.Aop.OnLogExecuting = (sql, pars) =>// //{// // Console.WriteLine(sql + "\r\n" + db.Utilities.SerializeObject// // (pars.ToDictionary(it => it.ParameterName, it => it.Value)));// // Console.WriteLine();// //};// return db;//}public void CreateTable(bool Backup = false, int StringDefaultLength = 50, params Type[] types){//设置varchar的默认长度db.CodeFirst.SetStringDefaultLength(StringDefaultLength);db.DbMaintenance.CreateDatabase();//创建表if (Backup){db.CodeFirst.BackupTable().InitTables(types);}else{db.CodeFirst.InitTables(types);}}public SimpleClient<User> userDb { get { return new SimpleClient<User>(db); } }//public SqlSugarClient db => throw new NotImplementedException();}
2.4 使用
namespace nmmking.Core.Test
{class Program{static void Main(string[] args){MyContext context = new MyContext();context.CreateTable(false, 50, typeof(User));//AppDbContext context = new AppDbContext();//context.CreateTable(false, 50, typeof(Students), typeof(Schools));Console.WriteLine("Hello World!");}}
}
3. 仓储层
3.1 IBaseRepository
namespace nmmking.Core.IRepository
{public interface IBaseRepository<T> where T:class{Task<T> QueryById(object id, bool IsUseCache = false); //根据id查询Task<List<T>> GetEntities(Expression<Func<T, bool>> whereLambda); //根据查询条件查询Task<bool> Add(T entity);Task<bool> DeleteById(object Id);Task<bool> Update(T entity);}
}
3.2 BaseRepository
namespace nmmking.Core.Repository
{public class BaseRepository<T> : IBaseRepository<T> where T : class, new(){private readonly IDbContext _dbContext;public BaseRepository(IDbContext dbContext){this._dbContext = dbContext;}// 增加单条数据public async Task<bool> Add(T entity){return await _dbContext.db.Insertable<T>(entity).ExecuteCommandAsync() > 0;}// 根据id删除单条数据public async Task<bool> DeleteById(object id){return await _dbContext.db.Deleteable<T>(id).ExecuteCommandHasChangeAsync();}// 查询数据列表public async Task<List<T>> GetEntities(Expression<Func<T, bool>> whereExpression){return await _dbContext.db.Queryable<T>().WhereIF(whereExpression != null, whereExpression).ToListAsync();}// 根据Id查询一条数据public async Task<T> QueryById(object id, bool IsUseCache =false){return await _dbContext.db.Queryable<T>().WithCacheIF(IsUseCache).In(id).SingleAsync();}// 更新实体数据public Task<bool> Update(T entity){var i = await Task.Run(() => dbcontext.Updateable(model).ExecuteCommand());return i > 0;}}
}
4.读取 appsettings.json 文件
4.1 nuget 安装 Microsoft.Extensions.Configuration.Binder,Microsoft.Extensions.Configuration.Json。

4.2 新建 Appsettings 类
namespace nmmking.Core.Common.Helper
{/// <summary>/// appsettings.json操作类/// </summary>public class Appsettings{static IConfiguration Configuration { get; set; }static string contentPath { get; set; }static Appsettings(){//如果你把配置文件 是 根据环境变量来分开了,可以这样写//Path = $"appsettings.{Environment.GetEnvironmentVariable("ASPNETCORE_ENVIRONMENT")}.json";Configuration = new ConfigurationBuilder().Add(new JsonConfigurationSource { Path = "appsettings.json", ReloadOnChange = true })//请注意要把当前appsetting.json 文件->右键->属性->复制到输出目录->始终复制.Build();}/// <summary>/// 封装要操作的字符/// </summary>/// <param name="sections">节点配置</param>/// <returns></returns>public static string app(params string[] sections){try{if (sections.Any()){return Configuration[string.Join(":", sections)];}}catch (Exception) { }return "";}/// <summary>/// 递归获取配置信息数组/// </summary>/// <typeparam name="T"></typeparam>/// <param name="sections"></param>/// <returns></returns>public static List<T> app<T>(params string[] sections){List<T> list = new List<T>();// 引用 Microsoft.Extensions.Configuration.Binder 包Configuration.Bind(string.Join(":", sections), list);return list;}}
}
4.3 使用
string iss = Appsettings.app(new string[] { "Audience", "Issuer" });
string aud = Appsettings.app(new string[] { "Audience", "Audience" });
5.使用Cors跨域
5.1 允许所有域名访问接口
在Startup.cs文件的ConfigureServices方法添加:
public void ConfigureServices(IServiceCollection services){services.AddMvc().SetCompatibilityVersion(CompatibilityVersion.Version_2_2);services.AddCors(c => {c.AddPolicy("LimitRequests", policy => {policy.AllowAnyOrigin().AllowAnyHeader().AllowAnyMethod();});});services.AddTransient(typeof(IBaseRepository<>), typeof(BaseRepository<>));services.AddTransient<IUserService, UserService>();services.AddTransient<IDbContext, MyContext>();}
public void Configure(IApplicationBuilder app, IHostingEnvironment env)
{if (env.IsDevelopment()){app.UseDeveloperExceptionPage();}app.UseCors("LimitRequests");app.UseMvc();
}
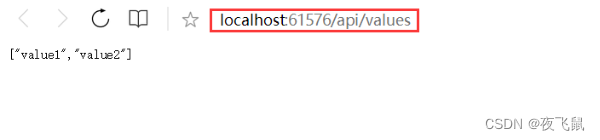
运行:http://localhost:61576/api/values
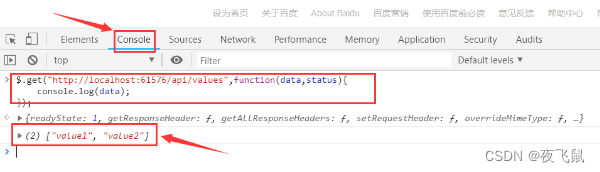
测试一下,打开百度地址:https://www.baidu.com/,按F12,在Console输入:
$.get("http://localhost:61576/api/values",function(data,status){console.log(data);
});
5.2 限制域的访问
services.AddCors(c => {c.AddPolicy("LimitRequests", policy => {policy//.AllowAnyOrigin().WithOrigins(new string[]{ "http://localhost:8881" })//.WithOrigins(Appsettings.app(new string[] { "Startup", "Cors", "IPs" }).Split(',')).AllowAnyHeader().AllowAnyMethod();});});public void Configure(IApplicationBuilder app, IHostingEnvironment env){if (env.IsDevelopment()){app.UseDeveloperExceptionPage();}app.UseCors("LimitRequests");app.UseMvc();}
5.3 跨域访问
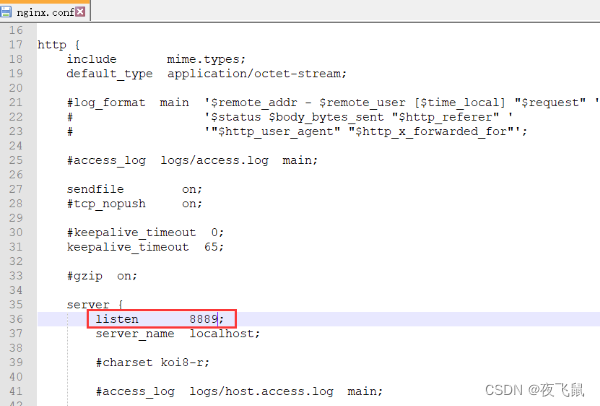
下载 nginx ,http://nginx.org/en/download.html,配置 nginx。
新建 index.html
<html>
<head>
<script src="https://s3.pstatp.com/cdn/expire-1-M/jquery/3.3.1/jquery.min.js"></script>
<script type="text/javascript">
$(document).ready(function(){$.get("http://localhost:61576/api/values",function(data,status){alert(data);console.log(data);});
});
</script>
</head><body>
<p>If you click on me, I will disappear.</p>
</body></html>
出现跨域问题

修改访问地址
services.AddCors(c => {c.AddPolicy("LimitRequests", policy => {policy//.AllowAnyOrigin().WithOrigins(new string[]{ "http://localhost:8889" })//.WithOrigins(Appsettings.app(new string[] { "Startup", "Cors", "IPs" }).Split(',')).AllowAnyHeader().AllowAnyMethod();});});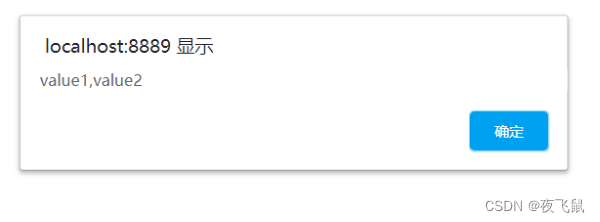
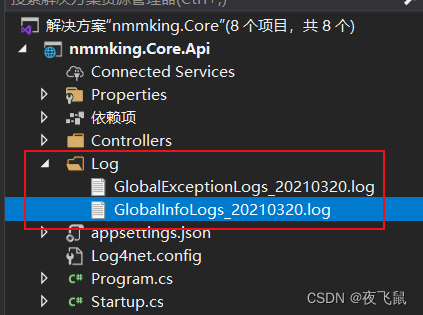
6.使用Log4Net日志处理
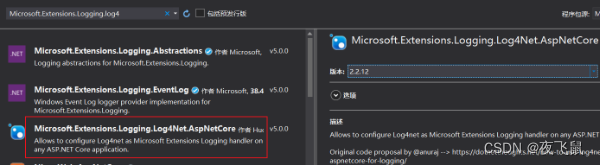
注册服务
public static IWebHostBuilder CreateWebHostBuilder(string[] args) =>WebHost.CreateDefaultBuilder(args).UseStartup<Startup>().ConfigureLogging((hostingContext, builder) =>{//过滤掉系统默认的一些日志builder.AddFilter("System", LogLevel.Error);builder.AddFilter("Microsoft", LogLevel.Error);//builder.AddFilter();//可配置文件var path = Path.Combine(Directory.GetCurrentDirectory(),"Log4net.config");builder.AddLog4Net(path);});
配置文件,下面文件配置了error和info两种级别的日志
<?xml version="1.0" encoding="utf-8"?>
<log4net><!-- 将日志以回滚文件的形式写到文件中 --><!-- 按日期切分日志文件,并将日期作为日志文件的名字 --><!--Error--><appender name="ErrorLog" type="log4net.Appender.RollingFileAppender"><file value="Log/"/><appendToFile value="true" /><rollingStyle value="Date" /><!--日期的格式,每天换一个文件记录,如不设置则永远只记录一天的日志,需设置--><datePattern value=""GlobalExceptionLogs_"yyyyMMdd".log"" /><!--日志文件名是否为静态--><StaticLogFileName value="false"/><!--多线程时采用最小锁定--><lockingModel type="log4net.Appender.FileAppender+MinimalLock" /><!--布局(向用户显示最后经过格式化的输出信息)--><layout type="log4net.Layout.PatternLayout"><conversionPattern value="%date| %-5level %newline%message%newline--------------------------------%newline" /></layout><filter type="log4net.Filter.LevelRangeFilter"><levelMin value="ERROR" /><levelMax value="FATAL" /></filter></appender><!--Error--><!--Info--><appender name="InfoLog" type="log4net.Appender.RollingFileAppender"><!--定义文件存放位置--><file value="Log/"/><appendToFile value="true" /><rollingStyle value="Date" /><!--日志文件名是否为静态--><StaticLogFileName value="false"/><!--日期的格式,每天换一个文件记录,如不设置则永远只记录一天的日志,需设置--><datePattern value=""GlobalInfoLogs_"yyyyMMdd".log"" /><!--多线程时采用最小锁定--><lockingModel type="log4net.Appender.FileAppender+MinimalLock" /><!--布局(向用户显示最后经过格式化的输出信息)--><layout type="log4net.Layout.PatternLayout"><conversionPattern value="%date| %-5level %newline%message%newline--------------------------------%newline" /></layout><filter type="log4net.Filter.LevelRangeFilter"><levelMin value="DEBUG" /><levelMax value="WARN" /></filter></appender><!--Info--><root><!-- 控制级别,由低到高:ALL|DEBUG|INFO|WARN|ERROR|FATAL|OFF --><!-- 比如定义级别为INFO,则INFO级别向下的级别,比如DEBUG日志将不会被记录 --><!-- 如果没有定义LEVEL的值,则缺省为DEBUG --><level value="ALL" /><!-- 按日期切分日志文件,并将日期作为日志文件的名字 --><appender-ref ref="ErrorLog" /><appender-ref ref="InfoLog" /></root>
</log4net>
使用
[Produces("application/json")][Route("api/Values")][AllowAnonymous]public class ValuesController : ControllerBase{private readonly IUserService _userService;private readonly ILogger<ValuesController> _logger;public ValuesController(IUserService userService,ILogger<ValuesController> logger){this._userService = userService;this._logger = logger;}// GET api/values[HttpGet]public ActionResult<IEnumerable<string>> Get(){_logger.LogError("this is an error");return new string[] { "value1", "value2" };}
}
7.JWT基于策略的授权
安装 Microsoft.IdentityModel.Tokens 和 System.IdentityModel.Tokens.Jwt

新建Jwt操作类
public class JwtHelper{/// <summary>/// 颁发JWT字符串/// </summary>/// <param name="tokenModel"></param>/// <returns></returns>public static string IssueJWT(TokenModelJWT tokenModel){var dateTime = DateTime.UtcNow;string iss = Appsettings.app(new string[] { "Audience", "Issuer" });string aud = Appsettings.app(new string[] { "Audience", "Audience" });string secret = Appsettings.app(new string[] { "Audience", "Secret" });//var claims = new Claim[] //oldvar claims = new List<Claim>{//下边为Claim的默认配置new Claim(JwtRegisteredClaimNames.Jti, tokenModel.Uid.ToString()),new Claim(JwtRegisteredClaimNames.Iat, $"{new DateTimeOffset(DateTime.Now).ToUnixTimeSeconds()}"),new Claim(JwtRegisteredClaimNames.Nbf,$"{new DateTimeOffset(DateTime.Now).ToUnixTimeSeconds()}") ,//这个就是过期时间,目前是过期100秒,可自定义,注意JWT有自己的缓冲过期时间new Claim (JwtRegisteredClaimNames.Exp,$"{new DateTimeOffset(DateTime.Now.AddSeconds(100)).ToUnixTimeSeconds()}"),new Claim(JwtRegisteredClaimNames.Iss,iss),new Claim(JwtRegisteredClaimNames.Aud,aud),//new Claim(ClaimTypes.Role,tokenModel.Role),//为了解决一个用户多个角色(比如:Admin,System),用下边的方法};// 可以将一个用户的多个角色全部赋予;// 作者:DX 提供技术支持;claims.AddRange(tokenModel.Role.Split(',').Select(s => new Claim(ClaimTypes.Role, s)));//秘钥 (SymmetricSecurityKey 对安全性的要求,密钥的长度太短会报出异常)var key = new SymmetricSecurityKey(Encoding.UTF8.GetBytes(secret));var creds = new SigningCredentials(key, SecurityAlgorithms.HmacSha256);var jwt = new JwtSecurityToken(issuer: iss,claims: claims,signingCredentials: creds);var jwtHandler = new JwtSecurityTokenHandler();var encodedJwt = jwtHandler.WriteToken(jwt);return encodedJwt;}/// <summary>/// 解析/// </summary>/// <param name="jwtStr"></param>/// <returns></returns>public static TokenModelJWT SerializeJWT(string jwtStr){var jwtHandler = new JwtSecurityTokenHandler();JwtSecurityToken jwtToken = jwtHandler.ReadJwtToken(jwtStr);object role = new object(); ;try{jwtToken.Payload.TryGetValue(ClaimTypes.Role, out role);}catch (Exception e){Console.WriteLine(e);throw;}var tm = new TokenModelJWT{Uid = Convert.ToInt32(jwtToken.Id),Role = role != null ? role.ToString() : "",};return tm;}}/// <summary>/// 令牌/// </summary>public class TokenModelJWT{/// <summary>/// Id/// </summary>public long Uid { get; set; }/// <summary>/// 角色/// </summary>public string Role { get; set; }/// <summary>/// 职能/// </summary>public string Work { get; set; }}
配置文件appsettings.json
{"Logging": {"LogLevel": {"Default": "Warning"}},"Audience": {"Secret": "sdfsdfsrty45634kkhllghtdgdfss345t678fs", //至少要16位"Issuer": "nmmking.Core","Audience": "yika"},"Startup": {"Cors": {"IPs": "http://127.0.0.1:2364,http://localhost:2364,http://localhost:8080,http://localhost:8021,http://localhost:1818"}},"AllowedHosts": "*"}
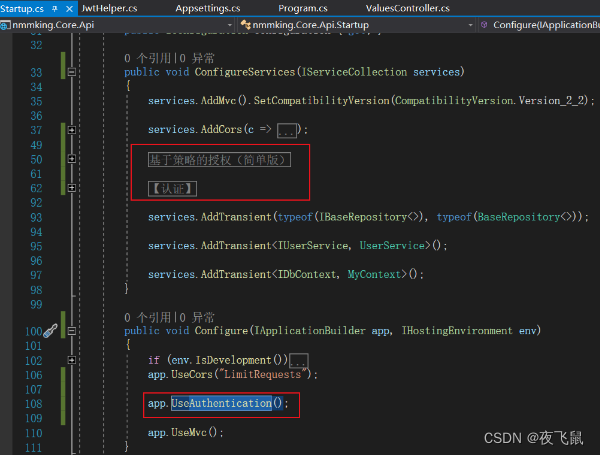
#region 基于策略的授权(简单版)// 1【授权】、这个和上边的异曲同工,好处就是不用在controller中,写多个 roles 。// 然后这么写 [Authorize(Policy = "Admin")]services.AddAuthorization(options =>{options.AddPolicy("Client", policy => policy.RequireRole("Client").Build());options.AddPolicy("Admin", policy => policy.RequireRole("Admin").Build());options.AddPolicy("SystemOrAdmin", policy => policy.RequireRole("Admin", "System"));});#endregion#region 【认证】//读取配置文件var audienceConfig = Configuration.GetSection("Audience");var symmetricKeyAsBase64 = audienceConfig["Secret"];var keyByteArray = Encoding.ASCII.GetBytes(symmetricKeyAsBase64);var signingKey = new SymmetricSecurityKey(keyByteArray);//2.1【认证】services.AddAuthentication(x =>{x.DefaultAuthenticateScheme = JwtBearerDefaults.AuthenticationScheme;x.DefaultChallengeScheme = JwtBearerDefaults.AuthenticationScheme;}).AddJwtBearer(o =>{o.TokenValidationParameters = new TokenValidationParameters{ValidateIssuerSigningKey = true,IssuerSigningKey = signingKey,ValidateIssuer = true,ValidIssuer = audienceConfig["Issuer"],//发行人ValidateAudience = true,ValidAudience = audienceConfig["Audience"],//订阅人ValidateLifetime = true,ClockSkew = TimeSpan.Zero,RequireExpirationTime = true,};});#endregion
app.UseAuthentication();接口 GetJWTToken
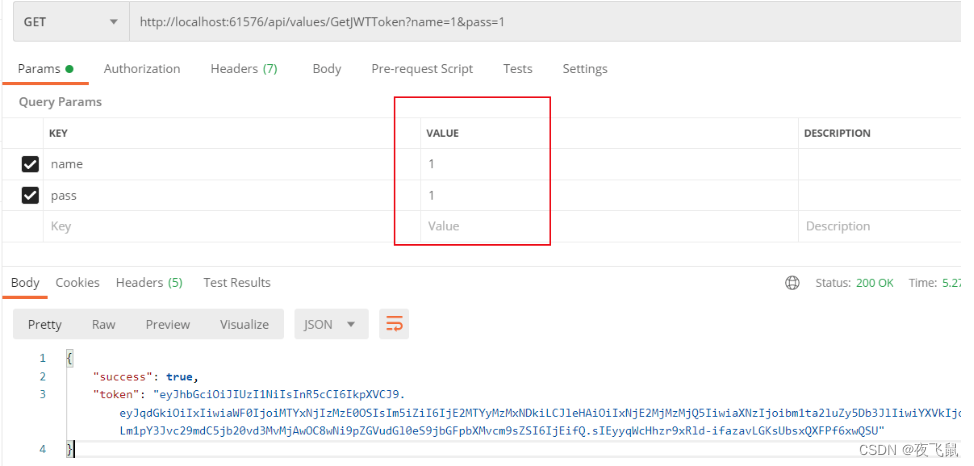
[Produces("application/json")][Route("api/[controller]/[action]")]public class ValuesController : ControllerBase{} /// <summary>/// 登录接口:随便输入字符,获取token,然后添加 Authoritarian/// </summary>/// <param name="name"></param>/// <param name="pass"></param>/// <returns></returns>[HttpGet]public async Task<object> GetJWTToken(string name, string pass){string jwtStr = string.Empty;bool suc = false;//这里就是用户登陆以后,通过数据库去调取数据,分配权限的操作//这里直接写死了if (string.IsNullOrEmpty(name) || string.IsNullOrEmpty(pass)){return new JsonResult(new{Status = false,message = "用户名或密码不能为空"});}TokenModelJWT tokenModel = new TokenModelJWT();tokenModel.Uid = 1;tokenModel.Role = name;jwtStr = JwtHelper.IssueJWT(tokenModel);suc = true;return Ok(new{success = suc,token = jwtStr});}
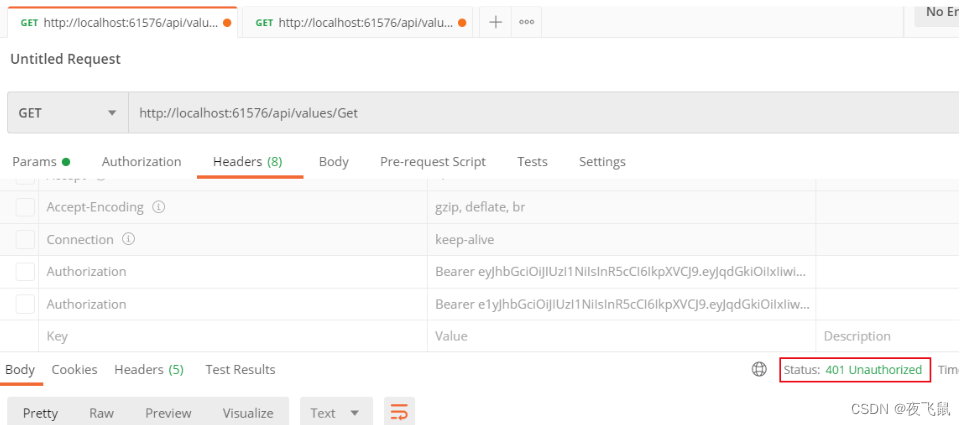
测试1:测试 Get
/// <summary>/// 这个也需要认证,只不过登录即可,不一定是Admin/// </summary>/// <param name="id"></param>/// <returns></returns>[HttpGet][Authorize]public ActionResult<string> Get(){return "value";}
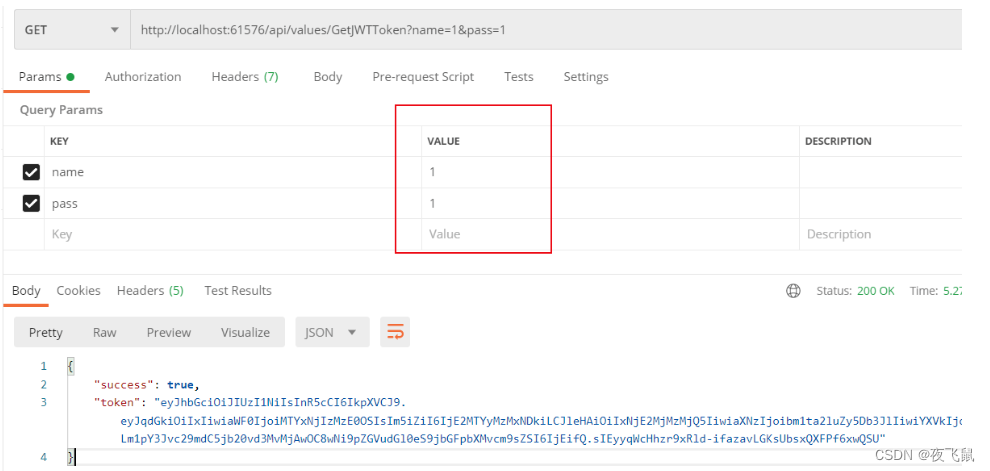
用户重新登录获取 token (这里没有指定的用户,只要登录就行),如下图所示:
再次访问 Get 接口,访问成功如下图所示: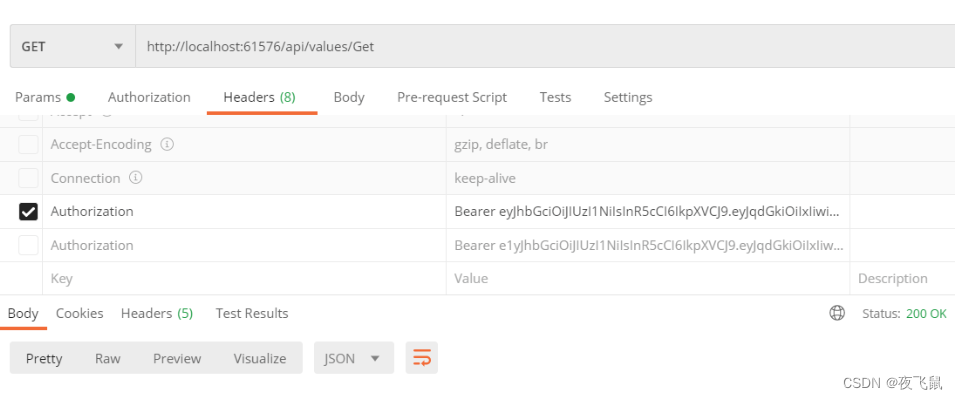
接口2:
/// <summary>/// 这个需要认证,角色必须是Admin,其他的不需要/// </summary>/// <returns></returns>[HttpGet][Authorize(Policy = "SystemOrAdmin")]public ActionResult<IEnumerable<string>> GetData(){_logger.LogError("this is an error");return new string[] { "value1", "value2" };}
随意的用户登录获取 token,如下所示
 登录的用户不是 Admin,结果是拒绝访问

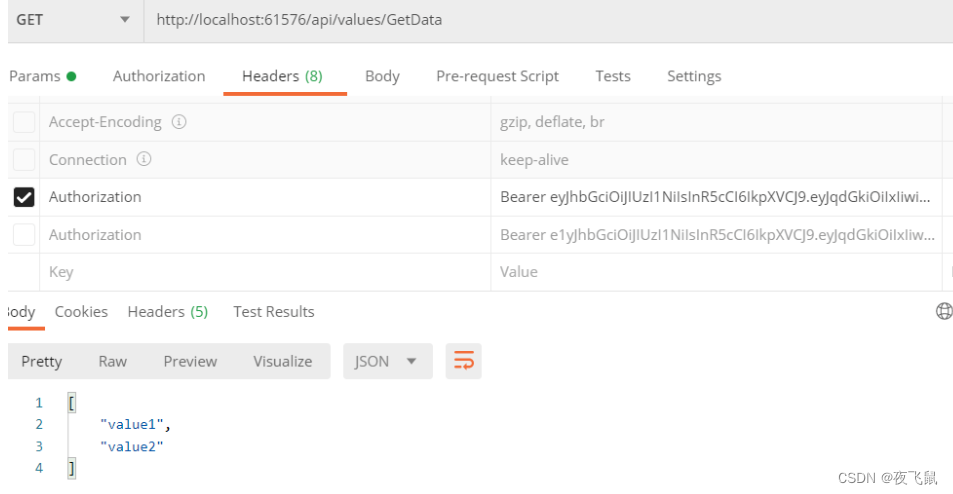
如果是admin用户,请求参数和请求头如下:

请求成功
8.Swagger和JWT设置
在Startup.cs设置:
private const string ApiName = "nmmking.Core.Api";
private readonly string version = "V1";
public void Configure(IApplicationBuilder app, IHostingEnvironment env){if (env.IsDevelopment()){app.UseDeveloperExceptionPage();}app.UseCors("LimitRequests");//注册异常处理中间件app.UseMiddleware<GlobalExceptionMiddleware>();#region Swaggerapp.UseSwagger();app.UseSwaggerUI(c =>{c.SwaggerEndpoint($"/swagger/{version}/swagger.json", $"{ApiName} {version}");//c.IndexStream = () => GetType().GetTypeInfo().Assembly.GetManifestResourceStream("index.html");c.RoutePrefix = "";});#endregion// 开启权限app.UseAuthentication();app.UseMvc();}
public IServiceProvider ConfigureServices(IServiceCollection services){services.AddMvc().SetCompatibilityVersion(CompatibilityVersion.Version_2_2);services.AddCors(c => {c.AddPolicy("LimitRequests", policy => {policy//.AllowAnyOrigin().WithOrigins(new string[]{ "http://localhost:8881" })//.WithOrigins(Appsettings.app(new string[] { "Startup", "Cors", "IPs" }).Split(',')).AllowAnyHeader().AllowAnyMethod();});});#region Swagger UI Servicevar basePath = Microsoft.DotNet.PlatformAbstractions.ApplicationEnvironment.ApplicationBasePath;services.AddSwaggerGen(c =>{//遍历出全部的版本,做文档信息展示c.SwaggerDoc(version, new OpenApiInfo{Version = version,Title = $"{ApiName} 接口文档——{RuntimeInformation.FrameworkDescription}",Description = $"{ApiName} HTTP API " + version,Contact = new OpenApiContact { Name = ApiName, Email = "nmmking.Core@xxx.com", Url = new Uri("http地址") },License = new OpenApiLicense { Name = ApiName + " 官方文档", Url = new Uri("http地址") }});c.OrderActionsBy(o => o.RelativePath);//就是这里var xmlPath = Path.Combine(basePath, "nmmking.Core.Api.xml");//这个就是刚刚配置的xml文件名c.IncludeXmlComments(xmlPath, true);//默认的第二个参数是false,这个是controller的注释,记得修改var xmlPath2 = Path.Combine(basePath, "nmmking.Core.Model.xml");c.IncludeXmlComments(xmlPath2, true);#region Token绑定到ConfigureServices// 开启加权小锁c.OperationFilter<AddResponseHeadersFilter>();c.OperationFilter<AppendAuthorizeToSummaryOperationFilter>();// 在header中添加token,传递到后台c.OperationFilter<SecurityRequirementsOperationFilter>();// Jwt Bearer 认证,必须是 oauth2c.AddSecurityDefinition("oauth2", new OpenApiSecurityScheme{Description = "JWT授权(数据将在请求头中进行传输) 直接在下框中输入Bearer {token}(注意两者之间是一个空格)\"",Name = "Authorization",//jwt默认的参数名称In = ParameterLocation.Header,//jwt默认存放Authorization信息的位置(请求头中)Type = SecuritySchemeType.ApiKey});#endregion});#endregion#region 授权// 读取配置文件var audienceConfig = Configuration.GetSection("Audience");var symmetricKeyAsBase64 = audienceConfig["Secret"];var keyByteArray = Encoding.ASCII.GetBytes(symmetricKeyAsBase64);var signingKey = new SymmetricSecurityKey(keyByteArray);var signingCredentials = new SigningCredentials(signingKey, SecurityAlgorithms.HmacSha256); //签名// 角色与接口的权限要求参数var permissionRequirement = new PermissionRequirement(ClaimTypes.Role,//基于角色的授权audienceConfig["Issuer"],//发行人audienceConfig["Audience"],//听众signingCredentials,//签名凭据expiration: TimeSpan.FromSeconds(60 * 60)//接口的过期时间);// 授权services.AddAuthorization(options =>{// 权限变量配置options.AddPolicy("Permission",policy => policy.Requirements.Add(permissionRequirement));});// 令牌验证参数var tokenValidationParameters = new TokenValidationParameters{ValidateIssuerSigningKey = true,IssuerSigningKey = signingKey,ValidateIssuer = true,ValidIssuer = audienceConfig["Issuer"],//发行人ValidateAudience = true,ValidAudience = audienceConfig["Audience"],//订阅人ValidateLifetime = true,ClockSkew = TimeSpan.FromSeconds(30),RequireExpirationTime = true,};services.AddAuthentication("Bearer").AddJwtBearer(o =>{o.TokenValidationParameters = tokenValidationParameters;o.Events = new JwtBearerEvents{OnAuthenticationFailed = context =>{// 如果过期,则把<是否过期>添加到,返回头信息中if (context.Exception.GetType() == typeof(SecurityTokenExpiredException)){context.Response.Headers.Add("Token-Expired", "true");}return Task.CompletedTask;}};});services.AddSingleton(permissionRequirement);#endregionreturn services.BuildDynamicProxyProvider();}