创建maven项目
创建父工程
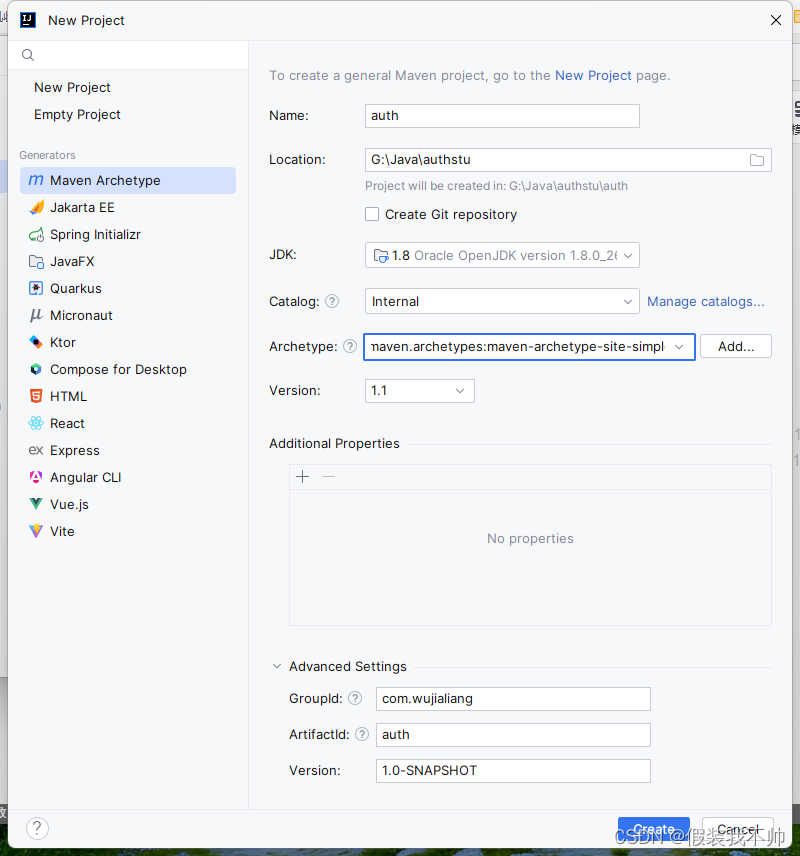
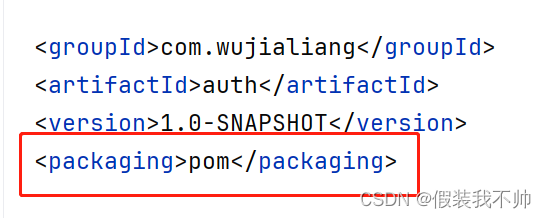
这类项目和原来项目的区别在于,打包方式是pom
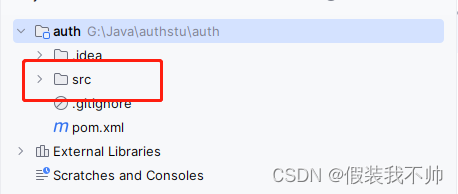
由于pom项目一般都是用来做父项目的,所以该项目的src文件夹可以删除掉。
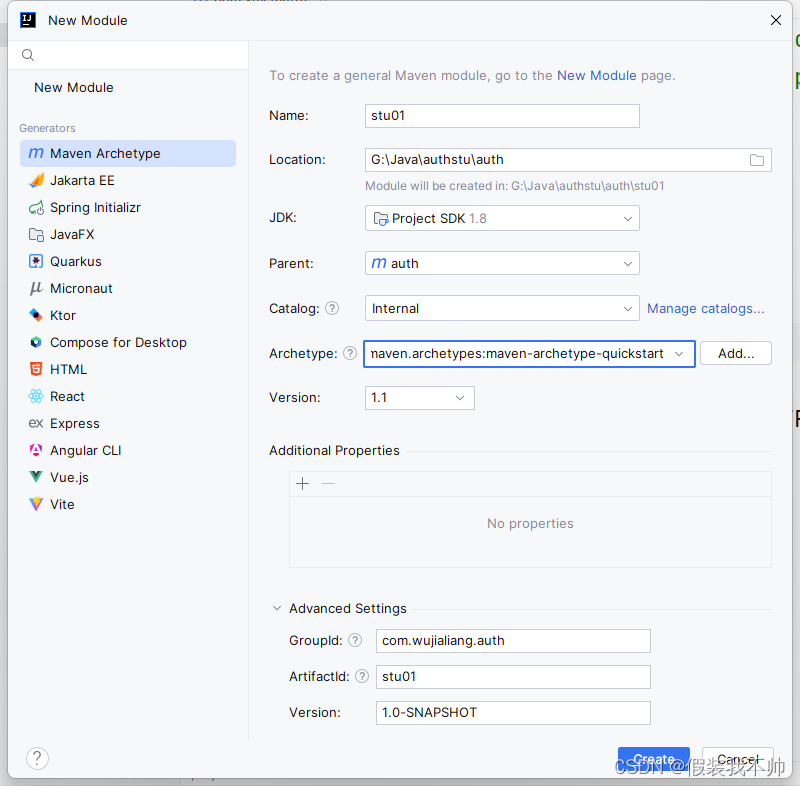
创建子工程
子工程pom.xml
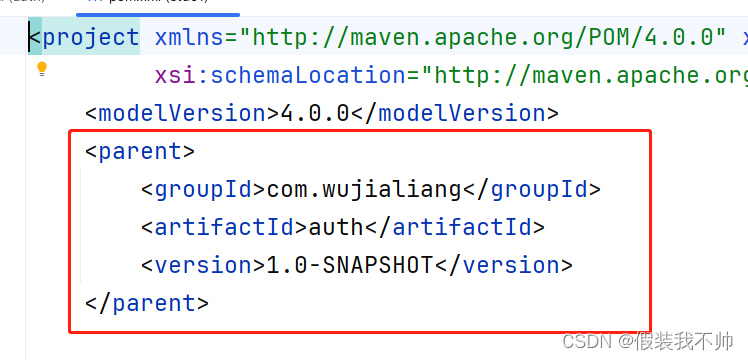
父工程pom.xml

添加依赖
父工程导入依赖包
<!--导入springboot 父工程-->
<parent><artifactId>spring-boot-starter-parent</artifactId><groupId>org.springframework.boot</groupId><version>2.5.3</version>
</parent>
子工程添加依赖包
<dependencies><!--web依赖包, web应用必备--><dependency><groupId>org.springframework.boot</groupId><artifactId>spring-boot-starter-web</artifactId></dependency><!--MySQL,连接MySQL必备--><dependency><groupId>com.mysql</groupId><artifactId>mysql-connector-j</artifactId><version>8.0.33</version></dependency><!--MyBatis-plus,ORM框架,访问并操作数据库--><dependency><groupId>com.baomidou</groupId><artifactId>mybatis-plus-boot-starter</artifactId><version>3.4.0</version></dependency><!-- lombok --><dependency><groupId>org.projectlombok</groupId><artifactId>lombok</artifactId><scope>provided</scope></dependency>
</dependencies>
stu01下main下新建resources文件夹,该文件夹下新建application.yml
server:port: 8080
spring:datasource:url: jdbc:mysql://127.0.0.1:3306/javaauth01?serverTimezone=GMT%2B8&useUnicode=true&characterEncoding=utf-8username: rootpassword: rootdriver-class-name: com.mysql.cj.jdbc.Driver
mybatis-plus:mapper-locations: classpath:mapper/*.xml                #对应mapper映射xml文件所在路径type-aliases-package: com.wujialiang.auth.entity          #对应实体类路径
resources下新建mapper
修改app.java
package com.wujialiang.auth;import org.springframework.boot.SpringApplication;
import org.springframework.boot.autoconfigure.SpringBootApplication;/*** 网站入口**/
@SpringBootApplication
public class App {public static void main(String[] args) {// 第一个参数是该类的名字.class 第二个参数是main方法中的参数SpringApplication.run(App.class, args);}
}
jwt登录验证
实现登录
entity下新建User实体
package com.wujialiang.auth.entity;import lombok.Data;@Data
public class User{private Integer id;private String username;private String password;
}
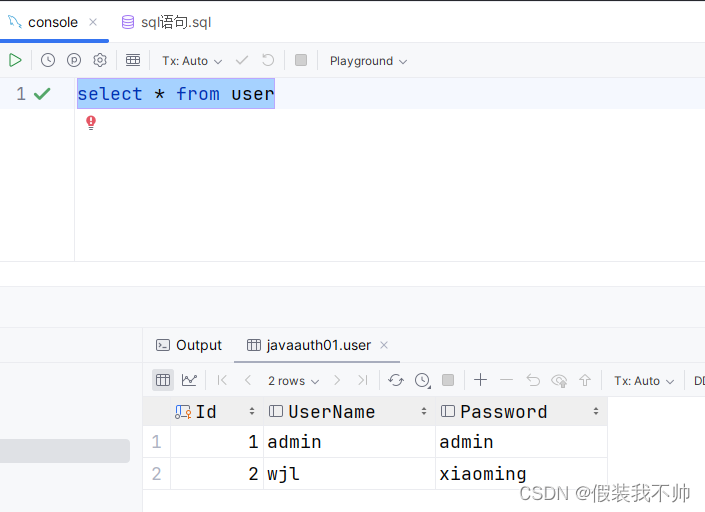
新建SQL
create table User(Id int primary key AUTO_INCREMENT,UserName varchar(50),Password varchar(50)
);insert into User (username, password) values('admin','admin');
insert into User (username, password) values('wjl','xiaoming');
新建mapper文件夹,新建UserMapper接口
package com.wujialiang.auth.mapper;import com.baomidou.mybatisplus.core.mapper.BaseMapper;
import com.wujialiang.auth.entity.User;
import org.apache.ibatis.annotations.Param;
import org.springframework.stereotype.Repository;//@MapperScan("com.example.playspring.mapper")
@Repository
@Mapper
public interface UserMapper extends BaseMapper<User> {/*** 用户登录判断* @param userName* @param password* @return*/boolean userLogin(@Param("userName") String userName,@Param("password") String password);
}
resource下mapper下新建UserMapper.xml
<?xml version="1.0" encoding="UTF-8"?>
<!DOCTYPE mapper PUBLIC "-//mybatis.org//DTD Mapper 3.0//EN" "http://mybatis.org/dtd/mybatis-3-mapper.dtd">
<mapper namespace="com.wujialiang.auth.mapper.UserMapper"><select id="userLogin" resultType="java.lang.Boolean">select count(id) from User where username=#{userName} and Password=#{password}</select>
</mapper>
新建UserController
package com.wujialiang.auth.controller;import com.wujialiang.auth.entity.User;
import com.wujialiang.auth.mapper.UserMapper;
import org.springframework.beans.factory.annotation.Autowired;
import org.springframework.web.bind.annotation.PostMapping;
import org.springframework.web.bind.annotation.RequestBody;
import org.springframework.web.bind.annotation.RestController;@RestController
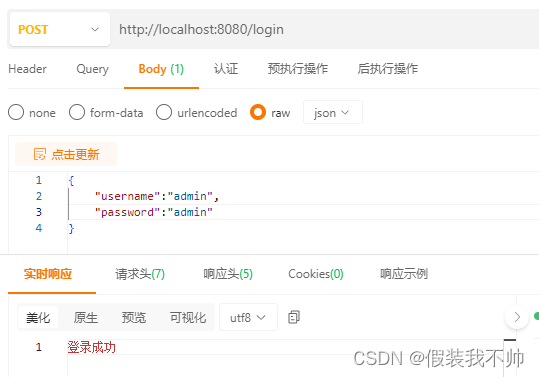
public class UserController {@Autowiredprivate UserMapper userMapper;@PostMapping("/login")public String login(@RequestBody User user) {boolean isLogin = userMapper.userLogin(user.getUsername(), user.getPassword());if (isLogin) {return "登录成功";}return "账号密码错误";}
}
访问接口调试http://localhost:8080/login
接入jwt
添加maven包
<dependency><groupId>io.jsonwebtoken</groupId><artifactId>jjwt</artifactId><version>0.9.1</version>
</dependency>
新建JwtUtil.java
package com.wujialiang.auth.util;import io.jsonwebtoken.Claims;
import io.jsonwebtoken.JwtException;
import io.jsonwebtoken.Jwts;
import io.jsonwebtoken.SignatureAlgorithm;
import org.springframework.util.StringUtils;import java.time.Duration;
import java.util.Date;/*** jwt帮助类*/
public class JwtUtil {/*** 这个秘钥是防止JWT被篡改的关键,随便写什么都好,但决不能泄露*/private final static String secretKey = "1234567890";/*** 过期时间目前设置成2天,这个配置随业务需求而定*/private final static Duration expiration = Duration.ofHours(2);/*** 生成JWT** @param userName 用户名* @return JWT*/public static String generate(String userName) {// 过期时间Date expiryDate = new Date(System.currentTimeMillis() + expiration.toMillis());return Jwts.builder().setSubject(userName) // 将userName放进JWT.setIssuedAt(new Date()) // 设置JWT签发时间.setExpiration(expiryDate)  // 设置过期时间.signWith(SignatureAlgorithm.HS512, secretKey) // 设置加密算法和秘钥.compact();}/*** 解析JWT** @param token JWT字符串* @return 解析成功返回Claims对象,解析失败返回null*/public static Claims parse(String token) {// 如果是空字符串直接返回nullif (StringUtils.isEmpty(token)) {return null;}// 这个Claims对象包含了许多属性,比如签发时间、过期时间以及存放的数据等Claims claims = null;// 解析失败了会抛出异常,所以我们要捕捉一下。token过期、token非法都会导致解析失败try {claims = Jwts.parser().setSigningKey(secretKey) // 设置秘钥.parseClaimsJws(token).getBody();} catch (JwtException e) {// 这里应该用日志输出,为了演示方便就直接打印了System.err.println("解析失败!");}return claims;}
}
修改登录接口
@RestController
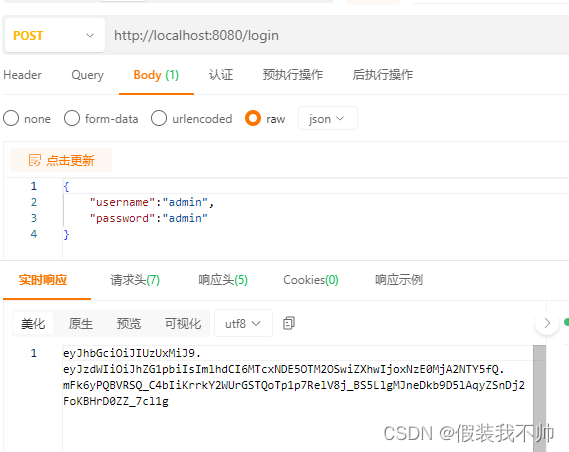
public class UserController {@Autowiredprivate UserMapper userMapper;@PostMapping("/login")public String login(@RequestBody User user) {boolean isLogin = userMapper.userLogin(user.getUsername(), user.getPassword());if (isLogin) {// 如果正确的话就返回生成的token(注意哦,这里服务端是没有存储任何东西的)return JwtUtil.generate(user.getUsername());}return "账号密码错误";}
}
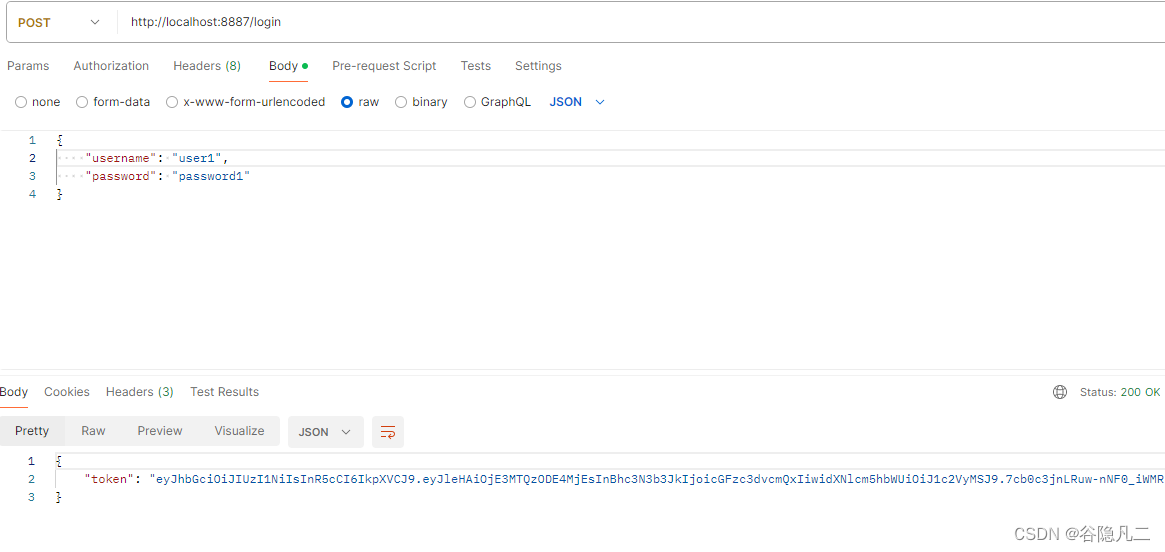
测试登录,返回token,后面要用
编写需要登陆后才能获取的接口
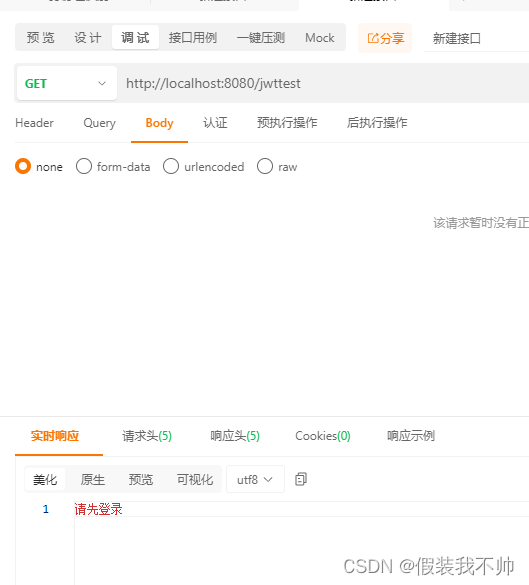
@GetMapping("/jwttest")
public String api(HttpServletRequest request) {// 从请求头中获取token字符串String jwt = request.getHeader("Authorization");// 解析失败就提示用户登录if (JwtUtil.parse(jwt) == null) {return "请先登录";}// 解析成功就执行业务逻辑返回数据return "api成功返回数据";
}
没有token
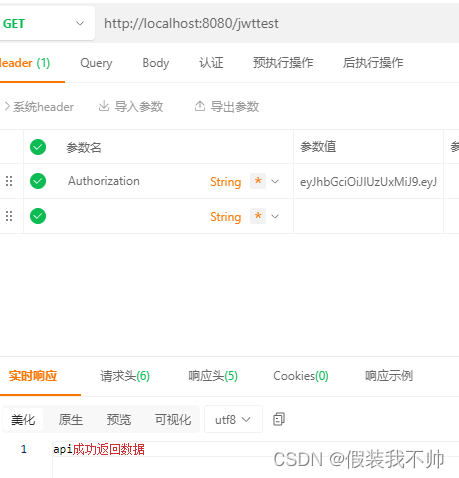
请求头中添加token
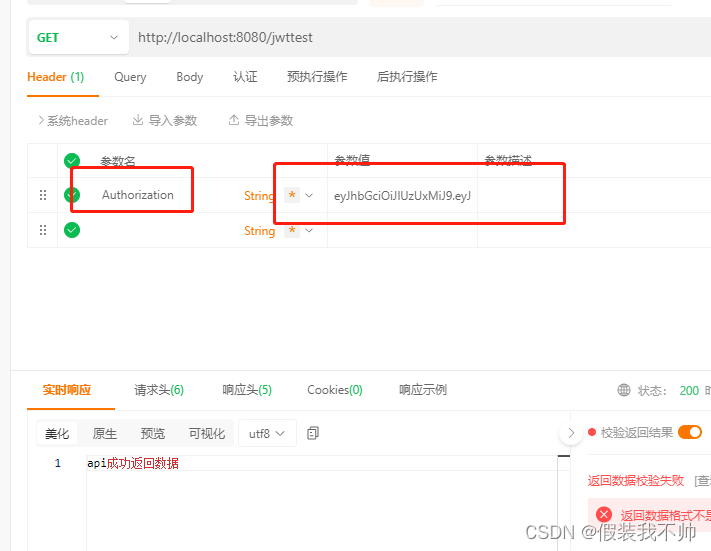
拦截器统一处理用户是否登录
新建LoginInterceptor
package com.wujialiang.auth.interceptor;import com.wujialiang.auth.util.JwtUtil;
import io.jsonwebtoken.Claims;
import org.springframework.web.servlet.handler.HandlerInterceptorAdapter;import javax.servlet.http.HttpServletRequest;
import javax.servlet.http.HttpServletResponse;
import java.io.PrintWriter;/*** 登录拦截器*/
public class LoginInterceptor extends HandlerInterceptorAdapter {@Overridepublic boolean preHandle(HttpServletRequest request, HttpServletResponse response, Object handler) throws Exception {// 简单的白名单,登录这个接口直接放行if ("/login".equals(request.getRequestURI())) {return true;}// 从请求头中获取token字符串并解析Claims claims = JwtUtil.parse(request.getHeader("Authorization"));// 已登录就直接放行if (claims != null) {return true;}// 走到这里就代表是其他接口,且没有登录// 设置响应数据类型为json(前后端分离)response.setContentType("application/json;charset=utf-8");PrintWriter out = response.getWriter();// 设置响应内容,结束请求out.write("请先登录");out.flush();out.close();return false;}
}
拦截器类写好之后,别忘了要使其生效,这里我们直接让SpringBoot启动类实现WevMvcConfigurer接口来做:
package com.wujialiang.auth;import com.wujialiang.auth.interceptor.LoginInterceptor;
import org.springframework.boot.SpringApplication;
import org.springframework.boot.autoconfigure.SpringBootApplication;
import org.springframework.web.servlet.config.annotation.InterceptorRegistry;
import org.springframework.web.servlet.config.annotation.WebMvcConfigurer;/*** 网站入口**/
@SpringBootApplication
public class App implements WebMvcConfigurer {public static void main(String[] args)  {// 第一个参数是该类的名字.class 第二个参数是main方法中的参数SpringApplication.run(App.class, args);}@Overridepublic void addInterceptors(InterceptorRegistry registry) {// 使拦截器生效registry.addInterceptor(new LoginInterceptor());}
}
修改jwttest接口
@GetMapping("/jwttest")
public String api() {return "api成功返回数据";
}
这样接口就简洁多了

上下文对象
为了方便在其他地方获取用户信息,特别是service层
首先我们定义一个上下文类,这个类专门存储JWT解析出来的用户信息。我们要用到ThreadLocal,以防止线程冲突
ThreadLocal 适用于每个线程需要自己独立的实例且该实例需要在多个方法中被使用,也即变量在线程间隔离而在方法或类间共享的场景
package com.wujialiang.auth.context;public final class UserContext {private static final ThreadLocal<String> user = new ThreadLocal<String>();public static void add(String userName) {user.set(userName);}public static void remove() {user.remove();}/*** @return 当前登录用户的用户名*/public static String getCurrentUserName() {return user.get();}
}
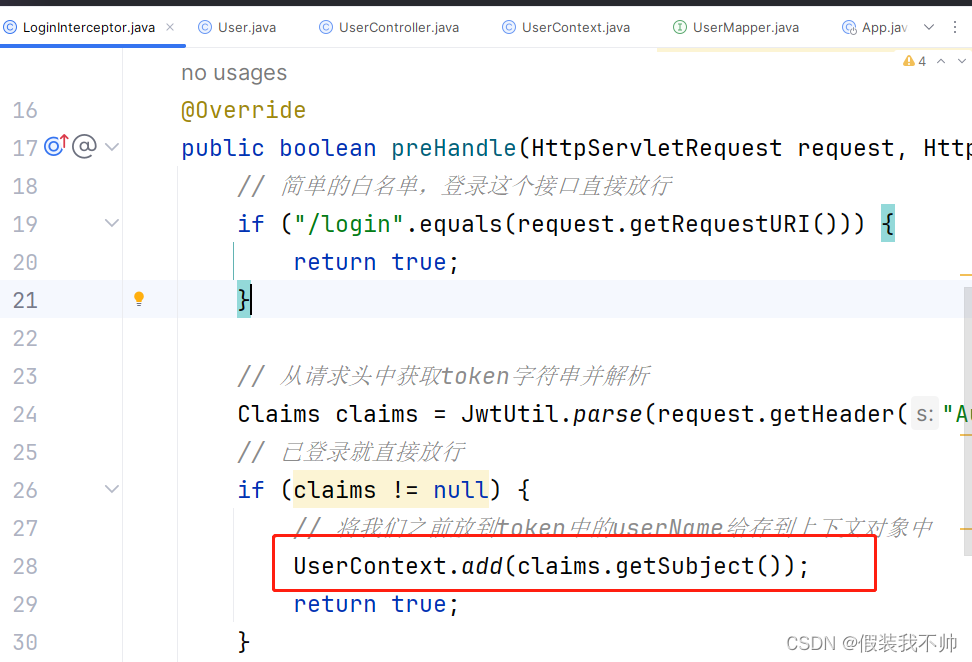
这个类创建好之后我们还需要在拦截器里做下处理
// 从请求头中获取token字符串并解析
Claims claims = JwtUtil.parse(request.getHeader("Authorization"));
// 已登录就直接放行
if (claims != null) {// 将我们之前放到token中的userName给存到上下文对象中UserContext.add(claims.getSubject());return true;
}
新建UserService
package com.wujialiang.auth.service;import com.wujialiang.auth.context.UserContext;
import com.wujialiang.auth.mapper.UserMapper;
import org.springframework.beans.factory.annotation.Autowired;
import org.springframework.stereotype.Service;@Service
public class UserService {@Autowiredprivate UserMapper userMapper;public Boolean userLogin(String userName,String password){boolean isLogin = userMapper.userLogin(userName, password);return isLogin;}public void doSomething() {String currentUserName = UserContext.getCurrentUserName();System.out.println("Service层---当前用户登录名:" + currentUserName);}
}
修改UserController
package com.wujialiang.auth.controller;import com.wujialiang.auth.entity.User;
import com.wujialiang.auth.service.UserService;
import com.wujialiang.auth.util.JwtUtil;
import org.springframework.beans.factory.annotation.Autowired;
import org.springframework.web.bind.annotation.GetMapping;
import org.springframework.web.bind.annotation.PostMapping;
import org.springframework.web.bind.annotation.RequestBody;
import org.springframework.web.bind.annotation.RestController;@RestController
public class UserController {@Autowiredprivate UserService userService;@PostMapping("/login")public String login(@RequestBody User user) {boolean isLogin = userService.userLogin(user.getUsername(), user.getPassword());if (isLogin) {// 如果正确的话就返回生成的token(注意哦,这里服务端是没有存储任何东西的)return JwtUtil.generate(user.getUsername());}return "账号密码错误";}@GetMapping("/jwttest")public String api() {userService.doSomething();return "api成功返回数据";}
}
至此jwt登录验证完成
权限控制
页面权限
页面权限非常容易理解,就是有这个权限的用户才能访问这个页面,没这个权限的用户就无法访问,它是以整个页面为维度,对权限的控制并没有那么细,所以是一种粗颗粒权限。
最直观的一个例子就是,有权限的用户就会显示所有菜单,无权限的用户就只会显示部分菜单:
资源表设计
create table resource(id int primary key AUTO_INCREMENT comment '主键',userId int comment '用户id',path varchar(255) comment 'URL路径'
);insert into resource (userId, path) value(1,'/');
insert into resource (userId, path) value(1,'/user/account');
insert into resource (userId, path) value(1,'/user/role');
insert into resource (userId, path) value(1,'/data');
insert into resource (userId, path) value(2,'/user/role');
insert into resource (userId, path) value(2,'/data');
用户1有全部页面的权限,用户2有部分页面的权限
新建Resource
package com.wujialiang.auth.entity;import lombok.Data;@Data
public class Resource {private int id;private int userId;private String path;
}
新建ResouceMapper
package com.wujialiang.auth.mapper;import com.baomidou.mybatisplus.core.mapper.BaseMapper;
import com.wujialiang.auth.entity.Resource;import java.util.List;@Repository
@Mapper
public interface ResouceMapper extends BaseMapper<Resource> {/*** 获取用户的菜单* @param userName* @return*/List<String> getCurrentUserMenus(String userName);
}
新建ResouceMapper.xml
<?xml version="1.0" encoding="UTF-8"?>
<!DOCTYPE mapper PUBLIC "-//mybatis.org//DTD Mapper 3.0//EN" "http://mybatis.org/dtd/mybatis-3-mapper.dtd">
<mapper namespace="com.wujialiang.auth.mapper.ResouceMapper"><select id="getCurrentUserMenus" parameterType="java.lang.String" resultType="java.lang.String">select path from resource where userId = (select user.id from user  where UserName=#{userName} limit 1)</select>
</mapper>
修改UserService
package com.wujialiang.auth.service;import com.wujialiang.auth.context.UserContext;
import com.wujialiang.auth.mapper.ResouceMapper;
import com.wujialiang.auth.mapper.UserMapper;
import org.springframework.beans.factory.annotation.Autowired;
import org.springframework.stereotype.Service;import java.util.List;@Service
public class UserService {@Autowiredprivate UserMapper userMapper;@Autowiredprivate ResouceMapper resouceMapper;public Boolean userLogin(String userName,String password){boolean isLogin = userMapper.userLogin(userName, password);return isLogin;}public void doSomething() {String currentUserName = UserContext.getCurrentUserName();System.out.println("Service层---当前用户登录名:" + currentUserName);}/*** 获取当前用户的菜单* @return*/public List<String> getCurrentUserMenus(){String currentUserName = UserContext.getCurrentUserName();return resouceMapper.getCurrentUserMenus(currentUserName);}
}
修改UserController
package com.wujialiang.auth.controller;import com.wujialiang.auth.entity.User;
import com.wujialiang.auth.service.UserService;
import com.wujialiang.auth.util.JwtUtil;
import org.springframework.beans.factory.annotation.Autowired;
import org.springframework.web.bind.annotation.GetMapping;
import org.springframework.web.bind.annotation.PostMapping;
import org.springframework.web.bind.annotation.RequestBody;
import org.springframework.web.bind.annotation.RestController;import java.util.List;@RestController
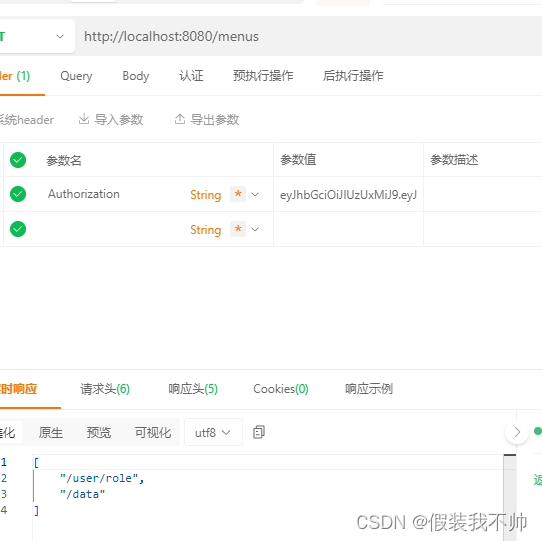
public class UserController {@Autowiredprivate UserService userService;/*** 登录接口* @param user* @return*/@PostMapping("/login")public String login(@RequestBody User user) {boolean isLogin = userService.userLogin(user.getUsername(), user.getPassword());if (isLogin) {// 如果正确的话就返回生成的token(注意哦,这里服务端是没有存储任何东西的)return JwtUtil.generate(user.getUsername());}return "账号密码错误";}@GetMapping("/jwttest")public String api() {userService.doSomething();return "api成功返回数据";}/*** 获取当前用户的菜单* @return*/@GetMapping("/menus")public List<String> getMenus() {return userService.getCurrentUserMenus();}
}用户1获取
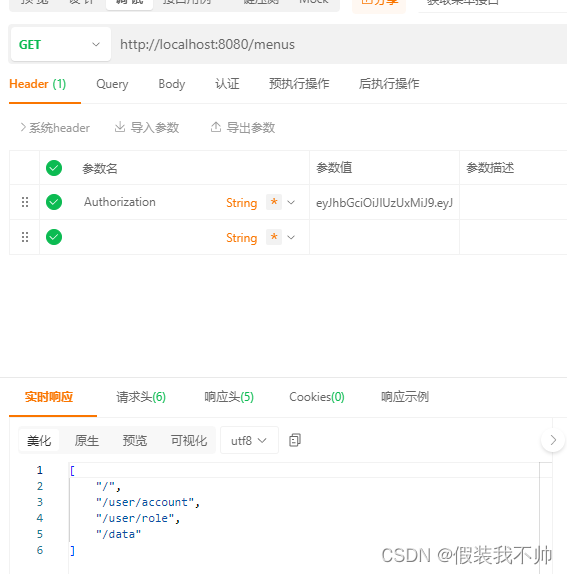
用户2获取菜单接口
对于页面的增删改不做讲解
RBAC模型
我这里为了方便演示所以没有设置过多的权限资源(就是导航菜单),所以整个权限系统用起来好像也挺方便的,不过一旦权限资源多了起来目前的设计有点捉襟见肘了。假设我们有100个权限资源,A用户要设置50个权限,BCD三个用户也要设置这同样的50个权限,那么我必须为每个用户都重复操作50下才行!这种需求还特别特别常见,比如销售部门的员工都拥有同样的权限,每新来一个员工我就得给其一步一步重复地去设置权限,并且我要是更改这个销售部门的权限,那么旗下所有员工的权限都得一一更改,极其繁琐。
现在我们的权限关系是和用户绑定的,所以每有一个新用户我们就得为其设置一套专属的权限。既然很多用户的权限都是相同的,那么我再封装一层出来,屏蔽用户和权限之间的关系不就搞定了。
修改资源表,添加角色表、用户角色关联关系、角色资源关联关系
create table resource(id int primary key AUTO_INCREMENT comment '主键',path varchar(255) comment 'URL路径',name varchar(255) comment 'URL名称'
);insert into resource (path,name) value('/','首页');
insert into resource (path,name) value('/user/account','账户管理');
insert into resource (path,name) value('/user/role','角色管理');
insert into resource (path,name) value('/data','数据管理');create table role(id int primary key AUTO_INCREMENT comment '主键',name varchar(255) comment '角色名称'
);insert into role (name) value('超级管理员');
insert into role (name) value('数据管理员');create table role_resource(roleId int comment '角色id',resourceId int comment '资源id'
);-- 超级管理员
insert into role_resource (roleId,resourceId) value(1,1);
insert into role_resource (roleId,resourceId) value(1,2);
insert into role_resource (roleId,resourceId) value(1,3);
insert into role_resource (roleId,resourceId) value(1,4);
-- 数据管理员
insert into role_resource (roleId,resourceId) value(2,1);
insert into role_resource (roleId,resourceId) value(2,4);create table user_role(roleId int comment '角色id',userId int comment '用户id'
);
-- 用户1超级管理员
insert into user_role (roleId,userId) value(1,1);
-- 用户2
insert into user_role (roleId,userId) value(2,2);
实体
@Data
public class Resource {private int id;private String name;private String path;
}@Data
public class Role {private int id;private String name;
}@Data
public class RoleResource {private int roleId;private int resourceId;
}@Data
public class UserRole {private int roleId;private int userId;
}
修改ResouceMapper以及相关的service和controller
@Repository
@Mapper
public interface ResouceMapper extends BaseMapper<Resource> {/*** 获取用户的菜单* @param userName* @return*/List<Resource> getCurrentUserMenus(String userName);
}
修改ResouceMapper.xml
<?xml version="1.0" encoding="UTF-8"?>
<!DOCTYPE mapper PUBLIC "-//mybatis.org//DTD Mapper 3.0//EN" "http://mybatis.org/dtd/mybatis-3-mapper.dtd">
<mapper namespace="com.wujialiang.auth.mapper.ResouceMapper"><select id="getCurrentUserMenus" parameterType="java.lang.String" resultType="com.wujialiang.auth.entity.Resource">select t2.id,t2.name,t2.path from role_resource t1left join resource t2 on t2.id=t1.resourceIdwhere t1.roleId =(select t3.roleId from user_role t3 where t3.userId=(select t4.id from user t4 where t4.UserName=#{userName} limit 1)limit 1)</select>
</mapper>
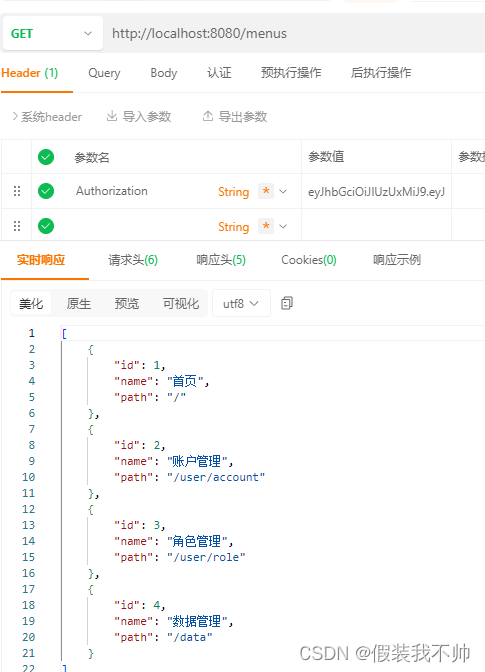
用户1超级管理员权限如下
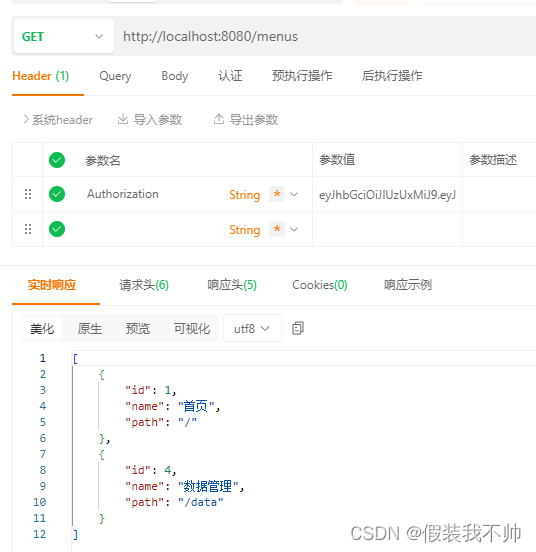
用户2数据管理员权限如下
后续请看下篇
springboot权限验证学习-下
参考
https://www.cnblogs.com/RudeCrab/p/14251274.html
https://www.cnblogs.com/RudeCrab/p/14251154.html
https://blog.csdn.net/qq1910506668/article/details/136608184