介绍
.NET 6.0 已经发布,ASP.NET Core 6.0 也已发布。其中有不少变化让很多人感到困惑。例如,“谁动了我的奶酪”,它在哪里Startup.cs?在这篇文章中,我将深入研究这个问题,看看它移动到了哪里以及其他变化。
ASP.NET Core 的中间件并没有发生根本性的变化,但部分项目结构以及注册依赖项的位置发生了变化。为了更好地理解它,最好从 .NET Core 3.1 项目模板开始,然后手动升级它,看看它与新模板相比如何。
升级旧式控制台项目
首先,让我们创建一个新的控制台项目。我将其命名为OldToNew。我选择了 .NET Core 3.1 目标,并将其升级到 .NET 6.0 以查看差异。如果您已经使用 .NET 一段时间,您会在文件中认出这个项目结构Program.cs。
using System;
namespace OldToNew
{
internal class Program
{
static void Main(string[] args)
{
Console.WriteLine("Hello World!");
}
}
}
在 .NET 6.0 中,这些变化旨在简化和消除应用程序中的冗余。他们引入的首批功能之一是所谓的Filescoped Namespaces。传统命名空间如下所示:
namespace OldToNew
{
// code goes here.
}
如果您已经使用过 .NET 一段时间,那么您可能从未在文件中放置过多个命名空间。您可以删除花括号,只需添加分号,将整个文件标记为使用一个命名空间。
namespace OldToNew;
// code goes here.
using System;
namespace OldToNew;
internal class Program
{
static void Main(string[] args)
{
Console.WriteLine("Hello World!");
}
}
Visual Studio 将会向我抱怨,因为这是一个 .NET Core 3.1 项目,所以在我们走得太远之前,我们需要编辑 .NET Core 3.1 .csproj 文件并将其转换为 .NET 6.0 应用程序。
<!-- .NET Core 3.1 -->
<Project Sdk="Microsoft.NET.Sdk">
<PropertyGroup>
<OutputType>Exe</OutputType>
<TargetFramework>netcoreapp3.1</TargetFramework>
</PropertyGroup>
</Project>
<!-- .NET 6.0 -->
<Project Sdk="Microsoft.NET.Sdk">
<PropertyGroup>
<OutputType>Exe</OutputType>
<TargetFramework>net6.0</TargetFramework>
</PropertyGroup>
</Project>
一旦我们做出这一改变,Visual Studio 就会对文件范围的命名空间感到满意。
我们要做的下一个更改是删除该using System;行。为此,我们需要再次编辑项目文件并启用Implicit Usings。
<!-- .NET 6.0 -->
<Project Sdk="Microsoft.NET.Sdk">
<PropertyGroup>
<OutputType>Exe</OutputType>
<TargetFramework>net6.0</TargetFramework>
<ImplicitUsings>enable</ImplicitUsings>
</PropertyGroup>
</Project>
如果我们启用隐式 using 语句,我们通常使用的大多数常用 using 语句将默认包含在 SDK 中,您不再需要将它们包含在文件中。我们可以删除该using System;行,因为编译器会自动为我们添加 using 语句。
namespace OldToNew;
internal class Program
{
static void Main(string[] args)
{
Console.WriteLine("Hello World!");
}
}
他们引入的下一个功能是所谓的“顶级语句”。 其目的是删除每个控制台应用程序或 ASP.NET Core 应用程序中存在的“垃圾”。
使用顶级语句,我们可以删除static void Main(string[] args)方法和花括号以及命名空间和class Program声明。
Console.WriteLine("Hello World!");
一旦删除所有这些,您就会看到我们剩下的唯一代码就是我们的Console.WriteLine()方法!
将控制台应用更改为 Web 应用 (ASP.NET Core)
目前,这只是一个简单的控制台应用程序,但我想将其转换为 ASP.NET Core 应用程序。在执行此操作之前,让我们先查看解决方案资源管理器中的依赖项和框架节点。

您可以在上方看到,Frameworks这Microsoft.NETCore.App是包含创建控制台应用程序所需的所有包的 SDK。让我们将 .csproj 文件中的 SDK 类型更改为 .Web 类型项目,看看会发生什么Microsoft.NET.Sdk:Microsoft.NET.Sdk.Web。
<!-- .NET 6.0 -->
<Project Sdk="Microsoft.NET.Sdk.Web">
<PropertyGroup>
<OutputType>Exe</OutputType>
<TargetFramework>net6.0</TargetFramework>
</PropertyGroup>
</Project>
注意现在依赖下发生的情况:

该框架现在包括Microsoft.AspNetCore.App将引入创建 ASP.NET Core 应用程序所需的所有包。它还将修改全局 using 语句以包含 ASP.NET 特定的 using 语句。
现在让我们删除该Console.WriteLine("Hello World!");行并添加 ASP.NET Core 特定的代码。
var builder = WebApplication.CreateBuilder(args);
var app = builder.Build();
app.Run();
我们现在正在构建一个 Web 应用程序。WebApplication对象从哪里来?它属于Microsoft.AspNetCore.Builder命名空间。
我们可以运行这个应用程序,但是由于没有端点,所以会有点无聊。让我们添加一个端点来完成这个任务:
app.MapGet("/", () => {
return "Hello World!";
});
我们刚刚在 ASP.NET Core 6.0 中创建了一个最小 API Web 应用程序。让我们运行它并看看会发生什么。

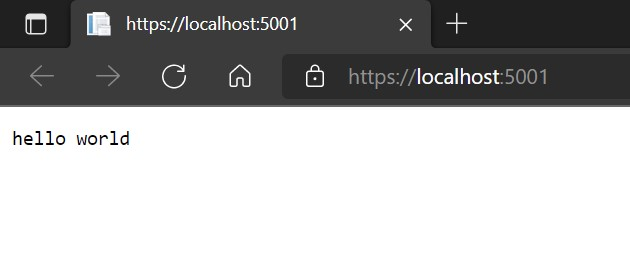
当我们启动默认路径时,它会返回,hello world因此我们有一个功能齐全的 Web 应用程序。最少的 API 是快速构建 Web API 项目的好方法。
Startup.cs 怎么样?
ASP.NET Core 6.0 中的中间件流程与完整 Web API MVC 项目的流程类似,并且共享许多相同的实现。在以前的 ASP.NET Core 项目中,您将获得一个Startup.cs包含两个方法的类ConfigureServices()和Configure()。
在 ConfigureServices()中,您注册了依赖项注入服务。在 Configure() 中,您概述了中间件管道顺序和结构。
在我们的新项目中,这是什么样子的?您将依赖注入放在哪里?答案是在第一行和第二行之间,注册中间件在第二行和第三行之间,如下所示。
var builder = WebApplication.CreateBuilder(args);
// REGISTER SERVICES HERE
var app = builder.Build();
// REGISTER MIDDLEWARE HERE
app.Run();
例如,如果我想添加身份验证,我会像这样注册:
var builder = WebApplication.CreateBuilder(args);
// REGISTER SERVICES HERE
builder.Services.AddAuthentication(...) ...
builder.Services.AddAuthorization();
var app = builder.Build();
// REGISTER MIDDLEWARE HERE
app.UseAuthentication();
app.UseAuthorization();
app.MapGet("/", () => {
return "Hello World!";
});
app.Run();
中间件管道中的顺序很重要,因此我在中间件MapGet()上方添加了UseAuthentication()和UseAuthorization()。但是,为了使其生效,您需要使用属性注释要保护的端点。这将需要使用语句[Authorize],必须引用:Microsoft.AspNetCore.Authorization 。
using Microsoft.AspNetCore.Authorization;
...
app.MapGet("/",[Authorize]() => {
return "Hello World!";
});
Program.cs到目前为止,我们的文件的完整代码如下所示:
var builder = WebApplication.CreateBuilder(args);
// REGISTER SERVICES HERE
builder.Services.AddAuthentication();
builder.Services.AddAuthorization();
var app = builder.Build();
// REGISTER MIDDLEWARE HERE
app.UseAuthentication();
app.UseAuthorization();
app.MapGet("/",[Authorize] () => {
return "Hello World!";
});
app.Run();
如果我们现在运行它,我们将会得到一个异常,因为我们从未指定身份验证方案。
让我们修复它。我们可以选择多种不同类型的身份验证方案,但在 WebAPI 中,我们通常使用诸如 bearer token 或 JWT token 之类的东西来保护应用程序。
让我们继续将 JWT 承载者添加到最小 API。我们需要Microsoft.AspNetCore.Authentication.JwtBearer通过 NuGet 导入包,然后添加以下代码:
using Microsoft.AspNetCore.Authentication.JwtBearer;
...
builder.Services.AddAuthentication(JwtBearerDefaults.AuthenticationScheme).AddJwtBearer();
所以完整的块应该是这样的:
using Microsoft.AspNetCore.Authentication.JwtBearer;
using Microsoft.AspNetCore.Authorization;
var builder = WebApplication.CreateBuilder(args);
// REGISTER SERVICES HERE
builder.Services.AddAuthentication(JwtBearerDefaults.AuthenticationScheme).AddJwtBearer();
builder.Services.AddAuthorization();
var app = builder.Build();
// REGISTER MIDDLEWARE HERE
app.UseAuthentication();
app.UseAuthorization();
app.MapGet("/", [Authorize] () => {
return "Hello World!";
});
app.Run();
JWT Bearer 已添加到应用程序中,让我们运行它并查看会发生什么。现在我们得到了我们正在寻找的状态,401 unauthorized因为我们没有为其提供任何类型的令牌。还需要其他步骤来设置获取令牌的方法并确保我们只允许接受有效的令牌,但这超出了本文的范围。本文的重点是演示在哪里注册依赖项和中间件以及如何使用它们。
我们应该做的最后一项修改是将 [Authorize] 属性更改为使用“流畅的语法”,如下所示:
//FROM THIS:
app.MapGet("/", [Authorize] () => {
return "Hello World!";
});
//TO THIS:
app.MapGet("/", () => {
return "Hello World!";
}).RequireAuthorization();
它们都做同样的事情,但是在最小 API 情况下,“流畅的语法”感觉更自然。
恢复丢失的 Startup.cs 文件
接下来,让我们看看能否恢复我们的老朋友Startup.cs文件。如果将所有内容都放在一个文件中,最小 API 结构可能会变得混乱和臃肿。
一定有办法让我们更好地组织这些。我将首先向Startup.cs项目添加一个名为的新类。
public class Startup
{
public Startup(IConfiguration configuration)
{
Configuration = configuration;
}
public IConfiguration Configuration { get; }
public void ConfigureServices(IServiceCollection services)
{
}
public void Configure(WebApplication app, IWebHostEnvironment env)
{
}
}
这看起来应该与过去的完整 Web API 项目模板很相似。我只是将其粘贴到我的新Startup.cs文件中并删除了命名空间。该Startup.cs文件需要IConfiguration传入一个对象。我们可以从我们的 中提供该对象吗Program.cs?
// Program.cs file
var builder = WebApplication.CreateBuilder(args);
var startup = new Startup(builder.Configuration);
是的。我们可以这样做。builder创建的对象包含一个Configuration属性,我们可以使用该属性将其传递给Startup构造函数。
接下来,让我们尝试为该ConfigureServices()方法提供一个IServiceCollection。
// Program.cs file
var builder = WebApplication.CreateBuilder(args);
var startup = new Startup(builder.Configuration);
startup.ConfigureServices(builder.Services);
同样,builder包含一个Services我们可以用来传递给ConfigureServices()方法的属性。现在我们可以从中删除所有依赖注入代码Program.cs并将其移动到ConfigureServices中的方法Startup.cs。
// Startup.cs file
public void ConfigureServices(IServiceCollection services)
{
services.AddAuthentication(JwtBearerDefaults.AuthenticationScheme).AddJwtBearer();
services.AddAuthorization();
}
接下来,让我们尝试Configure()用WebApplication类提供方法。
// Program.cs file
var builder = WebApplication.CreateBuilder(args);
var startup = new Startup(builder.Configuration);
startup.ConfigureServices(builder.Services);
var app = builder.Build();
startup.Configure(app, builder.HostingEnvironment);
有趣的是,虽然我们传递的app是 类型WebApplication,但如果你检查它,该Configure()方法需要的是IApplicationBuilder,但它似乎没问题。为什么?如果你深入研究该WebApplication对象,你会看到它实现了IApplicationBuilder接口。
我们将中间件管道代码剪切出来Program.cs,并将其粘贴到Configure()方法中Startup.cs。
// Startup.cs file
public void Configure(IApplicationBuilder app, IWebHostEnvironment env)
{
app.UseAuthentication();
app.UseAuthorization();
app.MapGet("/", () =>
{
return "hello world";
}).RequireAuthorization();
app.Run();
}
不幸的是,这实际上行不通,因为接口IApplicationBuilder没有MapGet()方法或Run()方法。那些存在于WebApplication类中。如果我们将Configure()方法更改为接受WebApplication对象,它应该可以工作。
// Startup.cs file
public void Configure(WebApplication app, IWebHostEnvironment env)
{
app.UseAuthentication();
app.UseAuthorization();
app.MapGet("/", () =>
{
return "hello world";
}).RequireAuthorization();
app.Run();
}
让我们看一下完整的文件“Program.cs”和“Startup.cs”,看看它们现在是什么样子。
// Program.cs file
var builder = WebApplication.CreateBuilder(args);
var startup = new Startup(builder.Configuration);
startup.ConfigureServices(builder.Services);
var app = builder.Build();
startup.Configure(app, builder.Environment);
// Startup.cs file
using Microsoft.AspNetCore.Authentication.JwtBearer;
public class Startup
{
public Startup(IConfiguration configuration)
{
Configuration = configuration;
}
public IConfiguration Configuration { get; }
// This method gets called by the runtime. Use this method to add services to the container.
public void ConfigureServices(IServiceCollection services)
{
services.AddAuthentication(options =>
{
options.DefaultScheme = JwtBearerDefaults.AuthenticationScheme;
}).AddJwtBearer();
services.AddAuthorization();
}
// This method gets called by the runtime. Use this method to configure the HTTP request pipeline.
public void Configure(WebApplication app, IWebHostEnvironment env)
{
app.UseAuthentication();
app.UseAuthorization();
app.MapGet("/", () =>
{
return "hello world";
}).RequireAuthorization();
app.Run();
}
}
如果我们运行它,我们会得到401 Unauthorized状态,这意味着它正在运行。除了将我们的配置内容移到 中之外Startup.cs,我们没有做太多改变,这让它看起来更像旧的 .Net Core 风格。
我们可以做得更好吗?
使用Startup.cs确实有助于改善组织,但我认为我们可以做得更好。我一直讨厌文件中Startup.cs单词ConfigureServices()和Configure()彼此太接近,而且你还要传递一个IConfiguration对象。这可能会让人搞不清楚什么放在哪里。
我们为什么不尝试改进这一点呢?我不喜欢这个名字ConfigureServices()。如果我们将它重命名为RegisterDependentServices()并将其放在自己的文件中会怎么样?这将使我们更容易理解发生了什么。
// RegisterDependentServices.cs file
using Microsoft.AspNetCore.Authentication.JwtBearer;
public static class RegisterDependentServices
{
public static WebApplicationBuilder RegisterServices(this WebApplicationBuilder builder)
{
// Register your dependencies
builder.Services.AddAuthentication(JwtBearerDefaults.AuthenticationScheme)
.AddJwtBearer();
builder.Services.AddAuthorization();
return builder;
}
}
我决定创建该类static并使用扩展方法将其添加到该类中。我们稍后WebApplicationBuilder会看到这如何改进文件。Program.cs
接下来,让我们创建一个新文件SetupMiddlewarePipeline.cs。此文件将包含中间件管道。
public static class SetupMiddlewarePipeline
{
public static WebApplication SetupMiddleware(this WebApplication app)
{
// Configure the pipeline !! ORDER MATTERS !!
app.UseAuthorization();
app.UseAuthentication();
app.MapGet("/", () =>
{
return "hello world";
}).RequireAuthorization();
return app;
}
}
现在,这会如何改变我们的Program.cs文件?
// Program.cs file
WebApplication app = WebApplication.CreateBuilder(args)
.RegisterServices()
.Build();
app.SetupMiddleware()
.Run();
这样就生成了一个非常干净的Program.cs文件。事实上,如果您愿意,您可以将其全部放在一行中。
// Program.cs file
WebApplication.CreateBuilder(args)
.RegisterServices()
.Build()
.SetupMiddleware()
.Run();
我并不讨厌它。事实上,我觉得我喜欢它。
那么 IConfiguration 怎么样?
之前,Startup()构造函数需要IConfiguration注入其中。但是,由于WebApplication和WebApplicationBuilder都具有.Configuration属性,因此我们不再需要显式注入它。
// RegisterDependentServices.cs file
public static class RegisterDependentServices
{
public static WebApplicationBuilder RegisterServices(this WebApplicationBuilder builder)
{
// ******* Access the configuration *******
var config = builder.Configuration;
// Register your dependencies
builder.Services.AddAuthentication(JwtBearerDefaults.AuthenticationScheme)
.AddJwtBearer();
builder.Services.AddAuthorization();
return builder;
}
}
// setupMiddlewarePipeline.cs file
public static class SetupMiddlewarePipeline
{
public static WebApplication SetupMiddleware(this WebApplication app)
{
// ******** Access the configuration ********
var config = app.Configuration;
// Configure the pipeline !! ORDER MATTERS !!
app.UseAuthorization();
app.UseAuthentication();
app.MapGet("/", () =>
{
return "hello world";
}).RequireAuthorization();
return app;
}
}
如果我们需要访问应用程序的配置,它是可用的,而且我们的状况很好。
如果您喜欢此文章,请收藏、点赞、评论,谢谢,祝您快乐每一天。


