官网链接:translate
1. 概述
translate是鸿蒙系统提供的一种通用属性,用来做组件的平移,可以在x, y, z三个方向上对组件进行平移处理,使之达到想要的效果。
2. translate属性
2.1. 语法参数
translate(value: TranslateOptions)参数:
| 参数名 | 类型 | 必填 | 说明 |
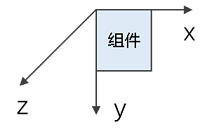
| value | TranslateOptions | 是 | 可使组件在以组件左上角为坐标原点的坐标系中进行移动(坐标系如下图所示)。其中,x,y,z的值分别表示在对应轴移动的距离,值为正时表示向对应轴的正向移动,值为负时表示向对应轴的反向移动。移动距离支持数字和字符串(比如'10px',‘10%’)两种类型。 默认值: { x: 0, y: 0, z: 0 } 单位:vp
说明: z轴方向移动时由于观察点位置不变,z的值接近观察点组件会有放大效果,远离则缩小。
|
TranslateOptions:
| 名称 | 类型 | 必填 | 说明 |
| x | number | string | 否 | x轴的平移距离。 |
| y | number | string | 否 | y轴的平移距离。 |
| z | number | string | 否 | z轴的平移距离。 |
2.2. 原理详解
translate的移动是相对组件初始化的左上角坐标而言,每一次的移动,都是从初始左上角计算,而不是从上一次移动后的位置计算,如下图所示:

在图中可以看到,组件每次的移动都是根据组件初始化的位置(0,0)的偏移量,而非基于上一次的偏移之后的移动。
那么如果组件的坐标不在(0,0)点呢?其实都是一样的,不管组件的初始坐标在哪里,组件的移动都是基于自身的初始坐标在移动,但是需要保证所有的坐标值是在同一个坐标系中的换算。
如下,在同一个坐标系下, 将组件从起始点,分别移动到A,B点偏移量的计算

如图,组件的初始位置为(50, 50), A点位置(300, 200), B点位置(450, 150)
组件移动到A的位置偏移量计算:
translateX = 300 - 50 = 250
translateY = 200 -50 = 150
组件移动到B位置偏移量计算:
translateX = 450 - 50 = 400
translateY = 150 - 50 = 100
如上所述,组件的每次移动都是相对于起初始的左上角的位置而言,左上角的坐标不随translate的改变而改变。(组件的位置可以使用position属性进行初始化)
2.3. Demo样例
根据以上组件移动到A,B点为例,写demo来看一下显示的效果
@Component
struct TranslateView {@State translateInfo: TranslateInfo = new TranslateInfo()private componentLeftPoint: Position = { x: 50, y: 50 }private pointA: Position = { x: 300, y: 200 }private pointB: Position = { x: 450, y: 150 }build() {Stack() {Text('A').position({ x: this.pointA.x, y: this.pointA.y as number - 20 })Shape() {Circle({ width: 8, height: 8 })}.position(this.pointA)Text('B').position({ x: this.pointB.x, y: this.pointB.y as number - 20 })Shape() {Circle({ width: 8, height: 8 })}.position(this.pointB)Image($rawfile('litte_car.png')).width(100).height(100).position(this.componentLeftPoint).translate({x: this.translateInfo.x,y: this.translateInfo.y,z: this.translateInfo.z}).border({ width: 1, color: Color.Red }).animation({ duration: 2000 })Row({ space: 10 }) {Button('translateA').onClick(() => {this.translateInfo.x = this.pointA.x as number - (this.componentLeftPoint.x as number);this.translateInfo.y = this.pointA.y as number - (this.componentLeftPoint.y as number);})Button('translateB').onClick(() => {this.translateInfo.x = this.pointB.x as number - (this.componentLeftPoint.x as number);this.translateInfo.y = this.pointB.y as number - (this.componentLeftPoint.y as number);})}.position({ x: 0, y: 200 })}.border({ width: 1, color: Color.Green }).width(600).height(350)}
}class TranslateInfo {public x: number = 0;public y: number = 0;public z: number = 0;
}
从起始位置移动到A点:
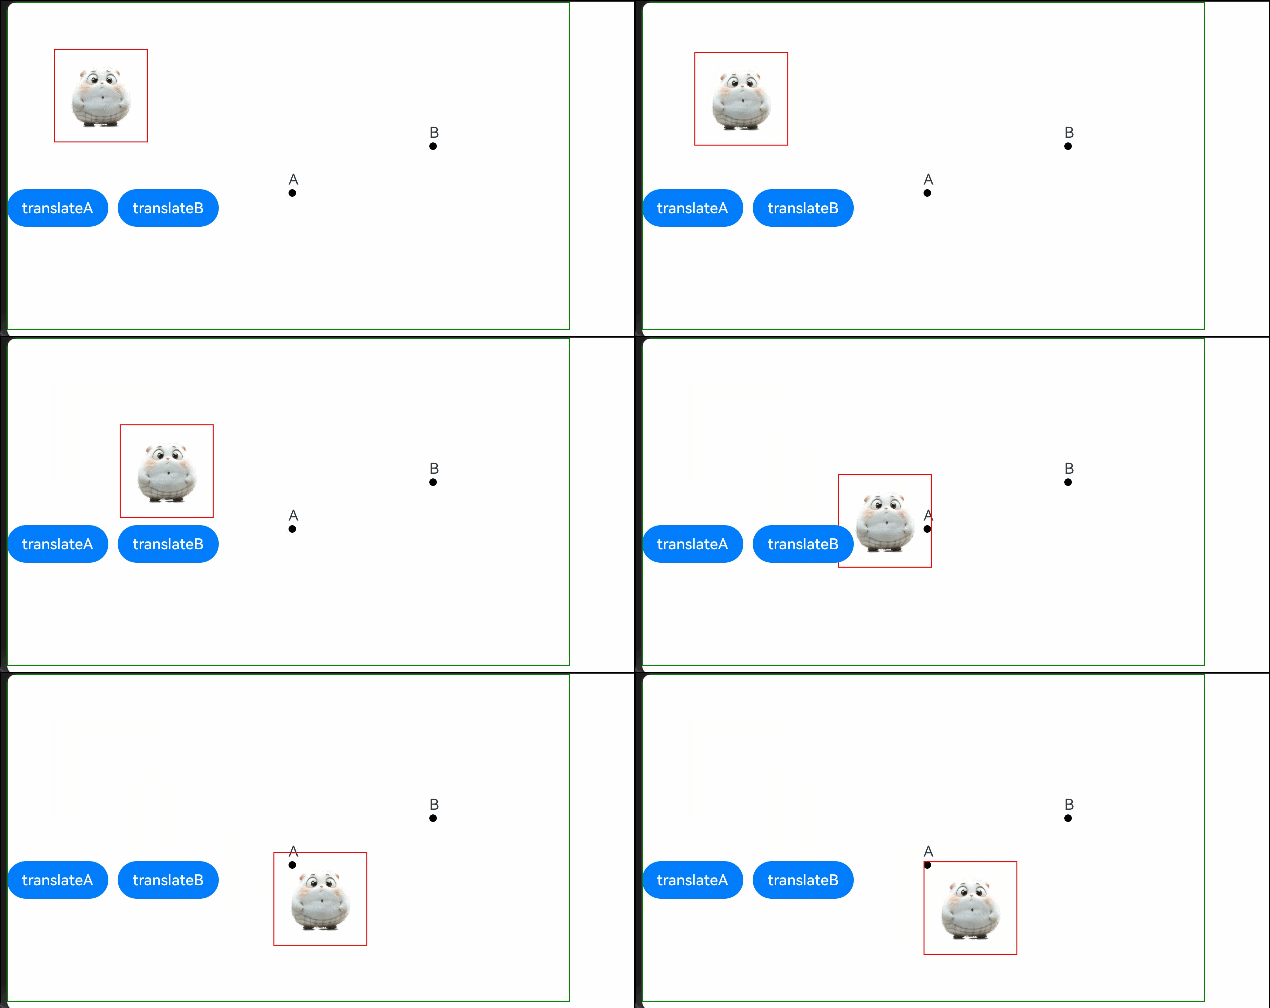
从起始位置移动到B点:
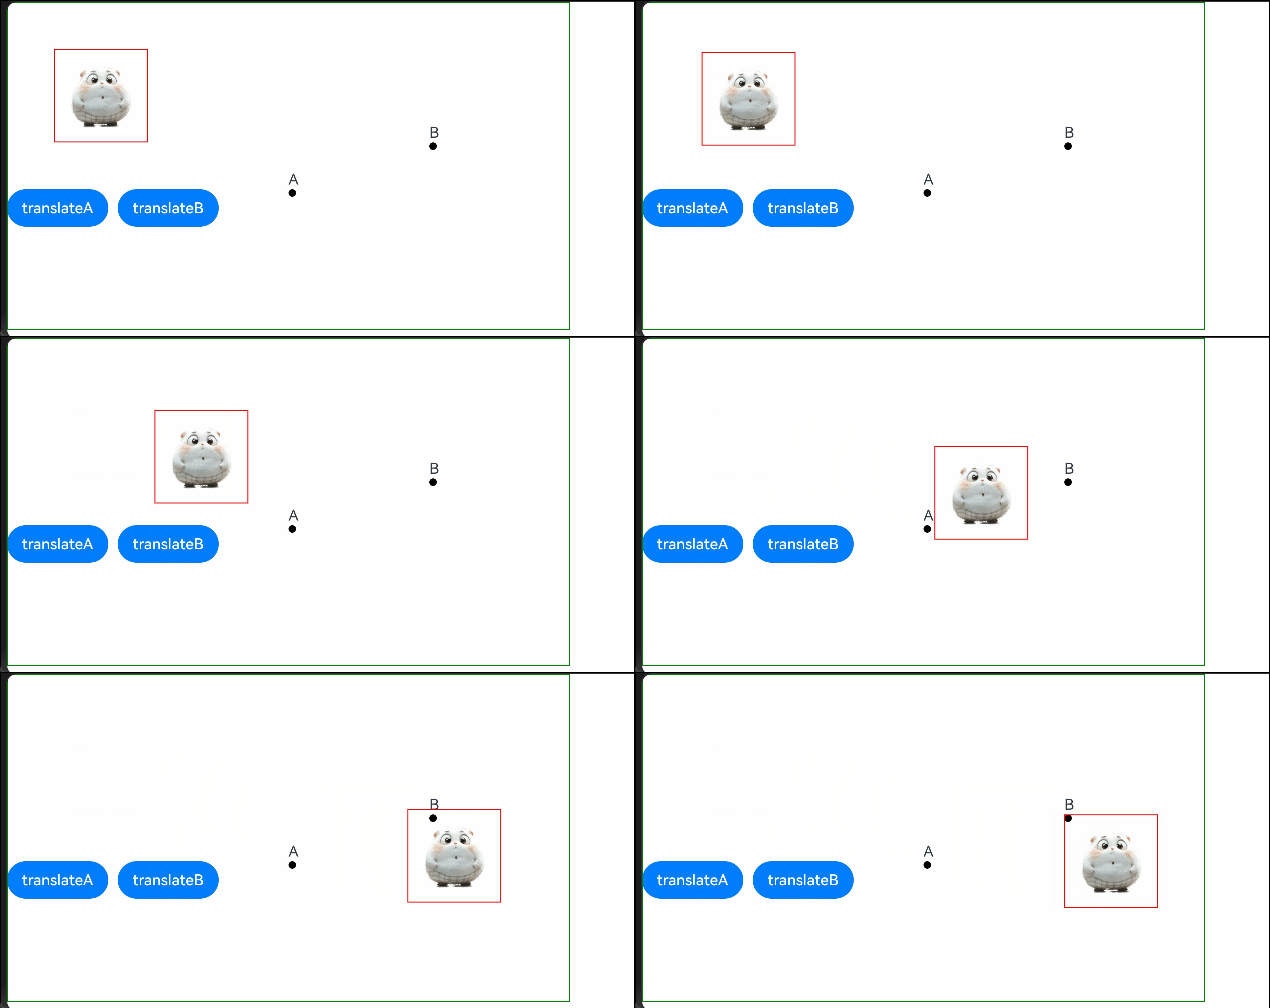
先移动到A,接着移动到B:
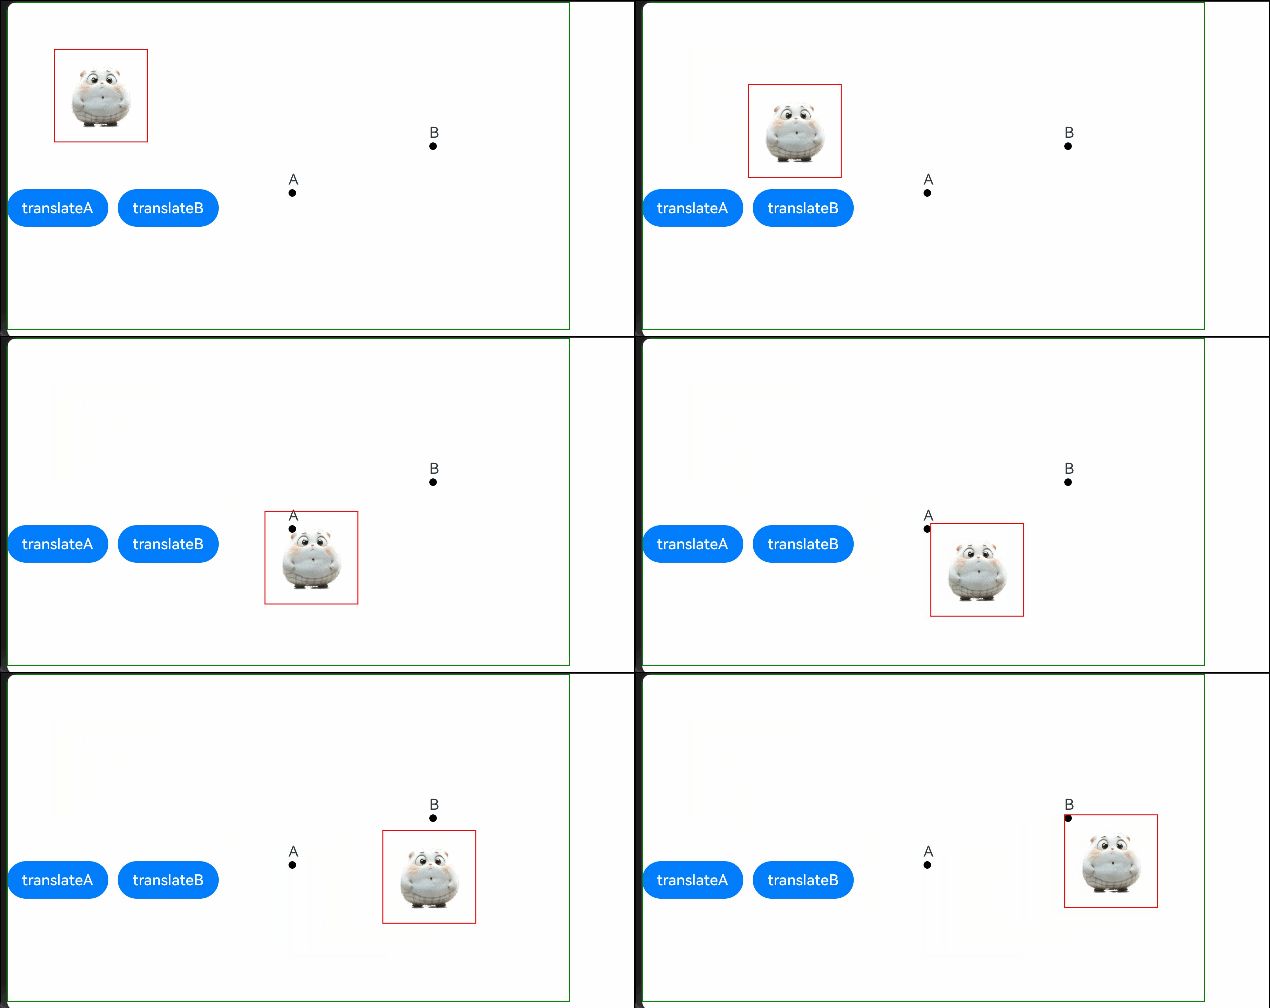
可以看到,从显示效果上,组件先移动到A,在移动到B,好像是从A移动到B点,实际上在计算B点的偏移值时,还是用组件左上角和B点坐标计算,而不是A和B的坐标点计算。
2.4. Z轴的平移
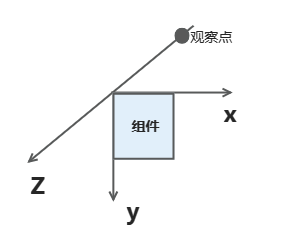
z轴的方向是由屏幕外向屏幕里,而人的观察点是在屏幕外的,所以,在Z轴正向移动时,看到的现象是组件越来越小,而在Z轴的负向移动时,看到组件越来越大。所以远离观察点,组件会变小,接近观察点,组件会变得
如下,将组件在Z轴的正向和负向上分别移动100,看一下显示的效果
Button('z轴远离观察点').onClick(() => {this.translateInfo.z = 100})
Button('z轴接近观察点').onClick(() => {this.translateInfo.z = -100})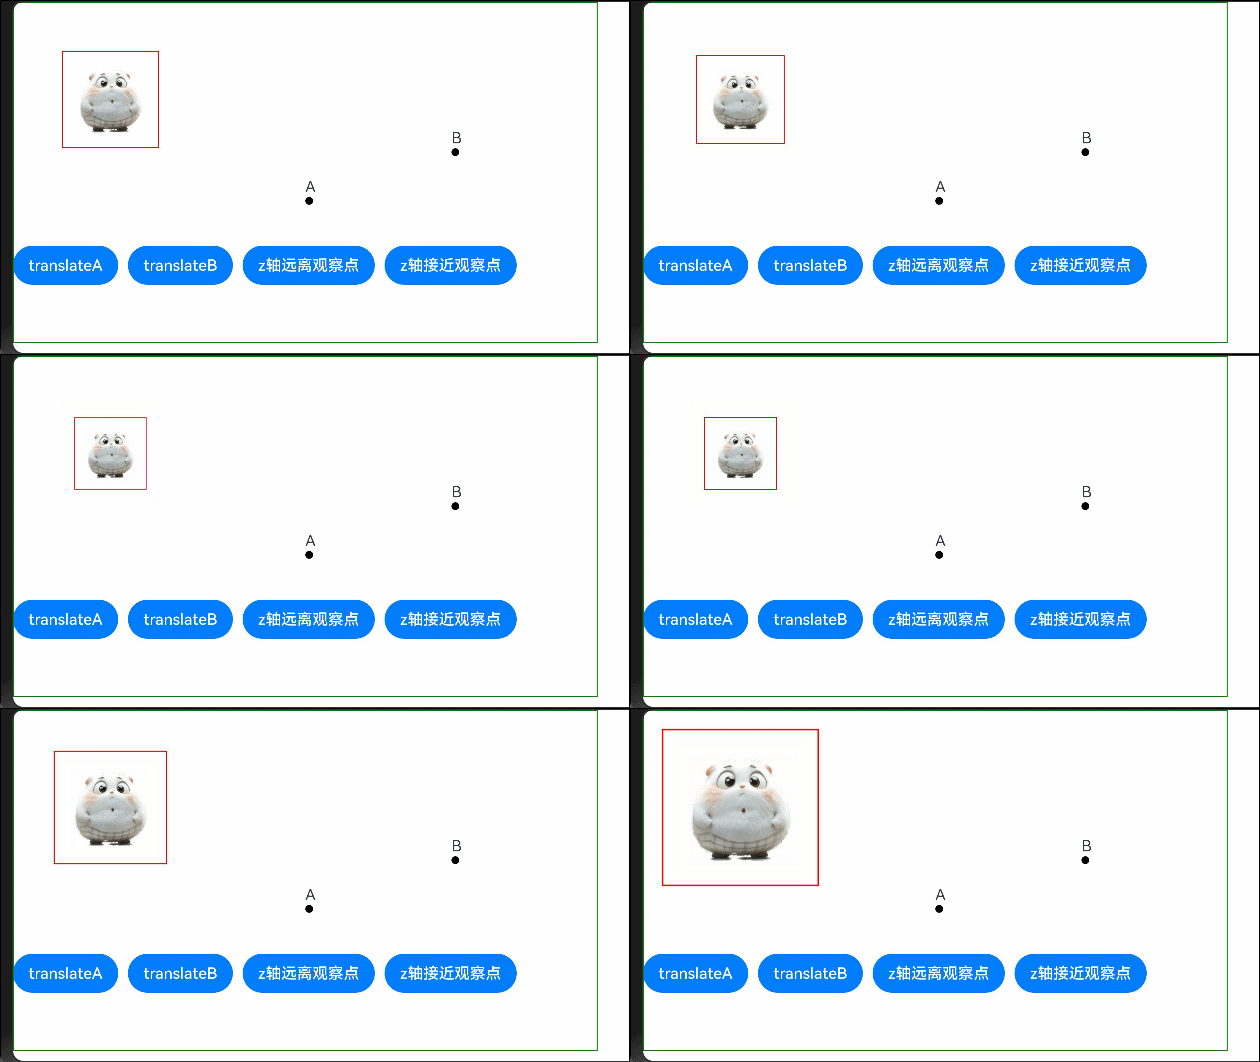
可以看到,在Z轴的正向移动是时,组件变小,在负向移动时,组件变大。Z轴的变换,也在再次说明了每次变换的偏移量是相对初始左上角的坐标(初始z = 0)
3. 总结
对于属性translate,只有x, y, z三个方向的变量控制,相对比较简单,只要记住,每次移动偏移量都是从组件的左上角坐标偏移到对应的位置即可。
