上次我在《PDF批量加水印 与 去除水印实践》一文中完成了对图片水印和文字水印的去除。
链接:https://xxmdmst.blog.csdn.net/article/details/139483535
但是对于页面对象的内容对象是单层,不是数组的情况,无法去除水印。今天我们专门研究PDF的文本绘制指令,并尝试去除这种水印。
PDF文本显示操作符
文本显示操作符有TJ和Tj两种,还有单引号和双引号两种。引号类的指令表示移动到下一行并显示文本,对于水印文本不可能使用这类指令。所以今天我们仅研究TJ和Tj两种指令。
TJ指令(或称操作符)用于显示一个数组中的文本字符串,每个字符串可能有插值调整。
例如:
[ (\\0319\\047) -3 <00180102> 14 (\\001\\232) 17 (\\001\\002\\001\\017) 4 (\\001\\002\\001\\220) 6 (\\001\\036) 9 <037f> ] TJ
[和]包围的区域表示一个数组。- 数组中的元素可以是文本字符串或者数字,其中数字表示字符间距调整,单位是千分之一的字体单位。
- 括号
()和括号<>包围的内容表示字符串。
括号 () 内的字符串,反斜杠 \表示后面三位数是8进制字符,\\0319\\047可以理解为\\031,9,\\047三部分组成。
括号<>内的内容是用十六进制表示的字符串。
而Tj指令则表示单个文本,对于TJ指令数组中其中一个文本元素。
PDF文本指令的解析
首先我们打印一下指令的完整内容:
import PyPDF2reader = PyPDF2.PdfReader(r"mysql【带水印】.pdf")
page = reader.pages[0]
page_content = page.get_contents()
page_data = page_content.get_data()
for line in page_data.splitlines():i = line.rfind(b" ")operator = line[i+1:]operand = line[:i]if operator in (b'TJ', b'Tj'):print(line)
截取一部分指令展示一下:
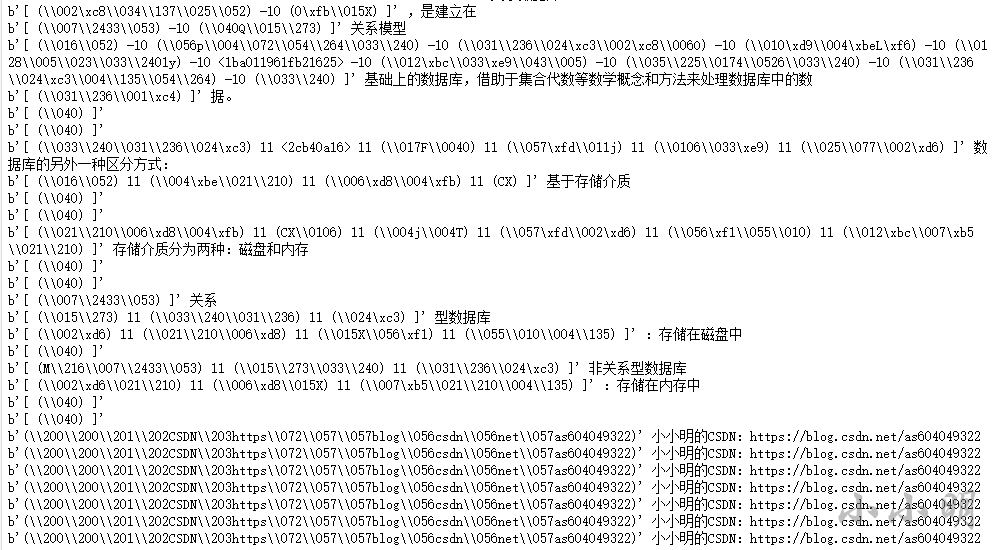
b'[ (\\033\\240\\031\\236\\024\xc3) 11 <2cb40a16> 11 (\\017F\\0040) 11 (\\057\xfd\\011j) 11 (\\0106\\033\xe9) 11 (\\025\\077\\002\xd6) ] TJ'
b'[ (\\016\\052) 11 (\\004\xbe\\021\\210) 11 (\\006\xd8\\004\xfb) 11 (CX) ] TJ'
b'[ (\\021\\210\\006\xd8\\004\xfb) 11 (CX\\0106) 11 (\\004j\\004T) 11 (\\057\xfd\\002\xd6) 11 (\\056\xf1\\055\\010) 11 (\\012\xbc\\007\xb5\\021\\210) ] TJ'
b'[ (\\007\\2433\\053) ] TJ'
b'[ (\\015\\273) 11 (\\033\\240\\031\\236) 11 (\\024\xc3) ] TJ'
b'[ (M\\216\\007\\2433\\053) 11 (\\015\\273\\033\\240) 11 (\\031\\236\\024\xc3) ] TJ'
b'[ (\\002\xd6\\021\\210) 11 (\\006\xd8\\015X) 11 (\\007\xb5\\021\\210\\004\\135) ] TJ'
b'(\\200\\200\\201\\202CSDN\\203https\\072\\057\\057blog\\056csdn\\056net\\057as604049322) Tj'
解析TJ和Tj指令,我的方法如下:
def parse_operand(operand):data = b""for part in re.findall(b"\(.+?\)|<.+?>", operand):s = part[1:-1]if chr(part[0]) == "(":data += re.sub(rb'\\([0-7]{3})',lambda m: chr(int(m.group(1), 8)).encode("charmap"), s)elif chr(part[0]) == "<":data += bytes.fromhex(s.decode())return data
尝试解析上面展示的最后一个指令:
data = parse_operand(operand)
print(data)
结果:
b'\x80\x80\x81\x82CSDN\x83https://blog.csdn.net/as604049322'
这样我们就解析出来原始的字节,要解析出原始的文本还需要解析Tf指令,使用对应的charmap编码表进行二次转换。
编码表构建
首先我们得到所有的编码表:
from PyPDF2._cmap import build_char_mapcmaps = {}
for f in page['/Resources']['/Font']:cmaps[f] = build_char_map(f, 200.0, page)
这里build_char_map如何实现,后面会给出分析原理后编写的简化代码。
然后需要解析Tf指令,构建当前文本所使用的char_map,解析函数为:
if operator == b'Tf':cmap_name = operand.split()[0].decode()charMapTuple = cmaps[cmap_name]cmap = (charMapTuple[2], charMapTuple[3],cmap_name, charMapTuple[4])
然后就可以使用下面的函数,对文本指令的内容进行解析获取文本:
def pdf_decode_text(tt):encoding = cmap[0]if isinstance(encoding, str):try:t = tt.decode(encoding, "surrogatepass")except Exception:fallback_encoding = "utf-16-be" if encoding == "charmap" else "charmap"t = tt.decode(fallback_encoding, "surrogatepass")else:t = "".join(encoding.get(x, chr(x)) for x in tt)return "".join(cmap[1].get(x, x) for x in t)
完整的文本解析代码如下:
import PyPDF2
from PyPDF2._cmap import build_char_map
import redef parse_operand(operand):data = b""for part in re.findall(b"\(.+?\)|<.+?>", operand):s = part[1:-1]if chr(part[0]) == "(":data += re.sub(rb'\\([0-7]{3})',lambda m: chr(int(m.group(1), 8)).encode("charmap"), s)elif chr(part[0]) == "<":data += bytes.fromhex(s.decode())return datadef pdf_decode_text(tt):encoding = cmap[0]if isinstance(encoding, str):try:t = tt.decode(encoding, "surrogatepass")except Exception:fallback_encoding = "utf-16-be" if encoding == "charmap" else "charmap"t = tt.decode(fallback_encoding, "surrogatepass")else:t = "".join(encoding.get(x, chr(x)) for x in tt)return "".join(cmap[1].get(x, x) for x in t)reader = PyPDF2.PdfReader(r"mysql【带水印】.pdf")
page = reader.pages[0]
cmaps = {}
for f in page['/Resources']['/Font']:cmaps[f] = build_char_map(f, 200.0, page)
page_content = page.get_contents()
page_data = page_content.get_data()
for line in page_data.splitlines():i = line.rfind(b" ")operator = line[i+1:]operand = line[:i]if operator == b'Tf':cmap_name = operand.split()[0].decode()charMapTuple = cmaps[cmap_name]cmap = (charMapTuple[2], charMapTuple[3],cmap_name, charMapTuple[4])elif operator in (b'TJ', b'Tj'):data = parse_operand(operand)text = pdf_decode_text(data)print(operand, text)

可以看到每条文本指令都已完美的解析出原始的文本内容。
去除文本水印实践
我的思路是寻找前10页,非空白文本出现次数最多的对应的文本指令,然后删除这些文本指令即可。
寻找前10页出现次数最多文本指令:
import PyPDF2
from collections import Counter
from PyPDF2._cmap import build_char_map
import redef parse_operand(operand):data = b""for part in re.findall(b"\(.+?\)|<.+?>", operand):s = part[1:-1]if chr(part[0]) == "(":data += re.sub(rb'\\([0-7]{3})',lambda m: chr(int(m.group(1), 8)).encode("charmap"), s)elif chr(part[0]) == "<":data += bytes.fromhex(s.decode())return datadef pdf_decode_text(tt):encoding = cmap[0]if isinstance(encoding, str):try:t = tt.decode(encoding, "surrogatepass")except Exception:fallback_encoding = "utf-16-be" if encoding == "charmap" else "charmap"t = tt.decode(fallback_encoding, "surrogatepass")else:t = "".join(encoding.get(x, chr(x)) for x in tt)return "".join(cmap[1].get(x, x) for x in t)reader = PyPDF2.PdfReader(r"mysql【带水印】.pdf")
counter = Counter()
for page in reader.pages[:10]:cmaps = {}for f in page['/Resources']['/Font']:cmaps[f] = build_char_map(f, 200.0, page)page_content = page.get_contents()page_data = page_content.get_data()for line in page_data.splitlines():i = line.rfind(b" ")operator = line[i+1:]operand = line[:i]if operator == b'Tf':cmap_name = operand.split()[0].decode()charMapTuple = cmaps[cmap_name]cmap = (charMapTuple[2], charMapTuple[3],cmap_name, charMapTuple[4])elif operator in (b'TJ', b'Tj'):data = parse_operand(operand)text = pdf_decode_text(data)if text.strip():counter[(text, line)] += 1
watermark_command = counter.most_common(1)[0][0][1]
watermark_command
b'(\\200\\200\\201\\202CSDN\\203https\\072\\057\\057blog\\056csdn\\056net\\057as604049322) Tj'
然后我们批量删除所有页的这行指令,并保存:
writer = PyPDF2.PdfWriter()
for page in reader.pages:page_content = page.get_contents()page_data = page_content.get_data()page_data_without_logo = page_data.replace(watermark_command+b"\n", b"")if page_content.decoded_self is not None:page_content.decoded_self.set_data(page_data_without_logo)else:page_content.set_data(page_data_without_logo)page[PyPDF2.generic.NameObject("/Contents")] = page_contentpage.compress_content_streams()writer.add_page(page)
output_path = "mysql【去水印】.pdf"
with open(output_path, "wb") as output_file:writer.write(output_file)
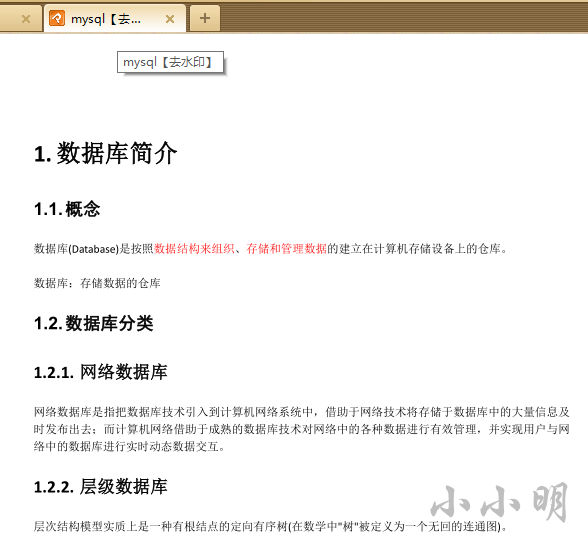
最终已经成功的完成了对这类文本水印的去除:

build_char_map的实现原理
经过深度分析后,最终代码如下:
from typing import Dict, List
from PyPDF2._codecs.zapfding import _zapfding_encoding
from PyPDF2._codecs.symbol import _symbol_encoding
from PyPDF2._codecs.std import _std_encoding
from PyPDF2._codecs.pdfdoc import _pdfdoc_encoding
from PyPDF2._codecs.adobe_glyphs import adobe_glyphs
import PyPDF2
import re
from binascii import unhexlifydef fill_from_encoding(enc: str) -> List[str]:lst: List[str] = []for x in range(256):e = bytes((x,)).decode(enc, errors='replace')if e == '\ufffd':e = chr(x)lst.append(e)return lst_predefined_cmap: Dict[str, str] = {"/Identity-H": "utf-16-be","/Identity-V": "utf-16-be","/GB-EUC-H": "gbk","/GB-EUC-V": "gbk","/GBpc-EUC-H": "gb2312","/GBpc-EUC-V": "gb2312",
}
charset_encoding: Dict[str, List[str]] = {"/StandardCoding": _std_encoding,"/WinAnsiEncoding": fill_from_encoding("cp1252"),"/MacRomanEncoding": fill_from_encoding("mac_roman"),"/PDFDocEncoding": _pdfdoc_encoding,"/Symbol": _symbol_encoding,"/ZapfDingbats": _zapfding_encoding,
}def get_encoding(ft):if "/Encoding" not in ft:if "/BaseFont" in ft and ft["/BaseFont"] in charset_encoding:enc = ft["/BaseFont"]else:enc = "/StandardCoding"else:enc = ft["/Encoding"]differences = {}if isinstance(enc, dict):if "/Differences" in enc:x: int = 0for o in enc["/Differences"]:if isinstance(o, int):x = oelse:differences[x] = adobe_glyphs.get(o, o)x += 1if "/BaseEncoding" in enc:enc = enc["/BaseEncoding"]if enc in charset_encoding:encoding = charset_encoding[enc]elif enc in _predefined_cmap:encoding = _predefined_cmap[enc]else:encoding = charset_encoding["/StandardCoding"]if isinstance(encoding, list):encoding = dict(zip(range(256), encoding))encoding.update(differences)return encodingdef get_map_dict(ft):map_dict = {}if "/ToUnicode" in ft:for process_type, text in re.findall(br"beginbf(range|char)\n(.+?)\nendbf\1", ft["/ToUnicode"].get_data(), flags=re.DOTALL):if process_type == b"char":lst = [e.zfill(4)for e in re.findall(b"<(.+?)>", text, re.DOTALL)]map_dict.update({unhexlify(lst[i]).decode("utf-16-be", "surrogatepass"):unhexlify(lst[i+1]).decode("utf-16-be", "surrogatepass")for i in range(0, len(lst), 2)})else:for line in text.splitlines():lst = re.findall(b"<(.+?)>", line, re.DOTALL)a, b, c = map(lambda x: int(x, 16), lst[:3])for i in range(b - a + 1):c_actual = int(lst[2 + i], 16) if 2 + \i < len(lst) else c + imap_dict[unhexlify(f"{a + i:04X}").decode("utf-16-be", "surrogatepass")] = unhexlify(f"{c_actual:04X}").decode("utf-16-be", "surrogatepass")return map_dict
调用示例:
reader = PyPDF2.PdfReader(r"mysql【带水印】.pdf")
page = reader.pages[0]
cmaps = {}
for font_name, ft in page['/Resources']['/Font'].items():ft = ft.get_object()encoding = get_encoding(ft)map_dict = get_map_dict(ft)cmaps[font_name] = (encoding, map_dict)


