如何在 Ubuntu 22.04 上安装和配置 Ansible 自动化平台
简介
Ansible 是一个开源项目,并在 Github 上收获了 63k 的 star 。它是一个极其简单的 IT 自动化平台,使您的应用程序和系统更易于部署和维护。使用 SSH,以接近简单英语的语言实现从代码部署到网络配置再到云管理的一切自动化,无需在远程系统上安装代理。

接下来,我将一步一步教大家如何进行安装和部署!!
准备工作
服务器准备
必要前提:
- 一个充满求知欲的大脑。
- 一台 Linux 服务器(推荐腾讯云、阿里云或雨云等)。
我将以 雨云 为例,带大家创建一台自己的云服务器,以便学习本篇文章的内容。
注册链接: https://rainyun.ivwv.site
创建雨云服务器
以下步骤仅供参考,请根据实际需求选择配置。
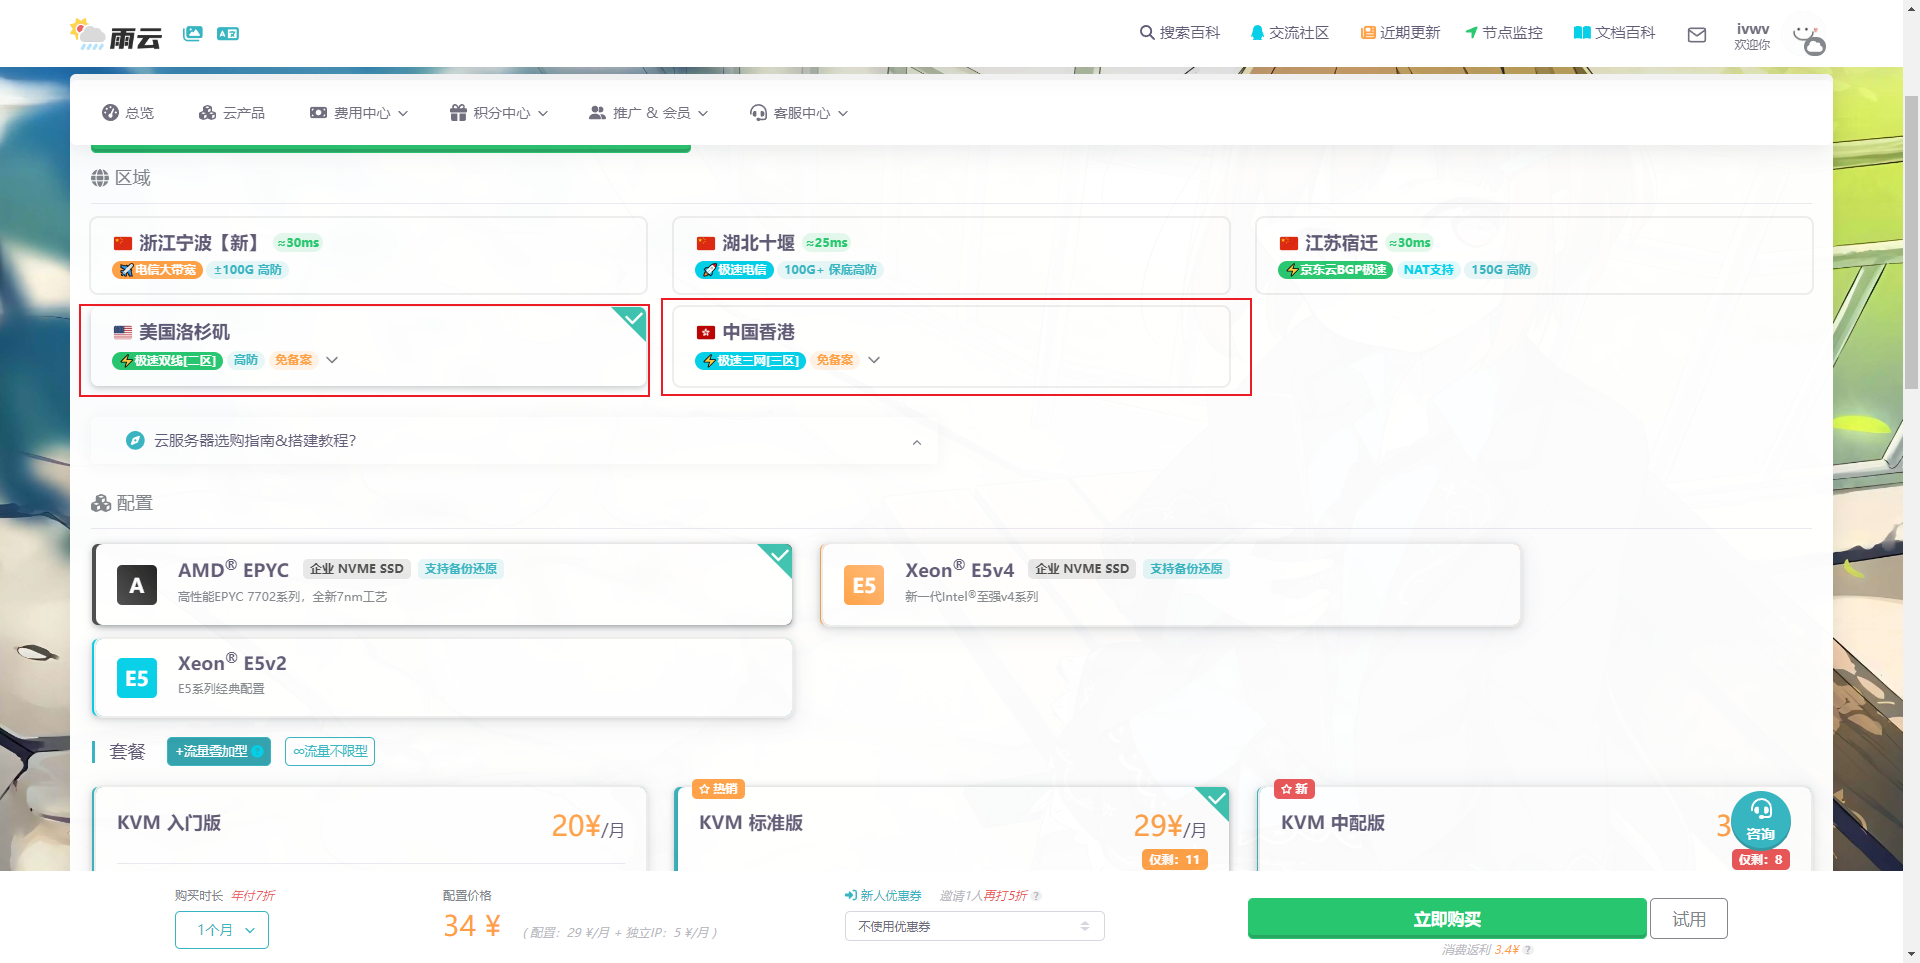
- 点击 云产品 → 云服务器 → 立即购买。
- 选择距离你较近的区域,以保证低延迟。

- 按照自己需求选择配置,选择Ubuntu 22.04 版本,按照自己需求是否预装Docker。
- 最后按照提示进行购买。
- 购买后等待机器部署完毕,点击刚刚创建好的服务器,进入管理面板,找到远程连接相关信息。

- 我们使用
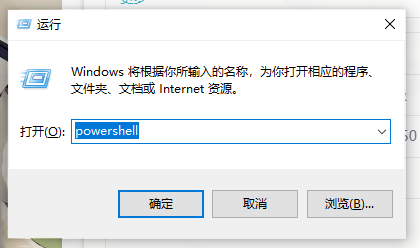
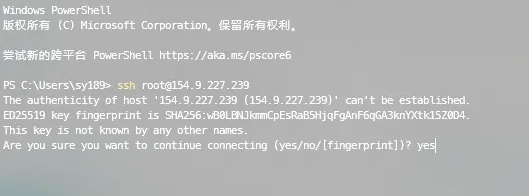
PowerShell进行SSH远程连接到服务器,Win+R打开运行窗口,输入powershell后点击确定。


- 到此为止,我们的云服务器就远程连接上了。
开始部署
1.更新系统
首先,确保你的系统是最新的,运行以下命令:
sudo apt update
sudo apt upgrade -y
2.安装Ansible
Ansible在Ubuntu的默认仓库中可用,但版本通常较旧。推荐从Ansible PPA安装以获取最新版本。
添加Ansible PPA:
sudo apt install software-properties-common
sudo add-apt-repository --yes --update ppa:ansible/ansible
安装Ansible:
sudo apt install ansible -y
验证安装:
ansible --version
你应该看到类似这样的输出,显示安装的Ansible版本:
ansible [core 2.16.6]
config file = /etc/ansible/ansible.cfg
configured module search path = ['/root/.ansible/plugins/modules', '/usr/share/ansible/plugins/modules']
ansible python module location = /usr/lib/python3/dist-packages/ansible
ansible collection location = /root/.ansible/collections:/usr/share/ansible/collections
executable location = /usr/bin/ansible
python version = 3.10.12 (main, Nov 20 2023, 15:14:05) [GCC 11.4.0] (/usr/bin/python3)
jinja version = 3.0.3
libyaml = True
3.基本配置
Ansible的默认配置文件位于/etc/ansible/ansible.cfg。你可以编辑这个文件来设置全局选项。
不过,为了避免权限问题,通常更容易在用户主目录下创建一个本地配置目录。
创建本地配置目录:
mkdir -p ~/ansible/config
禁用默认配置文件并启用我们的自定义配置文件:
ansible-config init -t all --disabled > ansible.cfg
创建和编辑配置文件:
nano ~/ansible/config/ansible.cfg
在**[defaults]**后添加以下配置设置:
inventory = ~/ansible/config/hosts
remote_user = your-username
host_key_checking = False
将your-username替换为你的实际Ubuntu用户名。
4.创建库存文件
库存文件定义了Ansible将管理的主机。
创建库存文件:
nano ~/ansible/config/hosts
添加你管理节点的IP地址或主机名。例如:
[webservers]
192.168.1.10
192.168.1.11[dbservers]
192.168.1.20
5.测试连接
Ansible使用SSH与被管理节点通信。确保你可以无需密码提示即可SSH到这些节点。推荐的方法设置SSH密钥。
生成SSH密钥对(如果尚未完成):
ssh-keygen -t rsa -b 2048
将SSH密钥复制到被管理节点:
ssh-copy-id [email protected]
ssh-copy-id [email protected]
ssh-copy-id [email protected]
将username替换为被管理节点上的用户名。
测试Ansible连接:
ansible all -m ping
你应该看到表示成功的输出:
192.168.1.10 | SUCCESS => {"ansible_facts": {"discovered_interpreter_python": "/usr/bin/python3"},"changed": false,"ping": "pong"
}
192.168.1.11 | SUCCESS => {"ansible_facts": {"discovered_interpreter_python": "/usr/bin/python3"},"changed": false,"ping": "pong"
}
192.168.1.20 | SUCCESS => {"ansible_facts": {"discovered_interpreter_python": "/usr/bin/python3"},"changed": false,"ping": "pong"
}
6.创建Nginx安装剧本
Ansible剧本是定义在被管理节点上执行任务的YAML文件。在这个剧本中,我们将更新系统,安装Nginx,并在firewall中放行HTTP和HTTPS端口。
创建剧本文件:
nano ~/ansible/config/playbook.yml
添加以下内容到剧本:
---
- name: Update and upgrade apt packageshosts: allbecome: yestasks:- name: Update apt cacheapt:update_cache: yes    - name: Installing Nginxapt:name: nginxstate: latest    - name: Starting Nginx Serviceservice:name: nginxstate: startedenabled: yes  # Enabling Nginx service if not available    - name: Allow all access to tcp port 80community.general.ufw:rule: allowport: '80'proto: tcp    - name: Allow all access to tcp port 443community.general.ufw:rule: allowport: '443'proto: tcp
7.运行剧本
执行剧本以更新和升级所有被管理节点上的软件包。
ansible-playbook ~/ansible/config/playbook.yml
你应该看到表示成功的输出:
PLAY [Update and upgrade apt packages] *****************************************************************************TASK [Gathering Facts] *********************************************************************************************
ok: [192.168.1.10]
ok: [192.168.1.11]
ok: [192.168.1.20]TASK [Update apt cache] ********************************************************************************************
changed: [192.168.1.10]
changed: [192.168.1.11]
changed: [192.168.1.20]TASK [Installing Nginx] ********************************************************************************************
changed: [192.168.1.10]
changed: [192.168.1.11]
changed: [192.168.1.20]TASK [Starting Nginx Service] **************************************************************************************
ok: [192.168.1.10]
ok: [192.168.1.11]
ok: [192.168.1.10]TASK [Allow all access to tcp port 80] *****************************************************************************
changed: [192.168.1.10]
changed: [192.168.1.11]
changed: [192.168.1.20]TASK [Allow all access to tcp port 443] ****************************************************************************
changed: [192.168.1.10]
changed: [192.168.1.11]
changed: [192.168.1.20]PLAY RECAP *********************************************************************************************************
192.168.1.10               : ok=6    changed=4    unreachable=0    failed=0    skipped=0    rescued=0    ignored=0
192.168.1.11               : ok=6    changed=4    unreachable=0    failed=0    skipped=0    rescued=0    ignored=0
192.168.1.20               : ok=6    changed=4    unreachable=0    failed=0    skipped=0    rescued=0    ignored=0
相关链接
雨云 - 新一代云服务提供商: https://rainyun.ivwv.site
我的博客:https://blog.ivwv.site


