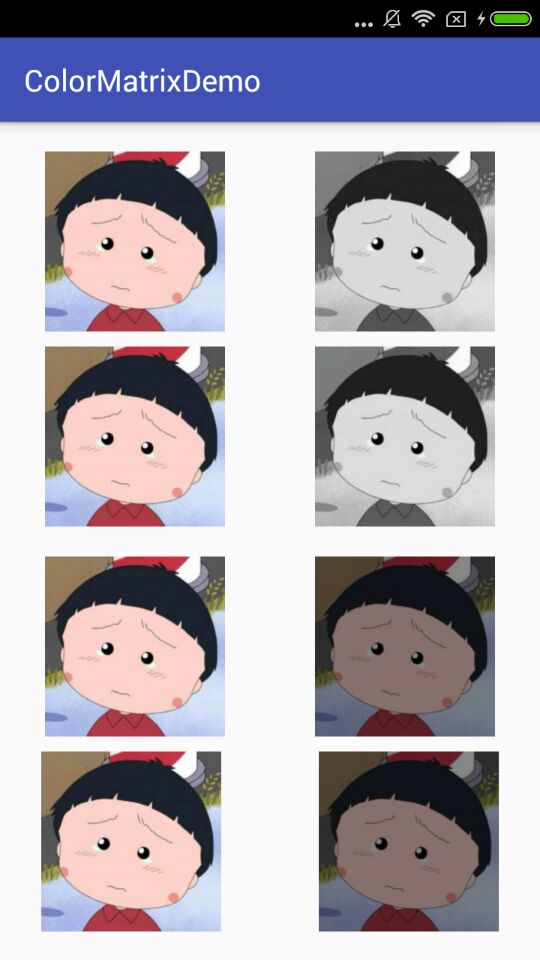
头像由彩色变灰色有两种实现方式:
/** 方法1:* ColorMatrix类有一个内置的方法可用于改变饱和度。* 传入一个大于1的数字将增加饱和度,而传入一个0~1之间的数字会减少饱和度。0值将产生一幅灰度图像。*/ColorMatrix matrix = new ColorMatrix();matrix.setSaturation(0);ColorMatrixColorFilter filter = new ColorMatrixColorFilter(matrix);image1.setColorFilter(filter);方法二:
/*** 将彩色图转换为纯黑白二色** @param* @return 返回转换好的位图*/private Bitmap convertToBlackWhite(Bitmap bmp) {int width = bmp.getWidth(); // 获取位图的宽int height = bmp.getHeight(); // 获取位图的高int[] pixels = new int[width * height]; // 通过位图的大小创建像素点数组bmp.getPixels(pixels, 0, width, 0, 0, width, height);int alpha = 0xFF << 24;for (int i = 0; i < height; i++) {for (int j = 0; j < width; j++) {int grey = pixels[width * i + j];// 分离三原色int red = ((grey & 0x00FF0000) >> 16);int green = ((grey & 0x0000FF00) >> 8);int blue = (grey & 0x000000FF);// 转化成灰度像素grey = (int) (red * 0.3 + green * 0.59 + blue * 0.11);grey = alpha | (grey << 16) | (grey << 8) | grey;pixels[width * i + j] = grey;}}// 新建图片Bitmap newBmp = Bitmap.createBitmap(width, height, Config.RGB_565);// 设置图片数据newBmp.setPixels(pixels, 0, width, 0, 0, width, height);//设置宽高Bitmap resizeBmp = ThumbnailUtils.extractThumbnail(newBmp, 460, 460);return resizeBmp;}
Bitmap bmp = BitmapFactory.decodeResource(getResources(),R.drawable.icon);image2.setImageBitmap(convertToBlackWhite(bmp));有时候我们需要把一张图变暗,也有两种方式可以实现
方法一:
ImageView image3 = (ImageView) findViewById(R.id.image3);Drawable drawable = getResources().getDrawable(R.drawable.icon1);drawable.setColorFilter(Color.GRAY, PorterDuff.Mode.MULTIPLY);image3.setImageDrawable(drawable);方法二:在布局把要显示的图片作为background,把变暗的图片或颜色设为src,就可以实现变暗的效果。
   <ImageView
            android:id="@+id/image4"android:layout_width="120dp"android:layout_height="120dp"android:src="#77000000"android:background="@drawable/icon"android:layout_marginLeft="30dp"/>