参考:Windows10下使用VS2017编译和使用yaml-cpp库_雪域迷影的博客-CSDN博客
1. 下载yaml-cpp
建议在github下载其最新的官方版本,不要在其他平台下载该工具软件,下载地址如下(其中的一个版本):
Release yaml-cpp-0.7.0 · jbeder/yaml-cpp · GitHub
2.编译
(1)解压到一个目录后并创建一个build文件夹,如下: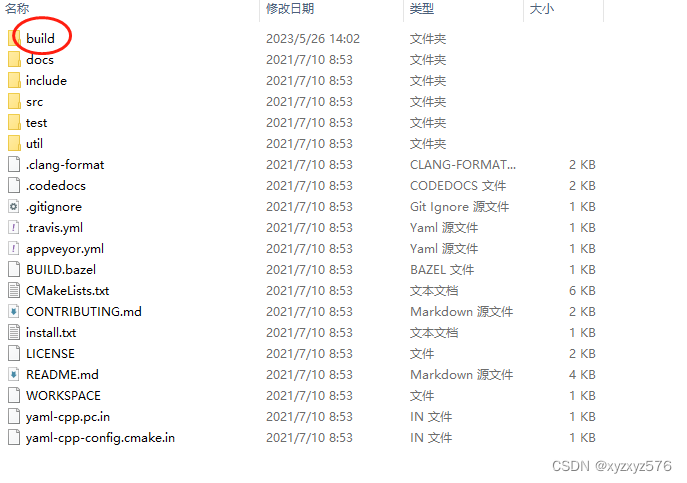
shift+鼠标右键 选择 在此处打开powershell窗口
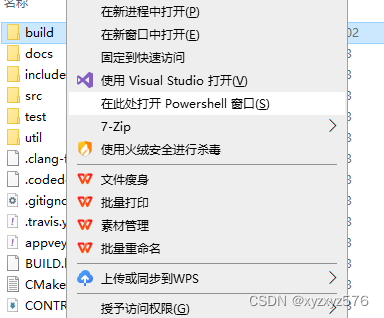
键入 cmake ..
待完成后。
(2)打开build文件夹下的sln工程
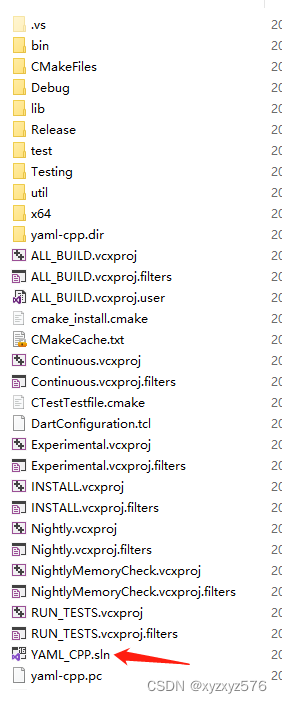
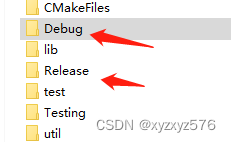
然后根据需要生产解决方案。平台训 x64或x86 , debug或releae,生产解决方案后如果没有报错,就会在bulid目录下生成相应的.lib库文件,debug是选择debug编译生产的,release是选择release模式生产的。
3. 测试
新建一个控制台工程:
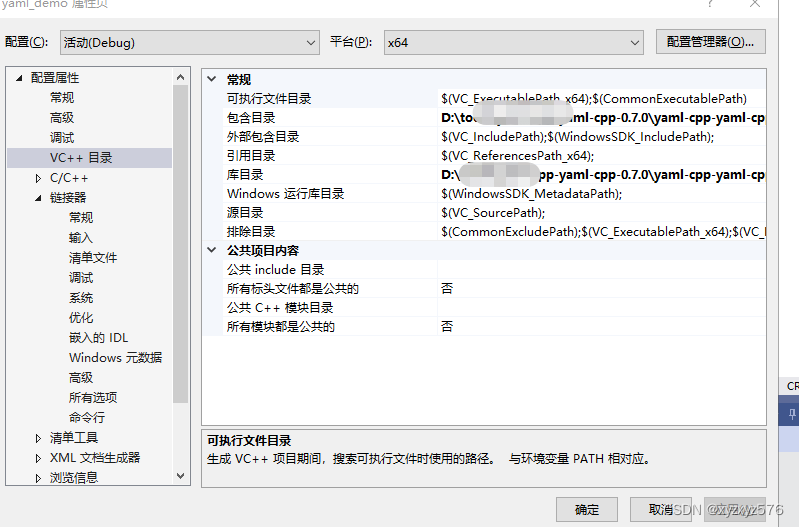
然后配置工程属性,
包含目录:D:\xxx\\yaml-cpp-yaml-cpp-0.6.0\include
库目录:D:\xxx\\yaml-cpp-yaml-cpp-0.6.0\build\Debug
或则 D:\xxx\\yaml-cpp-yaml-cpp-0.6.0\build\Release
链接器-输入:yaml-cppd.lib 和 yaml-cpp.lib
config.yaml
lastLogin: 2020-09-19 10:26:10
username: root1
password: 123456
测试样例:
#include "pch.h"
#include <iostream>
#include <fstream>
#include "yaml-cpp/yaml.h"using namespace std;int main()
{YAML::Emitter out;cout << "Hello, World!";cout << "Here's the output YAML:\n" << out.c_str();YAML::Node config = YAML::LoadFile("config.yaml");if (config["lastLogin"]) {cout << "Last logged in: " << config["lastLogin"].as<std::string>() << std::endl;}const std::string username = config["username"].as<std::string>();const std::string password = config["password"].as<std::string>();//login(username, password);//config["lastLogin"] = getCurrentDateTime();config["lastLogin"] = "2020-09-19 10:26:10";std::cout << "username: " << username << ", password: " << password << std::endl;std::ofstream fout("config.yaml");fout << config;return 0;
}
生成,执行


