kubernetes高可用+harbor高可用
- 基于kubeadm安装kubernetes高可用集群
- 全部主机环境初始化
- 双主节点部署keepalive
- 双主节点初始化kubeadm
- 在k8smaster1节点上初始化k8s
- 在k8smaster2节点上做扩容操作
- harbor高可用集群
- 初始化harbor1节点安装环境
- 在另一台节点上配置使用私有harbor仓库
- 初始化harbor2节点安装环境
- 部署keepalive+nginx
基于kubeadm安装kubernetes高可用集群
安装k8s时,node节点网段、service服务网段、pod容器网段,三者之间网段不可以冲突,否则安装失败。
使用kubeadm安装k8s时,所有的组件都是以pod的形式运行。
系统环境:centos7.9
| 节点 | IP | 角色 |
|---|---|---|
| k8smaster1 | 192.168.40.180 | 主节点1 |
| k8smaster2 | 192.168.40.181 | 主节点2 |
| k8snode1 | 192.168.40.181 | 从节点1 |
| k8snode1: |
全部主机环境初始化
#  固化IP地址
cat /etc/sysconfig/network-scripts/ifcfg-ens33
TYPE=Ethernet
PROXY_METHOD=none
BROWSER_ONLY=no
BOOTPROTO=static
DEFROUTE=yes
IPV4_FAILURE_FATAL=no
IPV6INIT=yes
IPV6_AUTOCONF=yes
IPV6_DEFROUTE=yes
IPV6_FAILURE_FATAL=no
IPV6_ADDR_GEN_MODE=stable-privacy
NAME=ens33
DEVICE=ens33
ONBOOT=yes
IPADDR=192.168.40.182
NETMASK=255.255.255.0
GATEWAY=192.168.40.2
DNS1=192.168.40.2service network restart
# 设置主机名
hostnamectl set-hostname k8smaster1 && bash
# 设置主机名解析
cat /etc/hosts
127.0.0.1   localhost localhost.localdomain localhost4 localhost4.localdomain4
::1         localhost localhost.localdomain localhost6 localhost6.localdomain6
192.168.40.180 k8smaster1
192.168.40.181 k8smaster2
192.168.40.182 k8snode1# 关闭selinux
setenforce 0 && sed -i 's/SELINUX=enforcing/SELINUX=disabled/g' /etc/selinux/config && getenforce
# 关闭交换分区swap,提升性能,使用"free -m"命令检测是否关闭swap
swapoff -a && vi /etc/fstab
#/dev/mapper/centos-swap swap                    swap    defaults        0 0# 修改内核参数
modprobe br_netfilter && lsmod | grep netfilter
cat > /etc/sysctl.d/k8s.conf << EOF
net.bridge.bridge-nf-call-ip6tables = 1
net.bridge.bridge-nf-call-iptables = 1
net.ipv4.ip_forward = 1
EOF
# 令配置生效
sysctl -p /etc/sysctl.d/k8s.conf
# 关闭防火墙
systemctl stop firewalld && systemctl disable firewalld
# 配置阿里云的repo源
yum install yum-utils -y
yum-config-manager --add-repo http://mirrors.aliyun.com/docker-ce/linux/centos/docker-ce.repo
# 配置安装k8s组件需要的阿里元的repo源
vi /etc/yum.repos.d/kubernetes.repo
[kubernetes]
name=Kubernetes
baseurl=https://mirrors.aliyun.com/kubernetes/yum/repos/kubernetes-el7-x86_64/
enabled=1
gpgcheck=0# 配置时间同步
yum install ntpdate -y
ntpdate cn.pool.ntp.org
crontab -e
* */1 * * * /usr/sbin/ntpdate cn.pool.ntp.orgservice crond restart
# 安装基础软件包
yum install wget net-tools nfs-utils lrzsz gcc gcc-c++ make cmake libxml2-devel openssl-devel curl curl-devel unzip sudo ntp libaio-devel vim ncurses-devel autoconf automake zlib-devel python-devel epel-release openssh-server socat ipvsadm conntrack yum-utils device-mapper-persistent-data lvm2 -y
# 安装docker
yum install docker-ce-20.10.6 docker-ce-cli-20.10.6 containerd.io -y
systemctl start docker && systemctl enable docker && systemctl status docker
# 安装k8s基础软件包
yum install kubelet-1.20.6 kubeadm-1.20.6 kubectl-1.20.6 -y
systemctl enable kubelet
# 配置docker镜像加速器
vi /etc/docker/daemon.json
{"registry-mirrors":["https://rsbud4vc.mirror.aliyuncs.com","https://registry.docker-cn.com","https://docker.mirrors.ustc.edu.cn","https://dockerhub.azk8s.cn","http://hub-mirror.c.163.com","http://qtid6917.mirror.aliyuncs.com", "https://rncxm540.mirror.aliyuncs.com"],"exec-opts": ["native.cgroupdriver=systemd"]
}
systemctl daemon-reload && systemctl restart docker && systemctl status docker# 重启机器
reboot -f
双主节点部署keepalive
yum install epel-release nginx keepalived -y
vi /etc/nginx/nginx.conf
user nginx;
worker_processes auto;
error_log /var/log/nginx/error.log;
pid /run/nginx.pid;include /usr/share/nginx/modules/*.conf;
events {worker_connections 1024;
}# 四层负载均衡,为两台Master apiserver组件提供负载均衡
stream {log_format  main  '$remote_addr $upstream_addr - [$time_local] $status $upstream_bytes_sent';access_log  /var/log/nginx/k8s-access.log  main;upstream k8s-apiserver {server 192.168.40.180:6443;   # Master1 APISERVER IP:PORTserver 192.168.40.181:6443;   # Master2 APISERVER IP:PORT}server {listen 16443; # 由于nginx与master节点复用,这个监听端口不能是6443,否则会冲突proxy_pass k8s-apiserver;}
}http {log_format  main  '$remote_addr - $remote_user [$time_local] "$request" ''$status $body_bytes_sent "$http_referer" ''"$http_user_agent" "$http_x_forwarded_for"';access_log  /var/log/nginx/access.log  main;sendfile            on;tcp_nopush          on;tcp_nodelay         on;keepalive_timeout   65;types_hash_max_size 2048;include             /etc/nginx/mime.types;default_type        application/octet-stream;server {listen       80 default_server;server_name  _;location / {}}
}vi /etc/keepalived/keepalived.conf
global_defs { notification_email { acassen@firewall.loc failover@firewall.loc sysadmin@firewall.loc } notification_email_from Alexandre.Cassen@firewall.loc  smtp_server 127.0.0.1 smtp_connect_timeout 30 router_id NGINX_MASTER
} vrrp_script check_nginx {script "/etc/keepalived/check_nginx.sh"
}vrrp_instance VI_1 { state MASTER   # 主节点2改为BACKUPinterface ens33  # 修改为实际网卡名virtual_router_id 51 # VRRP 路由 ID实例,每个实例是唯一的 priority 100    # 优先级,主节点2设置为 90 advert_int 1    # 指定VRRP 心跳包通告间隔时间,默认1秒 authentication { auth_type PASS      auth_pass 1111 }  # 虚拟IPvirtual_ipaddress { 192.168.40.199/24} track_script {check_nginx}
}vi /etc/keepalived/check_nginx.sh
#!/bin/bash
#1、判断Nginx是否存活
counter=$(ps -ef |grep nginx | grep sbin | egrep -cv "grep|$$" )
if [ $counter -eq 0 ]; then#2、如果不存活则尝试启动Nginxservice nginx startsleep 2#3、等待2秒后再次获取一次Nginx状态counter=$(ps -ef |grep nginx | grep sbin | egrep -cv "grep|$$" )#4、再次进行判断,如Nginx还不存活则停止Keepalived,让地址进行漂移if [ $counter -eq 0 ]; thenservice  keepalived stopfi
fichmod +x /etc/keepalived/check_nginx.sh
yum install nginx-mod-stream -y
systemctl start nginx && systemctl start keepalived && systemctl enable nginx keepalived && systemctl status keepalived
双主节点初始化kubeadm
vi /root/kubeadm-config.yaml
apiVersion: kubeadm.k8s.io/v1beta2
kind: ClusterConfiguration
kubernetesVersion: v1.20.6
controlPlaneEndpoint: 192.168.40.199:16443
imageRepository: registry.aliyuncs.com/google_containers
apiServer:certSANs:- 192.168.40.180- 192.168.40.181- 192.168.40.182- 192.168.40.199
networking:podSubnet: 10.244.0.0/16serviceSubnet: 10.96.0.0/16
---
apiVersion: kubeproxy.config.k8s.io/v1alpha1
kind:  KubeProxyConfiguration
mode: ipvs# 导入准备好的镜像。这不是必须的,只是为了跳过下载镜像的过程。如果不导入,默认会从镜像仓库拉取镜像。
# docker load -i k8simage-1-20-6.tar.gz
在k8smaster1节点上初始化k8s
kubeadm init --config kubeadm-config.yaml --ignore-preflight-errors=SystemVerification
mkdir -p $HOME/.kube
sudo cp -i /etc/kubernetes/admin.conf $HOME/.kube/config
sudo chown $(id -u):$(id -g) $HOME/.kube/config
在k8smaster2节点上做扩容操作
cd /root/ && mkdir -p /etc/kubernetes/pki/etcd && mkdir -p ~/.kube/
# 在k8smaster1节点上执行以下命令,将k8smaster1节点的证书拷贝到k8smaster2上
scp /etc/kubernetes/pki/ca.crt k8smaster2:/etc/kubernetes/pki/
scp /etc/kubernetes/pki/ca.key k8smaster2:/etc/kubernetes/pki/
scp /etc/kubernetes/pki/sa.key k8smaster2:/etc/kubernetes/pki/
scp /etc/kubernetes/pki/sa.pub k8smaster2:/etc/kubernetes/pki/
scp /etc/kubernetes/pki/front-proxy-ca.crt k8smaster2:/etc/kubernetes/pki/
scp /etc/kubernetes/pki/front-proxy-ca.key k8smaster2:/etc/kubernetes/pki/
scp /etc/kubernetes/pki/etcd/ca.crt k8smaster2:/etc/kubernetes/pki/etcd/
scp /etc/kubernetes/pki/etcd/ca.key k8smaster2:/etc/kubernetes/pki/etcd/
# 在k8smaster1节点上执行查看加入节点的命令
kubeadm token create --print-join-command
# 在k8smaster2节点上执行加入命令,以控制节点的身份加入k8s集群
kubeadm join 192.168.40.199:16443 --token 9h31u7.te9nuzupzzst9jy4     --discovery-token-ca-cert-hash sha256:aec91ea6994c432c769bc1671e264e6cfd4e06057ce9b6165c70ec796ea4699b --control-plane --ignore-preflight-errors=SystemVerification
mkdir -p $HOME/.kube
sudo cp -i /etc/kubernetes/admin.conf $HOME/.kube/config
sudo chown $(id -u):$(id -g) $HOME/.kube/config
kubectl get nodes
# 在k8snode1节点上执行加入命令,以工作节点的身份加入k8s集群
kubeadm join 192.168.40.199:16443 --token 9h31u7.te9nuzupzzst9jy4     --discovery-token-ca-cert-hash sha256:aec91ea6994c432c769bc1671e264e6cfd4e06057ce9b6165c70ec796ea4699b --ignore-preflight-errors=SystemVerification# 在k8smaster1节点上执行以下命令,安装calico
kubectl apply -f calico.yaml
kubectl get pods -n kube-system
# 查看k8s的配置文件
kubectl config view
# 测试k8s网络能否正常工作
kubectl run busybox --image busybox:1.28 --restart=Never --rm -it busybox -- sh
ping www.baidu.com
nslookup kubernetes.default.svc.cluster.local
harbor高可用集群
系统环境:centos7.9
| 节点 | IP | 角色 |
|---|---|---|
| harbor1 | 192.168.40.190 | harbor节点1 |
| harbor2 | 192.168.40.191 | harbor节点2 |
本次使用dockercompose安装harbor。
初始化harbor1节点安装环境
hostnamectl set-hostname harbor1 && bash
# 关闭防火墙
systemctl stop firewalld && systemctl disable firewalld
# 配置阿里云的repo源
yum install yum-utils -y
yum-config-manager --add-repo http://mirrors.aliyun.com/docker-ce/linux/centos/docker-ce.repo
# 关闭selinux
setenforce 0 && sed -i 's/SELINUX=enforcing/SELINUX=disabled/g' /etc/selinux/config && getenforce
# 安装基础软件包
yum install wget net-tools nfs-utils lrzsz gcc gcc-c++ make cmake libxml2-devel openssl-devel curl curl-devel unzip sudo ntp libaio-devel vim ncurses-devel autoconf automake zlib-devel python-devel epel-release openssh-server socat ipvsadm conntrack yum-utils device-mapper-persistent-data lvm2 -y
# 配置时间同步
yum install ntpdate -y
ntpdate cn.pool.ntp.org
crontab -e
* */1 * * * /usr/sbin/ntpdate cn.pool.ntp.org
# 安装docker
yum install docker-ce -y && systemctl start docker && systemctl enable docker && systemctl status dockermkdir -p /data/ssl && cd /data/ssl/
openssl genrsa -out ca.key 3072
# 生成ca证书,其中3650代表证书的有效时间是3年
openssl req -new -x509 -days 3650 -key ca.key -out ca.pem
Country Name (2 letter code) [XX]:CN
State or Province Name (full name) []:SD
Locality Name (eg, city) [Default City]:JN
Organization Name (eg, company) [Default Company Ltd]:
Organizational Unit Name (eg, section) []:
Common Name (eg, your name or your server's hostname) []:harbor1.xingfafa.com
Email Address []:openssl genrsa -out harbor.key 3072
openssl req -new -key harbor.key -out harbor.csrCountry Name (2 letter code) [XX]:CN
State or Province Name (full name) []:SD
Locality Name (eg, city) [Default City]:JN
Organization Name (eg, company) [Default Company Ltd]:
Organizational Unit Name (eg, section) []:
Common Name (eg, your name or your server's hostname) []:harbor1.xingfafa.com
Email Address []:Please enter the following 'extra' attributes
to be sent with your certificate request
A challenge password []:
An optional company name []:openssl x509 -req -in harbor.csr -CA ca.pem -CAkey ca.key -CAcreateserial -out harbor.pem -days 3650
# 安装docker-ce
yum install docker-ce -y && systemctl start docker && systemctl enable docker && systemctl status docker
# 修改内核参数
modprobe br_netfilter && lsmod | grep netfilter
cat > /etc/sysctl.d/docker.conf << EOF
net.bridge.bridge-nf-call-ip6tables = 1
net.bridge.bridge-nf-call-iptables = 1
net.ipv4.ip_forward = 1
EOF
# 令配置生效
sysctl -p /etc/sysctl.d/docker.conf
systemctl restart docker && systemctl status docker
# 配置docker镜像加速器,打开网址:https://cr.console.aliyun.com/cn-hangzhou/instances/mirrors
sudo mkdir -p /etc/docker && sudo tee /etc/docker/daemon.json <<-'EOF'
{"registry-mirrors": ["https://mq4yrzyb.mirror.aliyuncs.com","https://registry.docker-cn.com","https://docker.mirrors.ustc.edu.cn","https://dockerhub.azk8s.cn","http://hub-mirror.c.163.com"]
}
EOF
sudo systemctl daemon-reload && sudo systemctl restart docker
# 为harbor创建安装目录
mkdir /opt/project/harbor -p && cd /opt/project/harbor
# 下载最新的harbor。下载地址:https://github.com/goharbor/harbor/releases
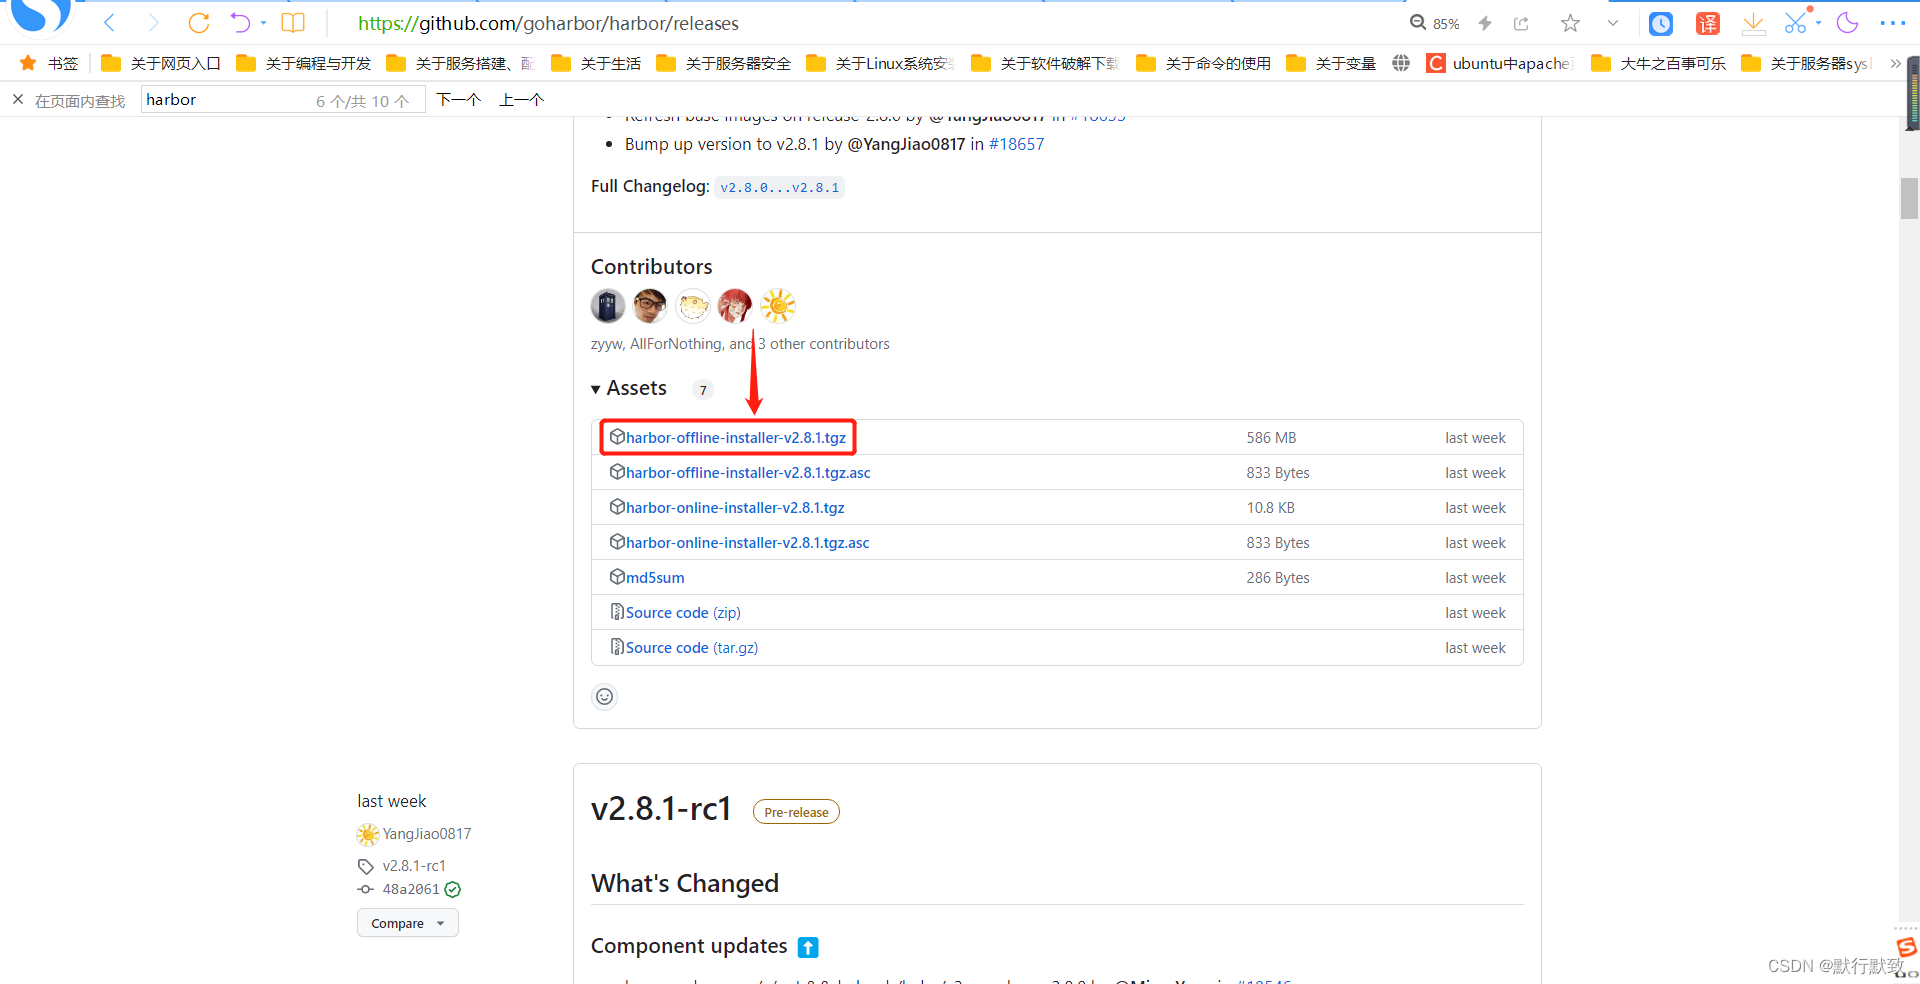
tar zxvf harbor-offline-installer-v2.8.1.tgz && cd harbor
cp harbor.yml.tmpl harbor.yml
vim harbor.ymlhostname: harbor1.xingfafa.comcertificate: /data/ssl/harbor.pemprivate_key: /data/ssl/harbor.key
打开网址:https://github.com/docker/compose/releases/tag/v2.18.1 ,下载docker-compose二进制文件
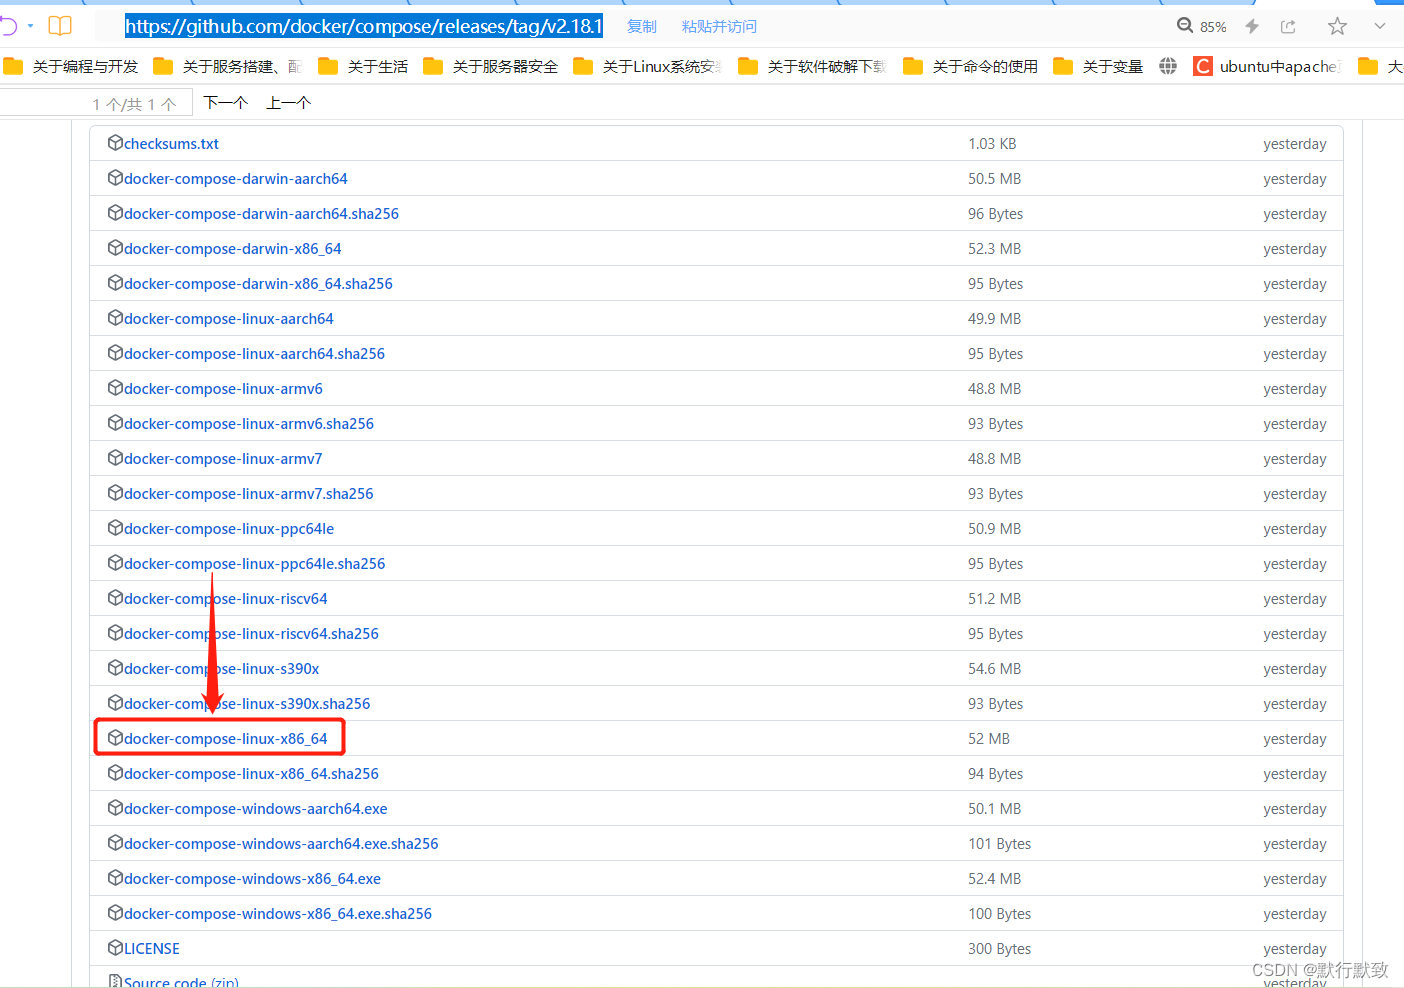
mv docker-compose-linux-x86_64 /usr/bin/docker-compose
chmod +x /usr/bin/docker-compose
docker-compose version
docker load -i harbor.v2.8.1.tar.gz
./install.sh
# 修改pc端hosts文件,增加"192.168.40.190 harbor1"
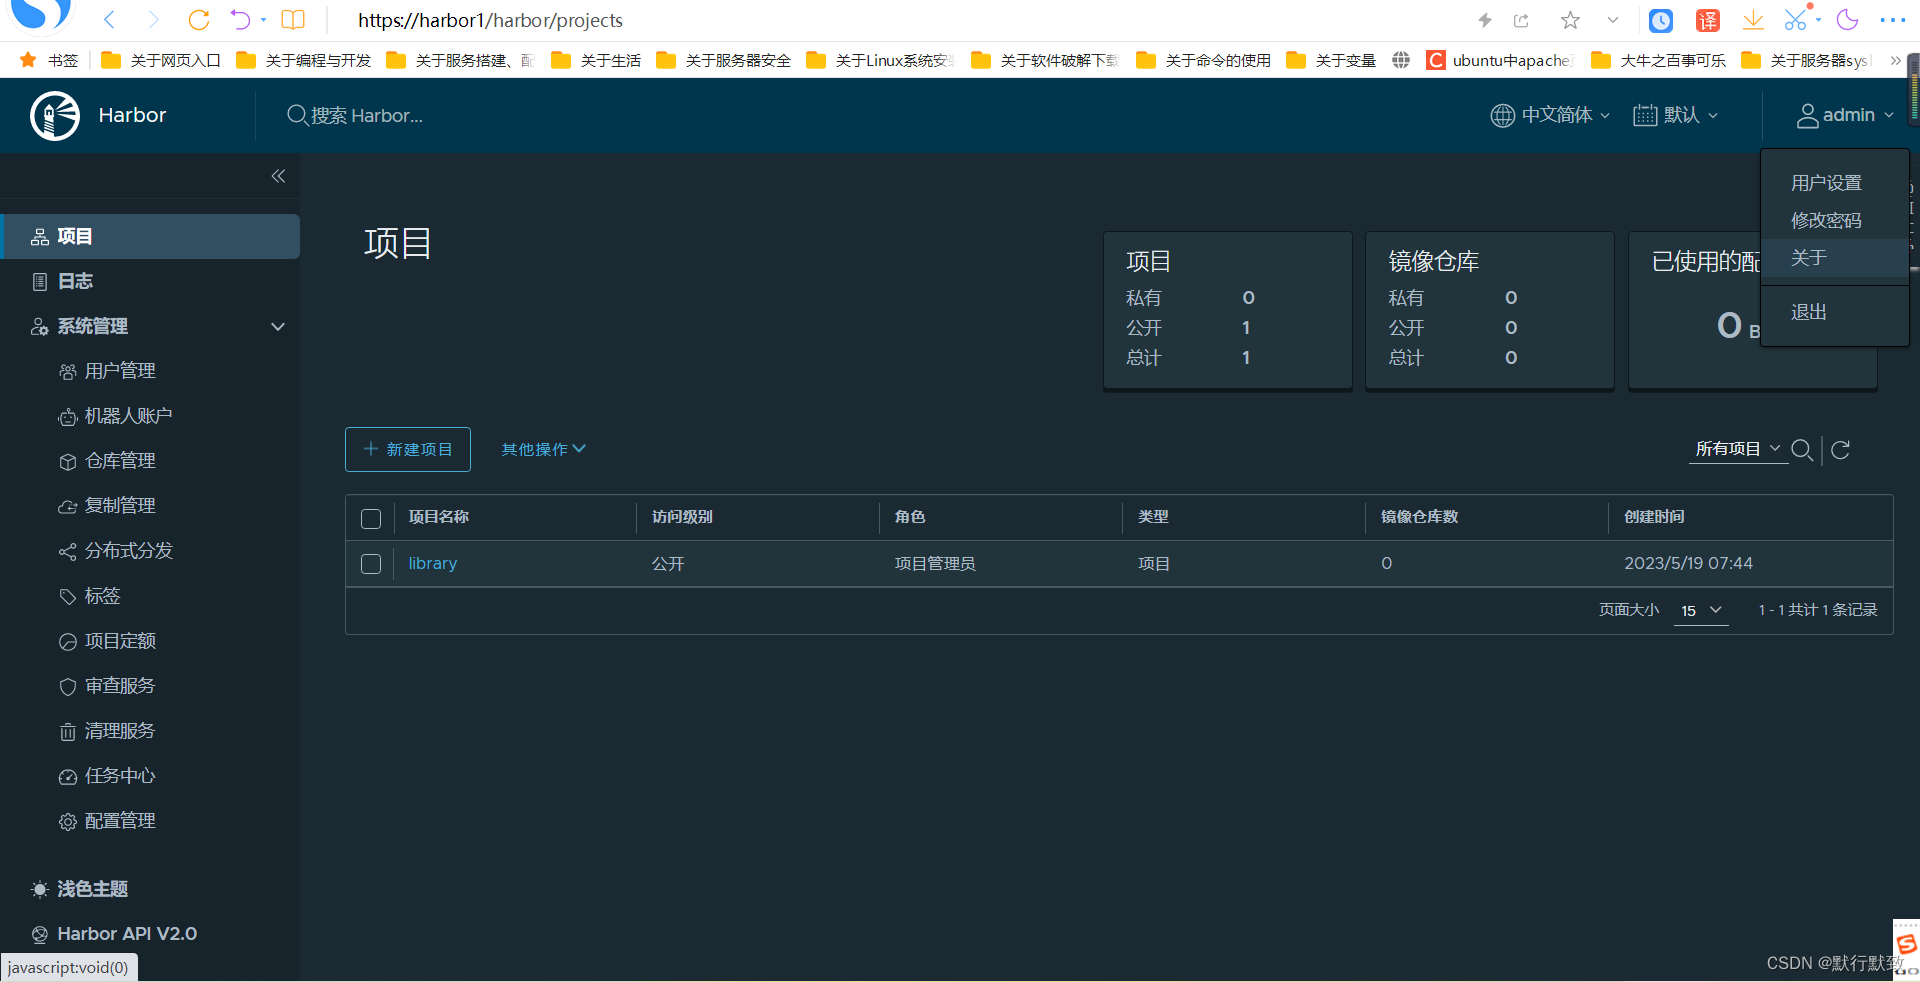
# 打开浏览器,访问地址:https://harbor1
# harbor默认的账号密码:admin/Harbor12345
在另一台节点上配置使用私有harbor仓库
vim /etc/docker/daemon.json
{"registry-mirrors": ["https://mq4yrzyb.mirror.aliyuncs.com","https://registry.docker-cn.com","https://docker.mirrors.ustc.edu.cn","https://dockerhub.azk8s.cn","http://hub-mirror.c.163.com"],"insecure-registries": ["192.168.40.190","harbor1"]
}
systemctl daemon-reload && systemctl restart docker && systemctl status docker.service
echo "192.168.40.190 harbor1" >> /etc/hosts
# 登录harbor1,用户名:admin,密码:Harbor12345
docker login 192.168.40.190
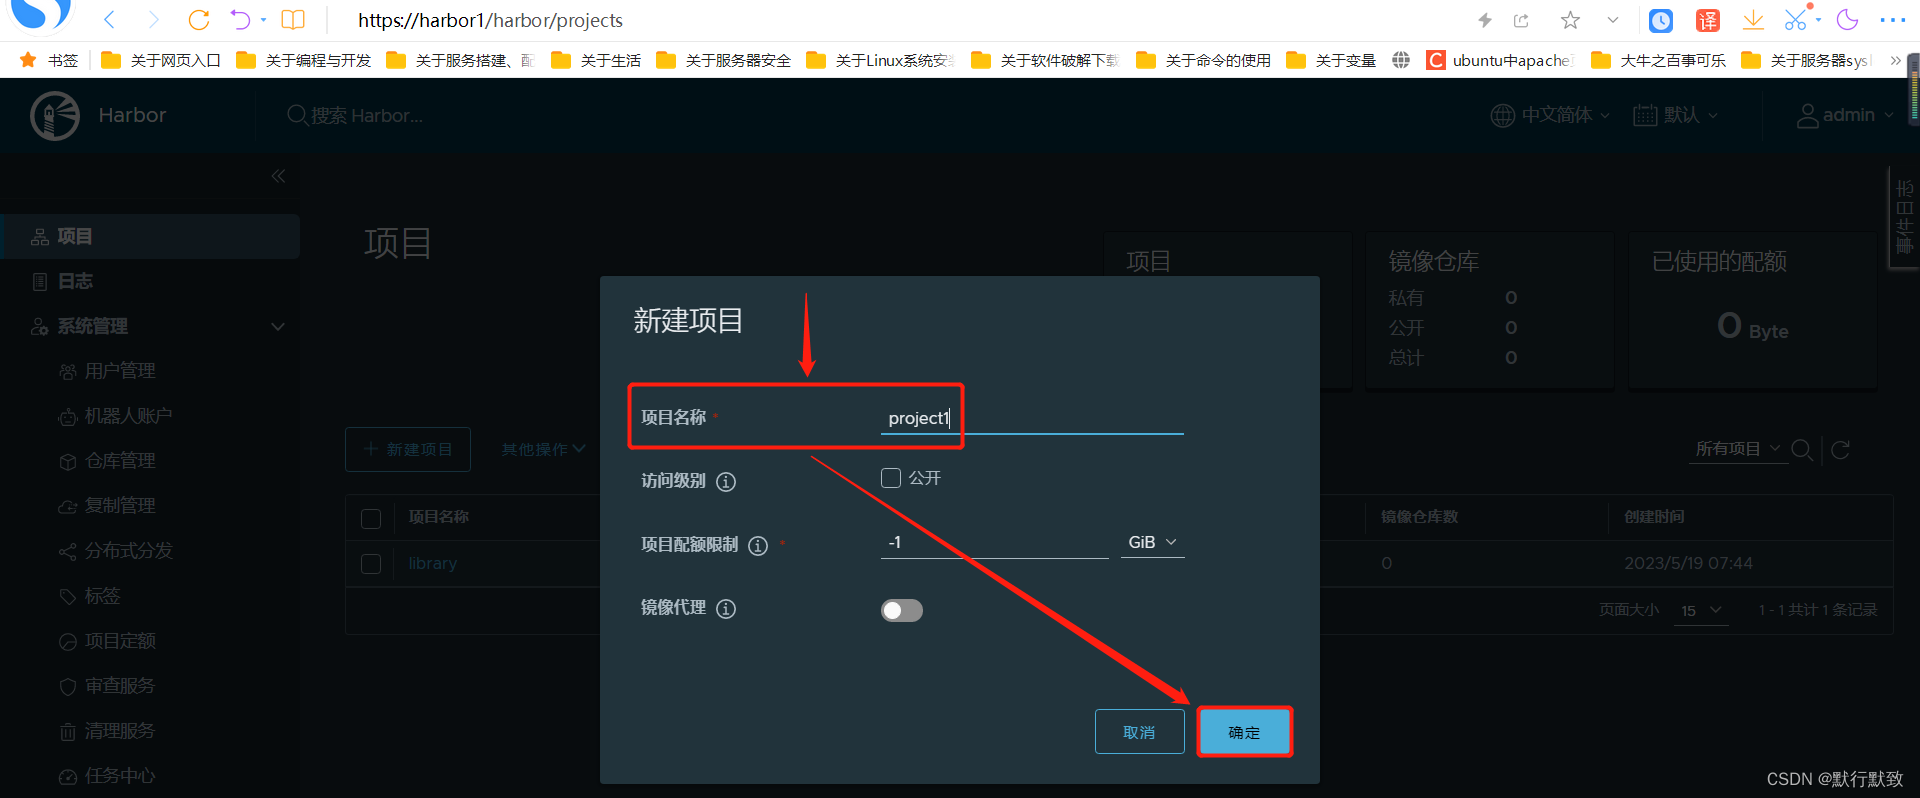
使用harbor控制台创建一个项目,比如project1
# 打标签创建一个符合格式的自制镜像
docker tag busybox:1.28 192.168.40.190/project1/busybox:v1
# push自制的镜像
docker push 192.168.40.190/project1/busybox:v1
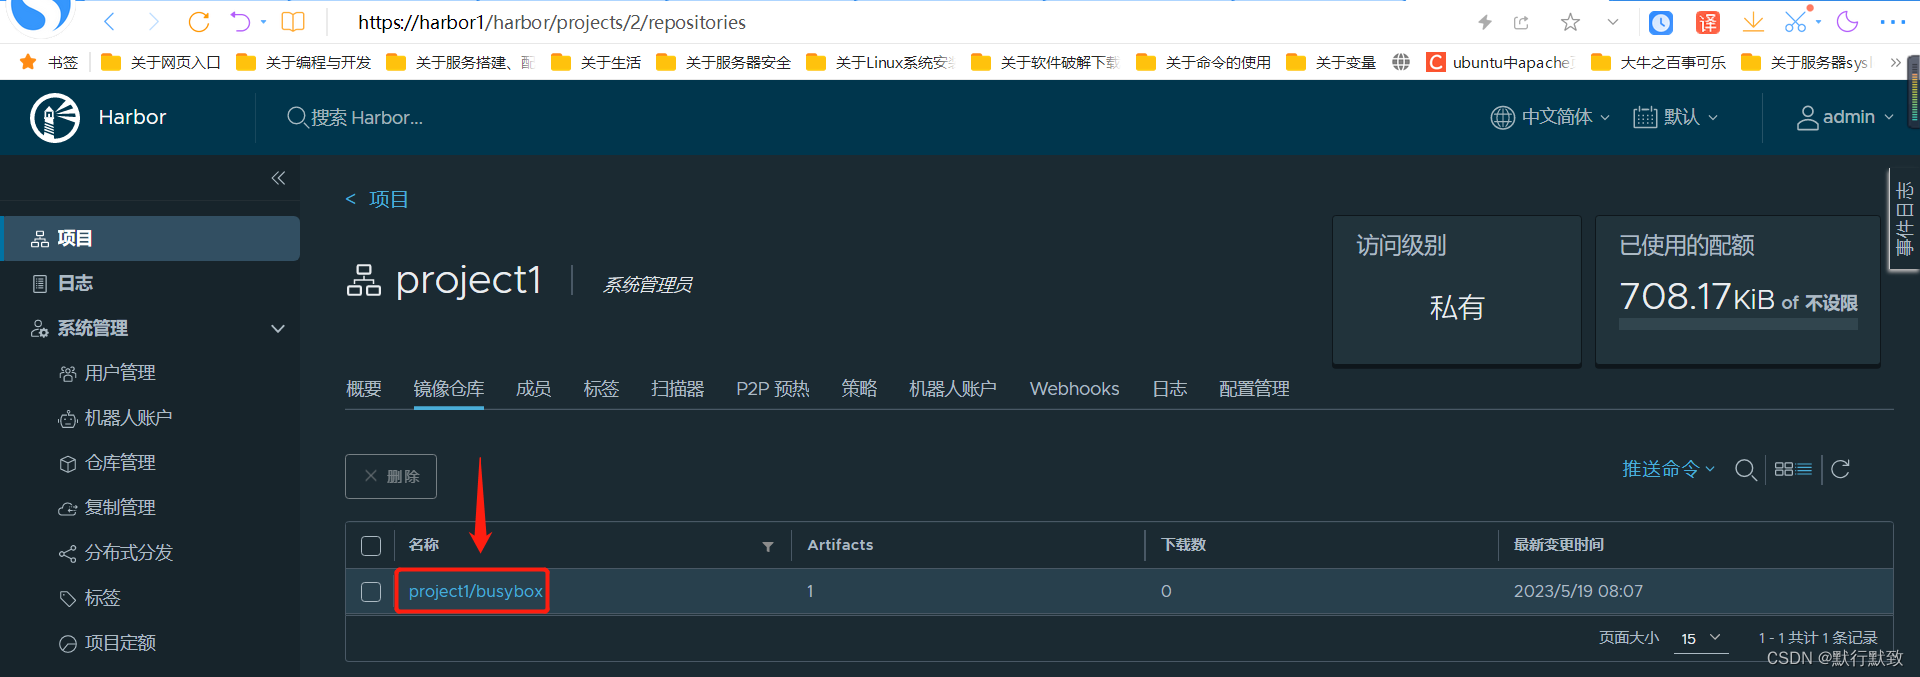
在harbor控制台可看到上传好的自制镜像
# 清理本地镜像,从私有镜像仓库拉取镜像
docker rmi busybox:1.28 192.168.40.190/project1/busybox:v1
docker pull 192.168.40.190/project1/busybox:v1
初始化harbor2节点安装环境
hostnamectl set-hostname harbor2 && bash
systemctl stop firewalld && systemctl disable firewalld
yum install yum-utils -y
yum-config-manager --add-repo http://mirrors.aliyun.com/docker-ce/linux/centos/docker-ce.repo
setenforce 0 && sed -i 's/SELINUX=enforcing/SELINUX=disabled/g' /etc/selinux/config && getenforce
yum install wget net-tools nfs-utils lrzsz gcc gcc-c++ make cmake libxml2-devel openssl-devel curl curl-devel unzip sudo ntp libaio-devel vim ncurses-devel autoconf automake zlib-devel python-devel epel-release openssh-server socat ipvsadm conntrack yum-utils device-mapper-persistent-data lvm2 -y
yum install ntpdate -y
ntpdate cn.pool.ntp.org
crontab -e
* */1 * * * /usr/sbin/ntpdate cn.pool.ntp.org
yum install docker-ce -y && systemctl start docker && systemctl enable docker && systemctl status dockermkdir -p /data/ssl && cd /data/ssl/
openssl genrsa -out ca.key 3072
openssl req -new -x509 -days 3650 -key ca.key -out ca.pem
openssl genrsa -out harbor.key 3072
openssl req -new -key harbor.key -out harbor.csr
openssl x509 -req -in harbor.csr -CA ca.pem -CAkey ca.key -CAcreateserial -out harbor.pem -days 3650
yum install docker-ce -y && systemctl start docker && systemctl enable docker && systemctl status docker
modprobe br_netfilter && lsmod | grep netfilter
cat > /etc/sysctl.d/docker.conf << EOF
net.bridge.bridge-nf-call-ip6tables = 1
net.bridge.bridge-nf-call-iptables = 1
net.ipv4.ip_forward = 1
EOF
sysctl -p /etc/sysctl.d/docker.conf
systemctl restart docker && systemctl status docker
sudo mkdir -p /etc/docker && sudo tee /etc/docker/daemon.json <<-'EOF'
{"registry-mirrors": ["https://mq4yrzyb.mirror.aliyuncs.com","https://registry.docker-cn.com","https://docker.mirrors.ustc.edu.cn","https://dockerhub.azk8s.cn","http://hub-mirror.c.163.com"]
}
EOF
sudo systemctl daemon-reload && sudo systemctl restart docker
mkdir /opt/project/harbor -p && cd /opt/project/harbor
tar zxvf harbor-offline-installer-v2.8.1.tgz && cd harbor
cp harbor.yml.tmpl harbor.yml
vim harbor.ymlhostname: harbor2.xingfafa.comcertificate: /data/ssl/harbor.pemprivate_key: /data/ssl/harbor.key
mv docker-compose-linux-x86_64 /usr/bin/docker-compose
chmod +x /usr/bin/docker-compose
docker-compose version
docker load -i harbor.v2.8.1.tar.gz
./install.sh
# 修改pc端hosts文件,增加"192.168.40.191 harbor2"
# 打开浏览器,访问地址:https://harbor2
# harbor默认的账号密码:admin/Harbor12345
在https://harbor2.xingfafa.com/harbor/registries的控制台中新增目标(使用https的控制台需要其他配置)
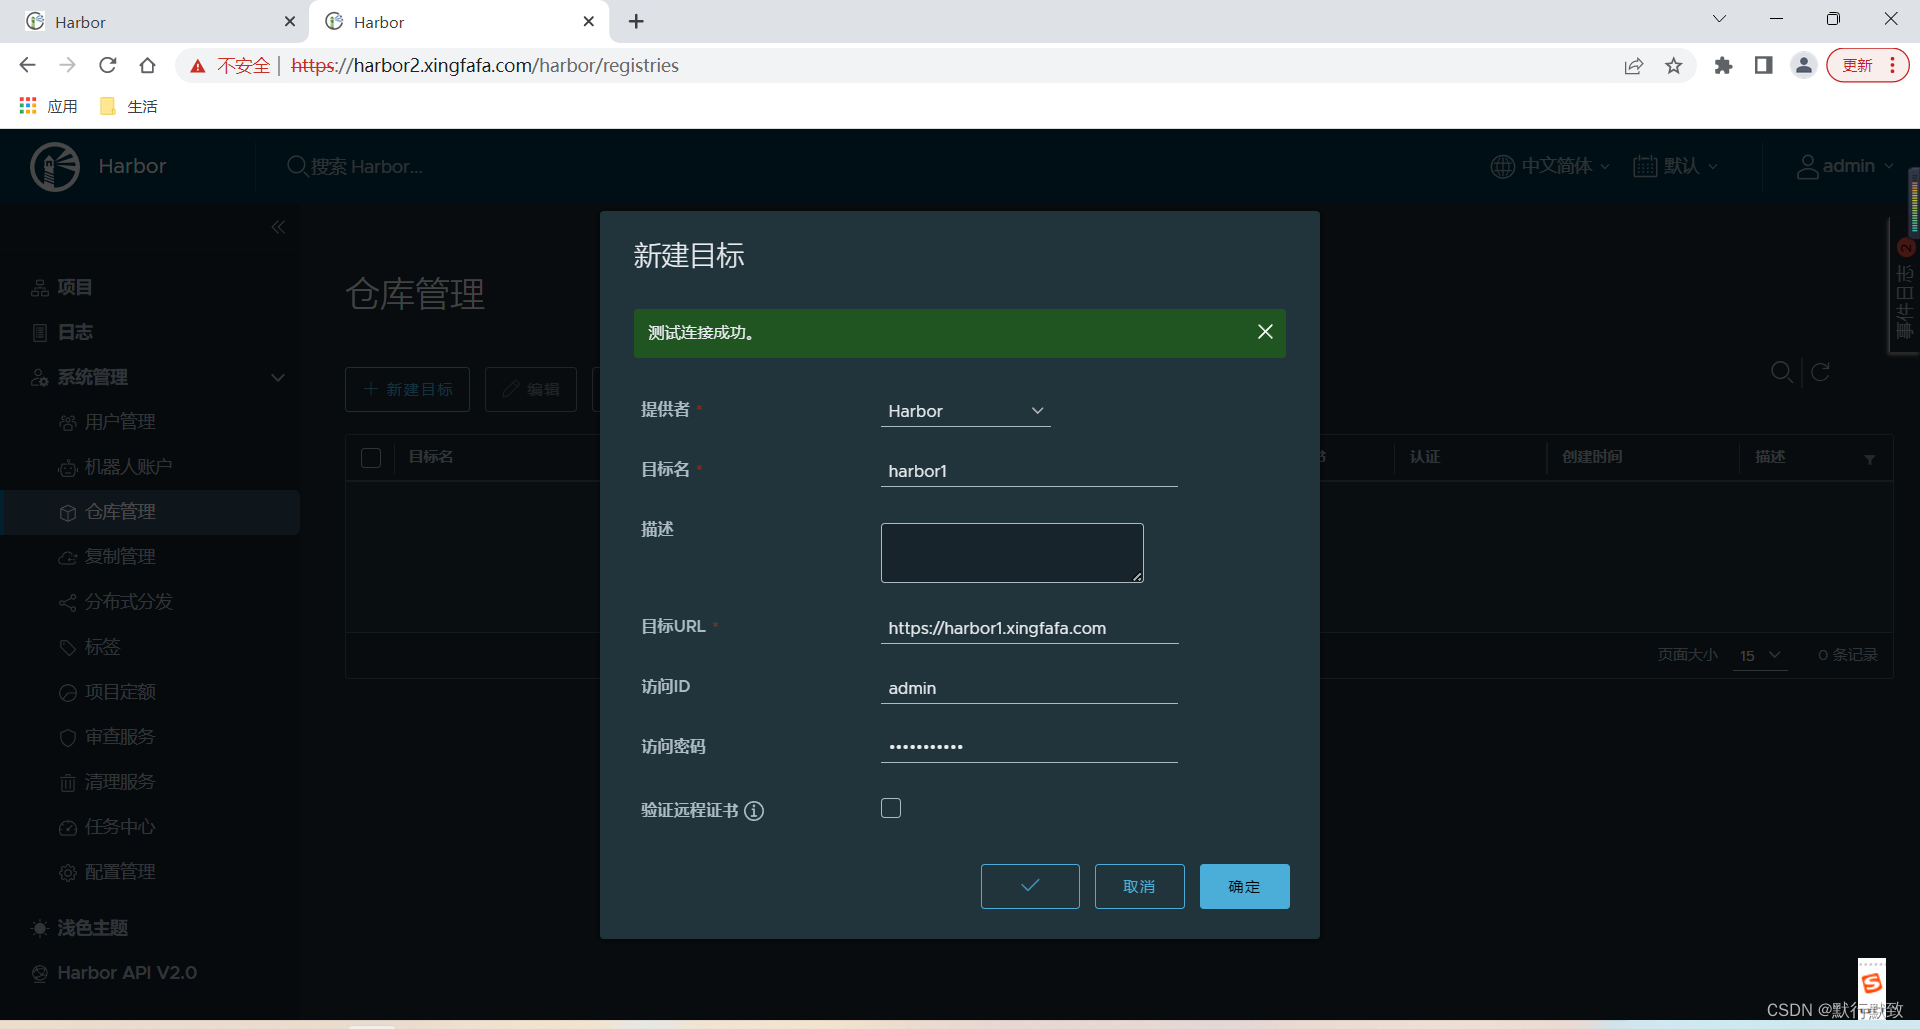
在https://harbor2.xingfafa.com/harbor/registries的控制台中新增目标
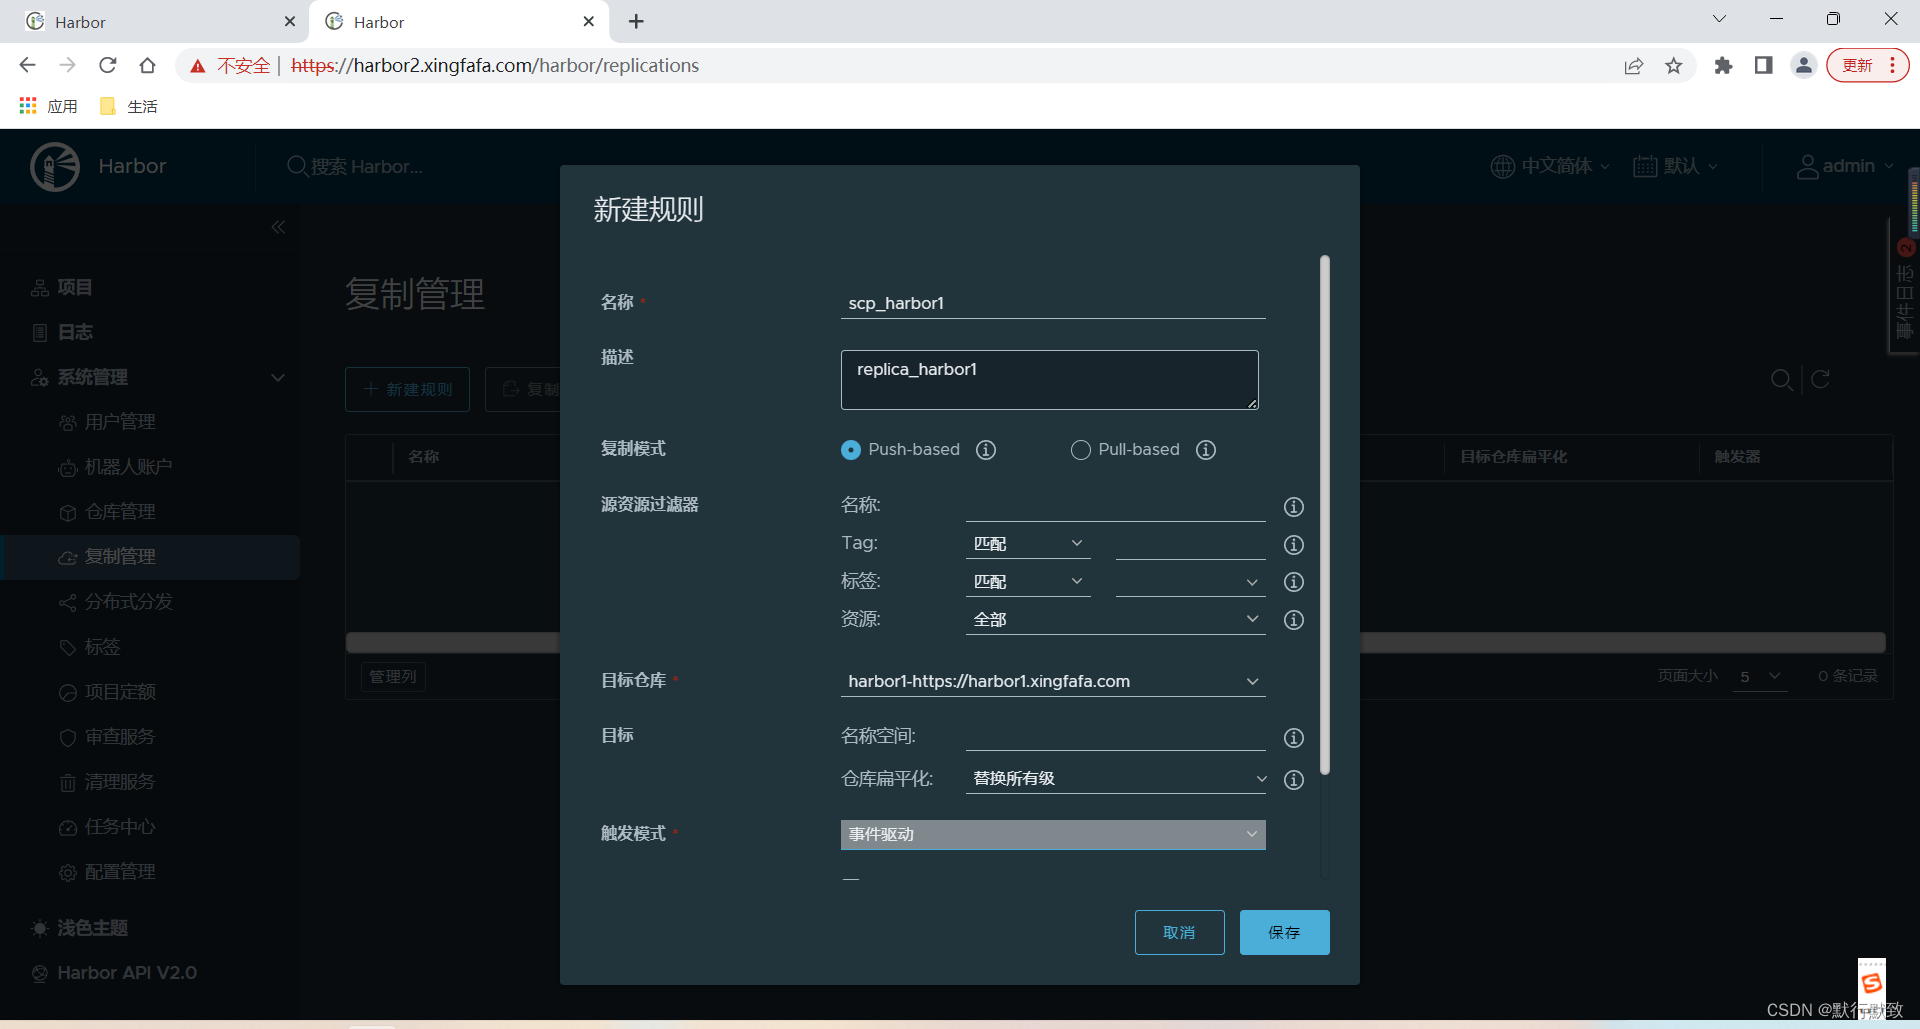
在harbor2控制台做相同的配置,令双方双向复制即可。
部署keepalive+nginx
yum install epel-release nginx keepalived -y
cat /etc/nginx/nginx.conf
worker_processes  1;
events {use  epoll;worker_connections  4096;
}
http {include  mime.types;default_type  application/octet-stream;log_format  main  '$remote_addr - $remote_user [$time_local] "$request"'  '$status $body_bytes_sent "$http_referer"'  '"$http_user_agent" "$http_x_forwarded_for"';access_log  /var/log/nginx/access.log  main;keepalive_timeout  65;upstream  web_servers {server  192.168.40.190:443;server  192.168.40.191:443;}server {listen  18080;ssl on;ssl_certificate /data/ssl/harbor.pem;ssl_certificate_key /data/ssl/harbor.key;server_name  192.168.40.209;charset  utf-8;location  /  {root  html;index  index.html  index.php;proxy_pass  https://web_servers;}}
}vi /etc/keepalived/keepalived.conf
global_defs { notification_email { acassen@firewall.loc failover@firewall.loc sysadmin@firewall.loc } notification_email_from Alexandre.Cassen@firewall.loc  smtp_server 127.0.0.1 smtp_connect_timeout 30 router_id NGINX_MASTER
} vrrp_script check_nginx {script "/etc/keepalived/check_nginx.sh"
}vrrp_instance VI_1 { state MASTER interface ens33  # 修改为实际网卡名virtual_router_id 51 # VRRP 路由 ID实例,每个实例是唯一的 priority 100    # 优先级,备服务器设置 90 advert_int 1    # 指定VRRP 心跳包通告间隔时间,默认1秒 authentication { auth_type PASS      auth_pass 1111 }  # 虚拟IPvirtual_ipaddress { 192.168.40.209/24} track_script {check_nginx}
}vi /etc/keepalived/check_nginx.sh
#!/bin/bash
#1、判断Nginx是否存活
counter=$(ps -ef |grep nginx | grep sbin | egrep -cv "grep|$$" )
if [ $counter -eq 0 ]; then#2、如果不存活则尝试启动Nginxservice nginx startsleep 2#3、等待2秒后再次获取一次Nginx状态counter=$(ps -ef |grep nginx | grep sbin | egrep -cv "grep|$$" )#4、再次进行判断,如Nginx还不存活则停止Keepalived,让地址进行漂移if [ $counter -eq 0 ]; thenservice  keepalived stopfi
fichmod +x /etc/keepalived/check_nginx.sh
yum install nginx-mod-stream -y
systemctl start nginx && systemctl start keepalived && systemctl enable nginx keepalived && systemctl status keepalived
# docker login harbor1.xingfafa.com:18080
# cat /etc/docker/daemon.json
#{
#  "registry-mirrors": ["https://mq4yrzyb.mirror.aliyuncs.com","https://registry.docker-cn.com","https://docker.mirrors.ustc.edu.cn","https://dockerhub.azk8s.cn","http://hub-mirror.c.163.com","http://192.168.40.190","http://192.168.40.191","https://192.168.40.209:18080"],
#  "insecure-registries": ["192.168.40.190","harbor1.xingfafa.com","192.168.40.191","harbor2","192.168.40.209:18080"]
#}