目录
一、环境准备
1.准备三台服务器(带图形化的linuxCentOS7,最小化缺少很多环境)
2.修改主机名
3.关闭防火墙
4.elk-node1、elk-node2 用系统自带的java
5.上传软件包到node1和node2
二、部署elasticsearch
1、node1、node2操作
2.node1 安装elasticsearch-head插件
3.安装npm
三、安装logstash
1、node1上安装logstash
2、node1配置收集系统日志
四、node1安装kibaba
五、开始配置192.168.1.145(apache)
1.下载、启动httpd
一、环境准备
1.准备三台服务器(带图形化的linuxCentOS7,最小化缺少很多环境)
192.168.1.145 apache
192.168.1.146 elk-node1
192.168.1.147 elk-node2
2.修改主机名
[root@apache ~]#
[root@elk-node1 ~]#
[root@elk-node2 ~]#
[root@elk-node1 ~] vim /etc/hosts
192.168.1.146 elk-node1
192.168.1.147 elk-node2
3.关闭防火墙
[root@elk-node1 ~] systemctl stop firewalld
[root@elk-node1 ~] setenforce 0
[root@elk-node1 ~] iptables -F
4.elk-node1、elk-node2 用系统自带的java
[root@elk-node1 ~] java -version
openjdk version "1.8.0_262"
OpenJDK Runtime Environment (build 1.8.0_262-b10)
OpenJDK 64-Bit Server VM (build 25.262-b10, mixed mode)[root@elk-node2 ~] java -version
openjdk version "1.8.0_262"
OpenJDK Runtime Environment (build 1.8.0_262-b10)
OpenJDK 64-Bit Server VM (build 25.262-b10, mixed mode)
5.上传软件包到node1和node2

二、部署elasticsearch
1、node1、node2操作
[root@elk-node1 ~] systemctl daemon-reload
[root@elk-node1 ~] systemctl enable elasticsearch.service
Created symlink from /etc/systemd/system/multi-user.target.wants/elasticsearch.service to /usr/lib/systemd/system/elasticsearch.service.[root@elk-node1 ~] vim /etc/elasticsearch/elasticsearch.yml
17  cluster.name: my-elk-cluster    #node1和node2的集群名
23  node.name: elk-node1       #主机名
33  path.data: /data/elk_data     #数据存放路径
37 path.logs: /var/log/elasticsearch   #日志存放路径
43 bootstrap.memory_lock: false     #不在启动时锁定内存
55 network.host: 0.0.0.0      #提供服务的端口
59 http.port: 9200            #指定侦听端口
68 discovery.zen.ping.unicast.hosts: ["elk-node1", "elk-node2"]  #集群中的实例名
node1
[root@elk-node1 ~] vim /etc/elasticsearch/elasticsearch.yml
#末行追加
http.cors.enabled:true     #开启跨区域传送
http.cors.allow-origin:"*"   #跨域访问允许的域名地址
node1、node2
[root@elk-node1 ~] mkdir -p /data/elk_data  #创建elk_data
[root@elk-node1 ~] chown elasticsearch:elasticsearch /data/elk_data/  #修改属主属组
[root@elk-node1 ~] systemctl start elasticsearch.service   #启动
[root@elk-node1 ~] netstat -anpt|grep 9200 #查看端口tcp6 0 0 :::9200 :::* LISTEN 55580/java 

下面的页面可以查看elasticsearch状态:green健康 yellow良好 red宕机

2.node1 安装elasticsearch-head插件
[root@elk-node1 ~] tar xf node-v8.2.1-linux-x64.tar.gz -C /usr/local/
#做链接
[root@elk-node1 ~] ln -s /usr/local/node-v8.2.1-linux-x64/bin/node /usr/bin/node
[root@elk-node1 ~] ln -s /usr/local/node-v8.2.1-linux-x64/bin/npm /usr/local/bin/
#查看版本
[root@elk-node1 ~] node -v
v8.2.1
[root@elk-node1 ~] npm -v
5.3.0
[root@elk-node1 ~] tar xf elasticsearch-head.tar.gz -C /data/elk_data/  #解压head软件包
[root@elk-node1 ~] cd /data/elk_data/
#修改属主属组
[root@elk-node1 elk_data] chown -R elasticsearch:elasticsearch elasticsearch-head/
[root@elk-node1 elk_data] cd elasticsearch-head/
3.安装npm
[root@elk-node1 elasticsearch-head] npm install   #安装npm
[root@elk-node1 elasticsearch-head] cd _site/
[root@elk-node1 _site] cp app.js{,.bak}    #备份
[root@elk-node1 _site] vim app.js  #修改配置
4329                         this.base_uri = this.config.base_uri || this.prefs.get("app-base_uri")      || "http://192.168.1.146:9200";
[root@elk-node1 _site] npm run start &  #启动npm
[root@elk-node1 _site] systemctl start elasticsearch
[root@elk-node1 _site] netstat -anptl |grep 9100
tcp        0      0 0.0.0.0:9100            0.0.0.0:*               LISTEN      55835/grunt
[root@elk-node1 _site]# netstat -anptl |grep 9200
tcp6       0      0 :::9200                 :::*                    LISTEN      55580/java          #插入数据测试类型为test
[root@elk-node1 _site]#  curl -XPUT 'localhost:9200/index-demo/test/1?pretty&pretty' -H 'Content-Type: application/json' -d '{ "user": "zhangsan","mesg":"hello word" }'
{"_index" : "index-demo","_type" : "test","_id" : "1","_version" : 1,"result" : "created","_shards" : {"total" : 2,"successful" : 1,"failed" : 0},"created" : true
}

#如果不显示node2
cd /data/elk_data/
rm -rf nodes/
三、安装logstash
1、node1上安装logstash
[root@elk-node1 ~] rpm -ivh logstash-5.5.1.rpm
[root@elk-node1 ~] systemctl start logstash.service
[root@elk-node1 ~] ln -s /usr/share/logstash/bin/logstash /usr/local/bin/
#'input { stdin{} } output { stdout{} }'是Logstash的配置语法,它定义了一个简单的管道,将从标准输入读取数据,并将数据输出到标准输出。
[root@elk-node1 ~]  logstash -e 'input { stdin{} } output { stdout{} }'  #
ERROR StatusLogger No log4j2 configuration file found. Using default configuration: logging only errors to the console.
WARNING: Could not find logstash.yml which is typically located in $LS_HOME/config or
18:56:52.669 [Api Webserver] INFO  logstash.agent - Successfully started Logstash API endpoint {:port=>9600}
#上面的警告不用管
www.baidu.com   #手动输入
2023-07-06T10:57:27.869Z elk-node1 www.baidu.com
www.sina.com.cn    #手动输入,然后ctrl+c退出
2023-07-06T10:57:38.298Z elk-node1 www.sina.com.cn
^C18:57:47.298 [SIGINT handler] WARN  logstash.runner - SIGINT received. Shutting down the agent.
18:57:47.312 [LogStash::Runner] WARN  logstash.agent - stopping pipeline {:id=>"main"}
[root@elk-node1 ~] logstash -e 'input { stdin{} } output { stdout{ codec =>rubydebug} }'19:00:52.958 [Api Webserver] INFO  logstash.agent - Successfully started Logstash API endpoint {:port=>9600}www.baidu.com  #手动输入
{"@timestamp" => 2023-07-06T11:05:20.466Z,"@version" => "1","host" => "elk-node1","message" => "www.baidu.com"
[root@elk-node1 ~] logstash -e 'input {stdin{} } output {  elasticsearch { hosts=> ["192.168.1.146:9200"]} }'
rt=>9600}
www.baidu.com   #输入
www.sina.com.cn
www.google.com
2、node1配置收集系统日志
[root@elk-node1 ~] cd /etc/logstash/conf.d/
[root@elk-node1 conf.d] vim systemc.confinput {file {path => "/var/log/messages"type => "system"start_position => "beginning"}
}
output  {elasticsearch {hosts => ["192.168.1.146:9200"]index => "system-%{+YYYY.MM.dd}"}
}[root@elk-node1 conf.d] systemctl restart logstash.service  #重启
#加载systemc.conf 文件并且查看是否打入到es当中
[root@elk-node1 conf.d] logstash -f systemc.conf

#如果9100端口掉了,很正常,重新cd到/data/elk——data/elasticsearch-head/
执行npm install,在执行npm run start &就又启动了
四、node1安装kibaba
[root@elk-node1 ~] rpm -ivh kibana-5.5.1-x86_64.rpm
[root@elk-node1 ~] systemctl enable kibana.service
[root@elk-node1 ~] vim /etc/kibana/kibana.yml 2 server.port: 5601
7 server.host: "0.0.0.0"
21 elasticsearch.url: "http://192.168.1.146:9200"
30 kibana.index: ".kibana"
[root@elk-node1 ~] vim /etc/kibana/kibana.yml
[root@elk-node1 ~] systemctl restart kibana.service
[root@elk-node1 ~] netstat -nptl|grep 5601
tcp        0      0 0.0.0.0:5601            0.0.0.0:*               LISTEN      62312/node
[root@elk-node1 ~] logstash -f /etc/logstash/conf.d/systemc.conf

#点击管理 查看索引是否可以配置


五、开始配置192.168.1.145(apache)
1.下载、启动httpd
[root@apache ~] yum -y install httpd
[root@apache ~] systemctl start  httpd
[root@apache ~] rpm -ivh logstash-5.5.1.rpm
[root@apache ~] systemctl enable logstash.service #开机自启
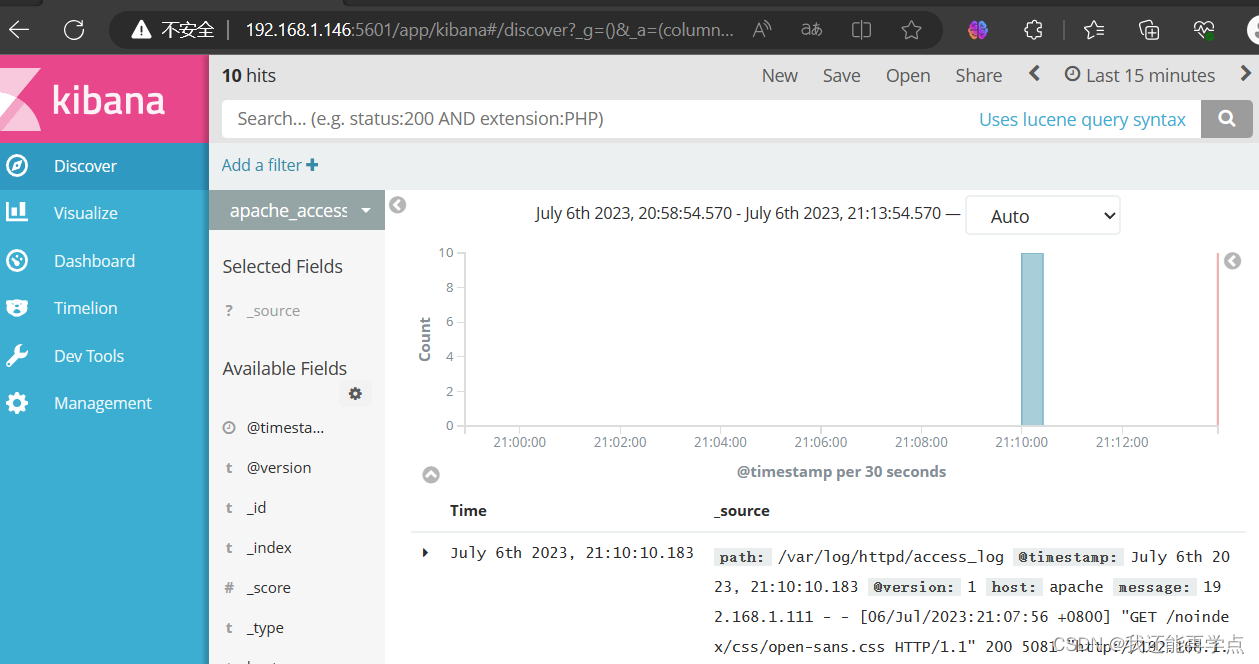
[root@apache ~] cd /etc/logstash/conf.d/  #编辑配置文件[root@apache conf.d] vim apache_log.confinput {file {path => "/var/log/httpd/access_log"type => "access"start_position => "beginning"}file {path => "/var/log/httpd/error_log"type => "error"start_position => "beginning"}
}
output  {if [type] == "access" {elasticsearch {hosts => ["192.168.1.146:9200"]index => "apache_access-%{+YYYY.MM.dd}"}}if [type] == "error" {elasticsearch {hosts => ["192.168.1.146:9200"]index => "apache_error-%{+YYYY.MM.dd}"}}
}
[root@apache conf.d] systemctl start logstash
#命令优化
[root@apache conf.d] ln -s /usr/share/logstash/bin/logstash /usr/local/bin/
[root@apache conf.d] logstash -f apache_log.conf #加载文件
20:39:59.950 [Api Webserver] INFO logstash.agent - Successfully started Logstash API endpoint {:port=>9601}
#出现successfully就ok
#点击创建索引


ELK端口号:
elasticsearch:9200
elasticsearch-head:9100
logstash:9600 input:4560
Logstash agent:9601
kibana:5601


