一.简介
SpringSecurity 默认是不支持验证码功能的,但是可以自己扩展,这也是使用SpringSecurity的好处之一,原生不支持,我们就自己扩展。
二.思路分析
因为系统默认的有一个DaoAuthenticationProvider 认证处理器,但是他只支持用户名和密码方式登录,所以是不能使用现有的认证器,那我们是不是可以实现一个自己的认证器,来覆盖这个默认的认证器呢?答案当然是可以的,大概实现思路是这样的:
- 创建一个认证器 继承默认的密码认证器DaoAuthenticationProvider
- 定义验证码认证器的逻辑
2.1. 从session获取保存的验证码
2.2. 从请求参数中获取用户输入的验证码
2.3. 比对验证码
2.4. 如果匹配成功,则调用DaoAuthenticationProvider的authenticate方法,进行原先逻辑认证
2.5. 如果匹配失败,则抛出异常,不走后面的逻辑 - 将自定义的provider加到AuthenticationManager中
这篇文章来看下如何通过自定义认证器来实现验证码校验的功能。
三.创建项目
如何创建一个SpringSecurity项目,前面文章已经有说明了,这里就不重复写了。
四.代码实现
4.1创建验证码处理器
4.1.1引入依赖
验证码的依赖:
com.github.penggle:kaptcha:2.3.2
4.1.2配置验证码
配置验证码的代码如下:
@Beanpublic Producer producer() {Properties properties = new Properties();properties.setProperty("kaptcha.image.width", "150");properties.setProperty("kaptcha.image.height", "50");properties.setProperty("kaptcha.textproducer.char.string", "012");properties.setProperty("kaptcha.textproducer.char.length", "4");Config config = new Config(properties);DefaultKaptcha defaultKaptcha = new DefaultKaptcha();defaultKaptcha.setConfig(config);return defaultKaptcha;}
4.1.3创建验证码入口
创建验证码入口的代码如下:
@Autowired(required = false)private Producer producer;@RequestMapping("/kaptcha")public void kaptcha(HttpServletResponse response, HttpSession session){response.setContentType("image/jpg");String text = producer.createText();session.setAttribute("KAPTCHA_CODE",text);BufferedImage image = producer.createImage(text);try(ServletOutputStream outputStream = response.getOutputStream()){ImageIO.write(image,"jpg",outputStream);} catch (IOException e) {throw new RuntimeException(e);}}
4.2自定义验证码认证处理器
自定义验证码认证处理器代码如下:
public class KaptchaAuthenticationProvider extends DaoAuthenticationProvider {@Overridepublic Authentication authenticate(Authentication authentication) throws AuthenticationException {HttpServletRequest request = ((ServletRequestAttributes) Objects.requireNonNull(RequestContextHolder.getRequestAttributes())).getRequest();String kaptchaCode = (String) request.getSession().getAttribute("KAPTCHA_CODE");String inputKaptcha = request.getParameter("kaptcha");if (!StrUtil.equals(kaptchaCode, inputKaptcha)) {throw new InternalAuthenticationServiceException("验证码验证失败");}return super.authenticate(authentication);}
}
4.3自定义登录页面
自定义登录页面的前端代码如下:
<!DOCTYPE html>
<html lang="en" xmlns:th="http://www.thymeleaf.org">
<head><meta charset="UTF-8"><title>Title</title>
</head>
<body>
<div th:text="${SPRING_SECURITY_LAST_EXCEPTION}"></div>
<form action="/login" method="post">用户名:<input name="username" type="text"><br>密码:<input name="password" type="password"><br>验证码:<input name="kaptcha" type="text"><br><img src="/kaptcha"><button type="submit">登陆</button>
</form>
</body>
</html>
4.4配置SecurityFilterchain
配置SecurityFilterchain的代码如下:
@Beanpublic SecurityFilterChain securityFilterChain(HttpSecurity http) throws Exception {http.authorizeHttpRequests((auth) ->{try {auth.antMatchers("/kaptcha").permitAll().anyRequest().authenticated().and().formLogin().loginPage("/login.html").loginProcessingUrl("/login").failureForwardUrl("/login.html").permitAll().and().csrf().disable();}catch (Exception e){}});return http.build();}
4.5配置AuthenticationManager
配置AuthenticationManager的代码如下:
@Beanpublic UserDetailsService userDetailsService(){UserDetails userDetails = User.withUsername("memory1").password("{noop}memory1").roles("memory1").build();return new InMemoryUserDetailsManager(userDetails);}@Beanpublic KaptchaAuthenticationProvider kaptchaAuthenticationProvider(){KaptchaAuthenticationProvider kaptchaAuthenticationProvider= new KaptchaAuthenticationProvider();kaptchaAuthenticationProvider.setUserDetailsService(userDetailsService());return kaptchaAuthenticationProvider;}@Beanpublic AuthenticationManager authenticationManager(){return new ProviderManager(kaptchaAuthenticationProvider());}
五.验证登录
截图如下:
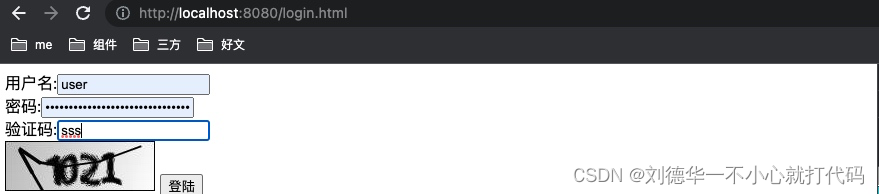
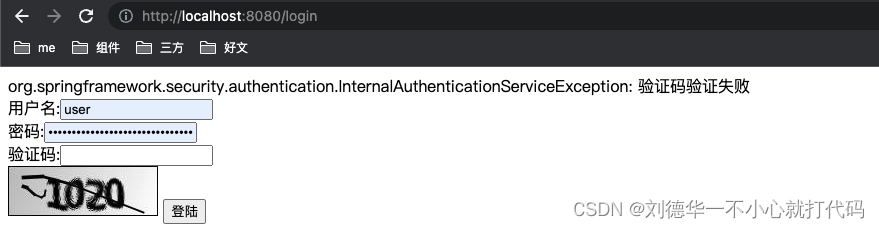
至此,扩展验证码功能就处理好了。