一、配置发件服务器
1.1 根据现场IP,配置主机名
vi /etc/hosts
192.168.40.133 mail.test.com
将主机名更改为邮件服务器域名mail.test.com


1.2 关闭防火墙,禁止开机启动
systemctl stop firewalld
systemctl disable firewalld
1.3 关闭selinux
vi /etc/selinux/config
将未注释的SELINUX值改为disabled
1.4 安装/配置postfix服务器
(1)检查系统是否已经安装了postfix服务器
rpm -q postfix
(2) 如果没有就安装,安装了就跳过
yum -y install postfix
(3) 编辑postfix的配置文件,查找并修改对应配置项
vi /etc/postfix/main.cf
在文件最后添加如下内容
myhostname = mail.test.com
mydomain = test.com
myorigin = $mydomain
inet_interfaces = all
inet_protocols = all
mydestination = $myhostname, $mydomain
home_mailbox = Maildir/
mynetworks = 0.0.0.0,127.0.0.0/8,60.60.60.0/24  // 网络权限(根据现场IP配置,粘贴进去的时候去掉//后面的所有内容)

(4) 检查配置文件是否有语法错误
postfix check
(5) 重新启动postfix服务器
systemctl restart postfix
1.5 发件测试
(1) 添加邮件账号组
groupadd mailusers
(2)添加邮箱账号
 useradd -g mailusers -s /sbin/nologin dkycs
passwd dkycs
useradd -g mailusers -s /sbin/nologin dfc
passwd dfc
(3) 安装远程登录插件
yum install -y telnet
(4) 远程登录25端口,如报错连接不上,重启postfix
telnet mail.test.com 25
(确认现场25端口是否开放)
(5)测试邮件发送
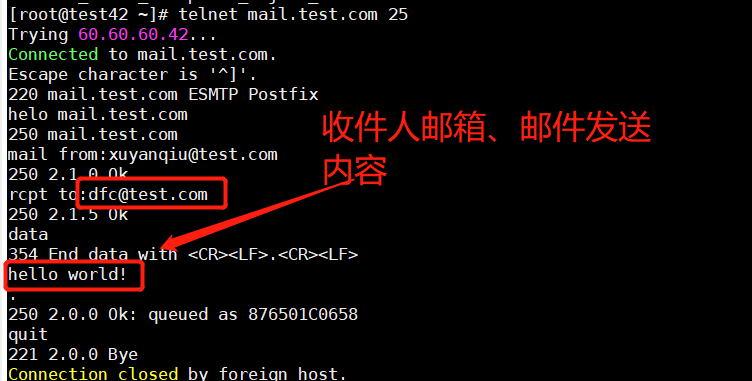
[root@localhost new]# telnet mail.test.com 25  //
Trying 192.168.40.133...
Connected to mail.test.com.
Escape character is '^]'.
220 mail.test.com ESMTP Postfix
#显示上面 表示telnet连接成功mail from:<shaokang@test.com>
#邮件发送者250 2.1.0 Ok
rcpt to:dfc@test.com
#邮件接收者250 2.1.5 Ok
data#data加回车开始编写邮件
354 End data with <CR><LF>.<CR><LF>
Subject:test mail
#邮件主题hello serva 3D_city_wprl^H
hello serva 3FD
hello 3D!thanks!
#邮件内容.
#.表示编写结束 发送邮件250 2.0.0 Ok: queued as 21C5340F1992
#发送成功quit
#退出telnet221 2.0.0 Bye
Connection closed by foreign host.

如果报错就修改下列文件:
vi /etc/postfix/main.cf

mynetworks = all
systemctl restart postfix
(6)接收查看邮件内容

cd /home/收件人/Maildir/new目录下,所有新收的邮件都在这个下面:
二、配置收件服务器
2.1 安装dovecot
yum -y install dovecot
安装完,查看版本:
dovecot --version
2.2 修改配置文件
(1)执行vi /etc/dovecot/dovecot.conf
修改如下:
protocols = imap pop3
listen = *, ::
login_trusted_networks = 0.0.0.0,127.0.0.0/8,60.60.60.0/24   (根据现场配置填写)
!include conf.d/*.conf
!include_try local.conf
(2)执行vi /etc/dovecot/conf.d/10-ssl.conf
修改如下:
ssl = no
(3)执行vi /etc/dovecot/conf.d/10-auth.conf
修改如下:
disable_plaintext_auth = no
auth_mechanisms = plain login
!include auth-system.conf.ext
(4)执行vi /etc/dovecot/conf.d/10-logging.conf
修改如下:
info_log_path = /var/log/dovecot_info.log
debug_log_path = /var/log/dovecot_debug.log
(5)执行vi /etc/dovecot/conf.d/10-mail.conf
修改如下:
mail_location = maildir:~/Maildir
2.3 启动服务
systemctl start dovecot
systemctl enable dovecot
2.3 查看服务状态
systemctl status dovecot
查看端口:
yum -y install net-tools
netstat -tlnp |grep dovecot

三、配置DNS
安装:
yum install rng-tools -y
service rngd start
安装/配置:
yum install bind-utils -y
yum install dnsmasq -y
vi /etc/hosts 添加 127.0.0.1 test.com

vi /etc/dnsmasq.conf
添加 address=/test.com/127.0.0.1, 添加 listen-address=127.0.0.1,192.168.40.133(本机ip)

service dnsmasq start
测试 nslookup
test.com
Server: 127.0.0.1
Address: 127.0.0.1#53
Name: test.com
Address: 60.60.60.42
Name: test.com
Address: 127.0.0.1
四、配置Foxmail客户端
Foxmail官方下载地址:http://fox.foxmail.com.cn/
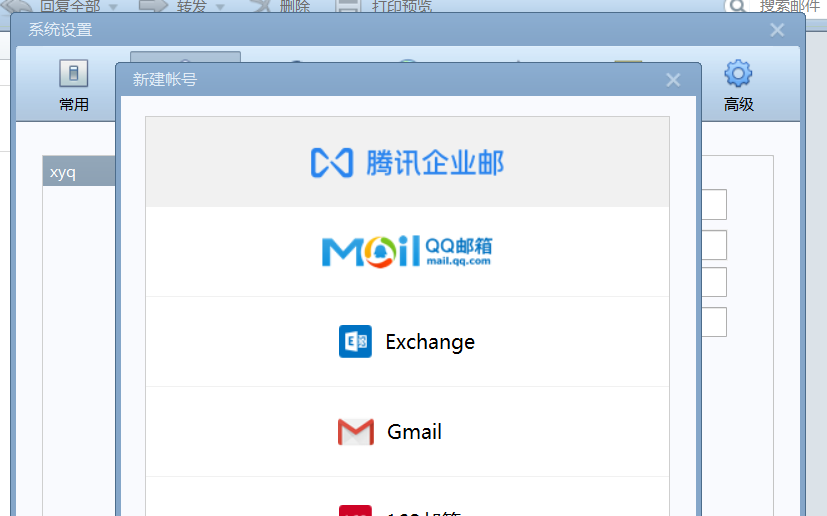
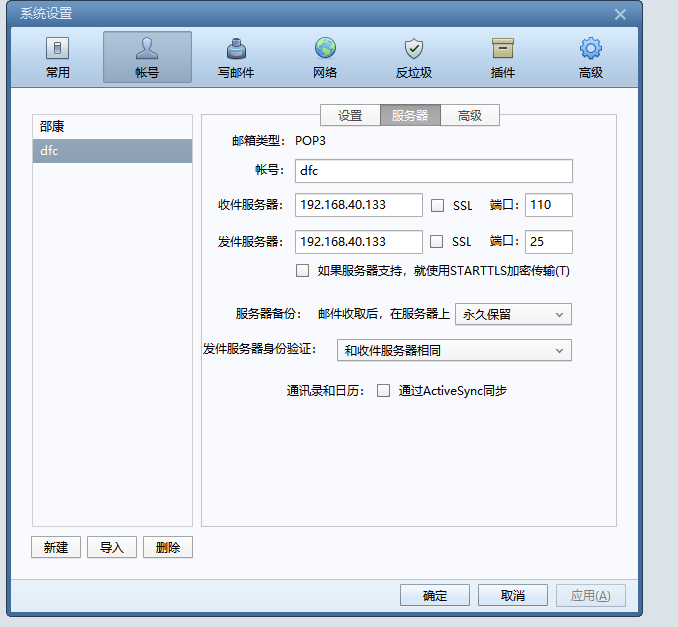
账号配置:
