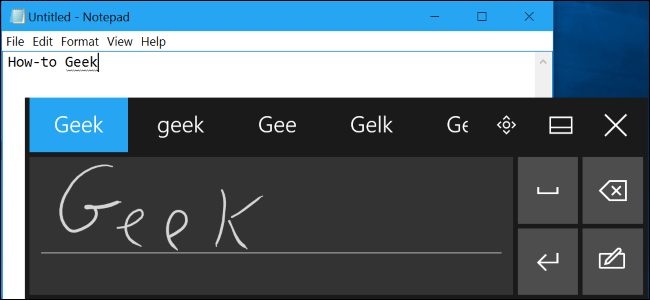
手写输入—随手写
最近做的是关于教育的app,分老师版和学生版;学生版有做题功能,领导最近看到别的app里面有手写输入功能,保留原笔迹,也就是说写成什么样就是什么样,然后保存,上传。
思路1:
①上面排版的是collectionView
② 输入区域,根据UIView的touch事件,生成UIBezilPath。然后得到了path。layer.path = bezierPath.cgpath 。然后layer.stokeColor = xxxx
③ 最后layer加到item的某个view属性的layer上,调整下transform即可实现.aspectFit的效果
④ 当touch事件结束一段时间后(这个时间根据需求定),生成path走后面的渲染方法。
⑤但放到collectionView的item里,必须保证用一个transform让它们统一大小,并和item边缘相切。
思路2:
①上面排版的是textView
②输入区域,根据UIView的touch事件,生成UIBezilPath。然后得到了path。layer.path = bezierPath.cgpath 。然后layer.stokeColor = xxxx生成path走后面的渲染方法
③当touch事件结束一段时间后,对渲染部分截图(具体截多大的图,从什么位置截,demo里细讲),保存。
④利用textview的TextAttachment属性显示图片,bounds是设定图片大小,index是设定图片的位置
总结:
根绝需求分析,第一个思路不是太满足项目需求,因为领导要求是可以编辑,用collectionView就很麻烦,还要写光标,果断选择思路2
具体实现过程
先实现画板部分
//触摸点开始记录,一移动再记录,这样就记录无数多个点便成了线
-(void)touchesBegan:(NSSet *)touches withEvent:(UIEvent *)event
{if (self.beginEditingBlock) {self.beginEditingBlock();}[self.timer invalidate];self.timer = nil;self.seconds = 1;flag=NO;NSArray *array = [touches allObjects];for(UITouch *touch in array){Squiggle *squiggle = [[Squiggle alloc] init];[squiggle setLineWidth:lineWidth];[squiggle setStrokeColor:color];//self  指当前这次触摸事件[squiggle addPoint:[touch locationInView:self]];//因为每次触摸事件的 内存地址唯一,所以将其作为 squiggle的关键字key//将内存地址转换为对象NSValue *touchValue = [NSValue valueWithPointer:(__bridge const void * _Nullable)(touch)];NSString *key = [NSString stringWithFormat:@"%@",touchValue];[squigglesDic setValue:squiggle forKey:key];}
}-(void) touchesMoved:(NSSet *)touches withEvent:(UIEvent *)event
{if (self.beginPaintBlock) {self.beginPaintBlock();}[self.timer invalidate];self.timer = nil;self.seconds = 1;self.timer = [NSTimer scheduledTimerWithTimeInterval:0.5 target:self selector:@selector(timeAnim) userInfo:nil repeats:YES];flag=YES;NSArray *array = [touches allObjects];for(UITouch *touch in array){//这里因为在前面 touchBegan中已经存好了相应的key,每一次触摸都有一关键字对应,这里只是在触摸的基础上移动画点NSValue *touchValue = [NSValue valueWithPointer:(__bridge const void * _Nullable)(touch)];Squiggle *squiggle = [squigglesDicvalueForKey:[NSString stringWithFormat:@"%@",touchValue]];CGPoint current = [touch locationInView:self];CGPoint previous = [touch previousLocationInView:self];//一直将当前点加进pointsArray中[squiggle addPoint:current];//更新后,得声明重新执行下 drawRect方法,系统不会自动执行CGPoint lower,higher;lower.x = (previous.x > current.x ? current.x : previous.x);lower.y = (previous.y > current.y ? current.y : previous.y);higher.x = (previous.x < current.x ? current.x : previous.x);higher.y = (previous.y < current.y ? current.y : previous.y);// redraw the screen in the required region[self setNeedsDisplayInRect:CGRectMake(lower.x-lineWidth,lower.y-lineWidth, higher.x - lower.x + lineWidth*2,higher.y - lower.y + lineWidth * 2)];}
}
保存图片
-(void)endFinish
{NSMutableArray *arr = _painterView.finishSquiggles;CGFloat minX = 0.0;CGFloat minY = 0.0;CGFloat maxX = 0.0;CGFloat maxY = 0.0;NSInteger index = 0;for(Squiggle *squiggle in arr){for (int i = 0; i<squiggle.pointsXArray.count; i++) {CGFloat x = [squiggle.pointsXArray[i] floatValue];CGFloat y = [squiggle.pointsYArray[i] floatValue];index++;if (index==1) {minX = x;maxX = x;minY = y;maxY = y;}else{if (x<minX) {minX = x;}if (x>maxX) {maxX = x;}if (y<minY) {minY = y;}if (y>maxY) {maxY = y;}}}}[pintArray addObject:[_painterView screenshot]];UIImage *image = [_painterView screenshotWithRect:CGRectMake(minX-2, minY-2, maxX-minX+4, maxY-minY+4)];CGFloat scale = image.size.width/image.size.height;UIImage *resultImage;NSInteger mMaxW = 42;NSInteger mMaxH = 40;if (image.size.height>mMaxH||image.size.width>mMaxW) {CGFloat imageW = 0;CGFloat imageH = 0;if (image.size.width>mMaxW) {if (image.size.height>mMaxH) {imageH = mMaxH;imageW = imageH*scale;CGSize size = CGSizeMake(imageW, imageH);//                    UIGraphicsBeginImageContext(size);UIGraphicsBeginImageContextWithOptions(size, NO, [UIScreen mainScreen].scale);[image drawInRect:CGRectMake(0, 0, size.width, size.height)];resultImage= UIGraphicsGetImageFromCurrentImageContext();UIGraphicsEndImageContext();}else{imageW = mMaxW;imageH = mMaxW/scale;CGSize size = CGSizeMake(imageW, imageH);//                    UIGraphicsBeginImageContext(size);UIGraphicsBeginImageContextWithOptions(size, NO, [UIScreen mainScreen].scale);[image drawInRect:CGRectMake(0, 0, size.width, size.height)];resultImage= UIGraphicsGetImageFromCurrentImageContext();UIGraphicsEndImageContext();}}else{if (image.size.height>mMaxH) {imageH = mMaxH;imageW = imageH*scale;CGSize size = CGSizeMake(imageW, imageH);//                    UIGraphicsBeginImageContext(size);UIGraphicsBeginImageContextWithOptions(size, NO, [UIScreen mainScreen].scale);[image drawInRect:CGRectMake(0, 0, size.width, size.height)];resultImage= UIGraphicsGetImageFromCurrentImageContext();UIGraphicsEndImageContext();}else{resultImage = image;}}}else{resultImage = image;}[pintArray addObject:resultImage];[_painterView resetView];NSMutableAttributedString *string = [[NSMutableAttributedString alloc] initWithAttributedString:contentTextView.attributedText];NSTextAttachment *textAttachment = [[NSTextAttachment alloc] initWithData:nil ofType:nil] ;textAttachment.image = resultImage; //要添加的图片NSAttributedString *textAttachmentString = [NSAttributedString attributedStringWithAttachment:textAttachment] ;CGFloat location = contentTextView.selectedRange.location;[string insertAttributedString:textAttachmentString atIndex:(NSUInteger)location];//index为用户指定要插入图片的位置contentTextView.attributedText = string;contentTextView.selectedRange = NSMakeRange(location+1, 0);
}
编辑
-(void)clickMenuButton:(UIButton *)sender
{
NSMutableAttributedString *string = [[NSMutableAttributedString alloc] initWithAttributedString:contentTextView.attributedText];
CGFloat location = contentTextView.selectedRange.location;
if (sender.tag==0) {//空格[string insertAttributedString:[[NSAttributedString alloc]initWithString:@" "] atIndex:(NSInteger)location];contentTextView.attributedText = string;contentTextView.selectedRange = NSMakeRange(location+1, 0);
}else if (sender.tag==1){//换行[string insertAttributedString:[[NSAttributedString alloc]initWithString:@"\n"] atIndex:(NSInteger)location];contentTextView.attributedText = string;contentTextView.selectedRange = NSMakeRange(location+@"\n".length, 0);
}else{//删除if (location<1) {return;}NSAttributedString *mu1 = [string attributedSubstringFromRange:NSMakeRange(0, location-1)];NSAttributedString *mu2 = [string attributedSubstringFromRange:NSMakeRange(location, string.length-location)];if (mu2.length==0) {mu2 = [[NSAttributedString alloc]initWithString:@""];}NSMutableAttributedString *muAtt = [[NSMutableAttributedString alloc]initWithAttributedString:mu1];[muAtt appendAttributedString:mu2];contentTextView.attributedText = [[NSAttributedString alloc]initWithAttributedString:muAtt];if (location>0) {contentTextView.selectedRange = NSMakeRange(location-1, 0);}else{contentTextView.selectedRange = NSMakeRange(0, 0);}
}
[self beginPaint];
}
demo放在GitHub上了记得Star 、 Fork