目录
- 1.简介
- 2. 拼接算法流程
- 3. 代码演示
1.简介
OpenCV从2.4.x版本之后多出来一个新的模型 图像拼接,该模块通过简单的高级API设置,可以获得比较好的图像拼接效果,OpenCV官方提供了一个高度集成的API函数 Stitcher,只要两行代码就可以得到一个很好的拼接图像。
Ptr<Stitcher> stitcher = Stitcher::create(mode);
Stitcher::Status status = stitcher->stitch(imgs, pano);
其中第一行代码是创建拼接Stitcher的指针,第二行代码是调用拼接算法,
imgs表示的输入参数,是一系列Mat对象的vector。
pano表示的输出结果,是拼接之后的Mat对象
2. 拼接算法流程
stitching拼接算法 流程图示如下:

可见图像拼接是一个很复杂的算法,是由一系列的基础算法构成,这些基础算法如果你不是很了解,其实很难实现自己的图像拼接,这其中影响拼接算法stitch工作最常见几个算法子模块为:
-
特征发现与描述子
常见的特征可以选择SIFT、SURF、AKAZE、ORB等特征算子进行匹配 -
相机参数
不同的相机参数与设置会导致不同的结果 -
融合方式(blender)
不同的融合方式,也会导致不同结果 -
各种阈值设置,特别是config threshold,如果无法特征匹配,记得把这个阈值调小点
3. 代码演示
#include <opencv2/opencv.hpp>
#include <iostream>using namespace cv;
using namespace std;int main(int argc, char** argv) {vector<string> files;glob("D:/images/zsxq/1", files);vector<Mat> images;for (int i = 0; i < files.size(); i++) {printf("image file : %s \n", files[i].c_str());images.push_back(imread(files[i]));}// 设置拼接模式与参数Mat result1, result2, result3;Stitcher::Mode mode = Stitcher::PANORAMA;Ptr<Stitcher> stitcher = Stitcher::create(mode);// 拼接方式-多通道融合auto blender = detail::Blender::createDefault(detail::Blender::MULTI_BAND, true);stitcher->setBlender(blender);// 拼接Stitcher::Status status = stitcher->stitch(images, result1);// 平面曲翘拼接auto plane_warper = makePtr<cv::PlaneWarper>();stitcher->setWarper(plane_warper);status = stitcher->stitch(images, result2);// 鱼眼拼接auto fisheye_warper = makePtr<cv::FisheyeWarper>();stitcher->setWarper(fisheye_warper);status = stitcher->stitch(images, result3);// 检查返回if (status != Stitcher::OK){cout << "Can't stitch images, error code = " << int(status) << endl;return EXIT_FAILURE;}imwrite("D:/result1.png", result1);imwrite("D:/result2.png", result2);imwrite("D:/result3.png", result3);waitKey(0);return 0;
}
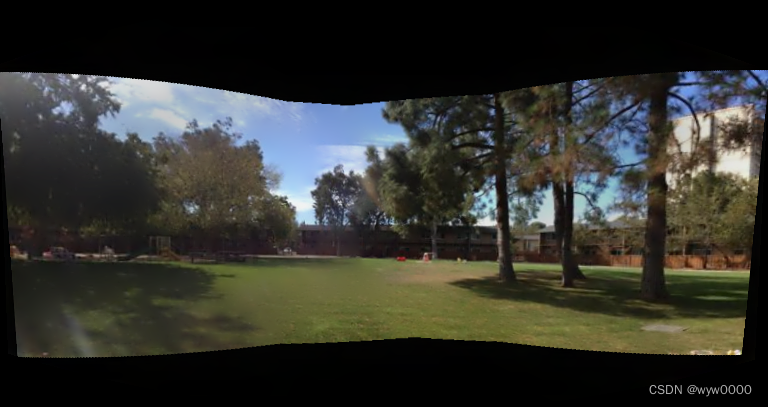
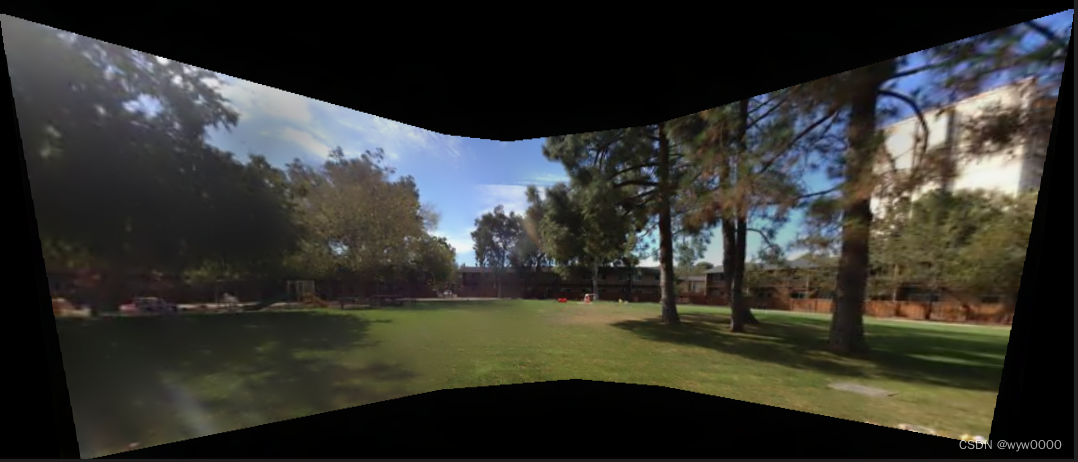
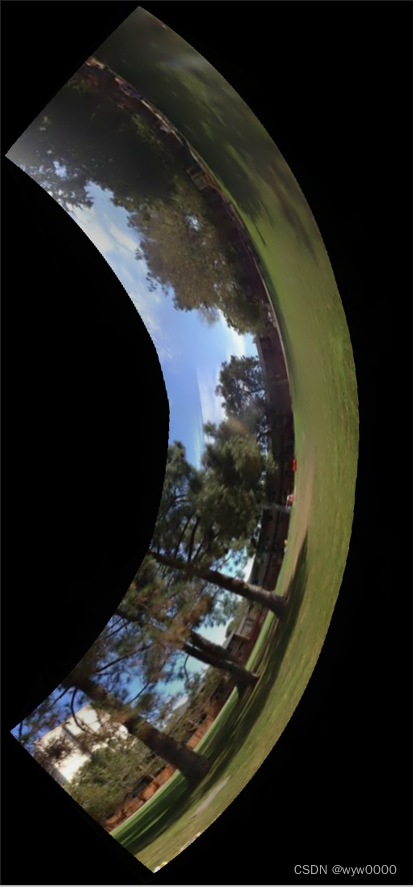
另外在拼接的时候可以设置不同warper,这样会对拼接之后的图像生成不同效果,常见的效果包括
-
默认
-
环视(平面曲翘)
-
鱼眼相机
原图:
img1

img2

img3

img4

效果图:
参考链接:
https://blog.csdn.net/qq_42722197/article/details/128021635
