路由器:DB120 + wifidog
手机一部
一、在OpenWrt的路由器上安装Wifidog应用程序
安装Wifidog程序有两种方式,一种是在刷了OpenWrt的路由器上直接安装Wifidog;或者是把Wifidog直接编译进OpenWrt中
1. 在OpenWrt根目录下
执行
make menuconfig,按 / ,查找wifidog,如果找不到,退出来安装。
执行./scripts/feeds install wifidog
make menuconfig4. 在Network/captive portals/下选择wifidog ,保存退出。
执行
make V=s
把编译好的wifidog拷贝到路由器/sbin下
./build_dir/target-mips_34kc_uClibc-0.9.33.2/wifidog-normal/wifidog-1.2.1/ipkg-ar71xx/wifidog/usr/bin/wifidog当然还需要一个依赖库,拷贝到/lib下
./build_dir/target-mips_34kc_uClibc-0.9.33.2/wifidog-normal/wifidog-1.2.1/ipkg-ar71xx/wifidog/usr/lib/libhttpd.so.0.0.0
然后软连接一下 ln -s libhttpd.so.0.0.0 libhttpd.so.0
一个配置文件,拷贝到/etc 下
./build_dir/target-mips_34kc_uClibc-0.9.33.2/wifidog-normal/wifidog-1.2.1/wifidog.conf
如果嫌麻烦就直接刷固件吧
二、在服务器上安装authpuppy认证服务
1、首先安装authpuppy服务端验证
1. 安装php开发环境:
sudo apt-get install apache2 php-mysql libapache2-mod-php mysql mysql-server
2. 启用apache rewrite,否则会出现(Therequested URL /install/3 was not found on this server.)错误
sudo a2enmod rewrite
3. 到https://launchpad.net/authpuppy 从http://launchpad.net/authpuppy下载authpuppy最新源码,解压并移动到/var/www/目录下。
tar xvzf authpuppy-<version>-<stability>_<packaging>.tgz
sudo mv authpuppy /var/www/
4. 为authpuppy赋予权限
chmod 777 /var/www/html/authpuppy/ -R
5. 修改/etc/apache2/sites-enabled/000-default.conf替换所有内容
sudo gedit /etc/apache2/sites-enabled/000-default.conf
修改如下:
<VirtualHost *:80>ServerAdmin webmaster@localhostServerName authpuppy.localhostServerAlias authpuppy.testDocumentRoot /var/www/html/authpuppy/webDirectoryIndex index.php<Directory /var/www/html/authpuppy/web/>Options Indexes FollowSymLinks MultiViewsAllowOverride AllOrder allow,denyallow from all</Directory>Alias /sf /var/www/html/authpuppy/lib/vendor/symfony/data/web/sf<Directory "/var/www/html/authpuppy/lib/vendor/symfony/data/web/sf">AllowOverride AllAllow from All</Directory>#ErrorLog /var/log/apache2/authpuppy/error.log
6. 重启apache
sudo service apache2 restart
7. Mysql数据库的创建
authpuppy需要使用数据库进行用户认证管理,可以使用mysql创建一个名为authpuppy的数据库。
user@yourserver $> mysqladmin -uroot -p create authpuppy
8. 访问http://localhost出现authpuppy配置页面

9. 点击下一步继续,这一步会检测系统的环境是否满足authpuppy的要求,不满足的会显示红色,按要求配置好就可以点击下一步了。

10. wifidog数据库的配置。填写在低7步创建的数据库名字,并填写你的数据库账号和密码等信息,此处为了方便,使用root登录,读者可以新建一个user用于访问。

11. 一直点击下一步,直到出现管理员用户配置页面,配置用户信息:

Username 和Password 是以后你登录服务器的用户和密码。
12. 最后配置成功,出现如下页面,此时authpuppy的基本配置完成:

13. 以后再次访问http://localhost,就会出现如下页面,不需要重新配置了:

2、配置服务器和插件管理
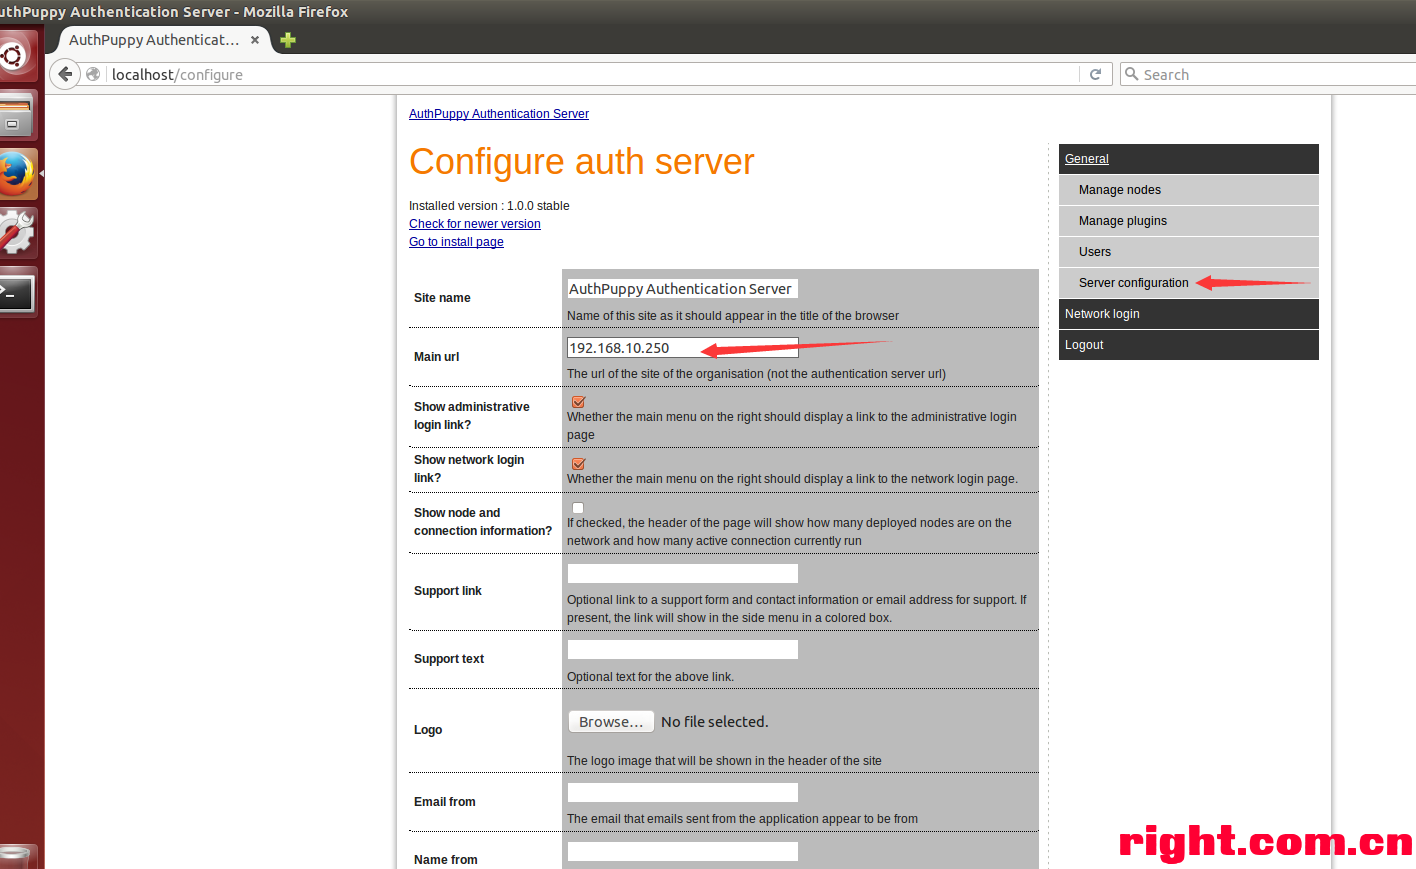
1. 访问http://localhost ,通过管理员账户登录,配置authserver
Logo 选择你喜欢的图片
Main url 就是点击点击Logo后跳转的界面
2. 配置完成后再次访问http://localhost 就会出现如下界面
3. 点击Manageplugins,点击View all available plugins and updates添加插件,
安装apAuthLocalUserPlugin这个插件,并启用,就可以对登录账号进行管理了,更多插件的使用可以自己慢慢摸索。

三、配置网络结点和路由器认证
1. 访问http://localhost 以管理员身份登录,点击Managenodes进行结点的管理,服务器默认为我们创建了一个叫My first node的结点,我们对其进行编辑,修改Name :mint,gw id:123456789,deployment status 选择Deployed
2. 登录到路由器(linux直接使用ssh命令,windows下可以使用putty、xshell等工具),编辑/etc/wifidog.conf,需要配置的主要有以下几点:
#这个需要与服务器中gw id相对应
GatewayID 123456789
#查看自己的路由器进行配置,外网接口
ExternalInterface  br-wan
#路由器内网接口
GatewayInterface br-lan
#服务器配置
AuthServer {
#服务器的ip地址
Hostname192.168.2.69 (服务器地址)
SSLAvailable no
Path /
}
3. 启动wifidog
wifidog -c /etc/wifidog.conf
4. 连接该无线网络,开始验证,没什么问题服务器上可以看到

四、总结几容易犯错的地方
1、权限问题,确定你的authpuppy 和 安装的插件都具有 777 权限,且要 -R,否则会出现,手机连接ap但是弹不出认证界面 的问题
2、Auth server did NOT say Pong,犯这个错误。一般是 路由器和authpuppy 路径没有对应上,导致ping服务器没有回应 HTTP/1.0 404 Not Found
#服务器配置
AuthServer 选项里的Path 和 /etc/apache2/sites-enabled/000-default.conf 里的
/var/www/html/authpuppy/web (不止一个)这2个路径合起来 是你的authpuppy里web的路径。
如果 000-default.conf 里写/var/www/html 那么Path 应该是 /authpuppy/web/
3、

容易出现Authpuppy does not connect to postgresql,这是因为你的Db name 或者usename password不对。
填写在第7步创建的数据库名字,并填写你的数据库账号和密码等信息。
4、failed to connect to server。 检测路由器wan口和服务器之间是否在同一网段,是否能ping通。
5、如果你认证之后无法上网,那要看看你的firewall配置文件了,我就是因为这个原因卡了2天,后来修改Firewalls之后才成功上网。

就是图中的option input选项在作怪!!!。


