CTK框架 - 通信 - 事件注册监听
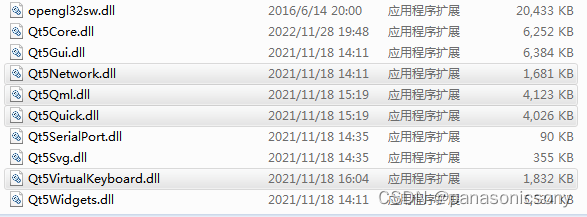
我们在第一篇中链接的教程是有编译CTK的事件的,编译完成之后会有对应的
liborg_commontk_eventadmin.dll
liborg_commontk_metatype.dll
liborg_commontk_configadmin.dll
liborg_commontk_log.dll
在将cmake中的文件拷贝部分修改如下, 如果你拉取了gitee中的代码,则不需修改这个部分,因为我已经在前面加上了这个部分:
if (CMAKE_BUILD_TYPE STREQUAL "Debug")file(COPY "${PROJECT_SOURCE_DIR}/third_party/CTK/libd/ctk-0.1/CTKCore.dll" DESTINATION ${PROJECT_SOURCE_DIR}/output)file(COPY "${PROJECT_SOURCE_DIR}/third_party/CTK/libd/ctk-0.1/CTKPluginFramework.dll" DESTINATION ${PROJECT_SOURCE_DIR}/output)file(COPY "${PROJECT_SOURCE_DIR}/third_party/CTK/libd/ctk-0.1/plugins/liborg_commontk_eventadmin.dll" DESTINATION ${PROJECT_SOURCE_DIR}/output/lib/plugins)file(COPY "${PROJECT_SOURCE_DIR}/third_party/CTK/libd/ctk-0.1/plugins/liborg_commontk_metatype.dll" DESTINATION ${PROJECT_SOURCE_DIR}/output/lib/plugins)file(COPY "${PROJECT_SOURCE_DIR}/third_party/CTK/libd/ctk-0.1/plugins/liborg_commontk_configadmin.dll" DESTINATION ${PROJECT_SOURCE_DIR}/output/lib/plugins)file(COPY "${PROJECT_SOURCE_DIR}/third_party/CTK/libd/ctk-0.1/plugins/liborg_commontk_log.dll" DESTINATION ${PROJECT_SOURCE_DIR}/output/lib/plugins)
else ()file(COPY "${PROJECT_SOURCE_DIR}/third_party/CTK/lib/ctk-0.1/CTKCore.dll" DESTINATION ${PROJECT_SOURCE_DIR}/output)file(COPY "${PROJECT_SOURCE_DIR}/third_party/CTK/lib/ctk-0.1/CTKPluginFramework.dll" DESTINATION ${PROJECT_SOURCE_DIR}/output)file(COPY "${PROJECT_SOURCE_DIR}/third_party/CTK/lib/ctk-0.1/plugins/liborg_commontk_eventadmin.dll" DESTINATION ${PROJECT_SOURCE_DIR}/output/lib/plugins)file(COPY "${PROJECT_SOURCE_DIR}/third_party/CTK/lib/ctk-0.1/plugins/liborg_commontk_metatype.dll" DESTINATION ${PROJECT_SOURCE_DIR}/output/lib/plugins)file(COPY "${PROJECT_SOURCE_DIR}/third_party/CTK/lib/ctk-0.1/plugins/liborg_commontk_configadmin.dll" DESTINATION ${PROJECT_SOURCE_DIR}/output/lib/plugins)file(COPY "${PROJECT_SOURCE_DIR}/third_party/CTK/lib/ctk-0.1/plugins/liborg_commontk_log.dll" DESTINATION ${PROJECT_SOURCE_DIR}/output/lib/plugins)
endif ()
事件介绍
CTK框架中的事件监听,即观察者模式流程上是这样:接收者注册监听事件->发送者发送事件->接收者接收到事件并响应;相比调用插件接口,监听事件插件间依赖关系更弱,不用指定事件的接收方和发送方是谁。比如我们需要弹出一个界面,可以使用事件来弹出。
- 通信主要使用了ctkEventAdmin结构体,主要定义了如下接口:
| 接口名称 | 作用 |
|---|---|
| postEvent | 类通信形式,异步发送事件 |
| sendEvent | 类通信形式,同步发送事件 |
| publishSignal | 信号槽通信形式,发送事件 |
| unpublishSignal | 信号槽通信形式, 取消发送事件 |
| subscribeSlot | 信号槽通信形式, 订阅事件, 返回订阅ID |
| unsubscribeSlot | 信号槽通信形式,取消订阅事件 |
| updateProperties | 更新某个订阅主题 |
- 通信数据是ctkDictionary
ctkDictionary 的原型是 typedef QHash<QString,QVariant> ctkDictionary;
我们之前再main.cpp中使用了如下代码:
// 在插件的搜索路径列表中添加一条路径
ctkPluginFrameworkLauncher::addSearchPath(path + "/libs/plugins");
// 设置并启动 CTK 插件框架
try {ctkPluginFrameworkLauncher::start("org.commontk.eventadmin");
}
catch (ctkException e)
{std::cout << e.message().toStdString() << std::endl;
}
这个里面的的ctkPluginFrameworkLauncher::addSearchPath是额外添加搜索路径,然后启用org.commontk.eventadmin事件插件,如果想使用事件则必须启动这个插件。
代码示例
第一步:
我们新增一个插件about,按照步骤写出activator和plugin,其他的配置不变
aboutactivator.h
#ifndef CTKTEST_ABOUTACTIVATOR_H
#define CTKTEST_ABOUTACTIVATOR_H
#include <QObject>
#include "ctkPluginActivator.h"
class AboutPlugin;
class AboutActivator : public QObject, public ctkPluginActivator
{Q_OBJECTQ_PLUGIN_METADATA(IID "About")Q_INTERFACES(ctkPluginActivator)
public:AboutActivator();void start(ctkPluginContext *context);void stop(ctkPluginContext *context);
private:AboutPlugin *plugin_{nullptr};
};
#endif //CTKTEST_ABOUTACTIVATOR_H
aboutactivator.cpp
#include "aboutactivator.h"
#include "aboutplugin.h"
#include <iostream>
AboutActivator::AboutActivator()
{
}
void AboutActivator::start(ctkPluginContext *context)
{std::cout <<  "about start" << std::endl;plugin_ = new AboutPlugin(context);
}
void AboutActivator::stop(ctkPluginContext *context)
{std::cout <<  "about stop" << std::endl;if(plugin_){delete plugin_;plugin_ = nullptr;}
}
aboutplugin.h
#ifndef CTKTEST_ABOUTPLUGIN_H
#define CTKTEST_ABOUTPLUGIN_H
#include <QObject>
#include "ctkPluginContext.h"
#include "service/event/ctkEventAdmin.h"
#include "service/event/ctkEventHandler.h"
class AboutPlugin : public QObject, public ctkEventHandler
{Q_OBJECTQ_INTERFACES(ctkEventHandler)
public:explicit AboutPlugin(ctkPluginContext *context);
protected:void handleEvent(const ctkEvent& event) override;
private:ctkPluginContext *m_context;
};
#endif //CTKTEST_ABOUTPLUGIN_H
aboutplugin.cpp
#include "aboutplugin.h"
#include <service/event/ctkEventConstants.h>
#include <iostream>
AboutPlugin::AboutPlugin(ctkPluginContext *context): m_context( context )
{//注册监听信号"About"ctkDictionary dic;dic.insert(ctkEventConstants::EVENT_TOPIC, "About");m_context->registerService<ctkEventHandler>(this, dic);
}
void AboutPlugin::handleEvent(const ctkEvent &event)
{//接收监听事件接口if(event.getTopic() == "About"){std::cout << event.getProperty("About").toString().toStdString() << std::endl;}
}
我们将about继承自ctkEventHandler是为了可以注册ctkEventHandler服务,方便接收发过来的事件
这里我们需要重新实现handleEvent函数来处理接收到的事件的事件。
第二步:
我们需要在imainwindow中添加一个函数来在core插件中实现发送事件,并且在Core中实现该函数
imainwindow.h
#ifndef CTKTEST_IMAINWINDOW_H
#define CTKTEST_IMAINWINDOW_H
#include <QObject>
class iMainWindow
{
public:virtual ~iMainWindow() = default;virtual void popWindow() = 0;virtual void senEvent() = 0;
};
//此宏将当前这个接口类声明为接口,后面的一长串就是这个接口的唯一标识。
Q_DECLARE_INTERFACE(iMainWindow, "interface_mainwindow")
#endif //CTKTEST_IMAINWINDOW_H
void MainWindowPlugin::senEvent()
{//获取事件服务接口ctkServiceReference ref = context_->getServiceReference<ctkEventAdmin>();ctkEventAdmin* eventAdmin{nullptr};if(ref){eventAdmin = context_->getService<ctkEventAdmin>(ref);context_->ungetService(ref);}//发送事件ctkDictionary message;ctkDictionary message2;ctkDictionary message3;message.insert("About", "im a message to about plugin");message2.insert("About", "im AAA message to about plugin");message3.insert("MMM", "im MMM message to about plugin");if(eventAdmin)eventAdmin->postEvent(ctkEvent("About", message));if(eventAdmin)eventAdmin->postEvent(ctkEvent("AAA", message2));if(eventAdmin)eventAdmin->postEvent(ctkEvent("About", message3));
}
第三步:
在main中调用该函数
ctkServiceReference ref =pluginContext->getServiceReference<iMainWindow>();
iMainWindow* mainWindow{nullptr};
if(ref)
{mainWindow = pluginContext->getService<iMainWindow>(ref);pluginContext->ungetService(ref);
}
if(mainWindow)
{mainWindow->popWindow();mainWindow->senEvent();
}
测试的时候我们的代码只能打印第一个信息,解释一下ctkEvent的第一个参数时我们注册事件的时候的过滤器,只有满足该过滤条件的时候我们注册的事件才能收到该事件,message的第一个参数时event.getTopic()的值。
信号槽介绍
原理是将Qt自己的信号与CTK的发送事件绑定、槽与事件订阅绑定。
修改mainwidowplugin如下, 不要忘了在头文件中定义信号blogPublished:
mainwindowplugin.cpp
// 在构造函数中绑定信号
MainWindowPlugin::MainWindowPlugin(ctkPluginContext *context): context_(context)
{ctkServiceReference ref = context->getServiceReference<ctkEventAdmin>();if (ref) {ctkEventAdmin* eventAdmin = context->getService<ctkEventAdmin>(ref);// 使用 Qt::DirectConnection 等同于 ctkEventAdmin::sendEvent()eventAdmin->publishSignal(this, SIGNAL(blogPublished(ctkDictionary)), "About");}
}
// 在sendEvent 发送
void MainWindowPlugin::senEvent() {ctkDictionary props;props.insert("title", "title 1");props.insert("content", "content 1");props.insert("author", "author 1");std::cout << "Publisher sends a message, properties:" << std::endl;emit blogPublished(props);
}
修改aboutplugin如下, 不要忘了在头文件中定义信号blogPublished:
// AboutPlugin.h
#include <QObject>
#include "ctkPluginContext.h"
#include "service/event/ctkEventAdmin.h"
#include "service/event/ctkEventHandler.h"
class AboutPlugin : public QObject
{Q_OBJECT
public:explicit AboutPlugin(ctkPluginContext *context);
public slots:void onBlogPublished(const ctkEvent& event);
private:ctkPluginContext *m_context;
};
// AboutPlugin.cpp#include "aboutplugin.h"
#include <service/event/ctkEventConstants.h>
#include <iostream>AboutPlugin::AboutPlugin(ctkPluginContext *context): m_context( context )
{//注册监听信号"About"ctkDictionary dic;ctkDictionary props;props[ctkEventConstants::EVENT_TOPIC] = "About";ctkServiceReference ref = context->getServiceReference<ctkEventAdmin>();if (ref) {ctkEventAdmin* eventAdmin = context->getService<ctkEventAdmin>(ref);eventAdmin->subscribeSlot(this, SLOT(onBlogPublished(ctkEvent)), props);}
}void AboutPlugin::onBlogPublished(const ctkEvent &event)
{QString title = event.getProperty("title").toString();QString content = event.getProperty("content").toString();QString author = event.getProperty("author").toString();std::cout << "EventHandler received the message, topic:" << event.getTopic().toStdString()<< "properties:" << "title:" << title.toStdString() << "content:" << content.toStdString() << "author:" << author.toStdString() << std::endl;
}
这个时候我们运行,则会打印出对应的EventHandler received the message, topic:Aboutproperties:title:title 1content:content 1author:author 1
事件通信和信号槽通信
1、事件通信
原理就是直接将信息使用CTK的eventAdmin接口send/post出去。
2、信号槽通信
原理是将Qt自己的信号与CTK的发送事件绑定、槽与事件订阅绑定。
二种方式的区别:
1、通过event事件通信,是直接调用CTK的接口,把数据发送到CTK框架;通过信号槽方式,会先在Qt的信号槽机制中转一次,再发送到CTK框架。故效率上来讲,event方式性能高于信号槽方式。
2、两种方式发送数据到CTK框架,这个数据包含:主题+属性。主题就是topic,属性就是ctkDictionary。 一定要注意signal方式的信号定义,参数不能是自定义的,一定要是ctkDictionary,不然会报信号槽参数异常错误。
3、两种方式可以混用,如发送event事件,再通过槽去接收;发送signal事件,再通过event是接收。
4、同步:sendEvent、Qt::DirectConnection;异步:postEvent、Qt::QueuedConnection
这里的同步是指:发送事件之后,订阅了这个主题的数据便会处理数据【handleEvent、slot】,处理的过程是在发送者的线程完成的。可以理解为在发送了某个事件之后,会立即执行所有订阅此事件的回调函数。
异步:发送事件之后,发送者便会返回不管,订阅了此事件的所有插件会根据自己的消息循环,轮到了处理事件后才会去处理。不过如果长时间没处理,CTK也有自己的超时机制。如果事件处理程序花费的时间比配置的超时时间长,那么就会被列入黑名单。一旦处理程序被列入黑名单,它就不会再被发送任何事件。


