引言
Elasticsearch是著名的开源分布式搜索和数据处理平台,是一个基于Lucene的分布式、实时、全文搜索系统,其稳定、可靠、高可用、可大规模扩展等特性,使得Elasticsearch的应用十分广泛。特别是结合Logstash、Kibana形成的ELK套件,更是在日志收集和可视化场景被大规模应用。
本文将从零开始,介绍Elasticsearch的核心概念、安装和基本使用,目标是看完本文能够快速入门Elasticsearch。
一、核心概念
索引(index)
一个索引是一些具有相似特征的文档的集合,例如一个用户信息的索引,一个学生成绩的索引,一个索引在Elasticsearch中由一个名字指定,名字由小写字母组成。
类型(type)
在一个索引中,可以定义一种或者多种类型,类型指的是一个索引上的逻辑分类,一般来说会为一组具有共同字段的文档定义类型,例如保存一个保存用户数据的索引,为会员用户创建一个类型,为普通用户创建一个类型。类型在最新版的Elasticsearch 7.X版本中已经被去掉了。
文档(document)
一个文档是以可被Elasticsearch索引的基础信息单元,文档以通用的数据交换格式JSON表示,存储于索引之中,理论上一个索引中可以存储任意多的文档。
分片(shards)
一个索引理论上可以存放任意多的文档,但是实际情况下单台服务器的容量有限,无法存放所有的数据。例如100亿的文档,单台服务器存储不下。为了解决这种情况,Elasticsearch提供了将一个索引的数据切分成多份存放到多个服务器的功能,每一份就是一个分片。
在创建索引的时候可以指定分片的数量,默认会有5个分片。一般来说指定以后不能更改(更改的代价太大),索引需要提前进行容量的规划。
分片的设计一方面让Elasticsearch具备了水平扩展的能力,另一方面多个分片可以并行提供查询和索引服务,大大提高系统的性能。
复制(replicas)
一个健壮的系统必须具备高可用性,复制就是Elasticsearch高可用性的体现。当某一个分片出现问题掉线的情况下,必须要有一个"备份"可以进行故障转移,这个备份就是"复制"分片。Elasticsearch允许对某一个主分片创建多个复制分片,默认为1个复制分片。特别需要注意的是,复制分片不能与主分片在同一个节点,否则就失去了高可用的能力。
综上,复制分片的作用:
- 提供Elasticsearch的高可用性
- 多个复制分片并行提供搜索功能,提升Elasticsearch的搜索能力。
集群(cluster)
Elasticsearch集群由一个或者多个节点组成,共同承担所有的数据存储和搜索功能。集群由一个唯一的名字进行区分,默认为"elasticsearch",集群中的节点通过整个唯一的名字加入集群。
节点(node)
节点是Elasticsearch集群的一部分,每个节点也有一个唯一的名称,只要多个节点在同个网络中,节点就可以通过指定集群的名称加入某个集群,与集群中的其他节点相互感知。
近实时(near real-time)
Elasticsearch从存储文档到文档可以被索引查询会存在短暂的延时,延时时间一般在1秒以内,所以是近实时的。
二、安装
2.1 下载Elasticsearch安装包
下载Elasticsearch安装包,并解压缩,本文以6.5.2版本为例。
$ wget https://artifacts.elastic.co/downloads/elasticsearch/elasticsearch-6.5.2.tar.gz
$ tar -zxvf elasticsearch-6.5.2.tar.gz
2.2 修改配置文件(可选)
修改配置文件是可选的一个步骤,只是为了向大家展示Elasticsearch一些基本的配置项,大家可以选择性配置,亦可以跳过使用默认配置。
#集群名字,elasticsearch使用集群名字来加入某一个集群,默认为elasticsearch
cluster.name: my-application
#节点名字
node.name: node-1
node.attr.rack: r1
#数据存放路径
path.data: /home/elastic/data
#日志存放路径
path.logs: /home/elastic/logs
#对外发布的IP
network.host: 192.168.56.3
#http访问的端口
http.port: 9200
#是否开启xpack安全配置
xpack.security.enabled: false
#添加跨域配置
http.cors.enabled: truehttp.cors.allow-origin: "*"
2.3 修改系统参数
2.3.1 修改最大文件描述符和最大线程数配置
切换到root用户,修改/etc/security/limits.conf配置文件,添加以下内容并保存。
#添加如下内容并保存
* soft nofile 65536* hard nofile 131072* soft nproc 4096* hard nproc 4096
以上的配置是因为ElasticSearch的运行对最大的文件描述符以及最大线程数有要求,默认值4096和2048太小了,若无以上配置,启动过程中会报如下错误。
max file descriptors [4096] for elasticsearch process is too low, increase to at least [65536]
[1]: max number of threads [2048] for user [elastic] is too low, increase to at least [4096]
2.3.2 修改max_map_count参数
打开/etc/sysctl.conf配置文件,添加如下内容并保存,执行sysctl -p命令生效。
vm.max_map_count=262144
以上的配置也是因为Elasticsearch对次参数有要求,设置太小启动将会报如下错误
max virtual memory areas vm.max_map_count [65530] is too low, increase to at least [262144]
2.3.3 关闭系统防火墙(可选)
$ systemctl stop firewalld.service
$ systemctl status firewalld.service
2.4 启动Elasticsearch
经过以上配置,就可以执行以下命令启动Elasticsearch,进入Elasticsearch根目录,执行以下命令
$ bin/elasticsearch
如果看到以下日志,代表已经正常启动
[2019-01-13T08:41:29,796][INFO ][c.f.s.h.SearchGuardHttpServerTransport] [node-1] publish_address {10.0.2.15:9200}, bound_addresses {[::]:9200}
[2019-01-13T08:41:29,796][INFO ][o.e.n.Node               ] [node-1] started
2.5 验证Elasticsearch
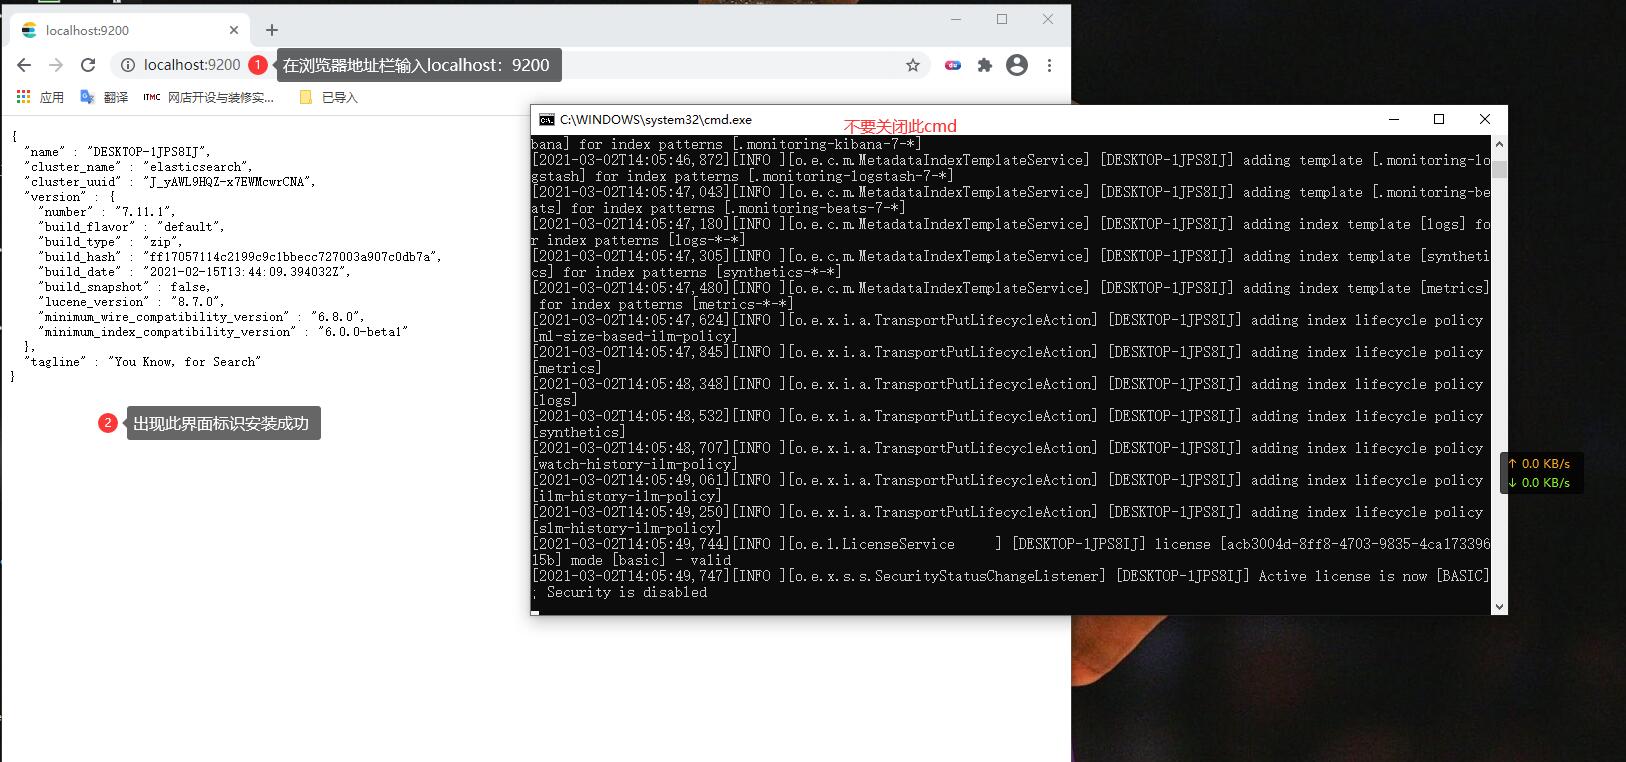
使用curl命令或者执行在浏览器输入如下URL,若有正常输出Elasticsearch集群信息,证明已经正常运行。
$ curl http://192.168.56.3:9200
或者
$ curl http://localhost:9200
{"name" : "node-1","cluster_name" : "my-application","cluster_uuid" : "C2ILS_NVRM-S-JPFFsHhUg","version" : {"number" : "6.5.2","build_flavor" : "default","build_type" : "zip","build_hash" : "424e937","build_date" : "2018-06-11T23:38:03.357887Z","build_snapshot" : false,"lucene_version" : "7.3.1","minimum_wire_compatibility_version" : "5.6.0","minimum_index_compatibility_version" : "5.0.0"},"tagline" : "You Know, for Search"
}
三、索引的操作
Elasticsearch提供一整套的RESTful的API用以支持各种索引、文档、搜索等操作。这里我们简单以索引的创建、查询和删除为例子来了解如何操作Elasticsearch的索引。
新建索引
使用HTTP PUT方法可以新建一个索引,如下创建一个名字为customer的索引,pretty参数表示response以方便读取的JSON格式返回。
$ curl -X PUT "localhost:9200/customer?pretty"
返回值如下,表示索引已经创建成功。
{"acknowledged":true,"shards_acknowledged":true
}
查询索引
$ curl http://localhost:9200/_cat/indices?v
health status index    uuid                   pri rep docs.count docs.deleted store.size pri.store.size
yellow open   customer IpQSnki7S1eQfYH6BgDd0Q   5   1          2            0      7.7kb          7.7kb
使用HTTP GET方法访问_cat API的indices接口可以查询到上一步中创建的索引,可以看到customer索引有5个primary分片,有1个复制分片。
删除索引
使用HTTP DELETE方法可以删除一个索引。
$ curl -X DELETE "localhost:9200/customer?pretty"
返回值如下,代表已经删除成功,也可以重新使用索引查询方法进行查询,可以发现索引已被删除。
{"acknowledged": true
}
四、文档的操作
Elasticsearch对于文档的操作也包括了一系列的_doc API,我们这里同样使用Document的增删改查为例来讲解如何操作Document(尝试这一步之前前面创建的索引不能删除)
创建文档
使用HTTP PUT方法可以新增一个Document,如下指定Document ID为1创建Document
$ curl -X PUT "localhost:9200/customer/_doc/1?pretty" -H 'Content-Type: application/json' -d'
{"name": "Liu Jintao"
}
'
返回值如下,代表已经成功创建了文档。
{"_index": "customer","_type": "_doc","_id": "1","_version": 2,"result": "updated","_shards": {"total": 2,"successful": 1,"failed": 0},"_seq_no": 1,"_primary_term": 2
}
查询文档
使用HTTP GET方法,通过Document ID查询Document
$ curl -X GET "localhost:9200/customer/_doc/1?pretty"
返回值如下,可以发现实际存储的内容放在了source字段。
{"_index": "customer","_type": "_doc","_id": "1","_version": 2,"found": true,"_source": {"name": "Liu Jintao"}
}
修改文档
使用HTTP POST请求修改一个Document,例如将上面创建的Document name的值改为“Test Name”
$ curl -X POST "localhost:9200/customer/_doc/1/_update?pretty" -H 'Content-Type: application/json' -d'
{"doc": { "name": "Test Name" }
}
'
返回值如下,可以发现_version字段的值已经改变了,证明我们的更新成功了,也可以使用查询API重新查询确认。
{"_index": "customer","_type": "_doc","_id": "1","_version": 3,"result": "updated","_shards": {"total": 2,"successful": 1,"failed": 0},"_seq_no": 2,"_primary_term": 2
}
删除文档
使用HTTP DELETE方法可以删除一个Document
$ curl -X DELETE "localhost:9200/customer/_doc/1?pretty"
返回值如下代表删除成功
{"_index": "customer","_type": "_doc","_id": "1","_version": 4,"result": "deleted","_shards": {"total": 2,"successful": 1,"failed": 0},"_seq_no": 3,"_primary_term": 2
}
五、数据搜索
数据搜索是Elasticsearch的重头戏,与Document、Index一样,Elasticsearch有一套专门的_search API来支持搜索功能。数据搜索基本使用HTTP GET方法,一般有两种方式:
-
使用Request URI,将查询参数放到URI上
-
使用Request Body,将查询参数放到Request Body下(推荐)
方式一
使用_search API,q=*代表查询customer索引下所有的Document
$ curl -X GET "localhost:9200/customer/_search?q=*&pretty"
返回值如下,_shards.total代表总共5个分片,_shards.successful为5代表5个分片全部成功进行了查询,hits段代表查询的结果,hits.total为1代表符合条件的Document数量为1。
{"took": 17,"timed_out": false,"_shards": {"total": 5,"successful": 5,"skipped": 0,"failed": 0},"hits": {"total": 1,"max_score": 1.0,"hits": [{"_index": "customer","_type": "_doc","_id": "2","_score": 1.0,"_source": {"name": "Liu jintao"}}]}
}
方式二
使用Request Body的方式进行查询,使用query参数,匹配条件为match_all,结果与上一步的查询结果一致,不再赘述。
这种查询方式使用的是Elasticsearch的 query DSL语法,后续文章会详细讲解这种语法。
$ curl -X GET "localhost:9200/bank/_search?pretty" -H 'Content-Type: application/json' -d'
{"query": { "match_all": {} }
}
'
更多内容
- 博客 : http://blog.liujintao.tech
- 公众号: 编程之路


