SpringBoot自定义注解
1. 创建一个注解的基本元素
修饰符:访问修饰符必须为public,不写默认为pubic;
关键字:关键字为@interface;
注解名称:注解名称为自定义注解的名称
注解类型元素:注解类型元素是注解中内容,根据需要标志参数,例如上面的注解的value;
规则总结如下:
- Annotation型定义为@interface, 所有的Annotation会自动继承java.lang.Annotation这一接口,并且不能再去继承别的类或是接口.
- 参数成员只能用public或默认(default)这两个访问权修饰
- 参数成员只能用基本类型byte,short,char,int,long,float,double,boolean八种基本数据类型和String、Enum、Class、annotations等数据类型,以及这一些类型的数组.
- 要获取类方法和字段的注解信息,必须通过Java的反射技术来获取 Annotation对象,因为你除此之外没有别的获取注解对象的方法
- 注解也可以没有定义成员, 不过这样注解就没啥用了
2. 元注解(@Target、@Retention、@Inherited、@Documented)
我们上面的创建的注解XinLinLog上面还有几个注解(@Target、@Retention、@Inherited、@Documented),这四个注解就是元注解,元注解的作用就是负责注解其他注解。Java5.0定义了4个标准的元注解类型,它们被用来提供对其它 注解类型作标志操作(可以理解为最小的注解,基础注解)
@Target:用于描述注解的使用范围,该注解可以使用在什么地方
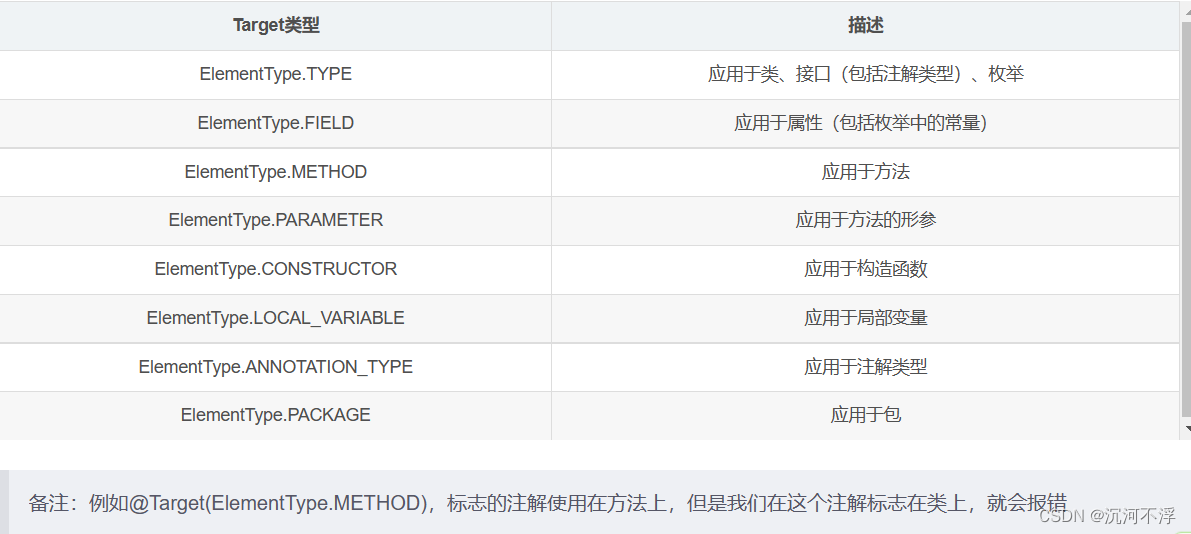
@Retention:表明该注解的生命周期

@Inherited:是一个标记注解,@Inherited阐述了某个被标注的类型是被继承的。如果一个使用了@Inherited修饰的annotation类型被用于一个class,则这个annotation将被用于该class的子类。
@Documented:表明该注解标记的元素可以被Javadoc 或类似的工具文档化
3. 如何自定义注解
注解其实就是一种标记,可以在程序代码中的关键节点(类、方法、变量、参数、包)上打上这些标记,然后程序在编译时或运行时可以检测这些标记从而执行一些特殊操作,因此自定义注解使用的基本流程为:
- 第一步,定义注解 – 相当于定义标记
- 第二步,配置注解 – 把标记打在需要用到的程序代码中
- 第三步,解析注解 – 在编译期或运行时检测到标记,并进行特殊操作
4. 示例代码
创建一个maven项目,导入下列依赖:
<?xml version="1.0" encoding="UTF-8"?>
<project xmlns="http://maven.apache.org/POM/4.0.0"xmlns:xsi="http://www.w3.org/2001/XMLSchema-instance"xsi:schemaLocation="http://maven.apache.org/POM/4.0.0 http://maven.apache.org/xsd/maven-4.0.0.xsd"><modelVersion>4.0.0</modelVersion><parent><artifactId>spring-boot-starter-parent</artifactId><groupId>org.springframework.boot</groupId><version>2.7.0</version></parent><groupId>com.young</groupId><artifactId>Annotation02</artifactId><version>1.0-SNAPSHOT</version><dependencies><dependency><groupId>org.springframework.boot</groupId><artifactId>spring-boot-starter-web</artifactId></dependency><dependency><groupId>org.springframework.boot</groupId><artifactId>spring-boot-starter-test</artifactId></dependency><dependency><groupId>org.projectlombok</groupId><artifactId>lombok</artifactId></dependency><dependency><groupId>com.alibaba</groupId><artifactId>fastjson</artifactId><version>1.2.83</version></dependency></dependencies><properties><maven.compiler.source>11</maven.compiler.source><maven.compiler.target>11</maven.compiler.target></properties></project>
目录结构如下:
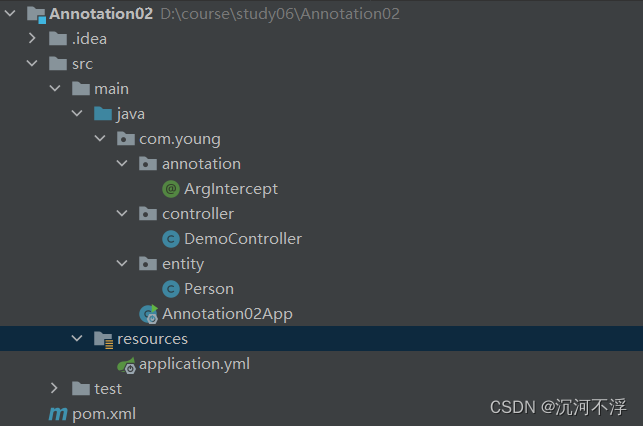
application.yml:
server:port: 8089
Annotation02App.class
package com.young;import org.springframework.boot.SpringApplication;
import org.springframework.boot.autoconfigure.SpringBootApplication;@SpringBootApplication
public class Annotation02App {public static void main(String[] args) {SpringApplication.run(Annotation02App.class,args);}
}
4.1 创建一个ArgIntercept注解,用于类、接口、枚举的方法
package com.young.annotation;import java.lang.annotation.ElementType;
import java.lang.annotation.Retention;
import java.lang.annotation.RetentionPolicy;
import java.lang.annotation.Target;@Target({ElementType.METHOD,ElementType.TYPE})//注解范围为类,接口,枚举的方法上
@Retention(RetentionPolicy.RUNTIME) //被虚拟机保存,可用反射机制读取
public @interface ArgIntercept {boolean required()default true;
}
创建Person.class
package com.young.entity;import com.young.annotation.ArgIntercept;public class Person {private String name;private String mobile;private Integer age;private String sex;public Person(){}public Person(String name,String mobile,Integer age,String sex){this.name=name;this.mobile=mobile;this.age=age;this.sex=sex;}public void setName(String name){this.name=name;}public void setMobile(String mobile){this.mobile=mobile;}public void setAge(Integer age){this.age=age;}public void setSex(String sex){this.sex=sex;}public String getName(){return this.name;}@ArgInterceptpublic String getMobile(){return this.mobile;}@ArgIntercept(required = false)public Integer getAge(){return this.age;}public String getSex(){return this.sex;}
}
创建DemoController.java,用于测试
package com.young.controller;import com.young.annotation.ArgIntercept;
import com.young.entity.Person;
import org.springframework.web.bind.annotation.GetMapping;
import org.springframework.web.bind.annotation.RestController;import java.lang.reflect.Method;@RestController
public class DemoController {@GetMapping("/testMethod1")public String testMethod1()throws Exception{Person person=new Person("cxy","134****8118",22,"男");Method[] methods = Person.class.getMethods();String res="";for (Method m : methods) {String methodName=m.getName();if (!methodName.contains("get")||methodName.equals("getClass")){continue;}ArgIntercept declaredAnnotation = m.getDeclaredAnnotation(ArgIntercept.class);//当ArgIntercept注解值为true时,跳过if (declaredAnnotation!=null&&declaredAnnotation.required()){continue;}//只有没有ArgIntercept或者ArgIntercept的required为false时,才拼接字符串String temp=String.valueOf(m.invoke(person))+" ";res=res+temp;}return res;}
}
启动项目,访问http://localhost:8089/testMethod01
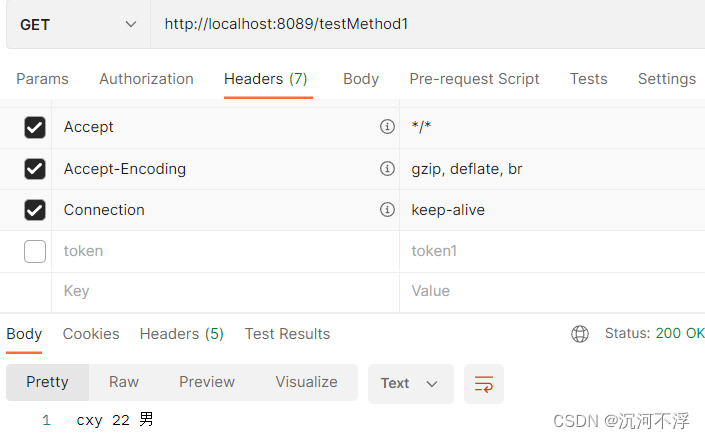
4.2 创建一个ClassIntercept,用于对象属性注解
创建一个User.java
package com.young.entity;import lombok.Data;import java.time.LocalDateTime;
import java.util.Date;@Data
public class User {private Integer id;private String username;private String password;private LocalDateTime loginTime;
}
创建LoginIntercept注解
package com.young.annotation;import java.lang.annotation.ElementType;
import java.lang.annotation.Retention;
import java.lang.annotation.RetentionPolicy;
import java.lang.annotation.Target;@Target({ElementType.METHOD})
@Retention(RetentionPolicy.RUNTIME)
public @interface LoginIntercept {boolean required()default true;
}
ControllerConfiguration
package com.young.config;import com.young.annotation.LoginIntercept;
import com.young.interceptor.LoginInterceptor;
import org.springframework.context.annotation.Configuration;
import org.springframework.web.servlet.config.annotation.InterceptorRegistry;
import org.springframework.web.servlet.config.annotation.WebMvcConfigurer;import javax.annotation.Resource;@Configuration
public class ControllerConfiguration implements WebMvcConfigurer {@Overridepublic void addInterceptors(InterceptorRegistry registry){registry.addInterceptor(new LoginInterceptor()).addPathPatterns("/**");}
}
LoginInterceptor.java
package com.young.interceptor;import com.young.annotation.LoginIntercept;
import org.springframework.stereotype.Component;
import org.springframework.web.method.HandlerMethod;
import org.springframework.web.servlet.HandlerInterceptor;import javax.servlet.http.HttpServletRequest;
import javax.servlet.http.HttpServletResponse;public class LoginInterceptor implements HandlerInterceptor {@Overridepublic boolean preHandle(HttpServletRequest request,HttpServletResponse response,Object handler)throws Exception{if (!(handler instanceof HandlerMethod)){return true;}HandlerMethod method=(HandlerMethod) handler;//判断是否有添加LoginIntercept注解LoginIntercept loginIntercept=method.getMethodAnnotation(LoginIntercept.class);if (loginIntercept==null||!loginIntercept.required()){//没有注解或注解的required为false,直接放行return true;}//鉴权String token = request.getHeader("token");if (token==null||!"token".equals(token)){//校验失败return false;}return true;}
}
修改DemoController.java
package com.young.controller;import com.young.annotation.ArgIntercept;
import com.young.annotation.LoginIntercept;
import com.young.entity.Person;
import com.young.entity.User;
import org.springframework.web.bind.annotation.GetMapping;
import org.springframework.web.bind.annotation.RestController;import java.lang.reflect.Method;
import java.time.LocalDateTime;@RestController
public class DemoController {@GetMapping("/testMethod1")public String testMethod1()throws Exception{Person person=new Person("cxy","134****8118",22,"男");Method[] methods = Person.class.getMethods();String res="";for (Method m : methods) {String methodName=m.getName();if (!methodName.contains("get")||methodName.equals("getClass")){continue;}ArgIntercept declaredAnnotation = m.getDeclaredAnnotation(ArgIntercept.class);//当ArgIntercept注解值为true时,跳过if (declaredAnnotation!=null&&declaredAnnotation.required()){continue;}//只有没有ArgIntercept或者ArgIntercept的required为false时,才拼接字符串String temp=String.valueOf(m.invoke(person))+" ";res=res+temp;}return res;}@GetMapping("/testMethod2")@LoginIntercept(required = false)public User testMethod2(){User user=new User();user.setUsername("not require login");user.setId(1);user.setPassword("123456");user.setLoginTime(LocalDateTime.now());return user;}@GetMapping("/testMethod3")@LoginInterceptpublic User testMethod3(){User user=new User();user.setUsername("require login");user.setId(2);user.setPassword("1234567");user.setLoginTime(LocalDateTime.now());return user;}
}
运行项目
测试testMethod2接口,放行成功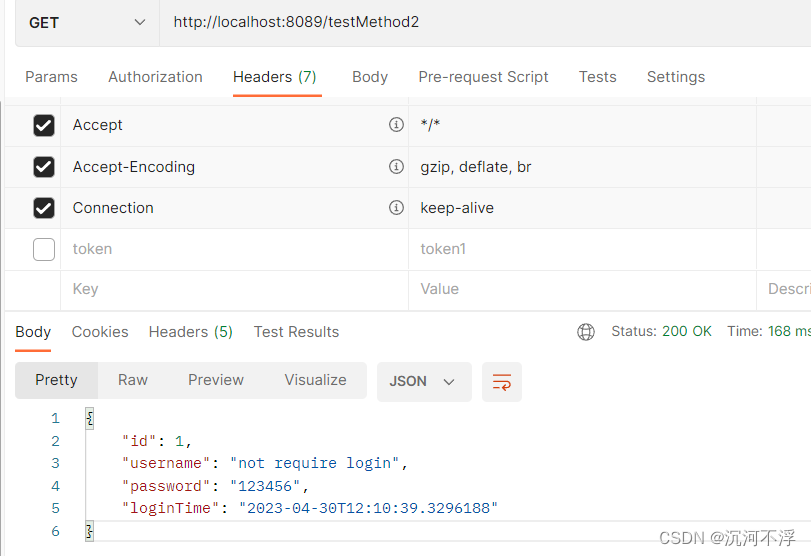
不带token测试testMethod3
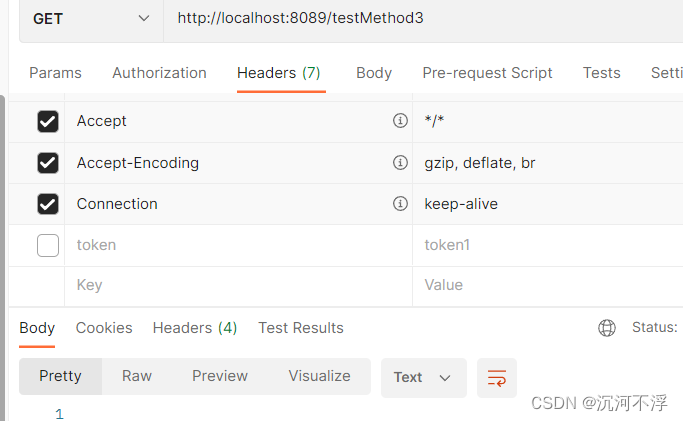
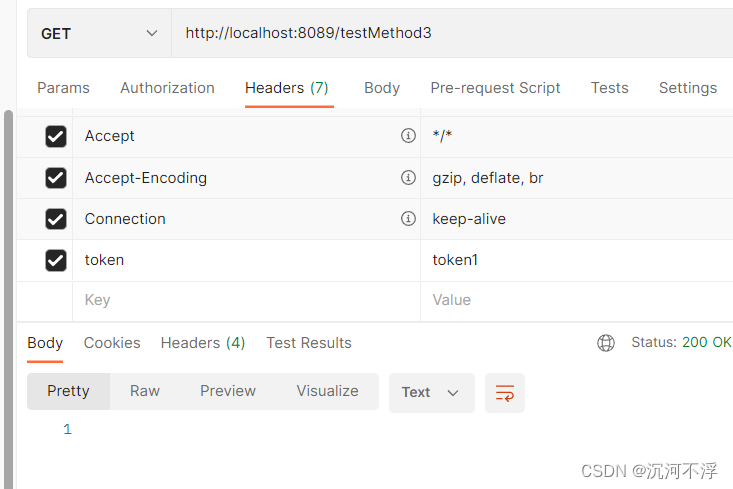
携带错误token访问testMethod3
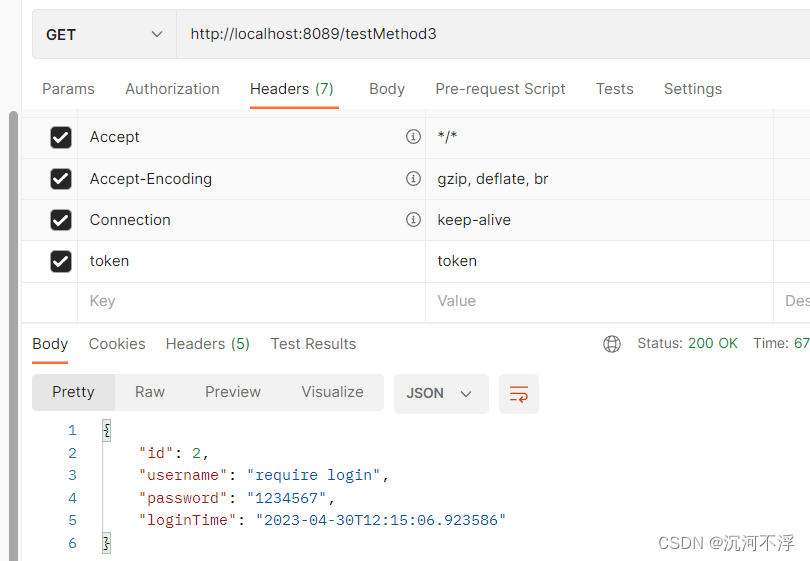
携带正确token
4.3 创建一个RoleIntercept,用于权限校验
在数据库中创建一个m_user表,结构如下:

数据如下:

修改pom.xml,添加下面两个依赖
<dependency><groupId>mysql</groupId><artifactId>mysql-connector-java</artifactId></dependency><dependency><groupId>com.baomidou</groupId><artifactId>mybatis-plus-boot-starter</artifactId><version>3.4.3</version></dependency>
修改User.java
package com.young.entity;import com.baomidou.mybatisplus.annotation.TableId;
import com.baomidou.mybatisplus.annotation.TableName;
import lombok.Data;import java.time.LocalDateTime;
import java.util.Date;@Data
@TableName(value = "m_user")
public class User {@TableIdprivate Integer id;private String username;private String password;private LocalDateTime loginTime;private String role;
}
UserVO.java
package com.young.vo;import lombok.Data;import java.io.Serializable;@Data
public class UserVO implements Serializable {private String username;private String password;
}
修改application.yml
server:port: 8089
spring:datasource:username: rootpassword: 3fa4d180driver: com.mysql.cj.jdbc.Driverurl: jdbc:mysql://localhost:3306/young?useSSL=false&serverTimezone=UTC
UserMapper.java
package com.young.mapper;import com.baomidou.mybatisplus.core.mapper.BaseMapper;
import com.young.entity.User;
import org.apache.ibatis.annotations.Mapper;@Mapper
public interface UserMapper extends BaseMapper<User> {
}
UserService.java
package com.young.service;import com.baomidou.mybatisplus.core.conditions.query.LambdaQueryWrapper;
import com.young.entity.User;
import com.young.mapper.UserMapper;
import org.springframework.beans.factory.annotation.Autowired;
import org.springframework.stereotype.Service;@Service
public class UserService {@Autowiredprivate UserMapper userMapper;public User login(String username,String password){LambdaQueryWrapper<User>queryWrapper=new LambdaQueryWrapper<>();queryWrapper.eq(User::getUsername,username).eq(User::getPassword,password);return userMapper.selectOne(queryWrapper);}
}
创建AdminIntercept注解
package com.young.annotation;import java.lang.annotation.ElementType;
import java.lang.annotation.Retention;
import java.lang.annotation.RetentionPolicy;
import java.lang.annotation.Target;@Target({ElementType.METHOD})
@Retention(RetentionPolicy.RUNTIME)
public @interface AdminIntercept {boolean required()default true;
}
创建AdminInterceptor.java拦截器
package com.young.interceptor;import com.young.annotation.AdminIntercept;
import com.young.entity.User;
import com.young.service.UserService;
import org.springframework.web.method.HandlerMethod;
import org.springframework.web.servlet.HandlerInterceptor;import javax.servlet.http.HttpServletRequest;
import javax.servlet.http.HttpServletResponse;public class AdminInterceptor implements HandlerInterceptor {@Overridepublic boolean preHandle(HttpServletRequest request, HttpServletResponse response,Object handler)throws Exception{if (!(handler instanceof HandlerMethod)){return true;}HandlerMethod method=(HandlerMethod) handler;//判断是否有adminIntercept注解AdminIntercept adminIntercept = method.getMethodAnnotation(AdminIntercept.class);if (adminIntercept==null||!adminIntercept.required()){//没有注解或注解的required为false,直接放行return true;}//获取会话中的用户User user=(User)request.getSession().getAttribute("user");//判断用户权限if (user==null){System.out.println("用户未登录");return false;}if(user.getRole()==null||!"admin".equals(user.getRole())){System.out.println("用户没有admin权限");return false;}return true;}
}
修改ControllerConfiguration
package com.young.config;import com.young.annotation.LoginIntercept;
import com.young.interceptor.AdminInterceptor;
import com.young.interceptor.LoginInterceptor;
import org.springframework.boot.autoconfigure.kafka.KafkaProperties;
import org.springframework.context.annotation.Configuration;
import org.springframework.web.servlet.config.annotation.InterceptorRegistry;
import org.springframework.web.servlet.config.annotation.WebMvcConfigurer;import javax.annotation.Resource;@Configuration
public class ControllerConfiguration implements WebMvcConfigurer {@Overridepublic void addInterceptors(InterceptorRegistry registry){registry.addInterceptor(new LoginInterceptor()).addPathPatterns("/**");registry.addInterceptor(new AdminInterceptor()).addPathPatterns("/user/**");}
}
创建UserController.java
package com.young.controller;import com.young.annotation.AdminIntercept;
import com.young.entity.User;
import com.young.service.UserService;
import com.young.vo.UserVO;
import org.springframework.beans.factory.annotation.Autowired;
import org.springframework.web.bind.annotation.*;import javax.servlet.http.HttpServletRequest;
import javax.servlet.http.HttpSession;@RestController
@RequestMapping("/user")
public class UserController {@Autowiredprivate UserService userService;@PostMapping("/login")public String login(@RequestBody UserVO userVO, HttpServletRequest request){User user = userService.login(userVO.getUsername(), userVO.getPassword());if (user!=null){HttpSession session = request.getSession();session.setAttribute("user",user);return "登录成功";}return "登录失败";}@GetMapping("/info")@AdminInterceptpublic User info(HttpServletRequest request){User user = (User)request.getSession().getAttribute("user");return user;}
}
运行项目,测试
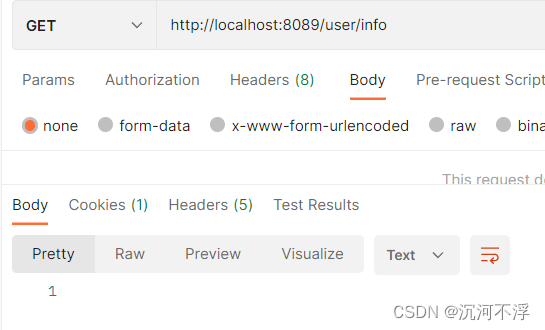
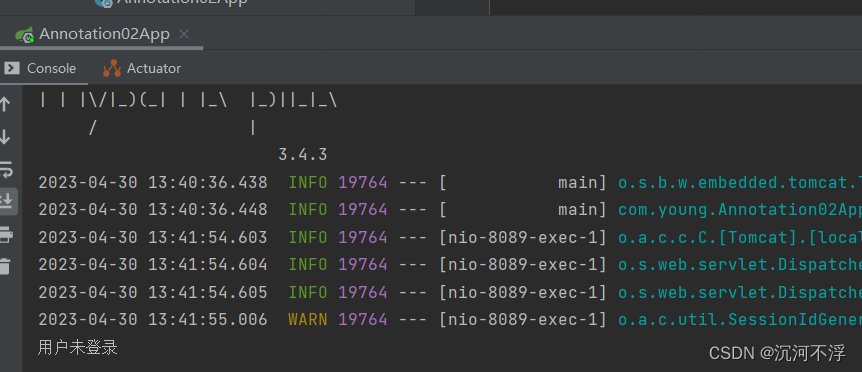
未登录测试/user/info
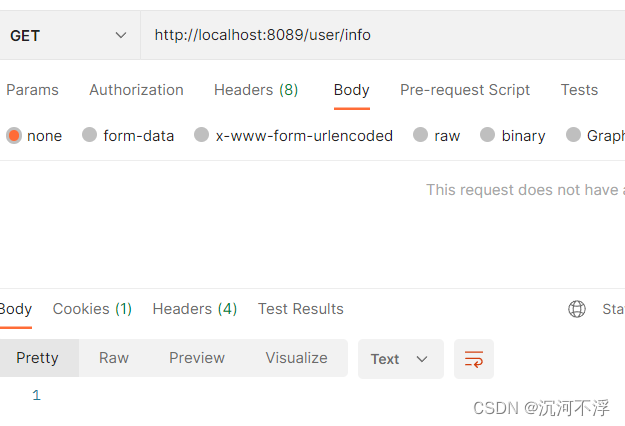
登录不是admin的用户
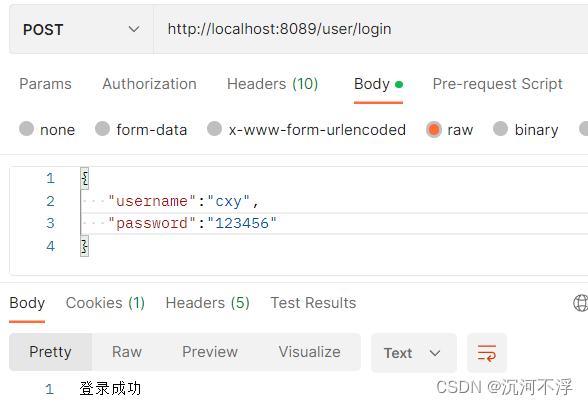
访问/user/info

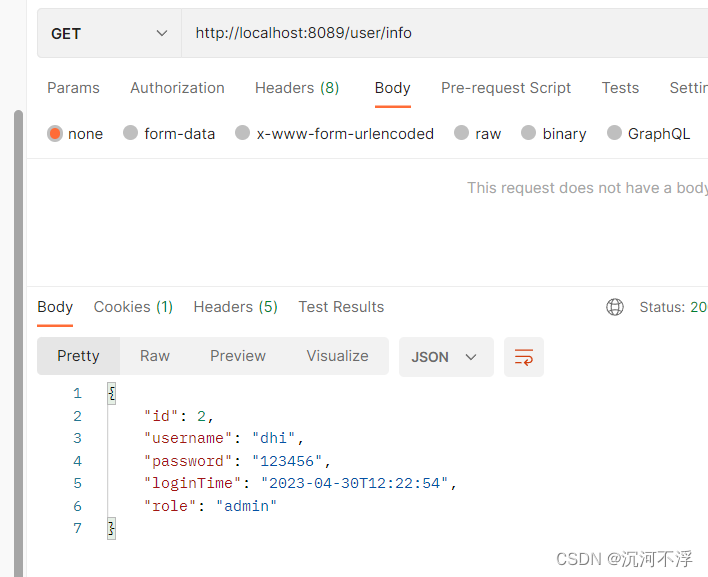
登录有admin权限的用户
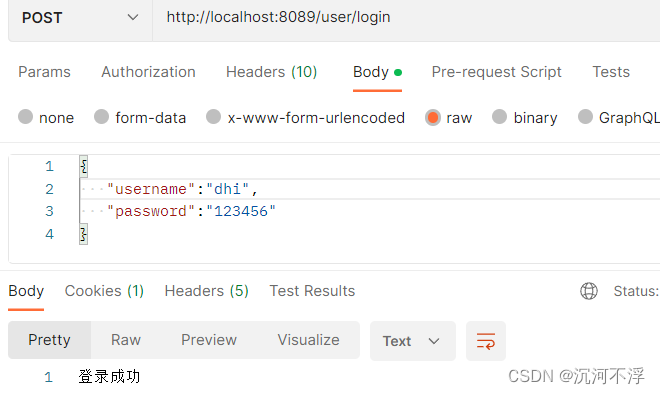
访问/user/info
4.4 使用自定义注解,整合Redis实现限流
pom.xml添加下列依赖
<dependency><groupId>org.springframework.boot</groupId><artifactId>spring-boot-starter-data-redis</artifactId></dependency>
修改application.yml
server:port: 8089
spring:datasource:username: rootpassword: 3fa4d180driver: com.mysql.cj.jdbc.Driverurl: jdbc:mysql://localhost:3306/young?useSSL=false&serverTimezone=UTCredis:host: 127.0.0.1port: 6379jedis:max-idle: 8pool:max-active: 8min-idle: 0max-wait: 3000timeout: 5000
LimitIntercept.java
package com.young.annotation;import java.lang.annotation.ElementType;
import java.lang.annotation.Retention;
import java.lang.annotation.RetentionPolicy;
import java.lang.annotation.Target;@Target({ElementType.METHOD})
@Retention(RetentionPolicy.RUNTIME)
public @interface LimitIntercept {boolean required()default true;//设置默认5秒内最多点击3次 int maxCount()default  3; //默认最多点击3次int waitTime()default 5; //默认时长5秒
}
修改ControllerConfiguration.java
package com.young.config;import com.young.annotation.LoginIntercept;
import com.young.interceptor.AdminInterceptor;
import com.young.interceptor.LimitInterceptor;
import com.young.interceptor.LoginInterceptor;
import org.springframework.beans.factory.annotation.Autowired;
import org.springframework.boot.autoconfigure.kafka.KafkaProperties;
import org.springframework.context.annotation.Bean;
import org.springframework.context.annotation.Configuration;
import org.springframework.data.redis.core.StringRedisTemplate;
import org.springframework.web.servlet.config.annotation.InterceptorRegistry;
import org.springframework.web.servlet.config.annotation.WebMvcConfigurer;import javax.annotation.Resource;@Configuration
public class ControllerConfiguration implements WebMvcConfigurer {@Autowiredprivate StringRedisTemplate stringRedisTemplate;@Overridepublic void addInterceptors(InterceptorRegistry registry){registry.addInterceptor(new LoginInterceptor()).addPathPatterns("/**");registry.addInterceptor(new AdminInterceptor()).addPathPatterns("/user/**");registry.addInterceptor(new LimitInterceptor(stringRedisTemplate));}
}
RedisConstant.java
package com.young.constants;public class RedisConstant {public final static String LIMIT_KEY="limit";
}
添加LimitInterceptor.java
package com.young.interceptor;import com.young.annotation.LimitIntercept;
import com.young.constants.RedisConstant;
import org.springframework.data.redis.core.StringRedisTemplate;
import org.springframework.stereotype.Component;
import org.springframework.web.method.HandlerMethod;
import org.springframework.web.servlet.HandlerInterceptor;import javax.servlet.http.HttpServletRequest;
import javax.servlet.http.HttpServletResponse;
import java.lang.invoke.MethodHandle;
import java.util.concurrent.TimeUnit;public class LimitInterceptor implements HandlerInterceptor {private StringRedisTemplate stringRedisTemplate;public LimitInterceptor(StringRedisTemplate stringRedisTemplate){this.stringRedisTemplate=stringRedisTemplate;}@Overridepublic boolean preHandle(HttpServletRequest request, HttpServletResponse response,Object handler)throws Exception{if (!(handler instanceof HandlerMethod)){return false;}HandlerMethod method=(HandlerMethod) handler;LimitIntercept limitIntercept = ((HandlerMethod) handler).getMethodAnnotation(LimitIntercept.class);if (limitIntercept==null||!limitIntercept.required()){return true;}int maxCount=limitIntercept.maxCount();int waitTime=limitIntercept.waitTime();//当未过期时if (stringRedisTemplate.hasKey(RedisConstant.LIMIT_KEY)){Integer count = Integer.valueOf(stringRedisTemplate.opsForValue().get(RedisConstant.LIMIT_KEY));if (count<=0){System.out.println("限流了=============");return false;}//减少次数stringRedisTemplate.opsForValue().decrement(RedisConstant.LIMIT_KEY);return true;}//设置到redis中stringRedisTemplate.opsForValue().set(RedisConstant.LIMIT_KEY,maxCount+"",waitTime, TimeUnit.SECONDS);return true;}
}
添加LimitController.java
package com.young.controller;import com.young.annotation.LimitIntercept;
import org.springframework.beans.factory.annotation.Autowired;
import org.springframework.data.redis.core.StringRedisTemplate;
import org.springframework.web.bind.annotation.GetMapping;
import org.springframework.web.bind.annotation.RequestMapping;
import org.springframework.web.bind.annotation.RestController;@RestController
@RequestMapping("/limit")
public class LimitController {@GetMapping("/test1")@LimitInterceptpublic String test1(){return "test1";}@GetMapping("/test2")@LimitIntercept(maxCount = 1,waitTime = 10)public String test2(){return "test2";}
}
运行,测试
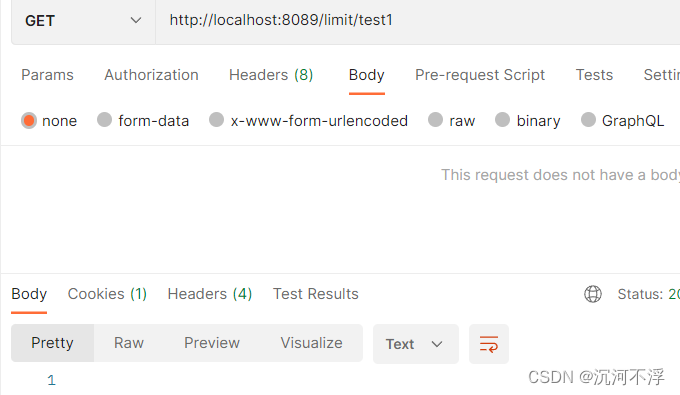
5秒内访问/limit/test1超过3次,开始限流

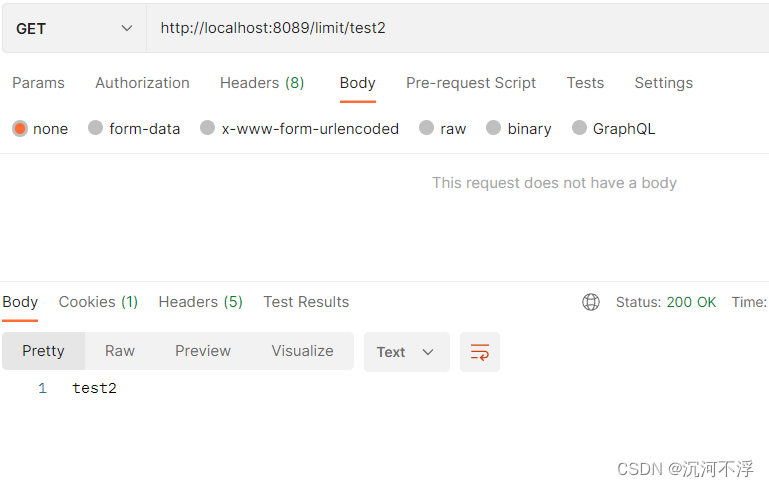
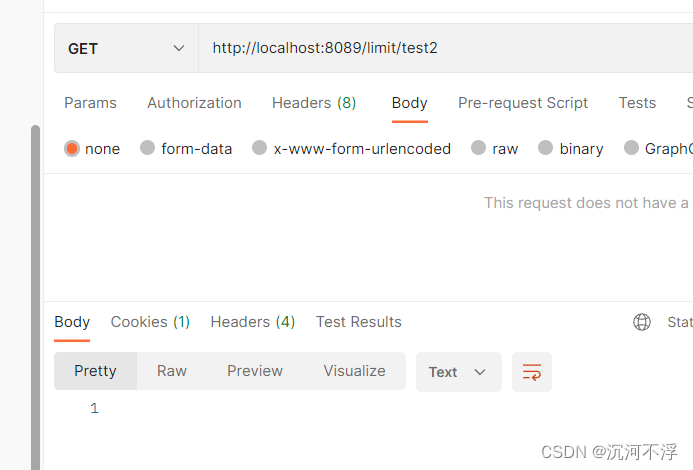
10秒内访问/limit/test2超过1次,开始限流
 #### 5. 参考文章
SpringBoot自定义注解
springboot项目中自定义注解的使用总结、java自定义注解实战(常用注解DEMO)
