ConstraintLayout
ConstraintLayout可让您使用扁平视图层次结构(无嵌套视图组)创建复杂的大型布局。它与RelativeLayout相似,其中所有的视图均根据同级视图与父布局之间的关系进行布局,但其灵活性要高于RelativeLayout,并且更易于与 Android Studio 的布局编辑器配合使用。
ConstraintLayout的所有功能均可直接通过布局编辑器的可视化工具来使用,因为布局 API 和布局编辑器是专为彼此构建的。 因此,您完全可以使用ConstraintLayout通过拖放的形式(而非修改 XML)来构建布局。
基础
在 ConstraintLayout 中定义某个视图的位置,您必须为该视图添加至少一个水平约束条件和一个垂直约束条件。
如果视图没有任何约束条件,则会在位置 [0,0](左上角)处进行绘制。
相对定位
相对定位和RelativeLayout的功能类似,并且更加简单理解和提供更多属性。
简单的演示
先了解一下各个控件的方向的名称

实现控件2在演示控件的左边,控件2在演示控件的下边

看xml的代码其实只有这两句
app:layout_constraintStart_toStartOf="@+id/one"
app:layout_constraintTop_toBottomOf="@+id/one"
简化一下就是
Start_toStartOf=one
Top_toBottomOf=one
翻译一下就是
(我)的左边在(目标)的左边=目标
(我)的上面在(目标)的下面=目标
目标可以是某个控件也可以是父容器
app:layout_constraintBottom_toTopOf="@+id/textView3"
app:layout_constraintEnd_toEndOf="parent"
填parent就是父容器
其实Start_toStartOf和Left_toLeftOf在中国是没有区别的。
Android推荐的使用Start_toStartOf当在从右往左读的国家的时候,就会变成Right_toRightOf
当控件被android:visibility=“gone”,约束关系是不变的和RelativeLayout中gone控件是不一样的。
RelativeLayout 被visibility=“gone”,控件会回到0,0位置,但是控件的关系没有变。

ConstraintLayout则不会,它只会把控件的宽和高设置为0,但是位置和约束关系还是不变的,

全部属性
看会了上面的属性下面的就随便用了
layout_constraintLeft_toLeftOf
layout_constraintLeft_toRightOf
layout_constraintRight_toLeftOf
layout_constraintRight_toRightOf
layout_constraintTop_toTopOf
layout_constraintTop_toBottomOf
layout_constraintBottom_toTopOf
layout_constraintBottom_toBottomOf
layout_constraintStart_toEndOf
layout_constraintStart_toStartOf
layout_constraintEnd_toStartOf
layout_constraintEnd_toEndOf
文本对齐
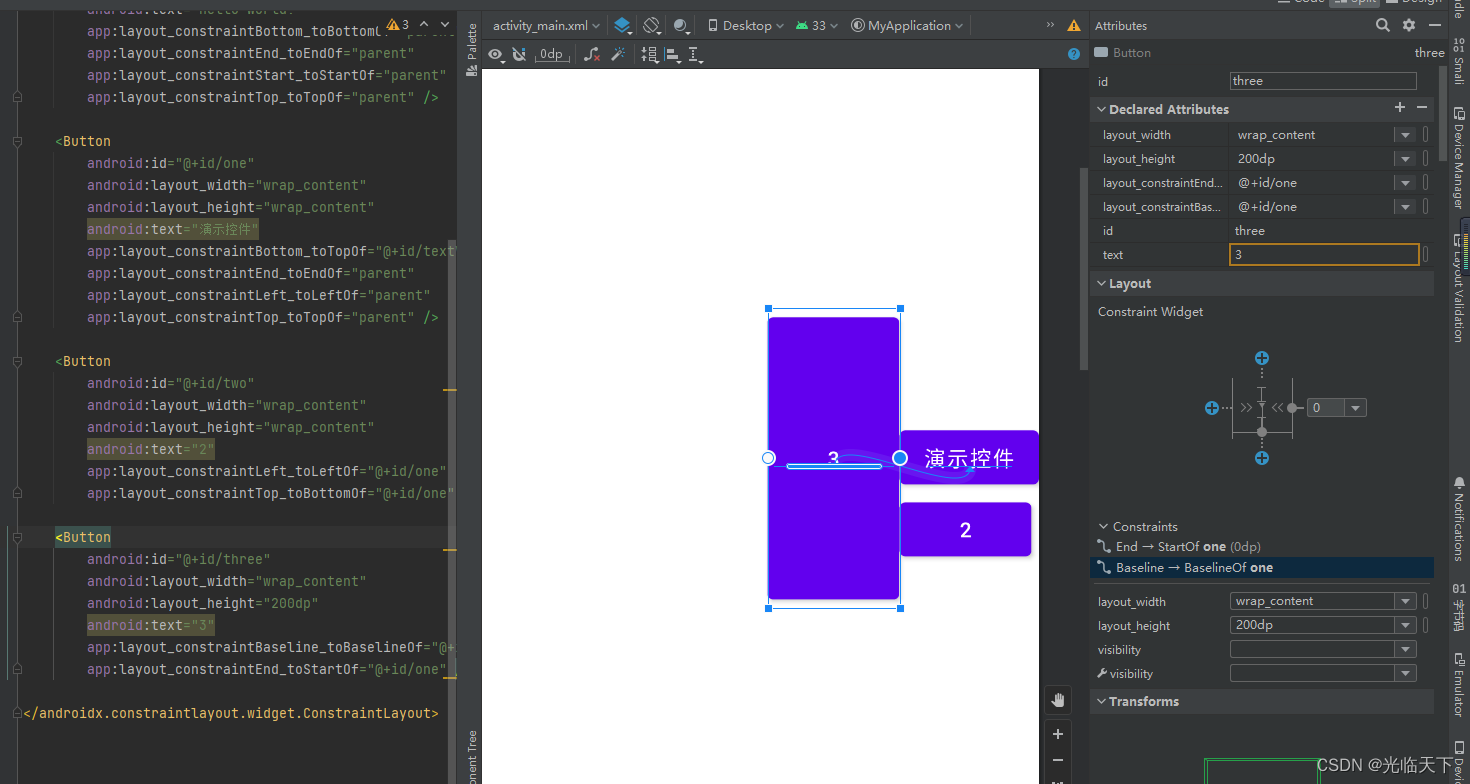
layout_constraintBaseline_toBaselineOf
layout_constraintBaseline_toTopOf
layout_constraintBaseline_toBottomOf
Baseline_toBaselineOf
翻译: (我)文本线和(目标)文本线对齐
边距
Margin

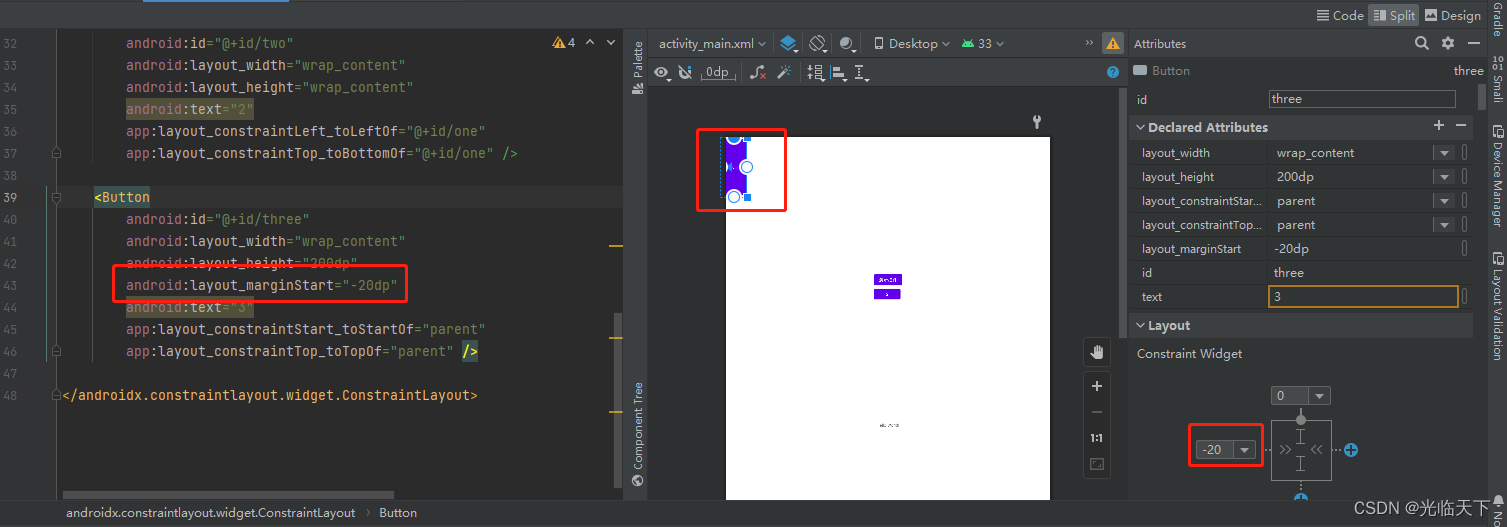
这个边距是允许填负数的
全部属性
android:layout_marginStart
android:layout_marginEnd
android:layout_marginLeft
android:layout_marginTop
android:layout_marginRight
android:layout_marginBottom
layout_marginBaseline
goneMargin
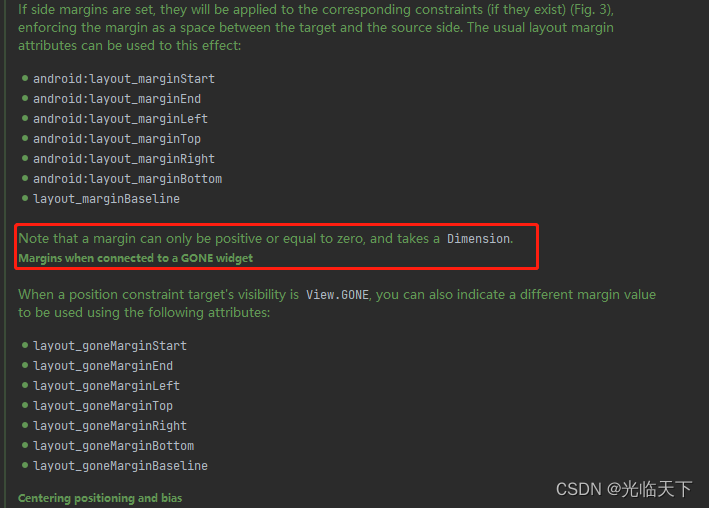
只有约束的控件可见性被设置为gone的时候,margin才会生效

这个值依然可以填写负数,但是源代码是不允许的
居中和偏移
居中
在RelativeLayout中,把控件放在布局中间的方法是把layout_centerInParent设为true,而在ConstraintLayout中的写法是:

app:layout_constraintBottom_toBottomOf="parent"
app:layout_constraintLeft_toLeftOf="parent"
app:layout_constraintRight_toRightOf="parent"
app:layout_constraintTop_toTopOf="parent"
偏移
一旦上下或者左右位置可以确定,就可以进行偏移了

app:layout_constraintHorizontal_bias="0.69"
app:layout_constraintVertical_bias="0.5"
角度定位
当使用角度定位,相对定位就会失效,并无法一起使用。
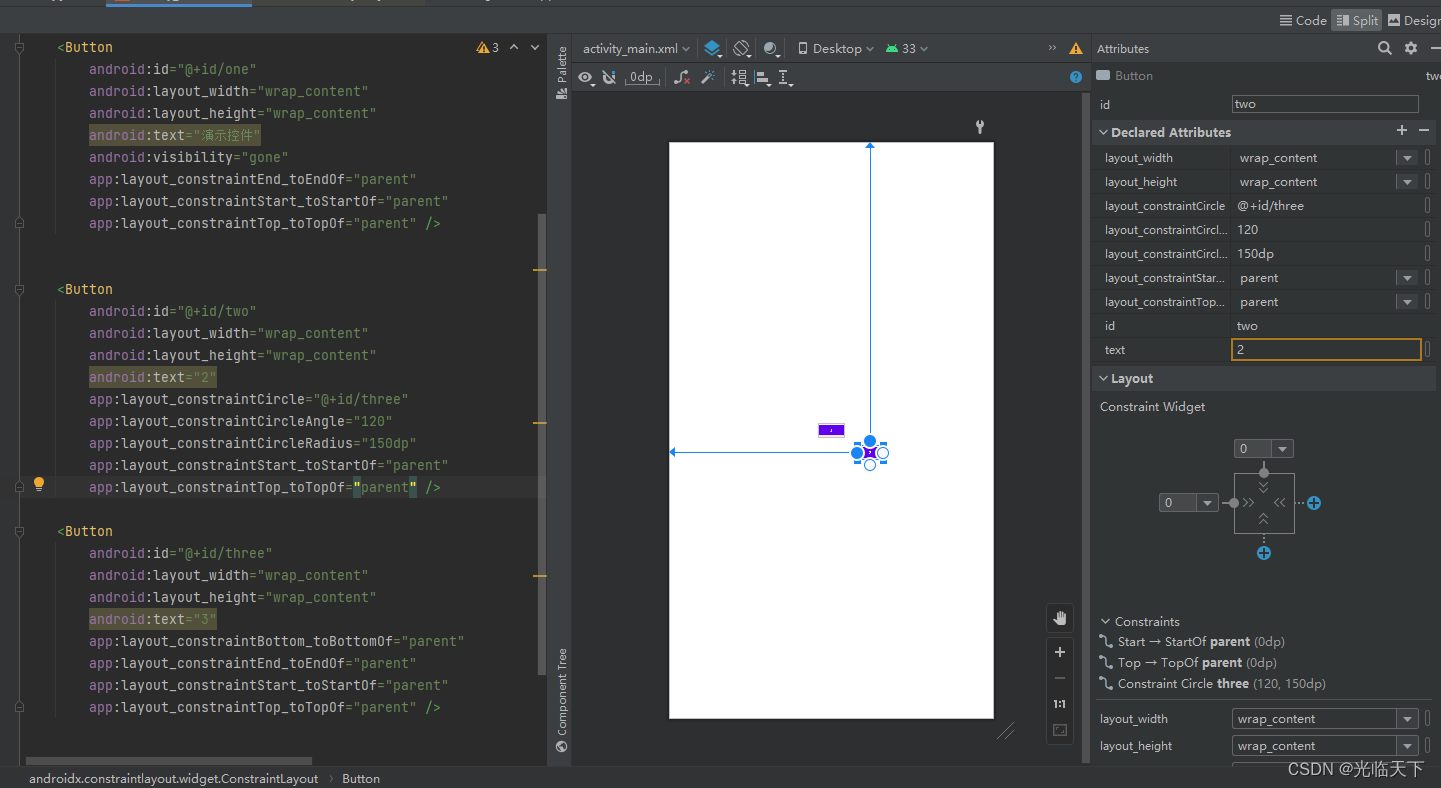
当目标控件被gone,当前控件就会到目标控件的位置

尺寸约束
0dp (MATCH_CONSTRAINT)
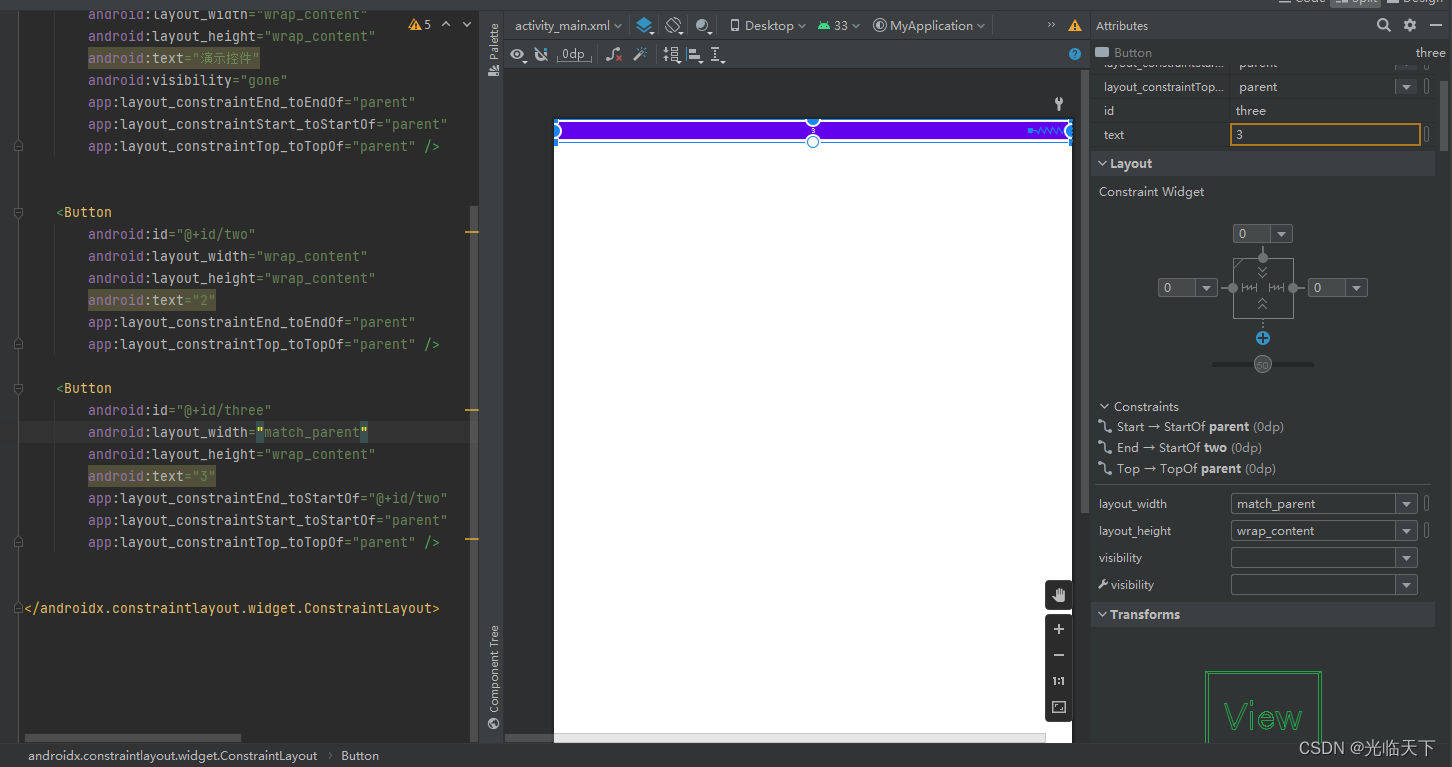
官方不推荐在ConstraintLayout中使用match_parent,可以设置 0dp (MATCH_CONSTRAINT), 配合约束代替match_parent。
0dp就是能有大的地方就占多大的地方,看下图的第一个控件的约束关系是结束要在第二个控件开始,所以就会先保证控件2绘制出来,然后剩余的空间给控件1。
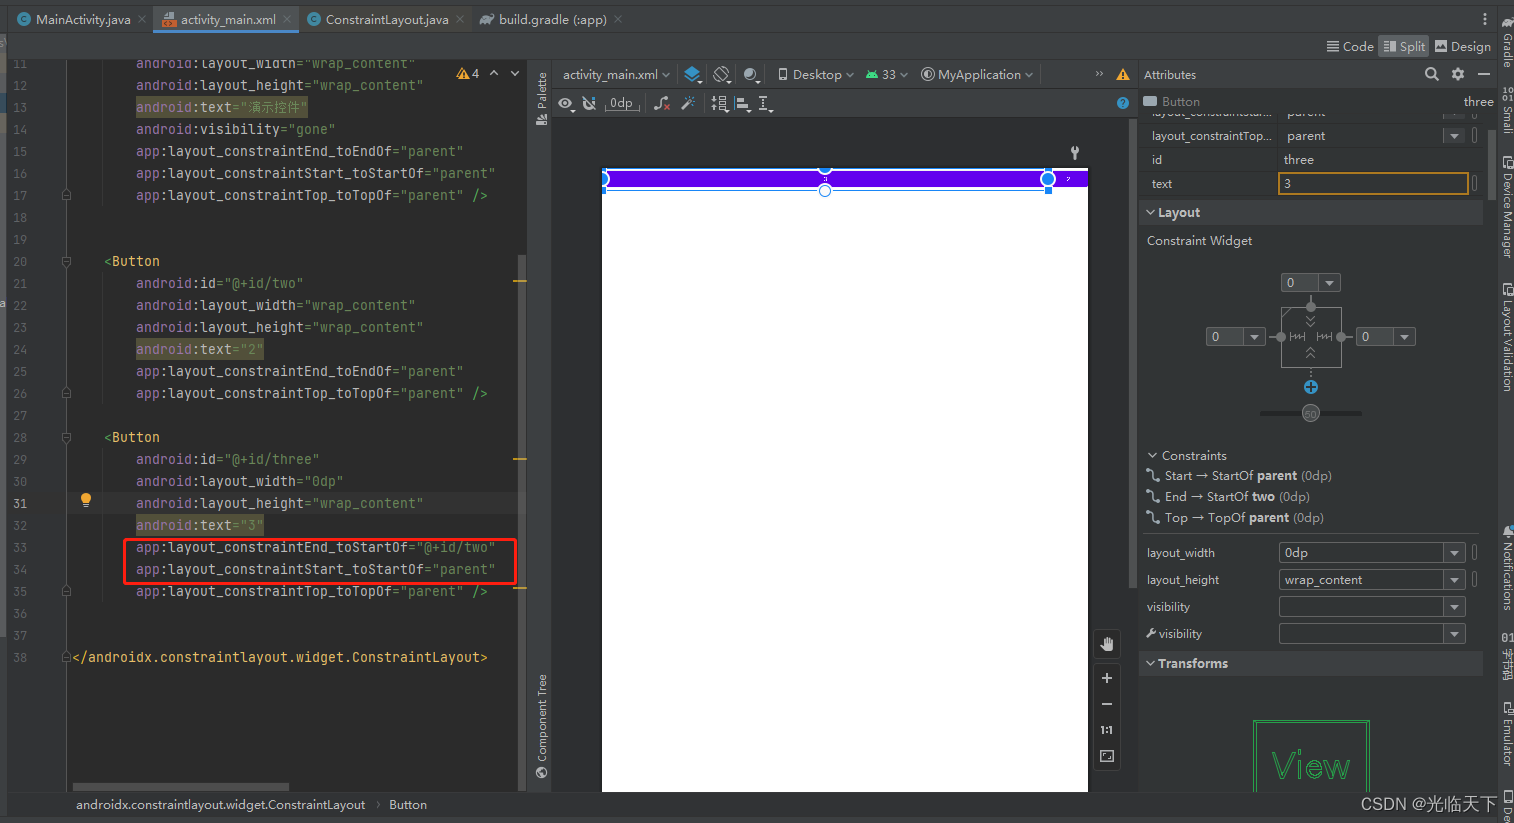
如果是match_parent就直接父容器最大了。match_parent在部分时候时长不生效。
宽高比
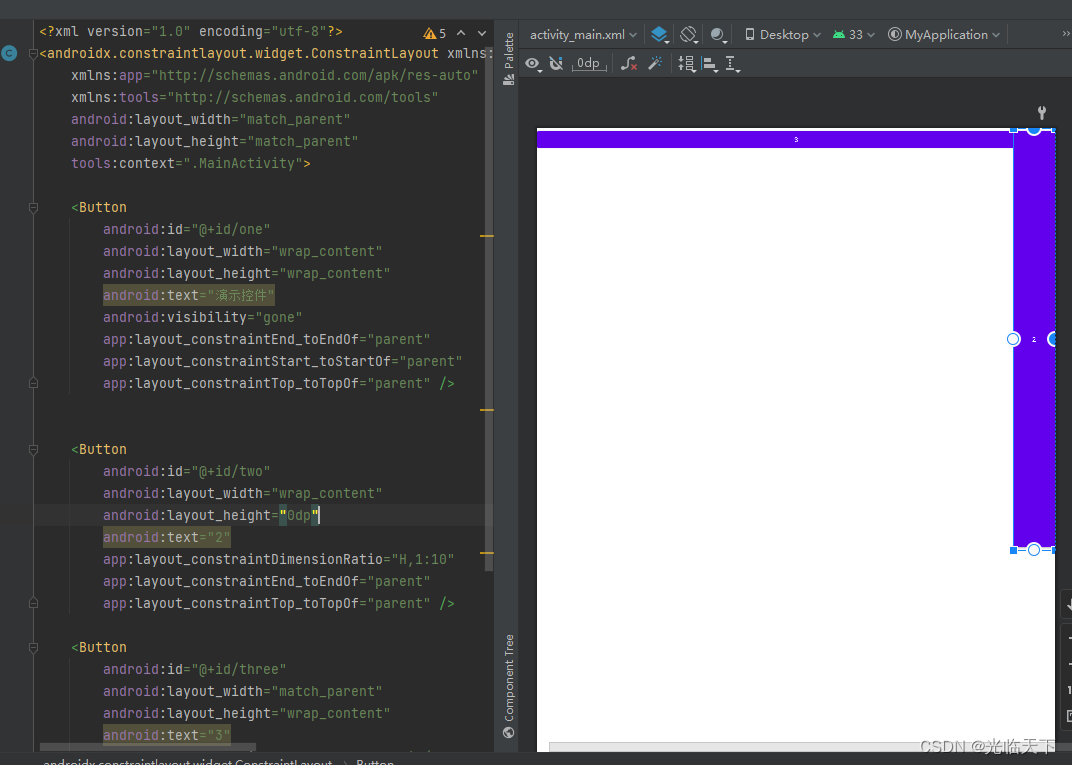
app:layout_constraintDimensionRatio="H,2:3"指的是 高:宽=2:3
app:layout_constraintDimensionRatio="W,2:3"指的是 宽:高=2:3
<Buttonandroid:id="@+id/two"android:layout_width="wrap_content"android:layout_height="0dp"android:text="2"app:layout_constraintDimensionRatio="H,1:10"app:layout_constraintEnd_toEndOf="parent"app:layout_constraintTop_toTopOf="parent" />
wrap_content
当控件的高度或宽度为wrap_content时,可以使用下列属性来控制最大、最小的高度或宽度:
android:minWidth 最小的宽度
android:minHeight 最小的高度
android:maxWidth 最大的宽度
android:maxHeight 最大的高度
使用指定的尺寸(不推荐)
就是填具体数值如:20dp
辅助功能
Guideline
使用辅助线把这个控件放在30%的宽高位置

Guideline不会显示在UI中
<Buttonandroid:id="@+id/button7"android:layout_width="wrap_content"android:layout_height="wrap_content"android:text="Button"app:layout_constraintStart_toStartOf="@+id/guideline3"app:layout_constraintTop_toTopOf="@+id/guideline4" /><androidx.constraintlayout.widget.Guidelineandroid:id="@+id/guideline3"android:layout_width="wrap_content"android:layout_height="wrap_content"android:orientation="vertical"app:layout_constraintGuide_percent="0.3" /><androidx.constraintlayout.widget.Guidelineandroid:id="@+id/guideline4"android:layout_width="wrap_content"android:layout_height="wrap_content"android:orientation="horizontal"app:layout_constraintGuide_percent="0.3" />
Group
可以把指定的控件放到一个组做一些操作,比如一组隐藏控件。
而且Group可以加入多个Group,一起控制

Barrier
假设有3个控件ABC,C在AB的右边,但是AB的宽是不固定的,这个时候C无论约束在A的右边或者B的右边都不对。当出现这种情况可以用Barrier来解决。Barrier可以在多个控件的一侧建立一个屏障,如下所示:

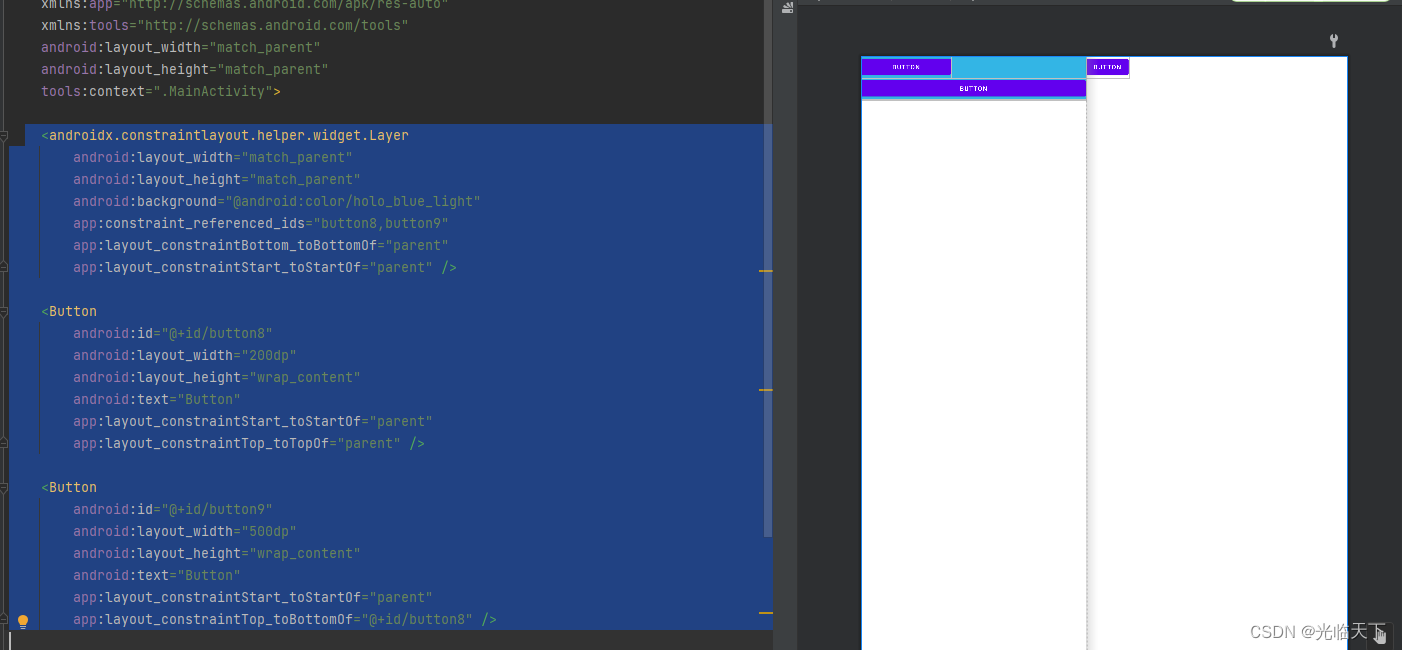
Layer
Layer本质是一个View,可以给多个视图设置共同的背景或者动画。
大部分都是做item的背景和动画,省一个布局嵌套。
<androidx.constraintlayout.helper.widget.Layerandroid:layout_width="match_parent"android:layout_height="match_parent"android:background="@android:color/holo_blue_light"app:constraint_referenced_ids="button8,button9"app:layout_constraintBottom_toBottomOf="parent"app:layout_constraintStart_toStartOf="parent" /><Buttonandroid:id="@+id/button8"android:layout_width="200dp"android:layout_height="wrap_content"android:text="Button"app:layout_constraintStart_toStartOf="parent"app:layout_constraintTop_toTopOf="parent" /><Buttonandroid:id="@+id/button9"android:layout_width="500dp"android:layout_height="wrap_content"android:text="Button"app:layout_constraintStart_toStartOf="parent"app:layout_constraintTop_toBottomOf="@+id/button8" />
注意点:
ConstraintLayout是无嵌套视图,大部分情况一层就完成UI编写。
梳理好级别关系,同级不互相约束,尽量把约束关系限定在上下级控件之间,方便以后的改动和管理。

