1. 连 接 redis
默认有三种方式连接redis.
第一种:jedis---传统的项目--ssm
第二种:lettuce:---->刚出现没有多久就被springboot整合进来。
第三种:springboot连接redis
1.1 jedis操作redis服务器
(1)引入jedis依赖
<dependency><groupId>redis.clients</groupId><artifactId>jedis</artifactId><version>3.8.0</version></dependency>
(2)编写相关的代码
string字符串命令:
@Test//jedis连接public void test01(){//获取jedis对象Jedis jedis = new Jedis ("192.168.28.222",6379);//获取所有Set<String> keys = jedis.keys ("*");System.out.println (keys);//判断是否存在Boolean k1 = jedis.exists ("是否存在-----" + "k1");System.out.println (k1);//string类 型 测 试//存值String set = jedis.set ("k6", "wjj");System.out.println (set);//取值String k6 = jedis.get ("k6");System.out.println (k6);//删除Long k61 = jedis.del ("k6");System.out.println ("删除-----" + k61);//设置时间jedis.expire ("k2",60);//查看剩余时间Long k51 = jedis.ttl ("k2");System.out.println ("剩余" + k51);//测试是否存在Boolean k2 = jedis.exists ("k2");System.out.println ("是否存在" + k2);//存在不存,不存在直接存入Long k21 = jedis.setnx ("k6", "33");System.out.println ("k21------" + k21);//指定数值增加数值Long k63 = jedis.incrBy ("k6", 5);String k62 = jedis.get ("k6");System.out.println (k62);//指定数值减少Long k64 = jedis.decrBy ("k6", 6);String k55 = jedis.get ("k6");System.out.println (k55);jedis.close ();}hash字段命令:
@Testpublic void test04(){//获取jedis对象Jedis jedis = new Jedis ("192.168.28.222",6379);//hash类型HashMap<String, String> hashMap = new HashMap<> ();hashMap.put ("name","wjjj");hashMap.put ("age","66");hashMap.put ("add","厕所");//存入数据Long k7 = jedis.hset ("k7----", hashMap);System.out.println (k7);//获取全部字段Map<String, String> k71 = jedis.hgetAll ("k7");System.out.println (k71);//获取所有字段Set<String> k72 = jedis.hkeys ("k7");System.out.println ("字段----" + k72);//获取所有值List<String> k73 = jedis.hvals ("k7");System.out.println ("值-----" + k73);//获取表中字段的数量Long k74 = jedis.hlen ("k7");System.out.println (k74);//获取所有给定字段的值List<String> hmget = jedis.hmget ("k7", "name", "age");System.out.println ("指定字段的值" + hmget);//只有在字段 field 不存在时,设置哈希表字段的值Long hsetnx = jedis.hsetnx ("k7", "sex", "男");System.out.println (hsetnx);//list队列Long lpush = jedis.lpush ("k8", "aa", "bb", "cc", "dd");List<String> k8 = jedis.lrange ("k8", 0, -1);System.out.println (k8);jedis.close ();}list 列表命令:
@Testpublic void test05(){//获取jedis对象Jedis jedis = new Jedis ("192.168.28.222",6379);//list队列//添加数据Long lpush = jedis.lpush ("k8", "aa", "bb", "cc", "dd");//获取数据List<String> k8 = jedis.lrange ("k8", 0, -1);System.out.println ("元素----" + k8);//获取列表长度Long k81 = jedis.llen ("k8");System.out.println ("长度-----" + k81);//获取最后一个元素并移除String k82 = jedis.rpop ("k8");List<String> k9 = jedis.lrange ("k8", 0, -1);System.out.println ("元素剩余-----" + k9);//通过索引获取列表中的元素String k83 = jedis.lindex ("k8", 4);System.out.println ("第五个数据" + k83);jedis.close ();}
set列表命令:
@Testpublic void test06(){//获取jedis对象Jedis jedis = new Jedis ("192.168.28.222",6379);// set 集合//添加数据Long sadd = jedis.sadd ("k9", "aa", "bb", "cc", "dd", "ee");Long sadd1 = jedis.sadd ("k10", "aa", "bb", "cc", "gg", "ll");System.out.println ("添加数据" + sadd);//取数据Set<String> k9 = jedis.smembers ("k9");System.out.println ("取数据" + k9);//取出交集Set<String> sinter = jedis.sinter ("k9", "k10");System.out.println ("交集" + sinter);//返回给定所有集合的差集Set<String> sdiff = jedis.sdiff ("k9", "k10");System.out.println ("差集" + sdiff);jedis.close ();}sort set 有序集合命令:
@Testpublic void test07(){//获取jedis对象Jedis jedis = new Jedis ("192.168.28.222",6379);// sort set 集合//添加数据HashMap<String, Double> hashMap = new HashMap<> ();hashMap.put ("yw",99.0);hashMap.put ("sx",88.0);hashMap.put ("yy",65.0);hashMap.put ("ls",69.0);hashMap.put ("hx",85.0);Long k11 = jedis.zadd ("k11", hashMap);System.out.println (k11);//返回区间之内的Set<String> k111 = jedis.zrange ("k11", 0, -1);System.out.println ("返回" + k111);//返回有序集合中指定成员的排名,有序集成员按分数值递减Long zrevrank = jedis.zrevrank ("k11", "ls");System.out.println ("排名" + zrevrank);//获取有序集合的成员数Long k112 = jedis.zcard ("k11");System.out.println ("成员数" + k112);//返回有序集中指定区间内的成员,通过索引,分数从高到底Set<String> k113 = jedis.zrevrange ("k11", 0, -1);System.out.println ("分数" + k113);jedis.close ();}
1.2 .测试jedis使用和不使用连接池的效率
配置连接池
@Testpublic void test02(){//连接池的配置信息JedisPoolConfig jedisPoolConfig = new JedisPoolConfig ();jedisPoolConfig.setMaxTotal (10);//最大连接个数jedisPoolConfig.setMinIdle (2);//最小空闲时间jedisPoolConfig.setMaxIdle (10);//最大空闲时间jedisPoolConfig.setTestOnBorrow (true);//在连接对象时验证是否有联通性JedisPool jedisPool = new JedisPool (jedisPoolConfig,"192.168.28.222",6379);Jedis jedis = jedisPool.getResource ();//清空当前库jedis .flushDB ();String k5 = jedis.set ("k5", "55");String k51 = jedis.get ("k5");System.out.println (k51);jedis.close ();//归还连接池}(1.) 不使用连接池

(2.)使用连接池
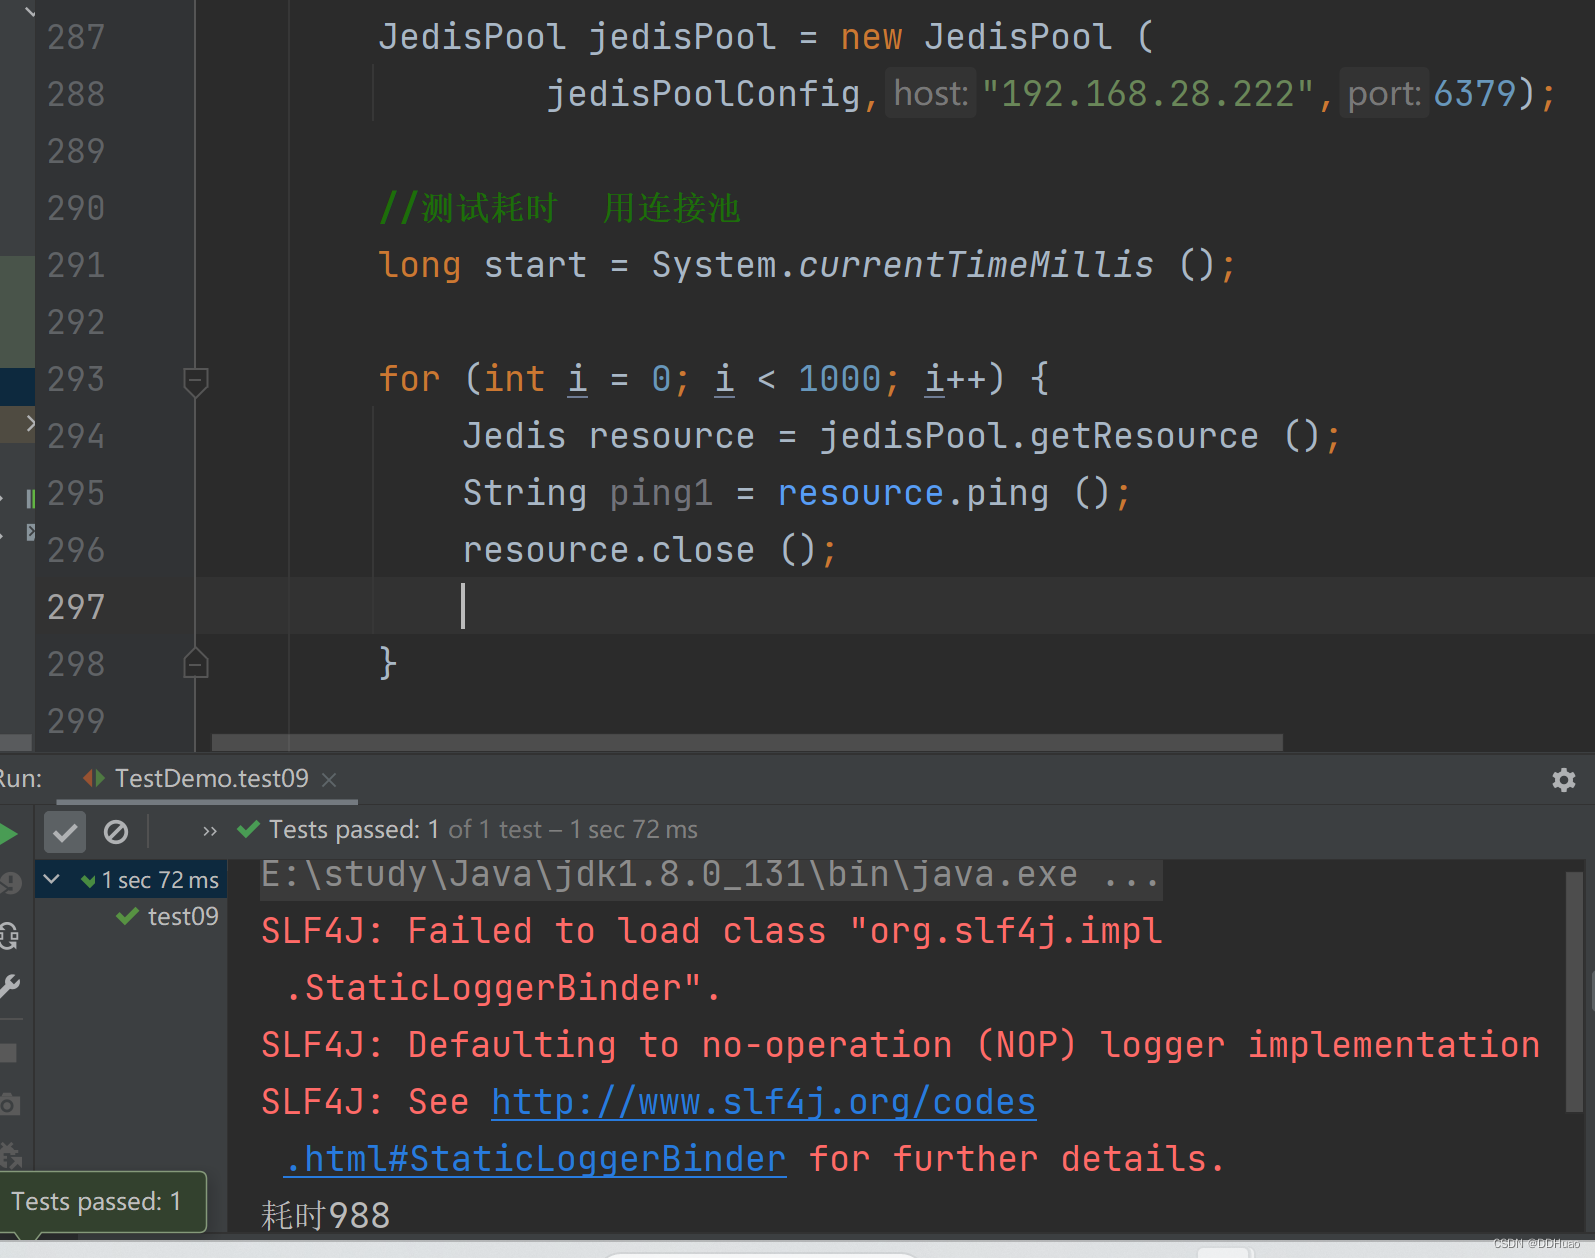
结论:使用连接池 比没用要快很多
2. springboot 整合redis
springboot在整合redis时提高两个模板类,StringRedisTemplate和RedisTemplate.以后对redis的操作都在该模板类中。StringRedisTemplate是RedisTemplate的子类。
2.1 导入依赖
<!--redis相关依赖--><dependency><groupId>org.springframework.boot</groupId><artifactId>spring-boot-starter-data-redis</artifactId></dependency><dependency><groupId>org.apache.commons</groupId><artifactId>commons-pool2</artifactId></dependency>2.2 修改配置文件
#redis的配置信息
spring.redis.host=192.168.28.222
spring.redis.port=6379#最多获取数
spring.redis.lettuce.pool.max-active=8
spring.redis.lettuce.pool.max-wait=-1ms
spring.redis.lettuce.pool.max-idle=8
spring.redis.lettuce.pool.min-idle=0
2.3 添加配置类
RedisTemplate
它是StringRedisTemplate的父类,它类可以存储任意数据类型,但是任意类型必须序列化,默认采用的是jdk的序列化方式。jdk序列化方式阅读能力差,而且占用空间大. 我们在使用是一般需要人为指定序列化方式。
package com.dxh;import com.fasterxml.jackson.annotation.JsonAutoDetect;
import com.fasterxml.jackson.annotation.PropertyAccessor;
import com.fasterxml.jackson.databind.ObjectMapper;
import org.springframework.context.annotation.Bean;
import org.springframework.context.annotation.Configuration;
import org.springframework.data.redis.connection.RedisConnectionFactory;
import org.springframework.data.redis.core.RedisTemplate;
import org.springframework.data.redis.serializer.Jackson2JsonRedisSerializer;
import org.springframework.data.redis.serializer.RedisSerializer;
import org.springframework.data.redis.serializer.StringRedisSerializer;/*** @program: redis* @author: ♥丁新华* @create: 2023-04-24 16:17**/
@Configuration
public class RedisConfig {//比如验证码@Bean //该方法的返回对象交于spring容器管理public RedisTemplate<String, Object> redisTemplate(RedisConnectionFactory factory) {RedisTemplate<String, Object> template = new RedisTemplate<>();RedisSerializer<String> redisSerializer = new StringRedisSerializer ();Jackson2JsonRedisSerializer jackson2JsonRedisSerializer = new Jackson2JsonRedisSerializer(Object.class);ObjectMapper om = new ObjectMapper ();om.setVisibility(PropertyAccessor.ALL, JsonAutoDetect.Visibility.ANY);om.enableDefaultTyping(ObjectMapper.DefaultTyping.NON_FINAL);jackson2JsonRedisSerializer.setObjectMapper(om);template.setConnectionFactory(factory);//key序列化方式template.setKeySerializer(redisSerializer);//value序列化template.setValueSerializer(jackson2JsonRedisSerializer);//key hashmap序列化template.setHashKeySerializer (redisSerializer);//value hashmap序列化template.setHashValueSerializer(jackson2JsonRedisSerializer);return template;}
}
2.4 测 试
(1 )关于key的方法
@SpringBootTest
class RedisApplicationTests {//因为springboot整合redis时会把StringRedisTemplate创建并交于spring容器管理@Autowiredprivate StringRedisTemplate redisTemplate;@Testvoid contextLoads() {//关于key的方法//获取所有keySet<String> keys = redisTemplate.keys ("*");System.out.println (keys);//判断key是否存在Boolean k1 = redisTemplate.hasKey ("k1");System.out.println (k1);//删除指定keyBoolean k11 = redisTemplate.delete ("k1");System.out.println (k11);//设置过期时间Boolean k12 = redisTemplate.expire ("k1", 60, TimeUnit.MILLISECONDS);//获取还剩多少时间redisTemplate.getExpire ("k1");}}
(2.) 关于字符串的操作
@SpringBootTest
class RedisApplicationTests3 {//因为springboot整合redis时会把StringRedisTemplate创建并交于spring容器管理@Autowiredprivate StringRedisTemplate redisTemplate;@Testvoid contextLoads() {//操作字符串//操作字符串===StringRedisTemplate会把对每一种数据的操作单独封装成一个类ValueOperations<String, String> s1 = redisTemplate.opsForValue ();//添加数据s1.set ("k1","33");s1.set ("k2","44");//获取数据  getString k12 = s1.get ("k1");System.out.println ("k1-----" + k12);//判断是否存入成功  setIfAbsentBoolean aBoolean = s1.setIfAbsent ("k2", "wjj");System.out.println ("是否----" + aBoolean);//增加指定时间  incrementLong k3 = s1.increment ("k3", 20);System.out.println ("k3---" + k3);//减少指定时间  decrementLong k31 = s1.decrement ("k3", 10);System.out.println ("k3----" + k31);ArrayList<String> list = new ArrayList<> ();list.add ("k1");list.add ("k2");list.add ("k3");//获取多个  multiGetList<String> list1 = s1.multiGet (list);System.out.println ("多个----" + list1);//判断是否存在,Boolean k6 = s1.setIfPresent ("k6", "22");System.out.println ("成功是否----" + k6);//获取原值同时设置新值【getset】String andSet = s1.getAndSet ("k2", "ghj");System.out.println ("同步----" + andSet);}}
3. 操作 hash 值
@SpringBootTest
class RedisApplicationTests4 {//因为springboot整合redis时会把StringRedisTemplate创建并交于spring容器管理@Autowiredprivate StringRedisTemplate redisTemplate;@Testvoid contextLoads() {// 操作hash方法HashOperations<String, Object, Object> s2 = redisTemplate.opsForHash ();// HashOperations<String, Object, Object> forHash = redisTemplate.opsForHash();// 向其中添加数据s2.put("k1","name","平家祥");s2.put("k1","age","16");s2.put("k1","sex","男");// 获取值  valuesList<Object> k1 = s2.values ("k1");System.out.println ("值---" + k1);//  获取变量中的键值对 entriesMap<Object, Object> k11 = s2.entries ("k1");System.out.println ("键值对---" + k11);//通过hasKey(H key, Object hashKey)方法判断变量中是否存在map键Boolean k12 = s2.hasKey ("k1", "22");System.out.println ("通过hasKey(H key, Object hashKey)方法判断变量中是否存在map键---" + k12);//keys 获取变量中的键Set<Object> k13 = s2.keys ("k1");System.out.println ("变量中的键----" + k13);//获取长度Long k14 = s2.size ("k1");System.out.println ("长度----" + k14);}}
4. 操作 list
@SpringBootTest
class RedisApplicationTests5 {//因为springboot整合redis时会把StringRedisTemplate创建并交于spring容器管理@Autowiredprivate StringRedisTemplate redisTemplate;@Testvoid contextLoads() {//操作list集合方法ListOperations<String, String> s3 = redisTemplate.opsForList ();//左侧添加数据Long k1 = s3.leftPush ("k1", "22");System.out.println ("左侧添加---" + k1);//右侧添加数据Long k2 = s3.rightPush ("k2", "33");System.out.println ("左侧添加---" + k2);//获取元素String k11 = s3.index ("k1", 0);System.out.println ("元素----" + k11);//范围查找List<String> k12 = s3.range ("k1", 0, -1);System.out.println ("范围查找" + k12);//列表长度Long k13 = s3.size ("k1");System.out.println ("长度" + k13);}}
5. set 集合
@SpringBootTest
class RedisApplicationTests6 {//因为springboot整合redis时会把StringRedisTemplate创建并交于spring容器管理@Autowiredprivate StringRedisTemplate redisTemplate;@Testvoid contextLoads() {//操作set集合方法SetOperations<String, String> s4 = redisTemplate.opsForSet ();//添加元素Long k1 = s4.add ("k1", "22", "33", "44", "55");Long k66 = s4.add ("k2", "22", "66", "44", "58");//移除Long k11 = s4.remove ("k1", "22");System.out.println ("移除----" + k11);//集合大小Long k12 = s4.size ("k1");System.out.println ("集合大小-----" + k12);//判断是否存在Boolean k13 = s4.isMember ("k1", "33");System.out.println ("是否存在----" + k13);//随机获取一个元素String k14 = s4.randomMember ("k1");System.out.println ("随机元素-----" + k14);//获取两个交集Set<String> intersect = s4.intersect ("k1", "k2");System.out.println ("交集---" + intersect);}}
6. zset 有序集合
@SpringBootTest
class RedisApplicationTests7 {//因为springboot整合redis时会把StringRedisTemplate创建并交于spring容器管理@Autowiredprivate StringRedisTemplate redisTemplate;@Testvoid contextLoads() {//操作zSet有序集合方法ZSetOperations<String, String> s6 = redisTemplate.opsForZSet ();//添加元素s6.add ("k1","english",88.0);s6.add ("k1","math",66.0);s6.add ("k1","history",86.0);//获取元素Set<String> k1 = s6.range ("k1", 0, -1);System.out.println ("元素---" + k1);//获取指定范围Set<String> k11 = s6.range ("k1", 0, -1);System.out.println ("指定范围---" + k11);//指定元素增加指定值Double aDouble = s6.incrementScore ("k1", "math", 22.0);System.out.println ("增加---" + aDouble);//获取对应key和value的scoreDouble score = s6.score ("k1", "english");System.out.println ("获取对应key和value的score" + score);}}
3. springboot连接集群
3.1 配置文件
spring.redis.lettuce.pool.max-active=8
spring.redis.lettuce.pool.max-wait=-1ms
spring.redis.lettuce.pool.max-idle=8
spring.redis.lettuce.pool.min-idle=0# 设置redis重定向的次数---根据主节点的个数
spring.redis.cluster.max-redirects=3spring.redis.cluster.nodes=192.168.28.222:7001,192.168.28.222:7002,192.168.28.222:7003,\192.168.28.222:7004,192.168.28.222:7005,192.168.28.222:7006
3.2 连接多个端口

3.3 添加数据
@SpringBootTest
class RedisApplicationTests8 {//因为springboot整合redis时会把StringRedisTemplate创建并交于spring容器管理@Autowiredprivate RedisTemplate redisTemplate;@Testvoid contextLoads() {ValueOperations vs = redisTemplate.opsForValue ();vs.set ("k2","55");}}
3.4 测试
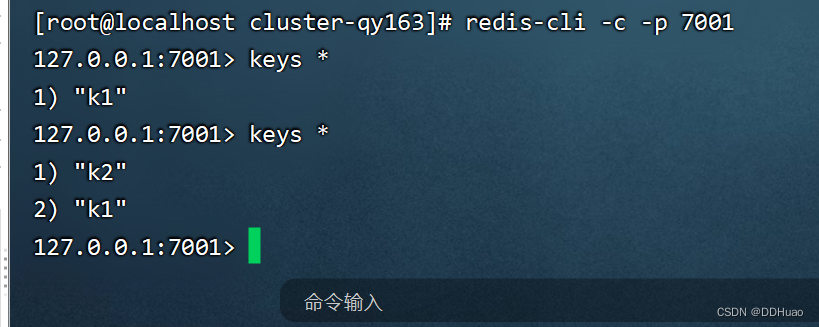
4. redis的应用场景
(1.) 缓存原理
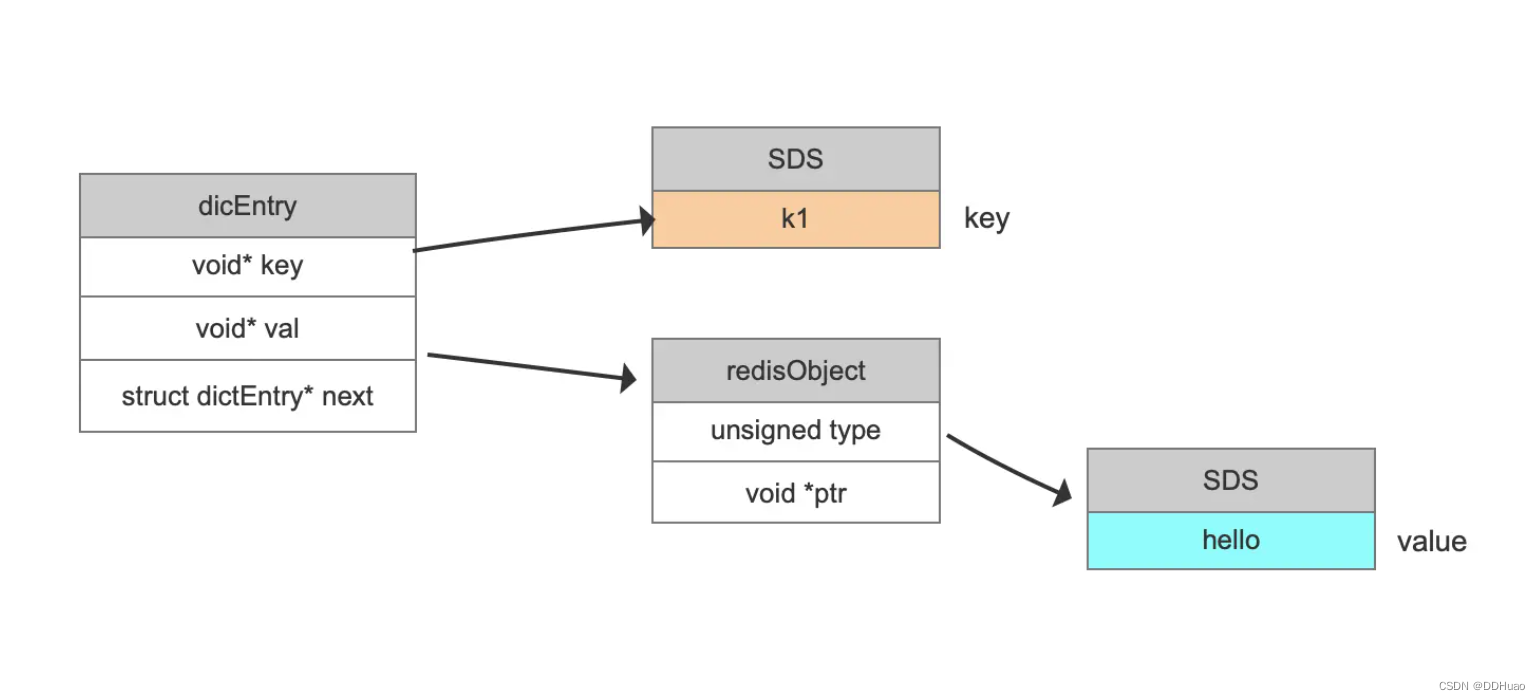
(2)缓存的作用:
用缓存,主要有两个用途:高性能、高并发。
高性能
假设这么个场景,你有个操作,一个请求过来,吭哧吭哧你各种乱七八糟操作 mysql,半天查出来一个结果,耗时 600ms。但是这个结果可能接下来几个小时都不会变了,或者变了也可以不用立即反馈给用户。那么此时咋办?
缓存啊,折腾 600ms 查出来的结果,扔缓存里,一个 key 对应一个 value,下次再有人查,别走 mysql 折腾 600ms 了,直接从缓存里,通过一个 key 查出来一个 value,2ms 搞定。性能提升 300 倍。
就是说对于一些需要复杂操作耗时查出来的结果,且确定后面不怎么变化,但是有很多读请求,那么直接将查询出来的结果放在缓存中,后面直接读缓存就好。
高并发
mysql 这么重的数据库,压根儿设计不是让你玩儿高并发的,虽然也可以玩儿,但是天然支持不好。mysql 单机支撑到 2000QPS 也开始容易报警了。
所以要是你有个系统,高峰期一秒钟过来的请求有 1万,那一个 mysql 单机绝对会死掉。你这个时候就只能上缓存,把很多数据放缓存,别放 mysql。缓存功能简单,说白了就是 key-value 式操作,单机支撑的并发量轻松一秒几万十几万,支撑高并发 so easy。单机承载并发量是 mysql 单机的几十倍。
(3)什么样的数据适合放入缓存
1.数据量不大
2.访问频率高
3.数据更改频率低
(4)如何使用缓存
1. 导入依赖
<?xml version="1.0" encoding="UTF-8"?>
<project xmlns="http://maven.apache.org/POM/4.0.0" xmlns:xsi="http://www.w3.org/2001/XMLSchema-instance"xsi:schemaLocation="http://maven.apache.org/POM/4.0.0 https://maven.apache.org/xsd/maven-4.0.0.xsd"><modelVersion>4.0.0</modelVersion><parent><groupId>org.springframework.boot</groupId><artifactId>spring-boot-starter-parent</artifactId><version>2.3.12.RELEASE</version><relativePath/> <!-- lookup parent from repository --></parent><groupId>com.example</groupId><artifactId>redis-springboot01</artifactId><version>0.0.1-SNAPSHOT</version><name>redis-springboot01</name><description>redis-springboot01</description><properties><java.version>8</java.version></properties><dependencies><dependency><groupId>org.springframework.boot</groupId><artifactId>spring-boot-starter-data-redis</artifactId></dependency><dependency><groupId>org.springframework.boot</groupId><artifactId>spring-boot-starter-web</artifactId></dependency><dependency><groupId>org.projectlombok</groupId><artifactId>lombok</artifactId><optional>true</optional></dependency><dependency><groupId>org.springframework.boot</groupId><artifactId>spring-boot-starter-test</artifactId><scope>test</scope></dependency><!-- mysql --><dependency><groupId>mysql</groupId><artifactId>mysql-connector-java</artifactId></dependency><dependency><groupId>com.baomidou</groupId><artifactId>mybatis-plus-boot-starter</artifactId><version>3.5.3.1</version></dependency></dependencies><build><plugins><plugin><groupId>org.springframework.boot</groupId><artifactId>spring-boot-maven-plugin</artifactId><configuration><excludes><exclude><groupId>org.projectlombok</groupId><artifactId>lombok</artifactId></exclude></excludes></configuration></plugin></plugins></build></project>
2. 配置文件
server.port=8888spring.datasource.url=jdbc:mysql:///student
spring.datasource.password=root
spring.datasource.username=abc123
spring.datasource.driver-class-name=com.mysql.cj.jdbc.Drivermybatis-plus.configuration.log-impl=org.apache.ibatis.logging.stdout.StdOutImpl#redis的配置信息
spring.redis.host=192.168.28.222
spring.redis.port=6379
#最多获取数
spring.redis.lettuce.pool.max-active=8
spring.redis.lettuce.pool.max-wait=-1ms
spring.redis.lettuce.pool.max-idle=8
spring.redis.lettuce.pool.min-idle=0
3. 编写mapper层
@Mapper
public interface StudentMapper extends BaseMapper<Student>{}
4. 编写service层
public interface StudentService {/*** 根据ID查询* @param id* @return*/Student findById (Integer id);
}
5. 服务层
@Service
public class StudentServiceimpl implements StudentService {@Resourceprivate StudentMapper studentMapper;@Autowiredprivate RedisTemplate<String,Object> redisTemplate;@Overridepublic Student findById(Integer id) {ValueOperations<String, Object> forValue = redisTemplate.opsForValue();//1.查询缓存Object o = forValue.get("dept::" + id);//判断if(o!=null){ //证明缓存里边有//返回数据return (Student) o;}//调用方法Student student = studentMapper.selectById(id);//查询之后直接放入缓存if(student!=null){forValue.set("student::"+id,student);}return student;}}
6. controller 层
/*** @program: redis-springboot01* @author: ♥丁新华* @create: 2023-04-25 11:20**/
@RestController
public class StudentController {@Resourceprivate StudentService studentService;//restful风格@GetMapping("b/{id}")public Student findById(@PathVariable Integer id){return studentService.findById (id);}}
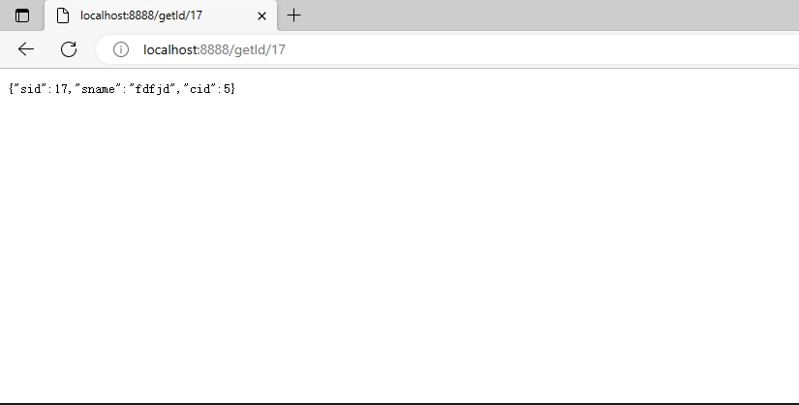
7. 测 试

控制台会查询数据库:
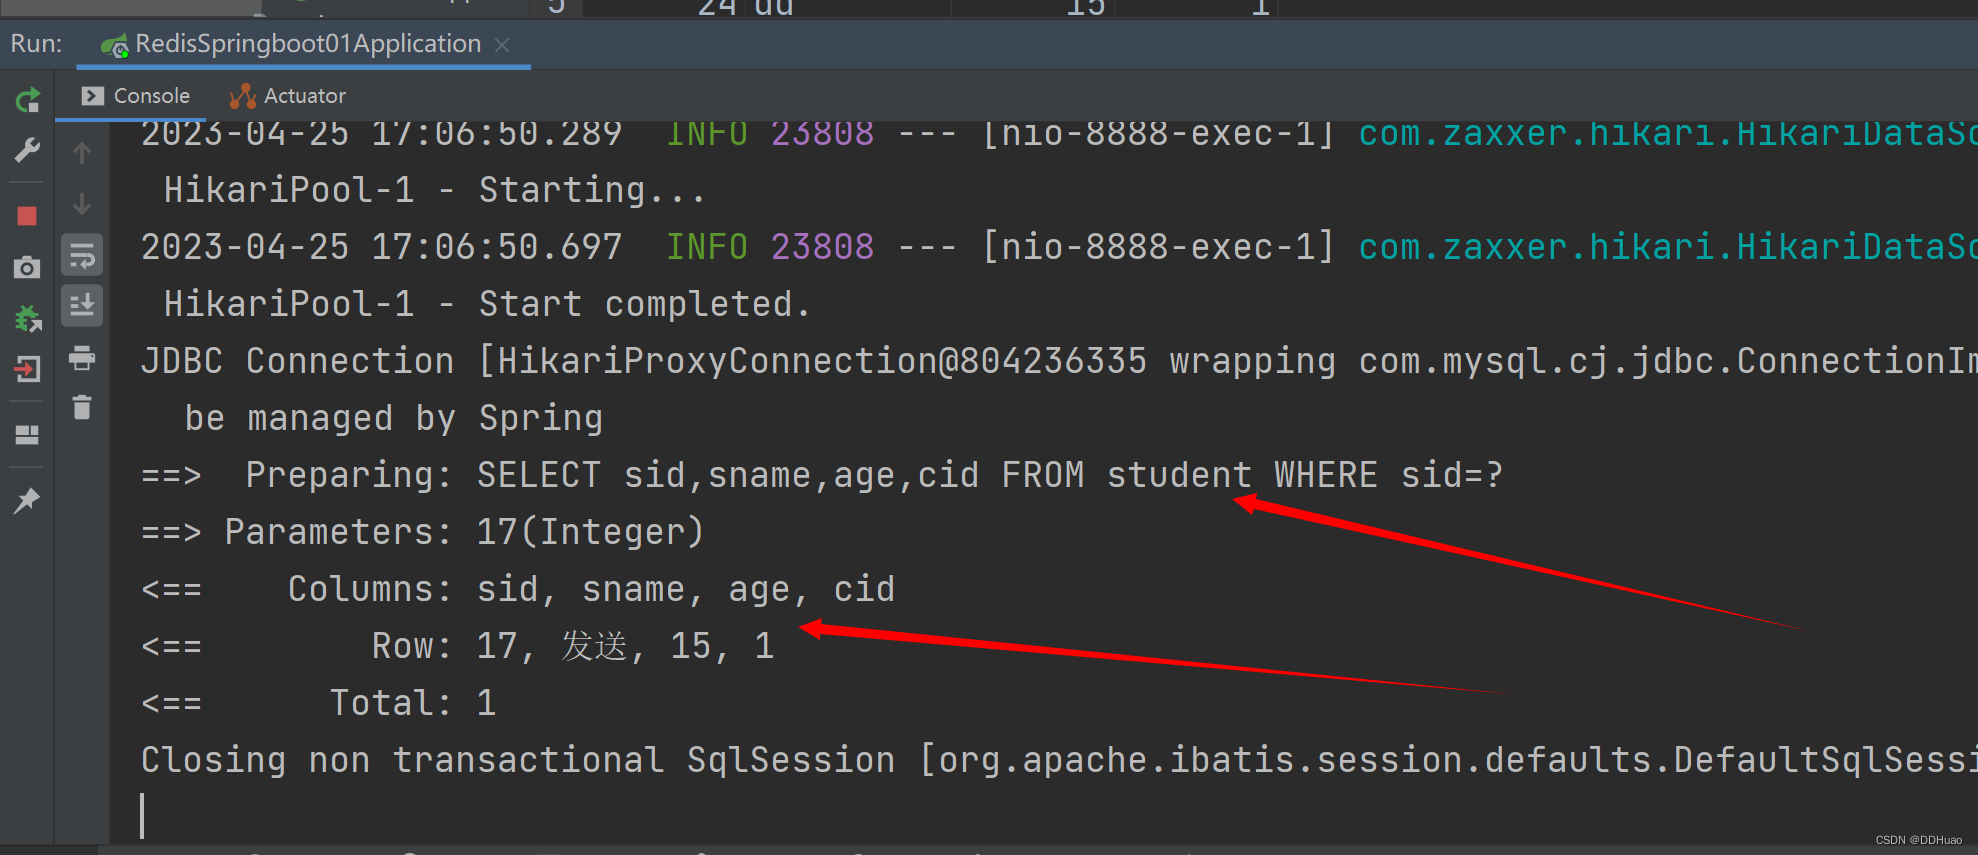
因为使用了缓存机制,再次访问的话会走缓存,不会再去访问数据库,可以释放一定的压力,
