目录
1.存储Bean对象的注解
1.1 五大类注解
1.2 方法注解
1.3添加注解的依赖
2.注解的使用
2.1 controller注解
2. 2Service注解
2.3.Resopsitory注解
2.4Component注解
2.5Configuration注解
2.6 注解之间的关系
3.方法注解
3.1 方法注解要配合类注解来使用。
3.2 重命名Bean
4.获取Bean对象(对象装配)
4.1属性注⼊(常用)
4.2构造⽅法注⼊(推荐使用)
4.3Setter 注⼊
4.4三种注⼊优缺点分析
4.5 @Resource:另⼀种注⼊关键字
4.6 @Autowired 和 @Resource 区别
4.7 解决同⼀类型多个 Bean 的报错:
1.存储Bean对象的注解
两种:五大类注解和方法注解
1.1 五大类注解
@Controller :(控制器:验证用户(广义用户包括前端)请求的数据正确性)(类似于安保系统)
@Service :(服务:服务层,用来编排和调度具体执行方法的,(客服中心))
@Repository: (持久层:和数据库的交互;执行者) ==DAO层(Date Accsess Object)数据访问层
@Component :(组件:(工具类))
@Configuration :(配置项:项目当中的一些配置,存储项目当中的一些注解)
1.2 方法注解
@Bean
1.3添加注解的依赖
Spring设计理念:约定大于配置,小驼峰的形式
在resources文件夹下创建spring.xml,设置扫描包的路径
<?xml version="1.0" encoding="UTF-8"?>
<beans xmlns="http://www.springframework.org/schema/beans"xmlns:xsi="http://www.w3.org/2001/XMLSchema-instance"xmlns:content="http://www.springframework.org/schema/context"xsi:schemaLocation="http://www.springframework.org/schema/beans http://www.springframework.org/schema/beans/spring-beans.xsd http://www.springframework.org/schema/context https://www.springframework.org/schema/context/spring-context.xsd">
<!--    扫描包的地址--><content:component-scan base-package="com.java.demo"></content:component-scan>
</beans>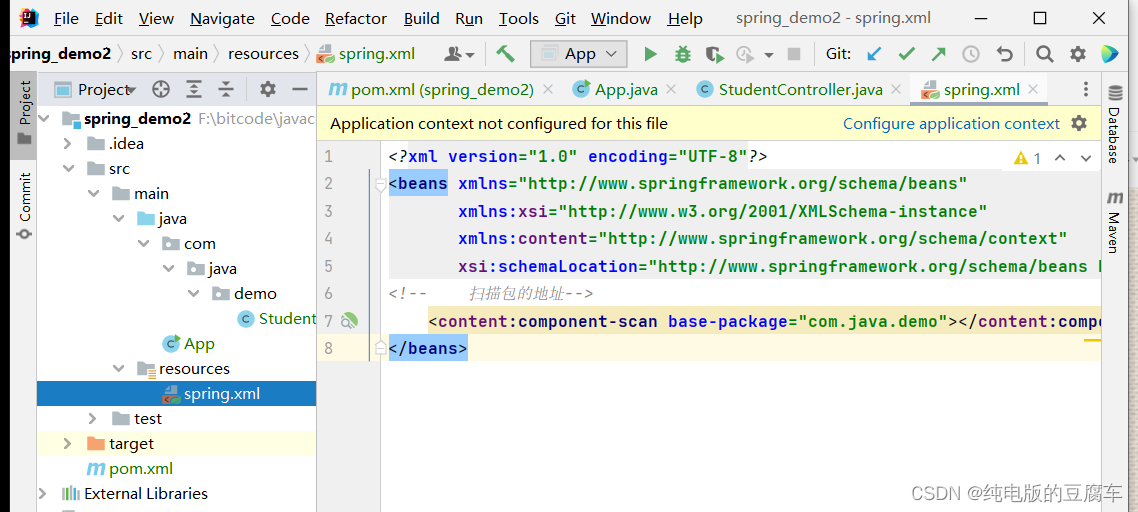
2.注解的使用
1.添加spring依赖(pom.xml)
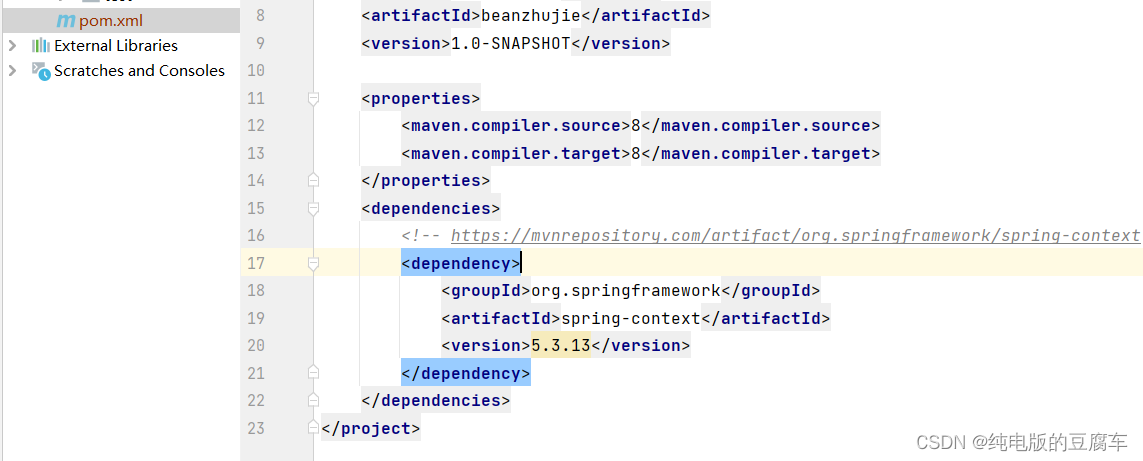
<dependencies><!-- https://mvnrepository.com/artifact/org.springframework/spring-context --><dependency><groupId>org.springframework</groupId><artifactId>spring-context</artifactId><version>5.3.13</version></dependency></dependencies>2.添加启动类
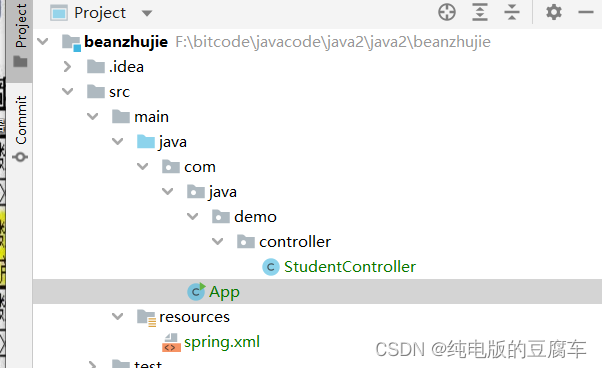
2.1 controller注解
package com.java.demo.controller;import org.springframework.stereotype.Controller;@Controller //将当前类存储到spring中
public class StudentController {public void sayHi(){System.out.println("do studentController sayHi()");}
}
import com.java.demo.controller.StudentController;
import org.springframework.context.ApplicationContext;
import org.springframework.context.support.ClassPathXmlApplicationContext;
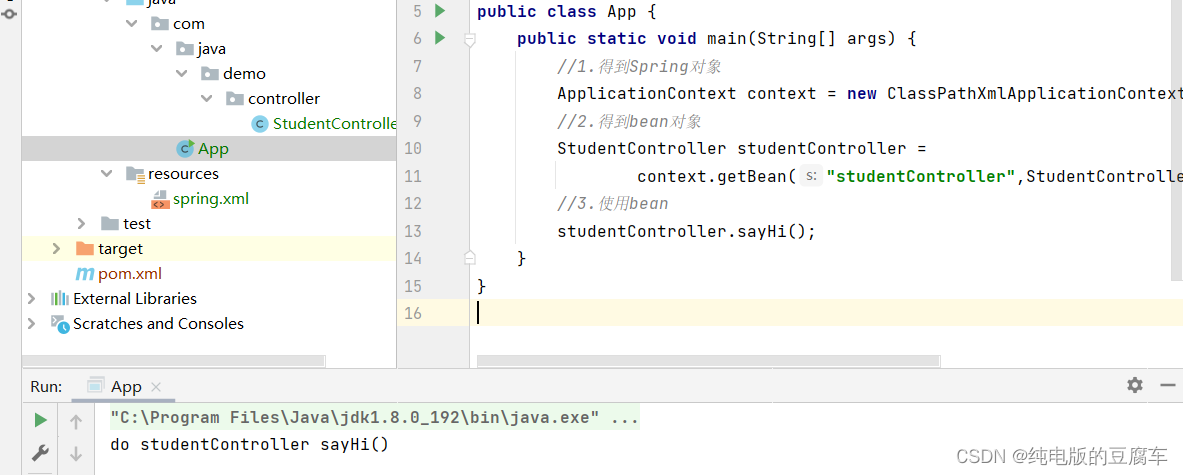
public class App {public static void main(String[] args) {//1.得到Spring对象ApplicationContext context = new ClassPathXmlApplicationContext("spring.xml");//2.得到bean对象StudentController studentController =context.getBean("studentController",StudentController.class);//3.使用beanstudentController.sayHi();}
}
注意:
默认情况:原类名首字母小写就能读取到Bean对象;
特例:原类名如果首字母和第二字母都是大写的情况下,那么bean名称就是原类名;
2. 2Service注解
package com.java.demo.service;
import org.springframework.stereotype.Service;
@Service
public class StudentService {public void sayHi(){System.out.println("StudentService sayHi()");}
}
ApplicationContext context = new ClassPathXmlApplicationContext("spring.xml");
StudentService studentService =context.getBean("studentService",StudentService.class);
studentService.sayHi();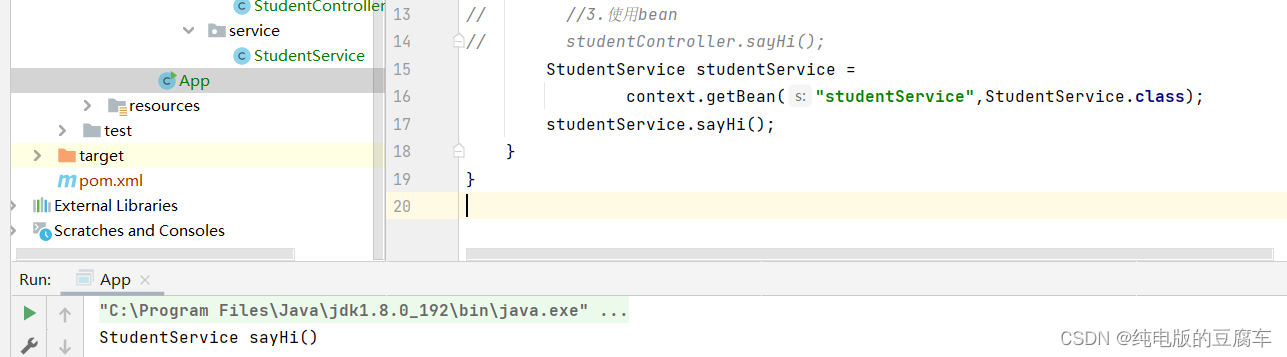
2.3.Resopsitory注解
import org.springframework.stereotype.Repository;
@Repository
public class StudentRepository {public void sayhi(){System.out.println("StudentRepository sayhi");}
}
ApplicationContext context = new ClassPathXmlApplicationContext("spring.xml");StudentRepository studentRepository =context.getBean("studentRepository",StudentRepository.class);
studentRepository.sayhi();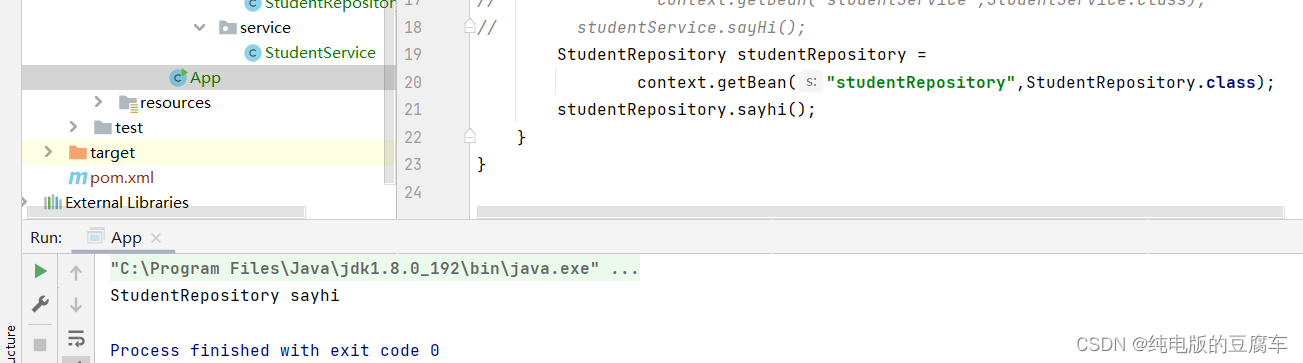
2.4Component注解
import org.springframework.stereotype.Component;
@Component
public class StudentComponent {public void sayhi(){System.out.println("StudentComponent sayhi");}
}
ApplicationContext context = new ClassPathXmlApplicationContext("spring.xml");
StudentComponent studentComponent =context.getBean("studentComponent",StudentComponent.class);
studentComponent.sayhi();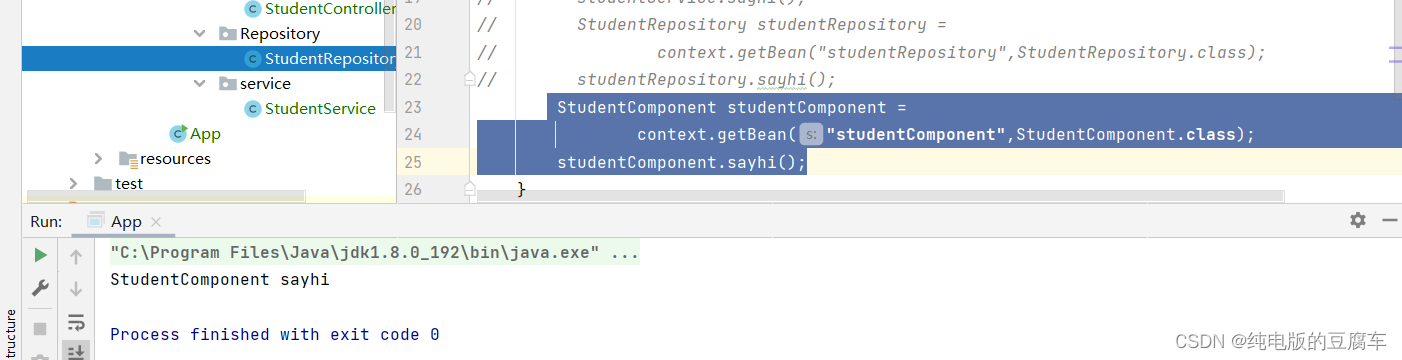
2.5Configuration注解
import org.springframework.context.annotation.Configuration;
@Configuration
public class StudentConfiguration {public void sayhi(){System.out.println("StudentConfiguration sayhi");}
}
ApplicationContext context = new ClassPathXmlApplicationContext("spring.xml");
StudentConfiguration studentConfiguration =context.getBean("studentConfiguration",StudentConfiguration.class);
studentConfiguration.sayhi();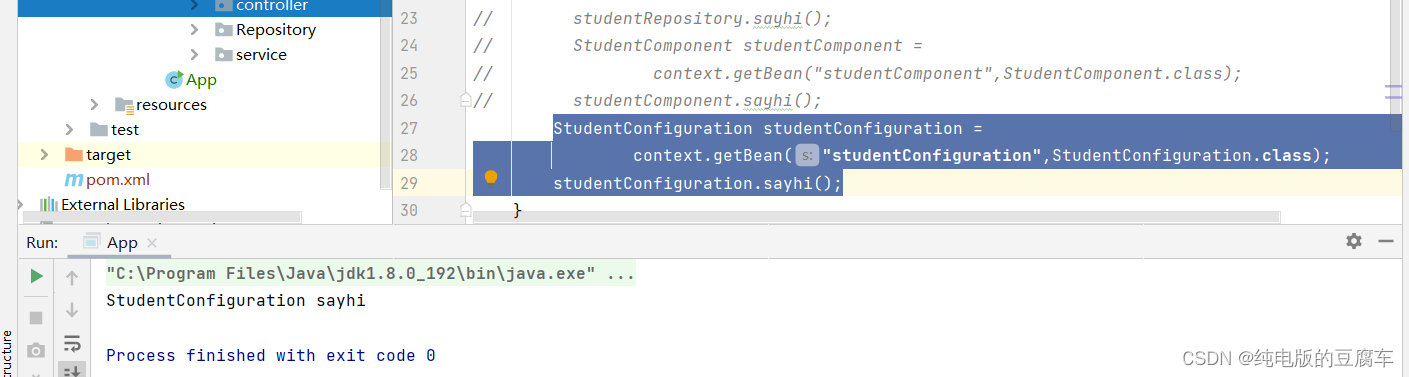
2.6 注解之间的关系
@Controller / @Service / @Repository / @Configuration 等注解的源码,他们属于@Component 的“⼦类”。
3.方法注解
类注解是添加到某个类上的,⽽⽅法注解是放到某个⽅法上的。
3.1 方法注解要配合类注解来使用。
在 Spring 框架的设计中,⽅法注解 @Bean 要配合类注解才能将对象正常的存储到 Spring 容器中,如下代码所示:
@Component
public class Users {
@Bean
public User user1() {
User user = new User();
user.setId(1);
user.setName("Java");
return user;
}
}
3.2 重命名Bean
可以通过设置 name 属性给 Bean 对象进⾏重命名操作,如下代码所示:
@Component
public class Users {
@Bean(name = {"u1"})
public User user1() {
User user = new User();
user.setId(1);
user.setName("Java");
return user;
}
}
name 其实是⼀个数组,⼀个 bean 可以有多个名字:
@Bean(name = {"u1", "us1"})
public User user1() {
User user = new User();
user.setId(1);
user.setName("Java");
return user;
}
问题:当@Bean使用了重命名之后,那么默认的方法名是否还能获取对象?
答案:不能,当给@Bean对象重命名之后,默认的使用方法名获取对象的方式就不能使用了。
4.获取Bean对象(对象装配)
获取对象装配的方法:
1. 属性注⼊
2. 构造⽅法注⼊
3. Setter 注⼊
4.1属性注⼊(常用)
属性注⼊是使⽤ @Autowired 实现的,将 Service 类注⼊到 Controller 类中。
优点:简单
缺点:
1.没办法实现final修饰的变量注入
2.兼容性不好:只适用于IoC容器
3.风险点:因为写法简单,所以违背单一设计原则的概论更大。
4.2构造⽅法注⼊(推荐使用)
构造方法注入(Spring官方推荐的注入方式),可以不加@Autowired。
特点:如果当前类中只有一个构造方法的话,那么@Autowired注解可以省略;
优点:
1.可以注入一个不可变的对象(使用了final修饰的对象);
2.注入的对象不会被修改(构造方法只能执行一次);
3.构造方法注入可以保证注入对象完全被初始化;
4.构造方法的兼容性(通用性)更好;
4.3Setter 注⼊
Setter 注⼊和属性的 Setter ⽅法实现类似,只不过在设置 set ⽅法的时候需要加上 @Autowired 注
解
优点:Setter注入非常符合单一设计原则(每个方法只传递一个对象)。
缺点:
1.没办法实现final修饰的变量注入
2.使用setter注入的对象,对象可能会被修改
示例代码:
package com.java.demo.controller;import com.java.service.UserService;
import org.springframework.beans.factory.annotation.Autowired;
import org.springframework.stereotype.Controller;import javax.annotation.Resource;@Controller
public class UserController {//1.属性注入@Autowired  //注入对象@Resourceprivate UserService userService;//2.Setter注入private UserService userService;@Autowired@Resourcepublic void setUserService(UserService userService) {this.userService = userService;}//3.构造方法注入private final UserService userService;@Autowired//@Resource //不能用在构造方法上public UserController(UserService userService) {this.userService = userService;}public void sayHi(){System.out.println("com.java.demo -> do UserController sayHi()");userService.sayHi();userService.age = 20;userService.sayHi();}
}
4.4三种注⼊优缺点分析
1.属性注⼊的优点是简洁,使⽤⽅便;缺点是只能⽤于 IoC 容器,如果是⾮ IoC 容器不可⽤,并且只有在使⽤的时候才会出现 NPE(空指针异常)。
2.构造⽅法注⼊是 Spring 推荐的注⼊⽅式,它的缺点是如果有多个注⼊会显得⽐较臃肿,但出现这种情况你应该考虑⼀下当前类是否符合程序的单⼀职责的设计模式了,它的优点是通⽤性,在使⽤之前⼀定能把保证注⼊的类不为空。
3.Setter ⽅式是 Spring 前期版本推荐的注⼊⽅式,但通⽤性不如构造⽅法,所有 Spring 现版本已
经推荐使⽤构造⽅法注⼊的⽅式来进⾏类注⼊了。
4.5 @Resource:另⼀种注⼊关键字
@Autowired 和 @Resource 的区别
1.出身不同:@Autowired 来⾃于 Spring,⽽ @Resource 来⾃于 JDK 的注解;
2.使⽤时设置的参数不同:相⽐于 @Autowired 来说,@Resource ⽀持更多的参数设置,例如
name 设置,根据名称获取 Bean。
3.@Autowired 可⽤于 Setter 注⼊、构造函数注⼊和属性注⼊,⽽ @Resource 只能⽤于 Setter 注
⼊和属性注⼊,不能⽤于构造函数注⼊。
解决同⼀类型多个 Bean 的报错:
a. 使⽤ @Resource(name="")
b. 使⽤ @Qualifier("")
4.6 @Autowired 和 @Resource 区别
1.出身不同:@Autowired 来⾃于 Spring,⽽ @Resource 来⾃于 JDK 的注解;
2.使⽤时设置的参数不同:相⽐于 @Autowired 来说,@Resource ⽀持更多的参数设置,例如
name 设置,根据名称获取 Bean。
3.@Autowired 可⽤于 Setter 注⼊、构造函数注⼊和属性注⼊,⽽ @Resource 只能⽤于 Setter 注⼊和属性注⼊,不能⽤于构造函数注⼊
4.拓展区别:
在Spring(容器)中找Bean有两种方式:
1.根据类型查找
2.根据名称查找
@Autowired先根据类型查找(byType),之后再根据名称查找(byname)
@Resource先根据名称查找(byname),之后再根据类型查找(byType)
4.7 解决同⼀类型多个 Bean 的报错:
a. 使⽤ @Resource(name="")重命名
b. 使⽤ @Autowired和@Qualifier("")进行重命名
package com.java.demo.controller;import com.java.demo.entity.User;
import com.java.service.UserService;
import org.springframework.beans.factory.annotation.Autowired;
import org.springframework.beans.factory.annotation.Qualifier;
import org.springframework.stereotype.Controller;import javax.annotation.Resource;@Controller
public class UserController2 {//@Resource(name = "user1")//1.属性注入方式@Autowired@Qualifier(value = "user1")private User user;public void sayHi(){System.out.println("com.java.demo -> do UserController sayHi()");System.out.println(user.getUsername());}
}