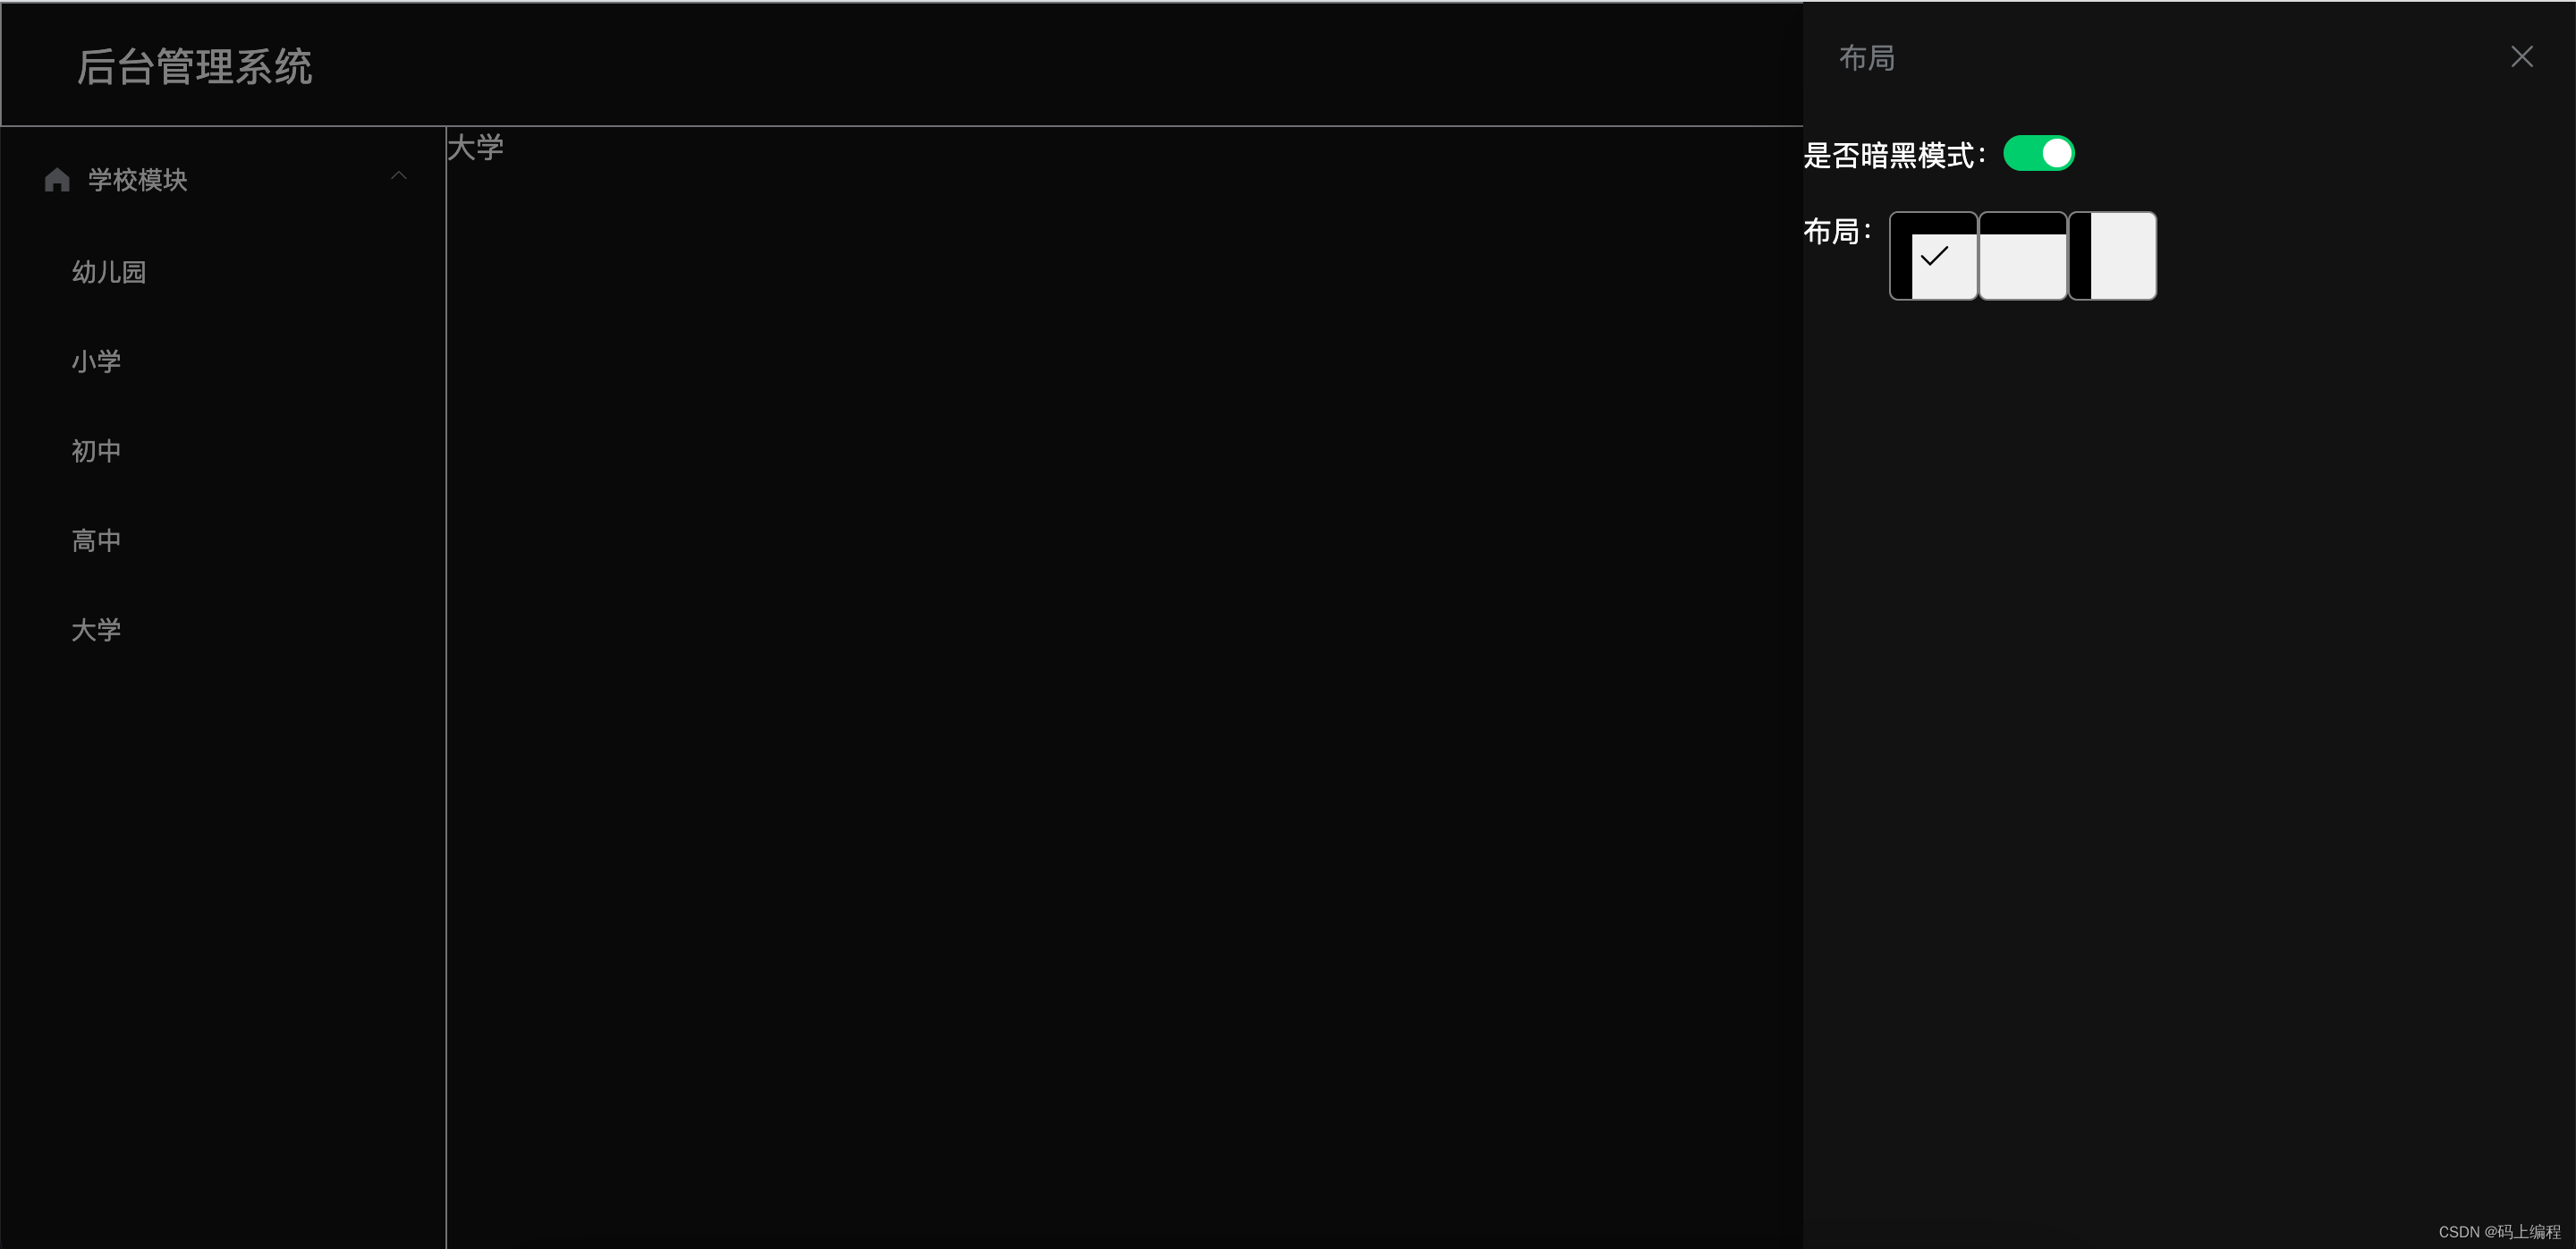
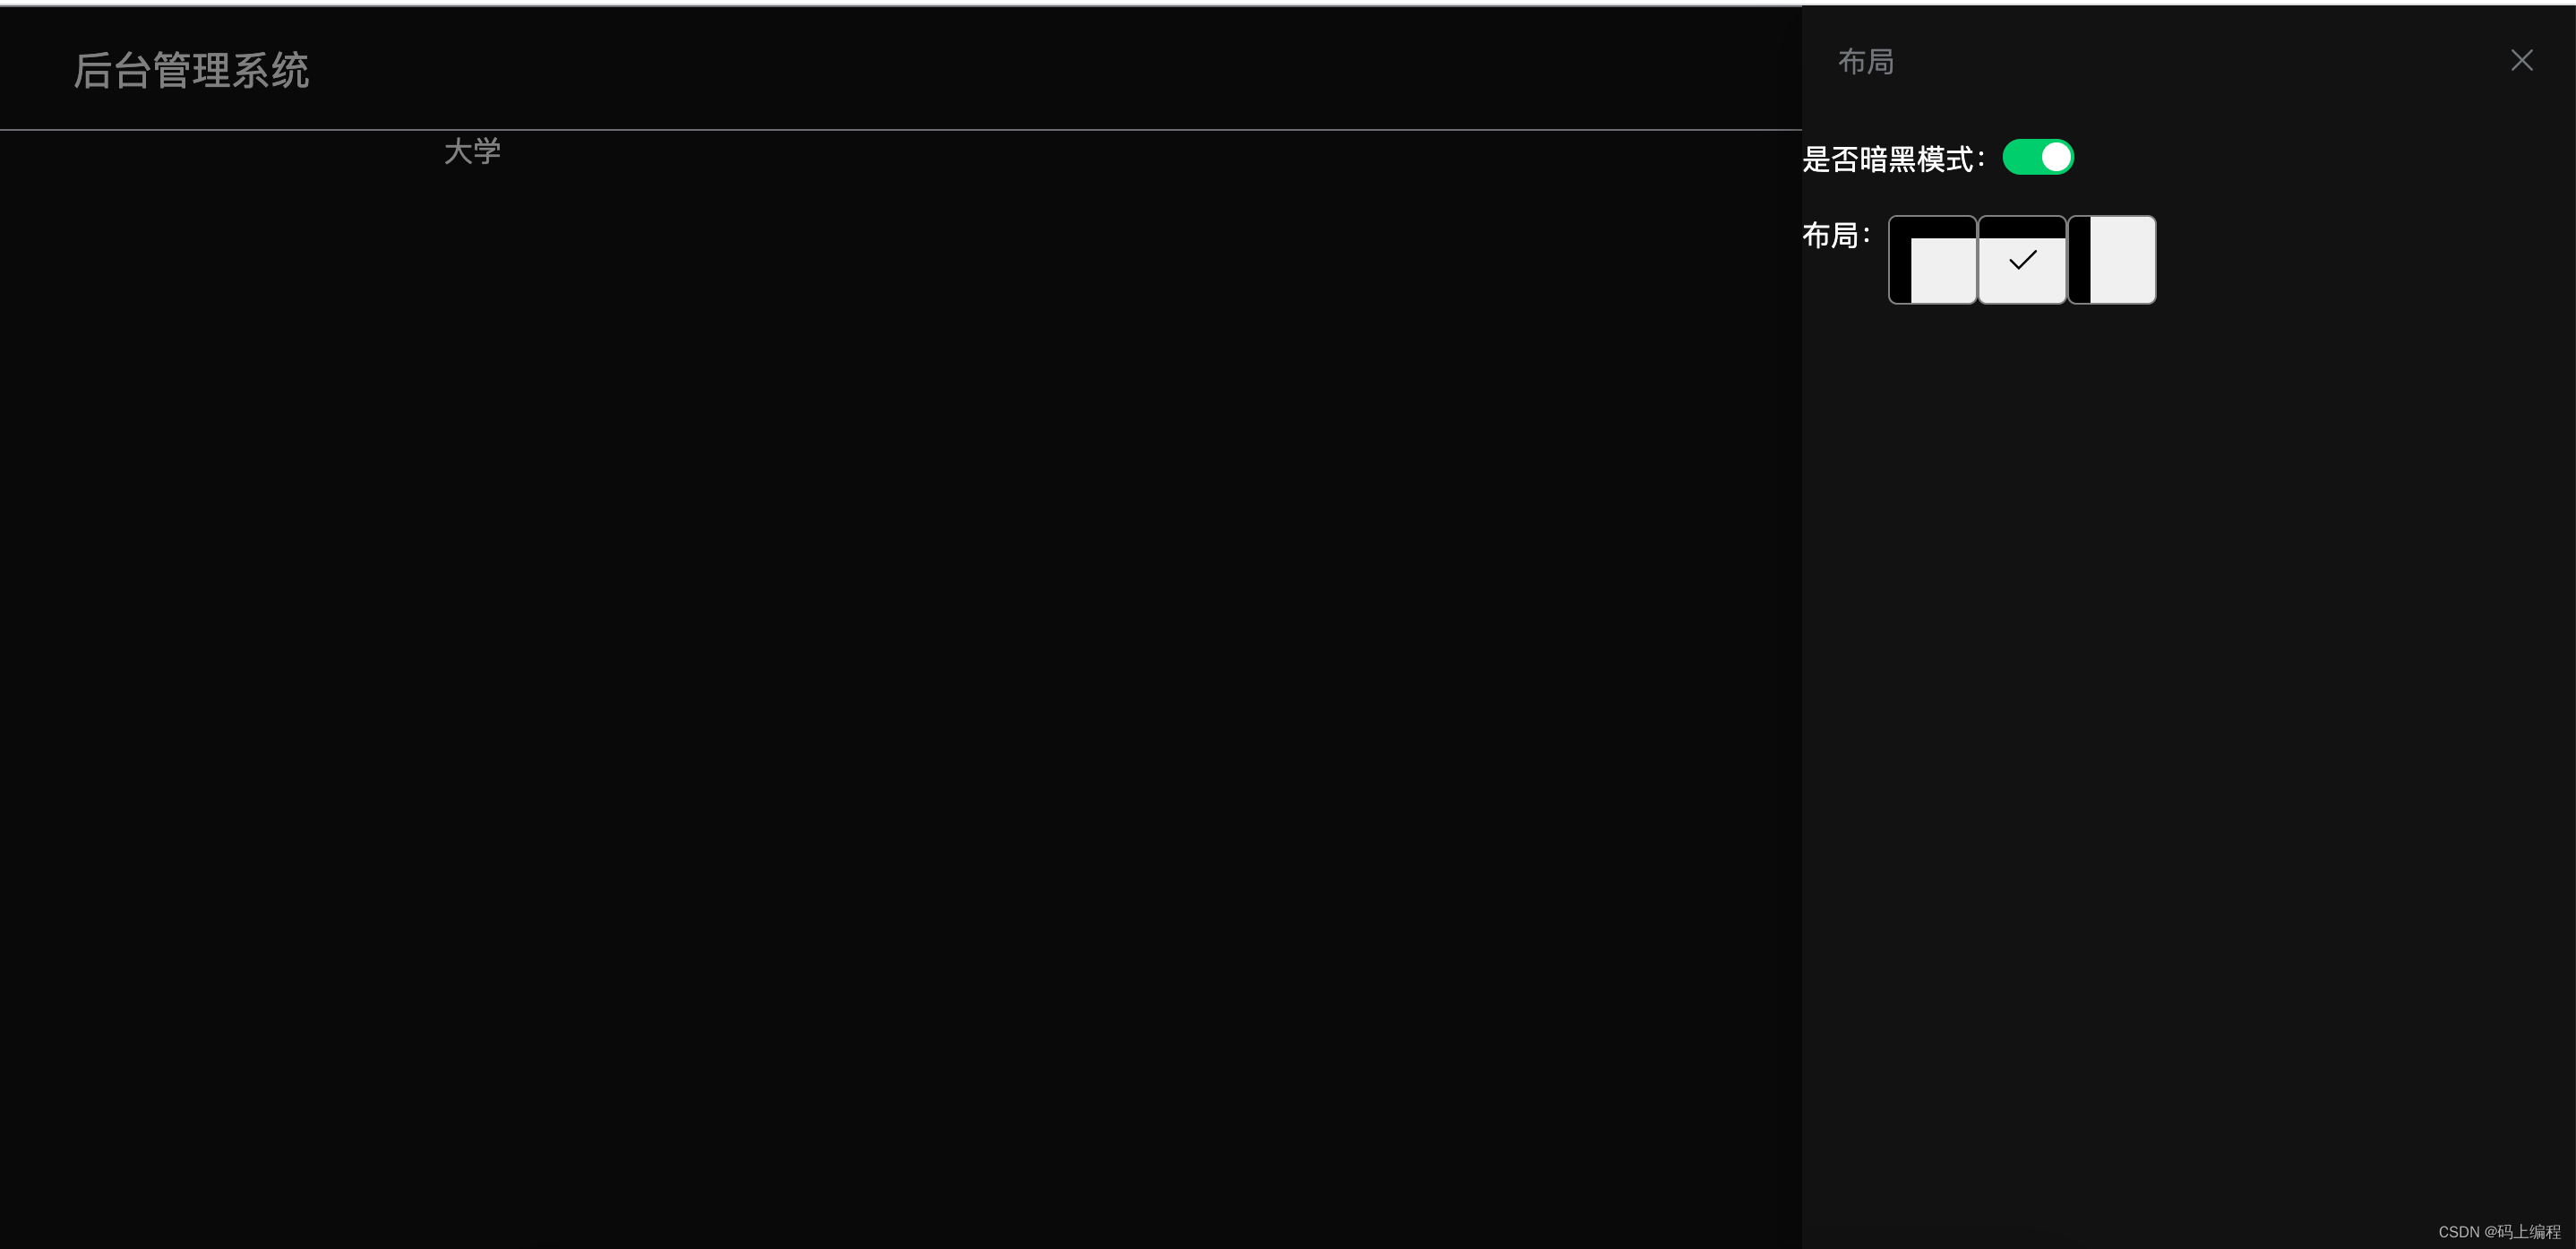
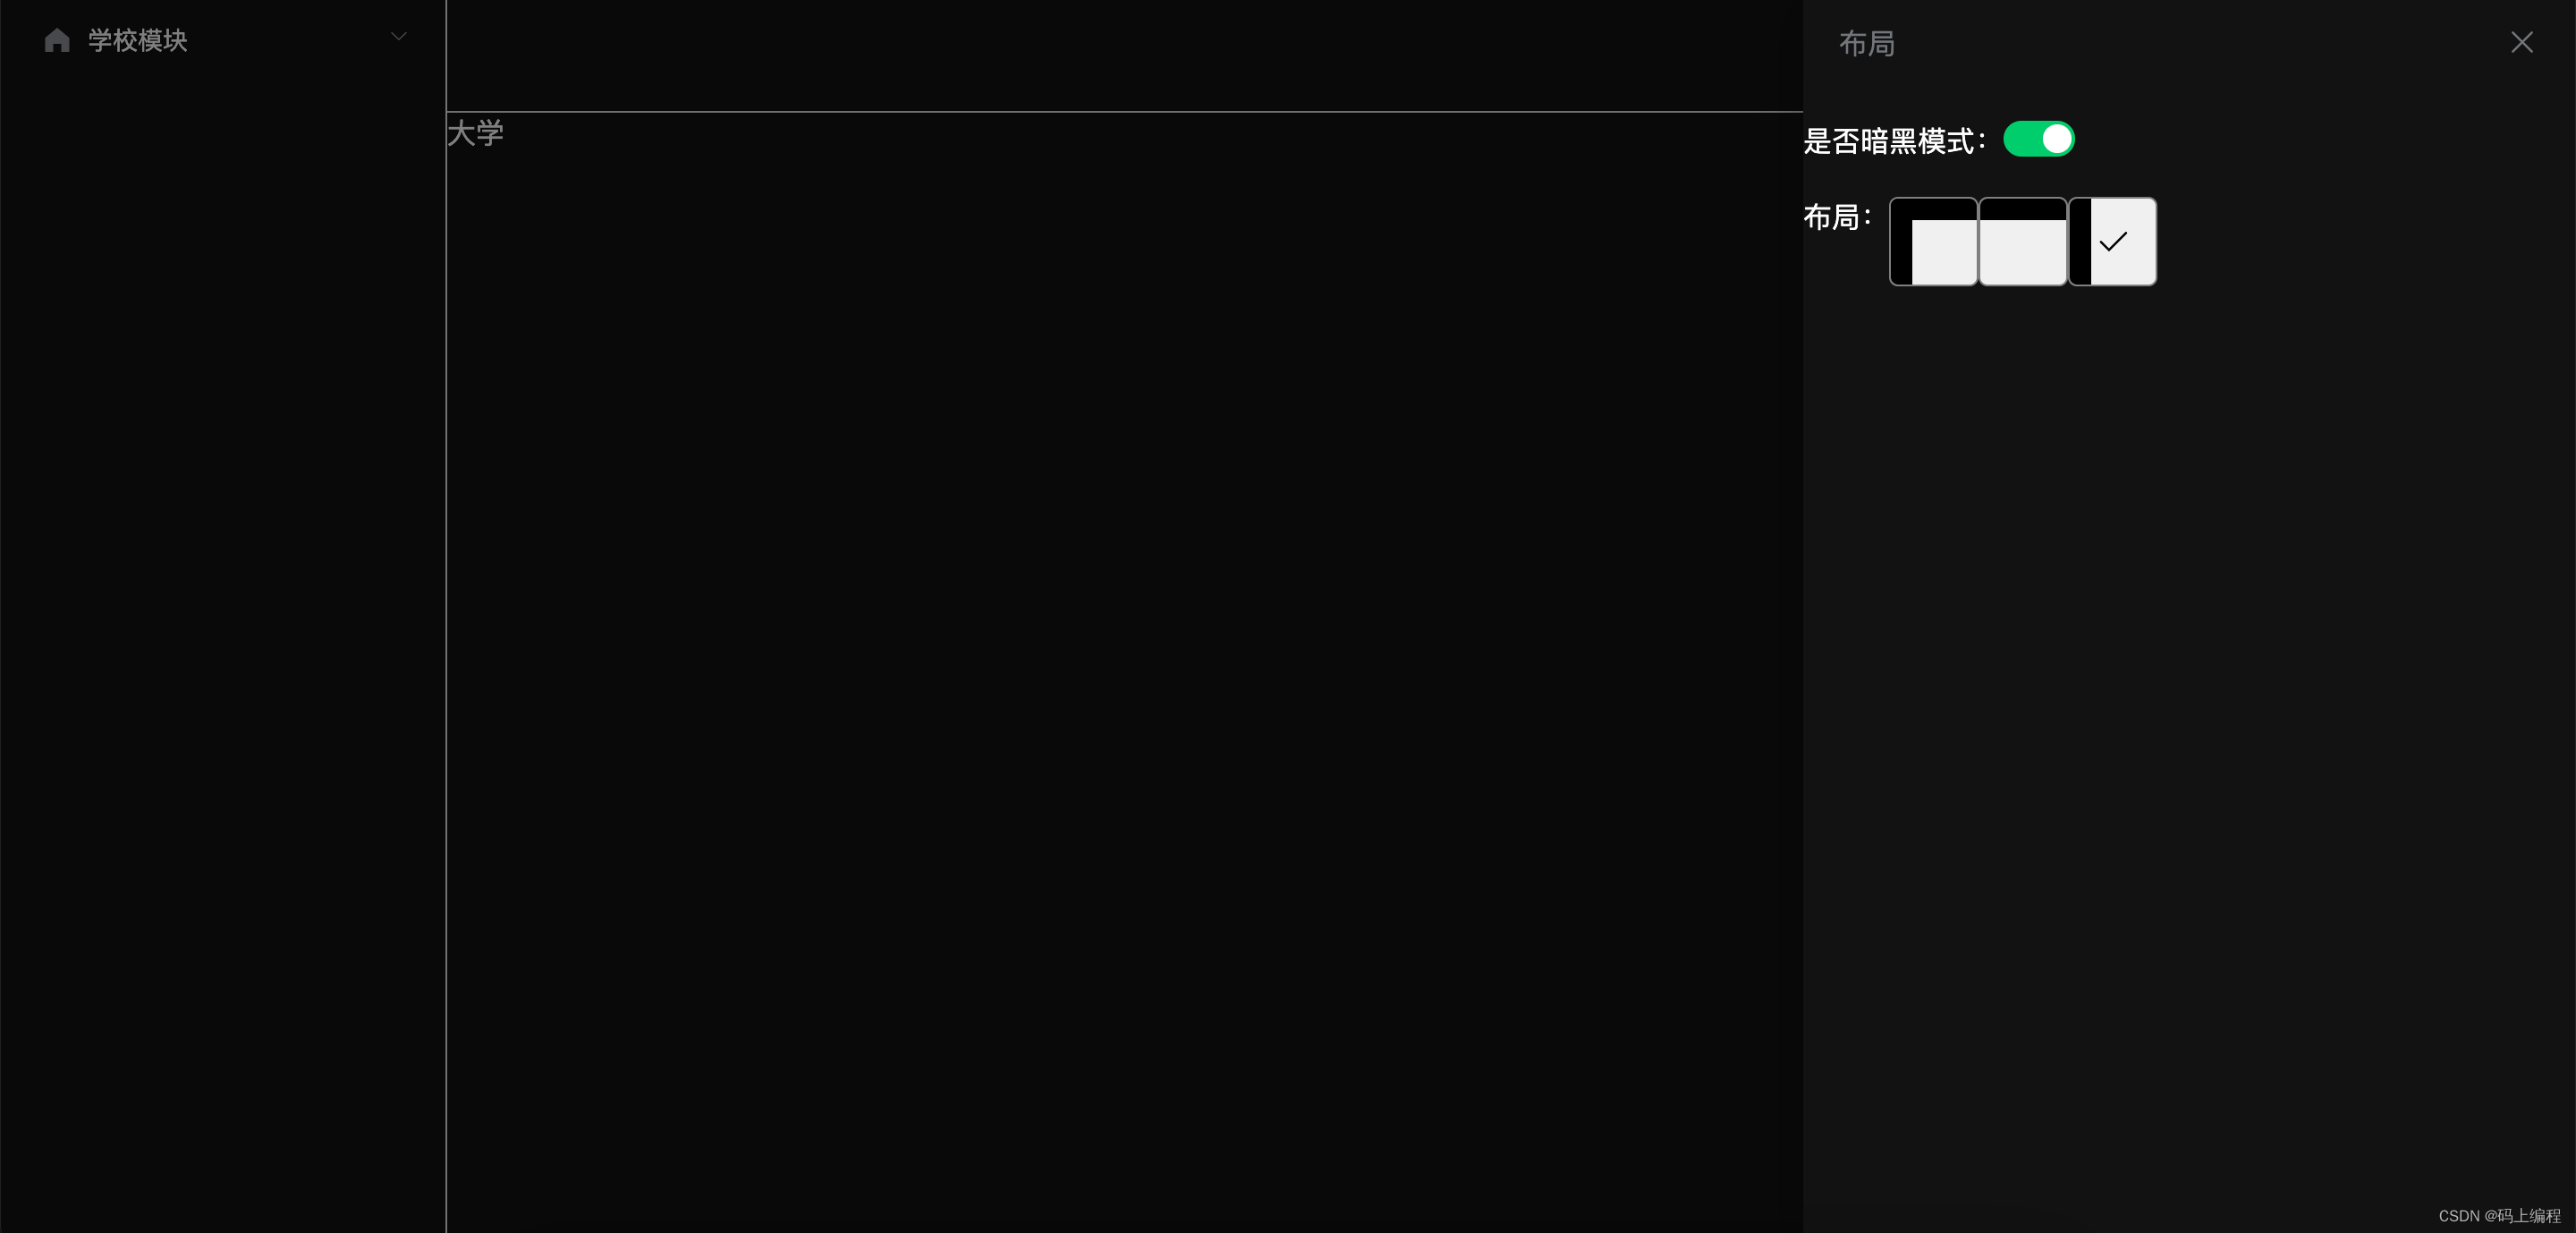
1、目标效果
源码地址:multipal-layout-demo: vue2实现多布局+暗黑模式
默认布局:头部宽度100%,侧边栏、内容区
顶部布局:头部宽度100%,内容区
侧边栏布局:侧边栏高度100%,头部、内容区
2、原理分析
(1)vuex文件
import Vue from 'vue'
import Vuex from 'vuex'Vue.use(Vuex)export default new Vuex.Store({state: {// 暗黑模式isDark: false,// 布局类型layoutType: 'default'},mutations: {// 修改暗黑模式set_is_dark(state, val) {state.isDark = val},// 修改布局类型set_layout_type(state, val) {state.layoutType = val}},actions: {},modules: {}
})
(2)布局缩略图如何实现?用div + css 手动实现布局样式
父组件传递一个布局类型数组,遍历此组件;用一个变量保存索引值,点击不同的布局类型项时切换索引并在vuex修改当前选中的布局类型
将缩略图封装成组件:Thumbnail.vue
<template><!-- 缩略图 --><div class="thumbnail"><div class="layout" v-for="(item, index) in layouts" @click="changeCheck(item, index)"><template v-if="item.type == 'default'"><div class="top" :style="{ background: isDark ? 'black' : '#fff' }"></div><div class="left" :style="{ background: isDark ? 'black' : '#fff' }"></div></template><template v-if="item.type == 'top'"><div class="top" :style="{ background: isDark ? 'black' : '#fff' }"></div></template><template v-if="item.type == 'slide'"><div class="top"></div><div class="left" :style="{ background: isDark ? 'black' : '#fff' }"></div></template><i class="el-icon-check" v-show="checked == index"></i></div></div>
</template><script>
import { mapState } from 'vuex'
export default {props: {// 布局类型数组layouts: {type: Array,default: () => []}},data() {return {// 当前选中值checked: 0,}},computed: {// 获取是否是暗黑模式,从而缩略图实现暗黑效果...mapState(['isDark'])},methods: {// 切换选中值changeCheck(item, index) {this.checked = indexthis.$store.commit('set_layout_type', item.type)}}
}
</script><style lang="less" scoped>
.thumbnail {display: flex;width: 100%;.layout {position: relative;width: 50px;height: 50px;border: 1px solid gray;overflow: hidden;background: #f0f0f0;border-radius: 5px;cursor: pointer;.top {position: absolute;left: 0;top: 0;width: 100%;height: 25%;}.left {position: absolute;left: 0;top: 0;bottom: 0;width: 25%;height: 100%;}.el-icon-check {position: absolute;left: 50%;top: 50%;transform: translate(-50%, -50%);font-size: 20px;}}
}
</style>
(3)建立多个不同类型的布局文件:
侧边栏布局 :src/views/layout/SlideLayout.vue
<template><!-- 侧边栏布局 --><div><Sliderbar></Sliderbar><Header></Header><div class="content-box"><router-view /></div></div> </template><script> import Sliderbar from '@/components/Sliderbar.vue' import Header from '@/components/Header.vue' export default {components: {Header,Sliderbar,}, } </script><style lang="less" scoped></style>默认布局布局:src/views/layout/DefaultLayout.vue
<template><!-- 默认布局 --><div><Header></Header><Sliderbar></Sliderbar><div class="content-box"><router-view /></div></div> </template><script> import Header from '@/components/Header.vue' import Sliderbar from '@/components/Sliderbar.vue' export default {components: { Header, Sliderbar }, } </script><style lang="less" scoped></style>顶部布局:src/views/layout/TopLayout.vue
<template><!-- 顶栏布局 --><div><Header></Header><div class="content-box"><router-view /></div></div>
</template><script>
import Header from '@/components/Header.vue'
export default {components: {Header,},
}
</script><style lang="less" scoped></style>
(4)首页组件 Home.vue,Home.vue下面渲染二级路由
<template><!-- vuex获取选中的布局类型 --><div><defaultLayout v-show="layoutType == 'default'"></defaultLayout><slideLayout v-show="layoutType == 'slide'"></slideLayout><topLayout v-show="layoutType == 'top'"></topLayout></div> </template><script> import defaultLayout from './layout/DefaultLayout.vue' import slideLayout from './layout/SlideLayout.vue' import topLayout from './layout/TopLayout.vue' import { mapState } from 'vuex'export default {components: { defaultLayout, slideLayout, topLayout },computed: {...mapState(['layoutType'])}, } </script><style lang="less" scoped></style>(5)暗黑模式、布局类型变量都是保存在vuex中,因为多个组件之间进行数据通信比较方便!通过mapState取出vuex数据,然后通过computed接受mapState值,但如果想要直接修改mapState中的值则会报以下的错误:
computed property "isDark" was assigned to but it has no setter.
这是因为computed为只读的。不能直接修改computed的数据,要想修改则使用set
computed: {...mapState(['isDark']),// computed property "isDark" was assigned to but it has no setter. 这是因为computed为只读的。不能直接修改computed的数据,要想修改则使用setdarkMode: {get() {return this.isDark},set(val) {this.$store.commit('set_is_dark', val)// 获取html根元素标签let html = document.documentElementif (val) {// html添加class="dark"选择器html.classList.add('dark')} else {// html移除class="dark"选择器html.classList.remove('dark')}}}},